


Table of contents
Overview
We are pleased to introduce smart lists for custom objects. You can now easily create, save, manage and share customised views of your custom object data with your entire team, simplifying your workflow and improving collaboration.
What's new?
- Create smart lists: easily build customised views for your custom objects.
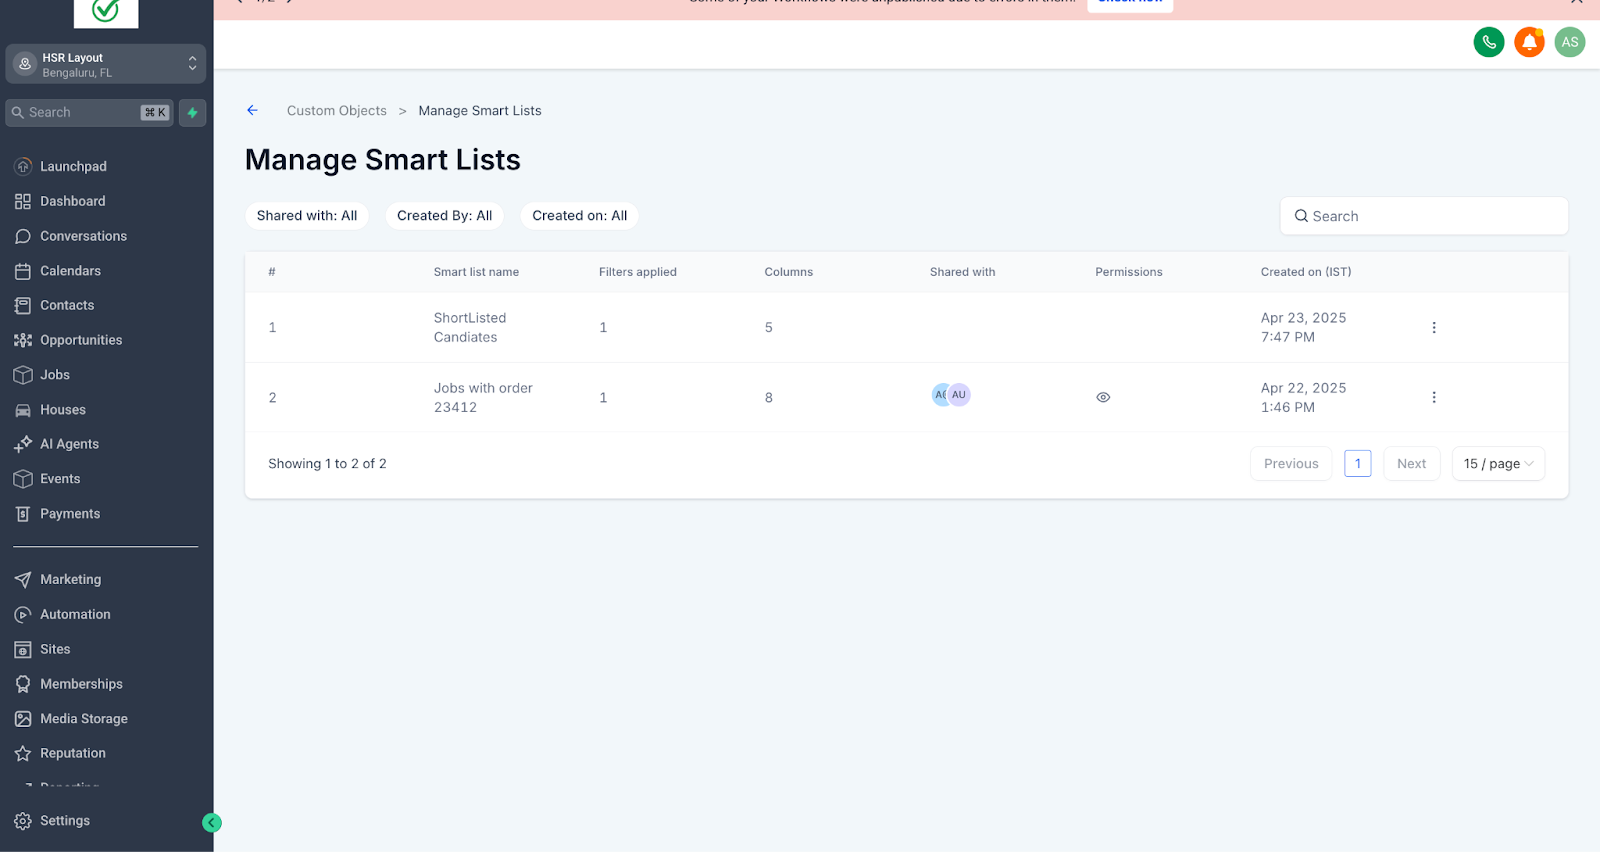
- Search within smart lists: you can instantly search for a smart list by going to "Manage smart lists" and typing the name of the list you need.
- Quick switching: move seamlessly between different smart lists.
- Column resizing: customise column widths and save your preferences.
- Simplified sharing:
- Share lists: easily share smart lists with your team or with selected members.
- Permissions: assign view-only or edit permissions to users.
- Direct links: share your lists directly via link for a consistent view across the whole team.
- Stay organised:
- Duplicate lists: quickly duplicate existing smart lists to create variants.
- Rename, export, delete: easily rename, export or delete smart lists as you need.
- Administrator controls: administrators can manage and oversee all smart lists.
How to use smart lists
-
Go to the custom object
To get started, navigate to the section of the custom object you want (for example, "Jobs").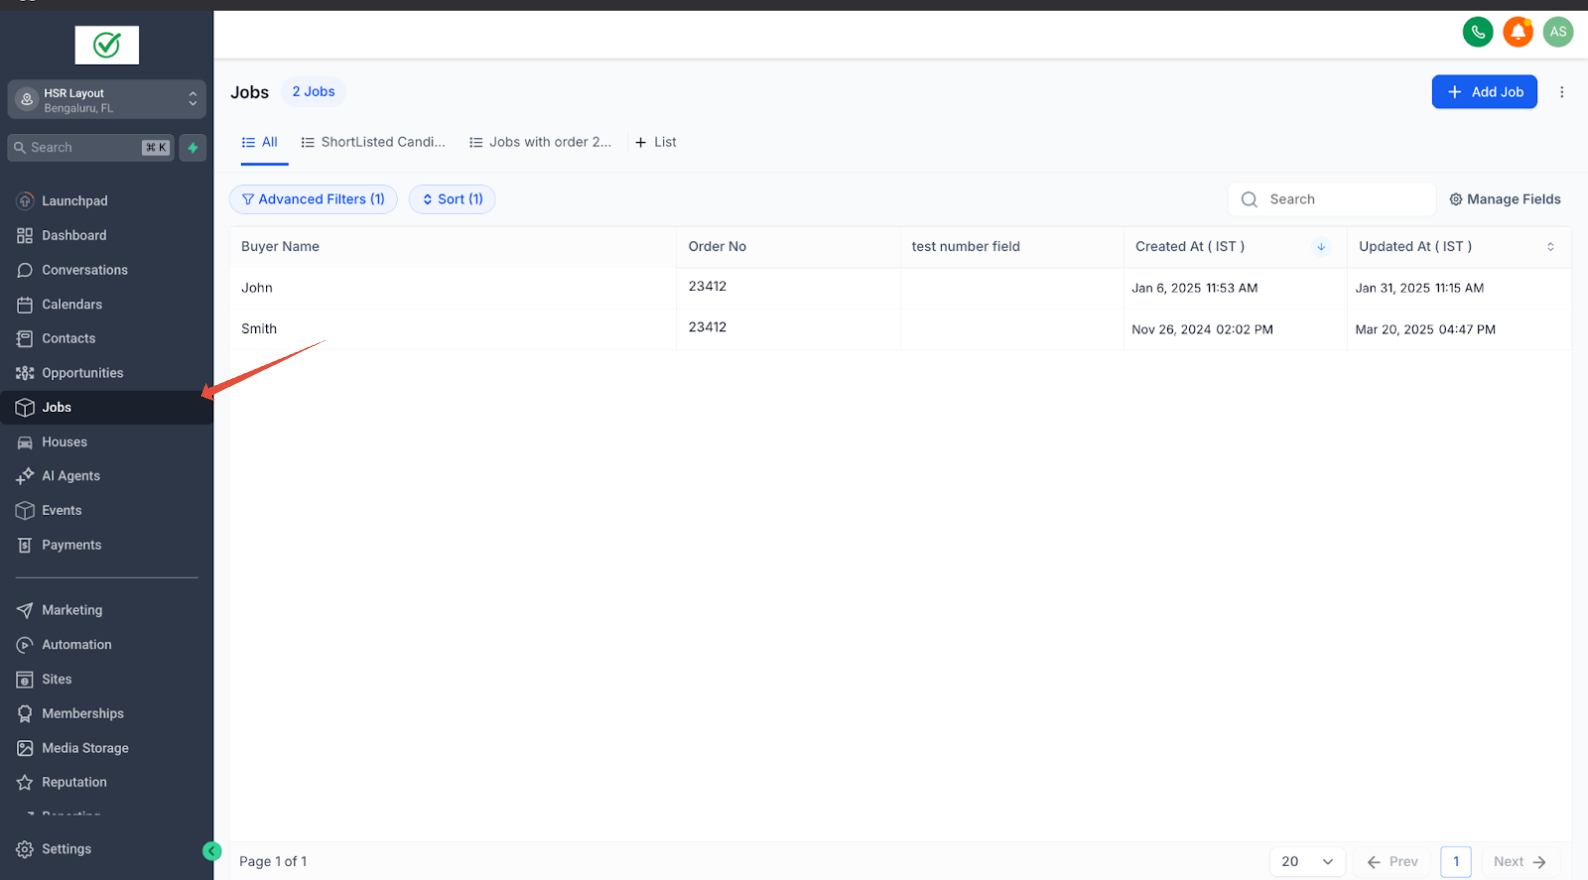
-
Set up filters and columns
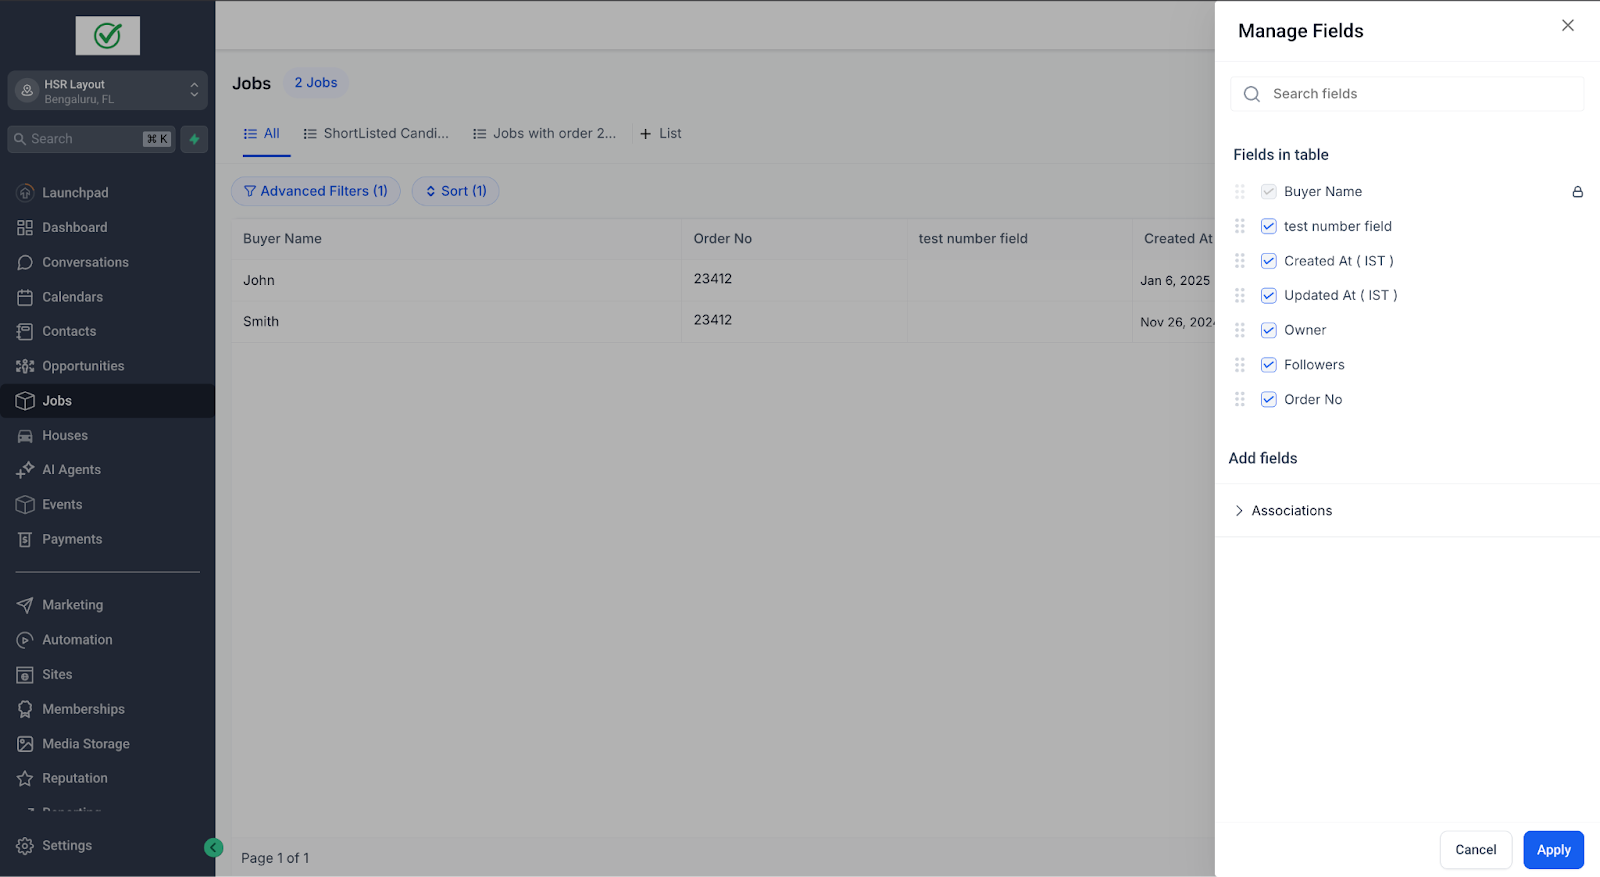
Smart lists combine advanced filters, sorting and custom columns to organise your data in a powerful way. To create a new list, click Advanced filters, choose your filter criteria, select the columns to display and set the sort order.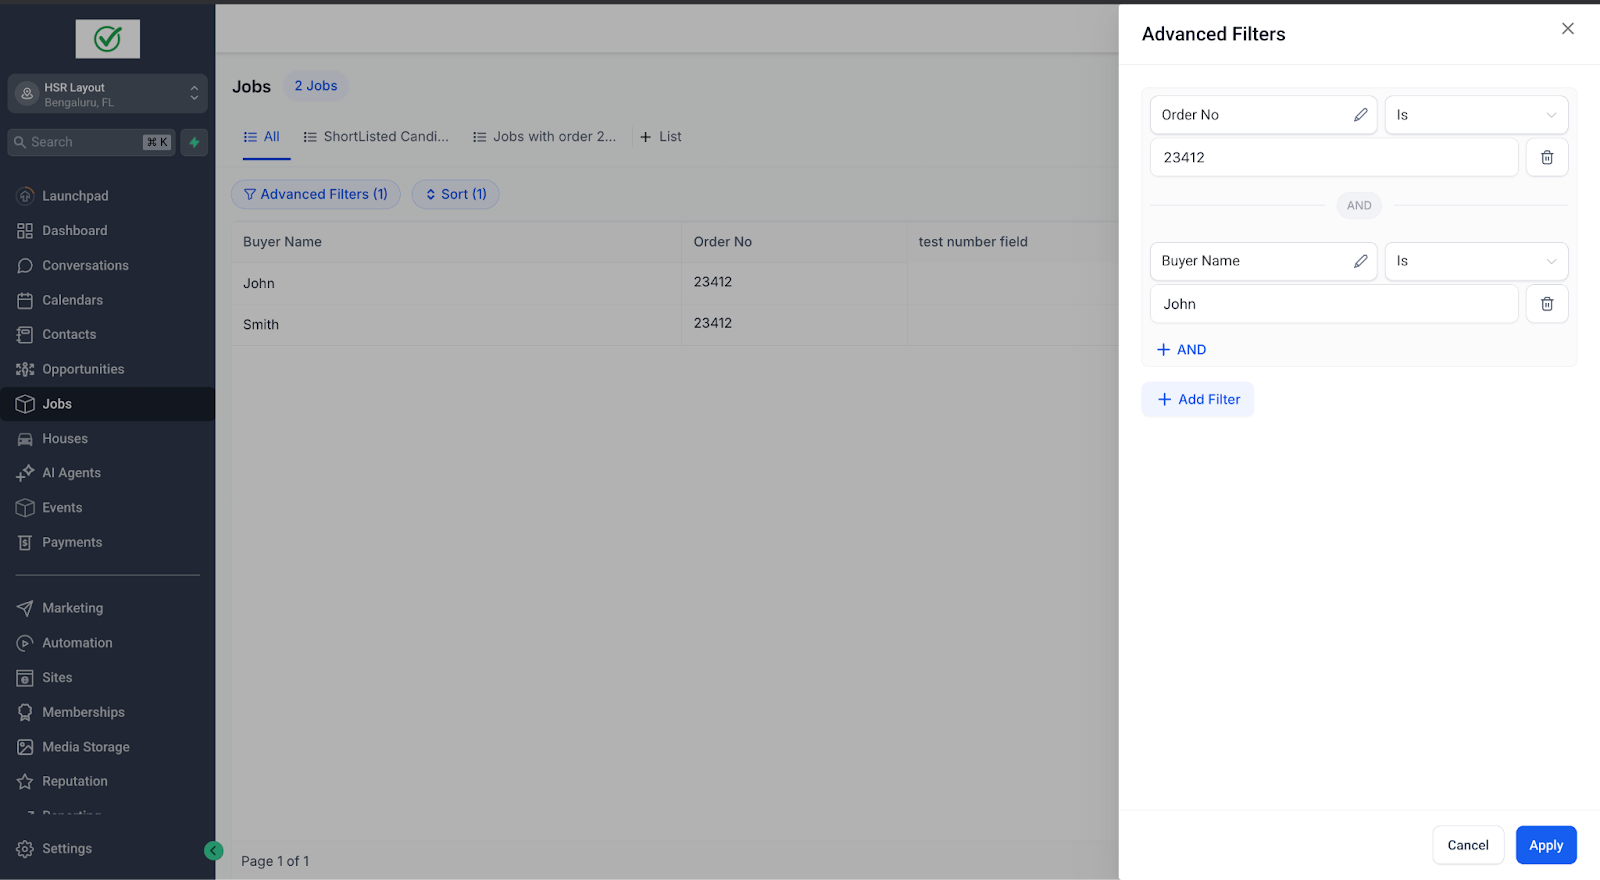
-
Create a new smart list
Click the "+ List" icon.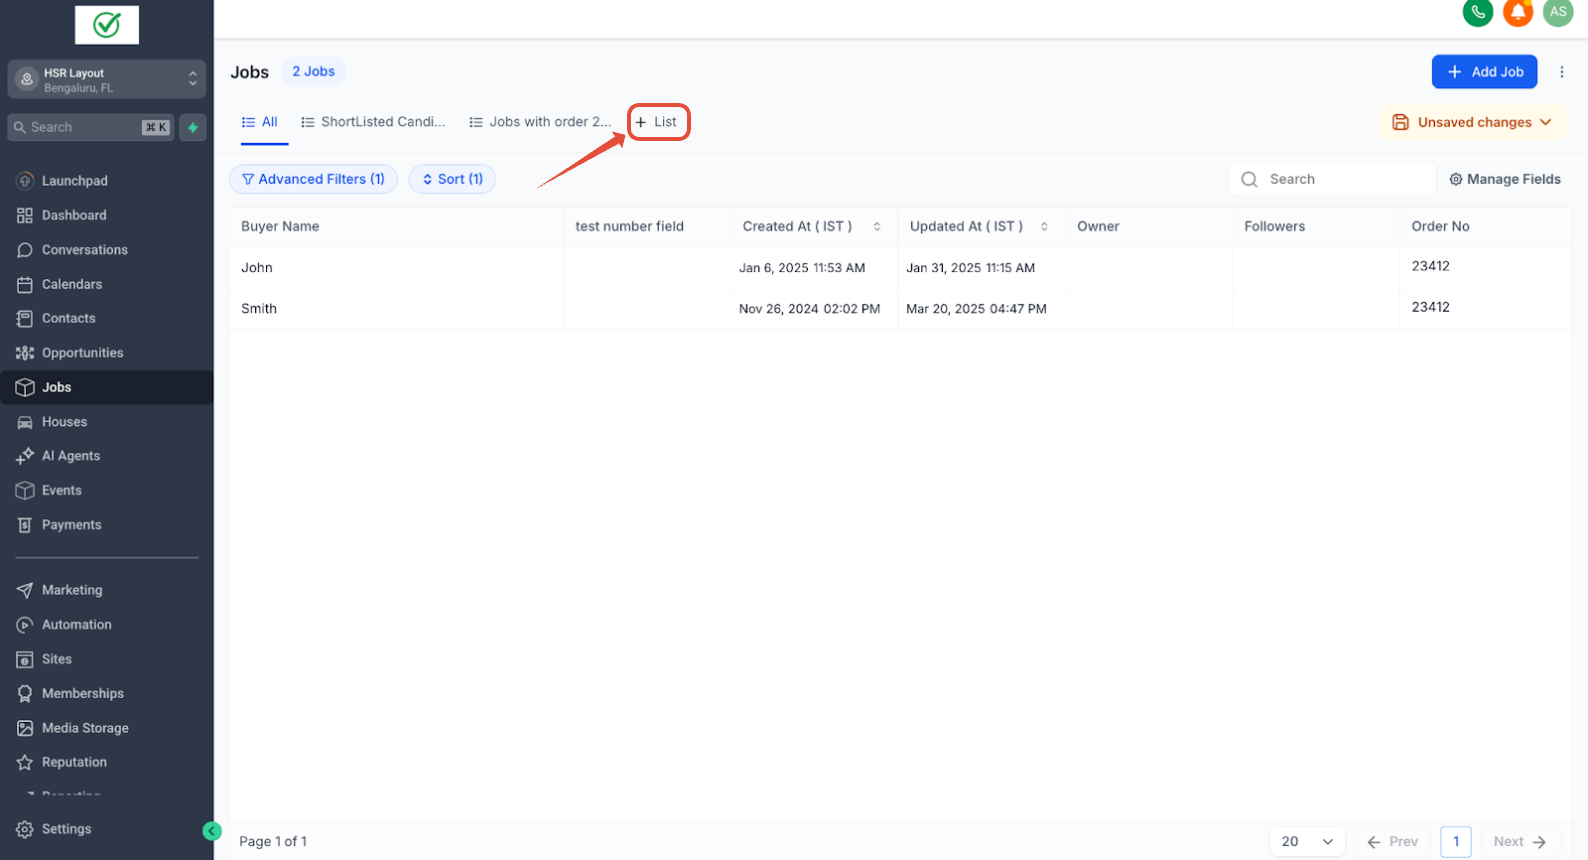
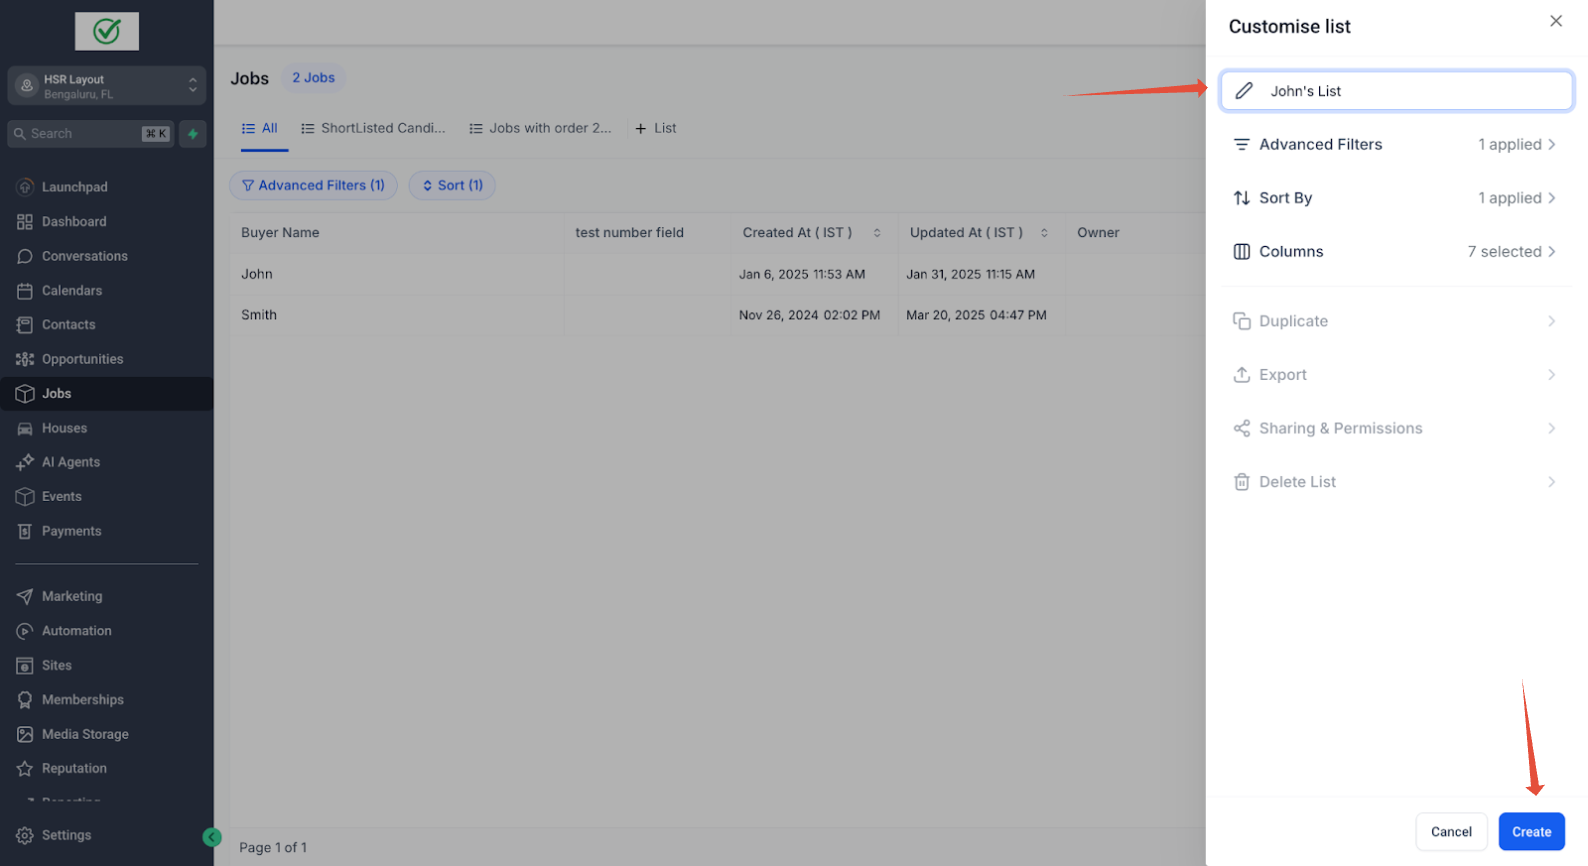
Enter a name for the list, check the filters, columns and sorting, then click "Create".
-
Manage your smart list
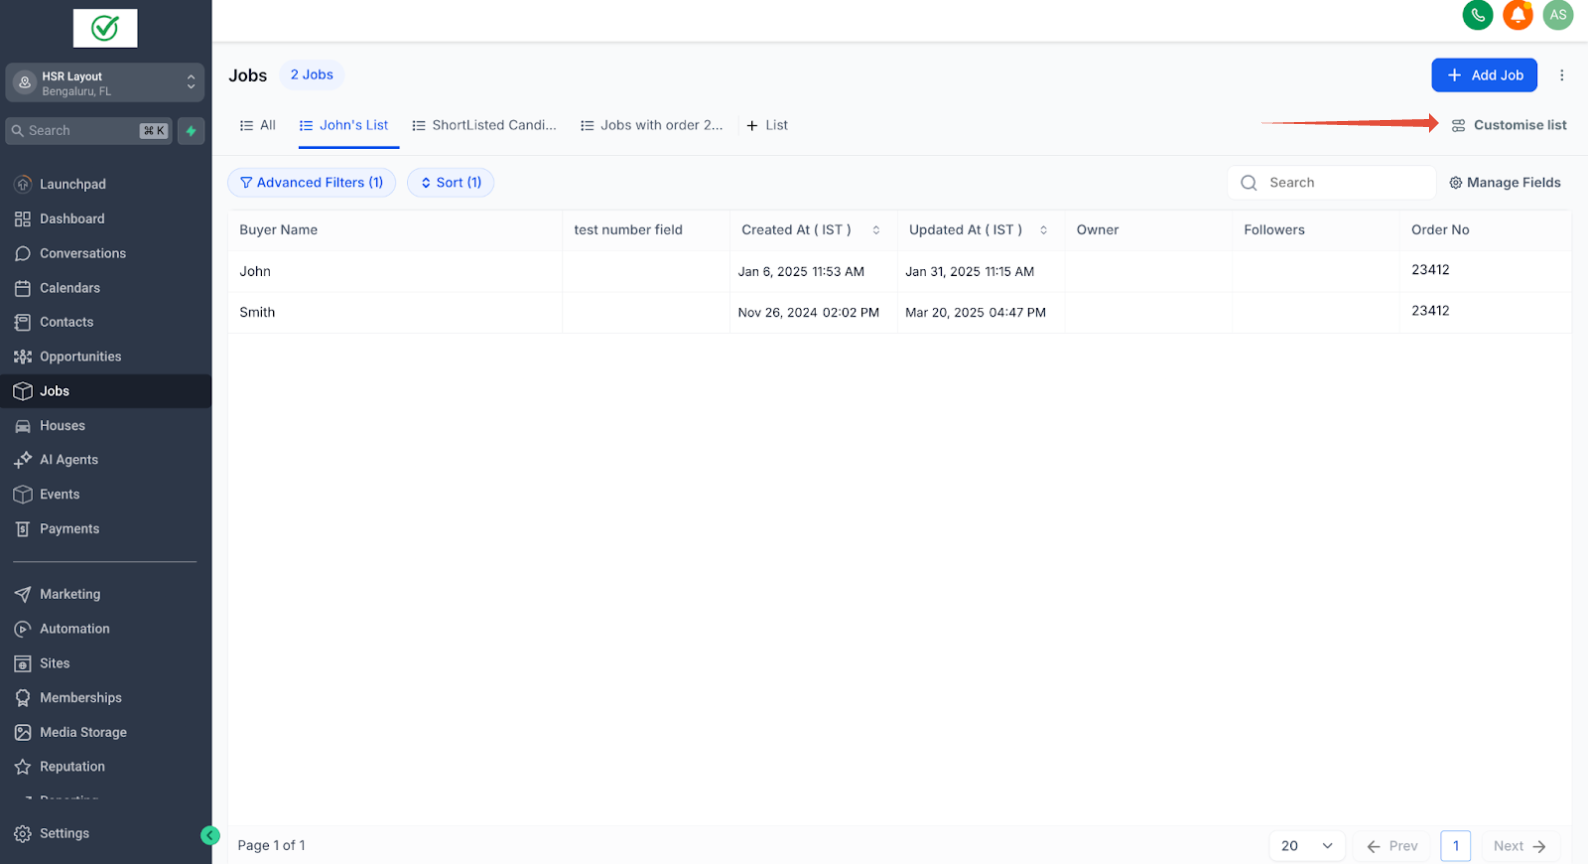
Once created, you can manage your list in several ways:- Edit: click Customise list to adjust filters, sorting and columns.
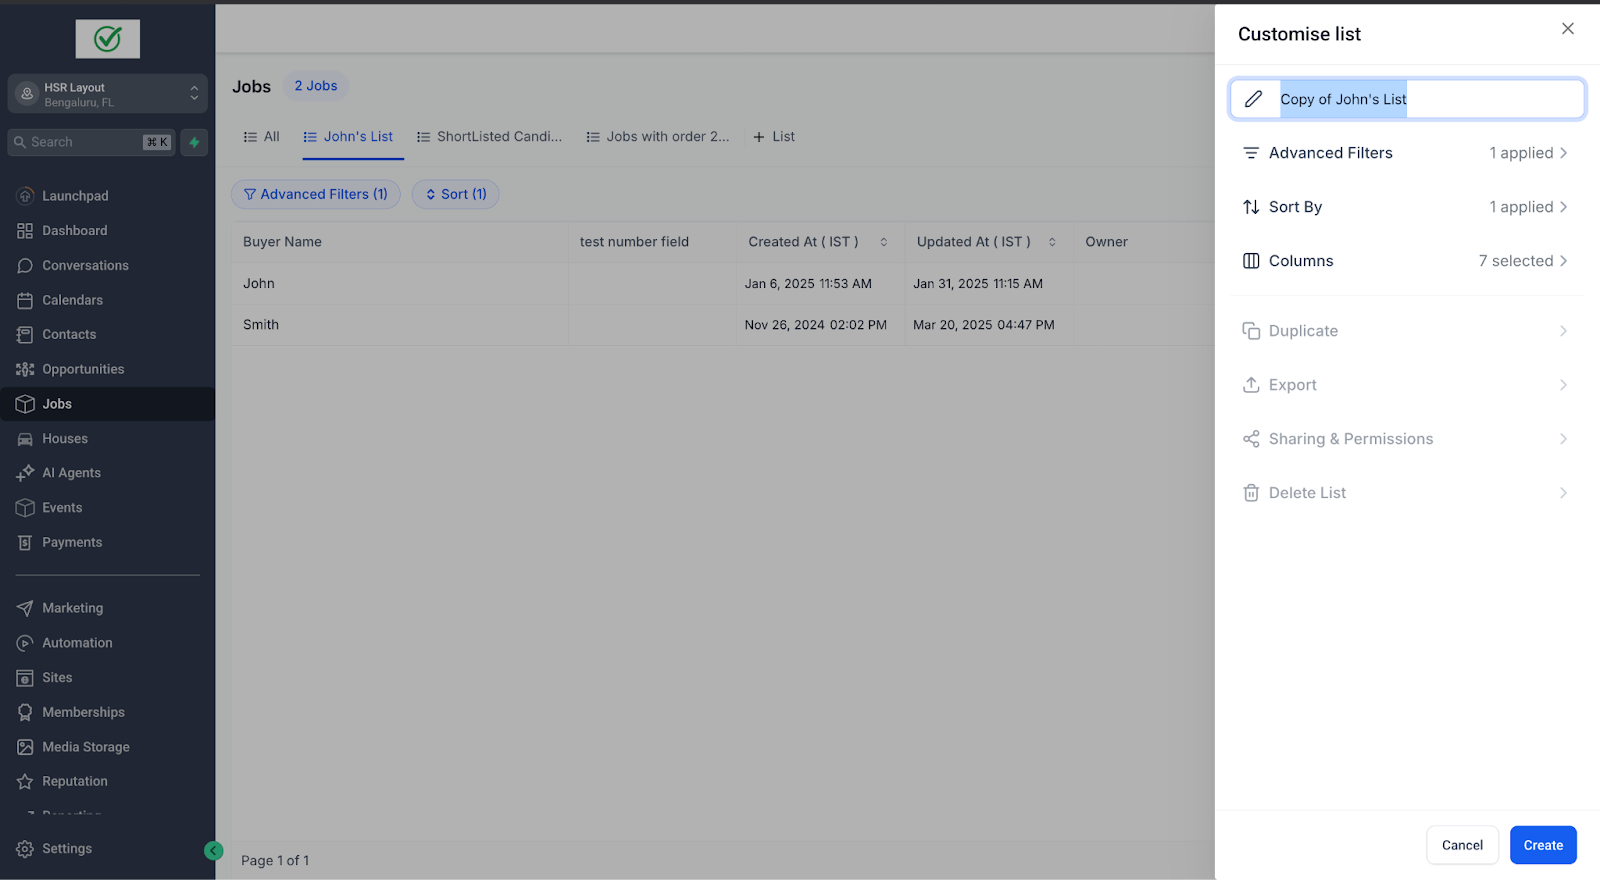
- Duplicate: select Duplicate, enter a new name and click "Create".
- Export: click Export to download your list data.
- Delete: use the Delete option to remove lists you no longer need.
-
Sharing and permissions
By default, the list is visible to the administrators and users of the account. To change access, click Share and assign View or Edit permissions to selected users.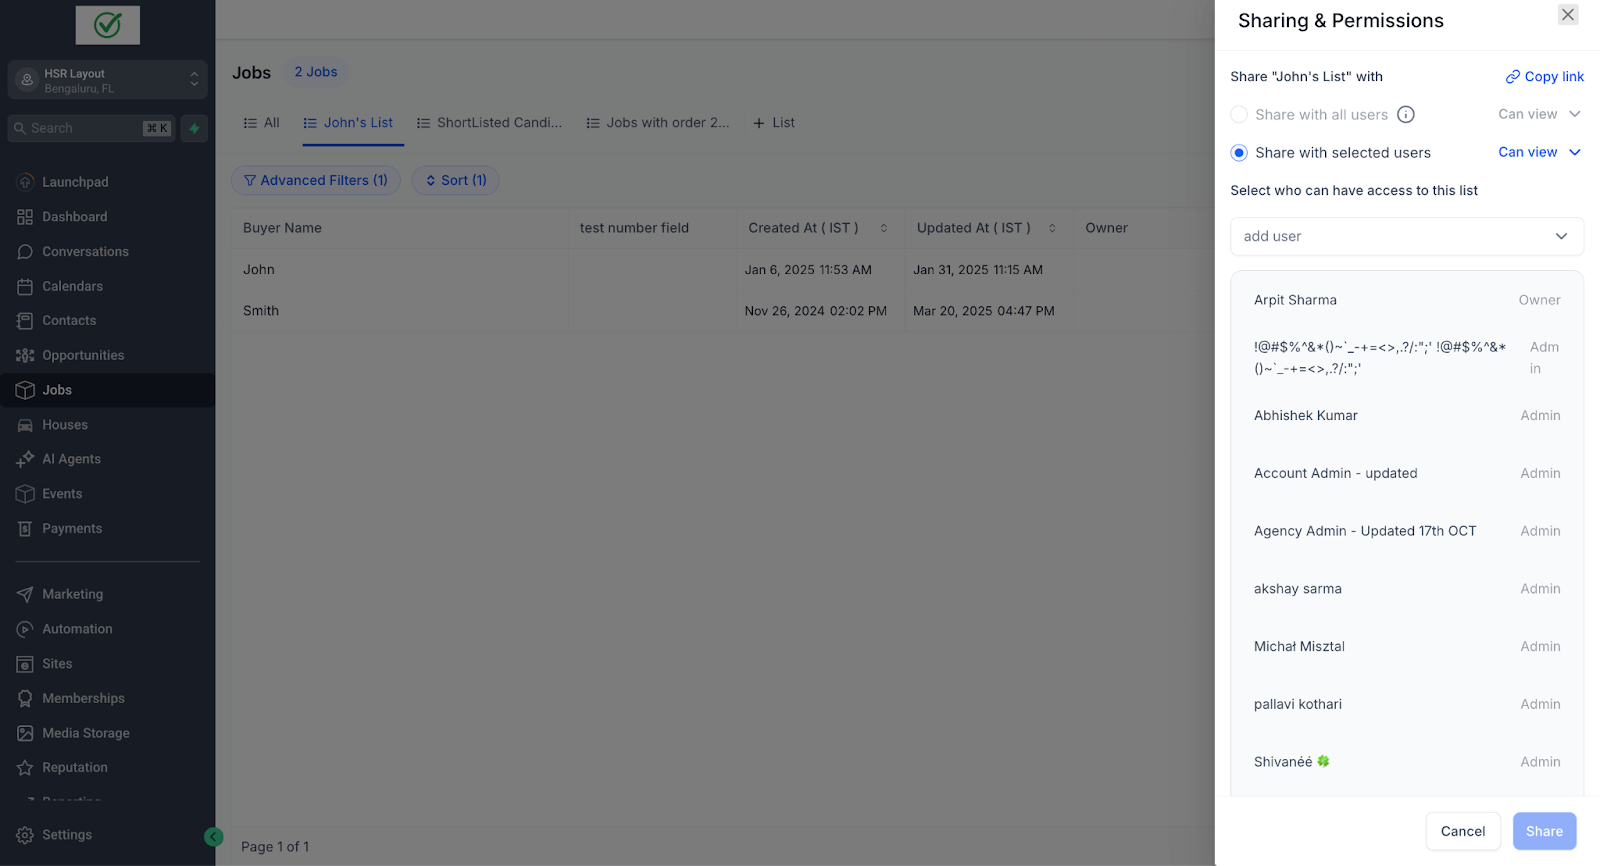
-
Creating a smart list quickly
Apply any Advanced filter and you will see an "unsaved changes" indicator.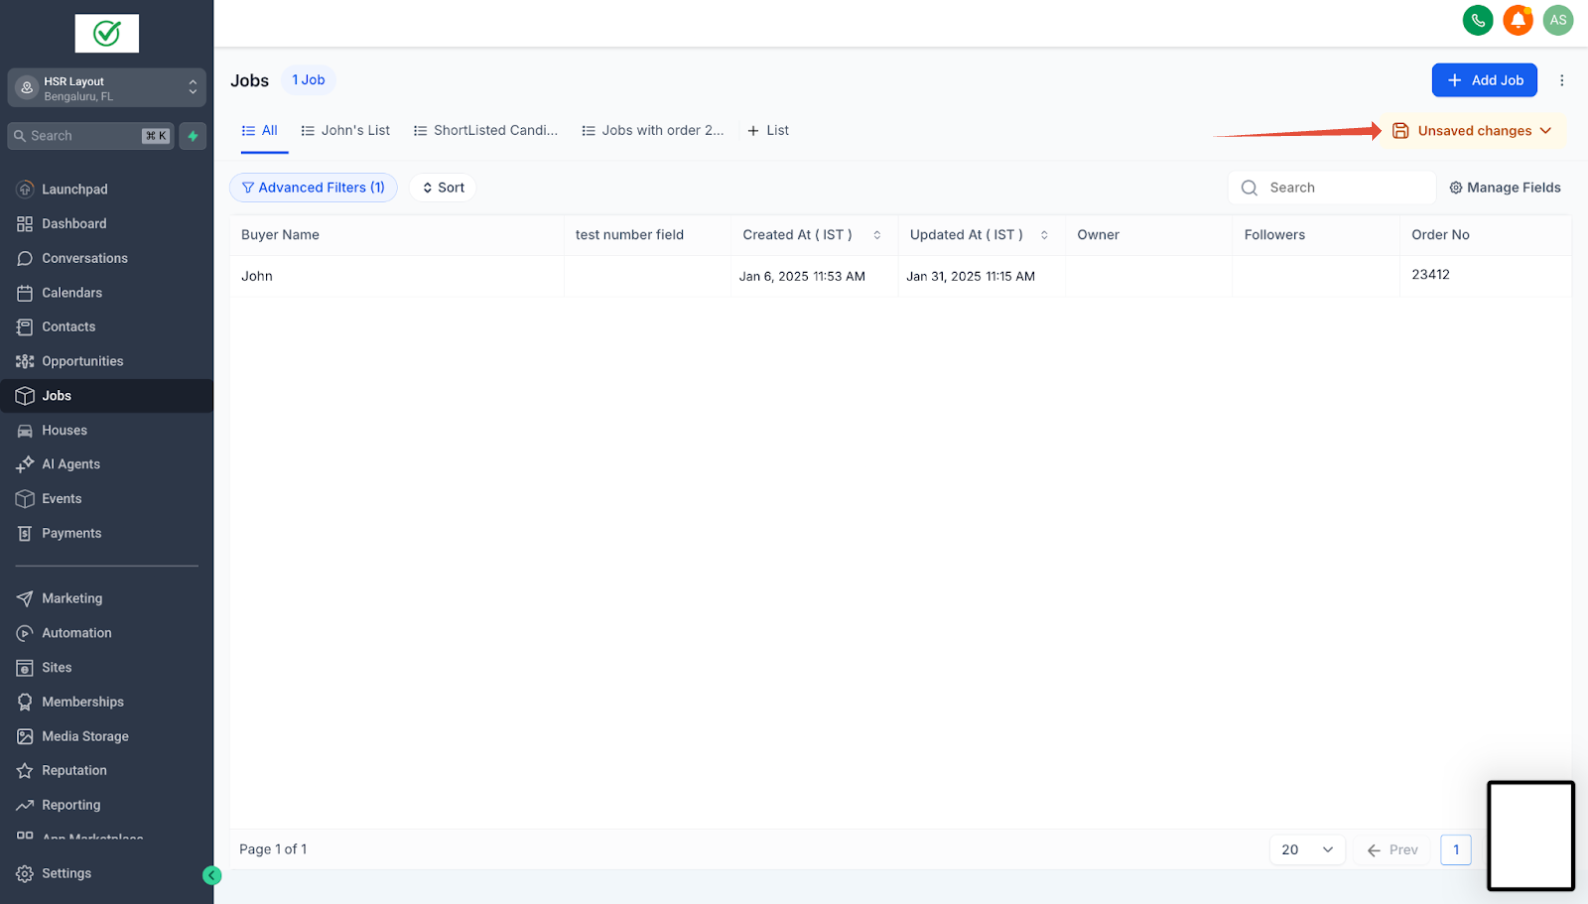
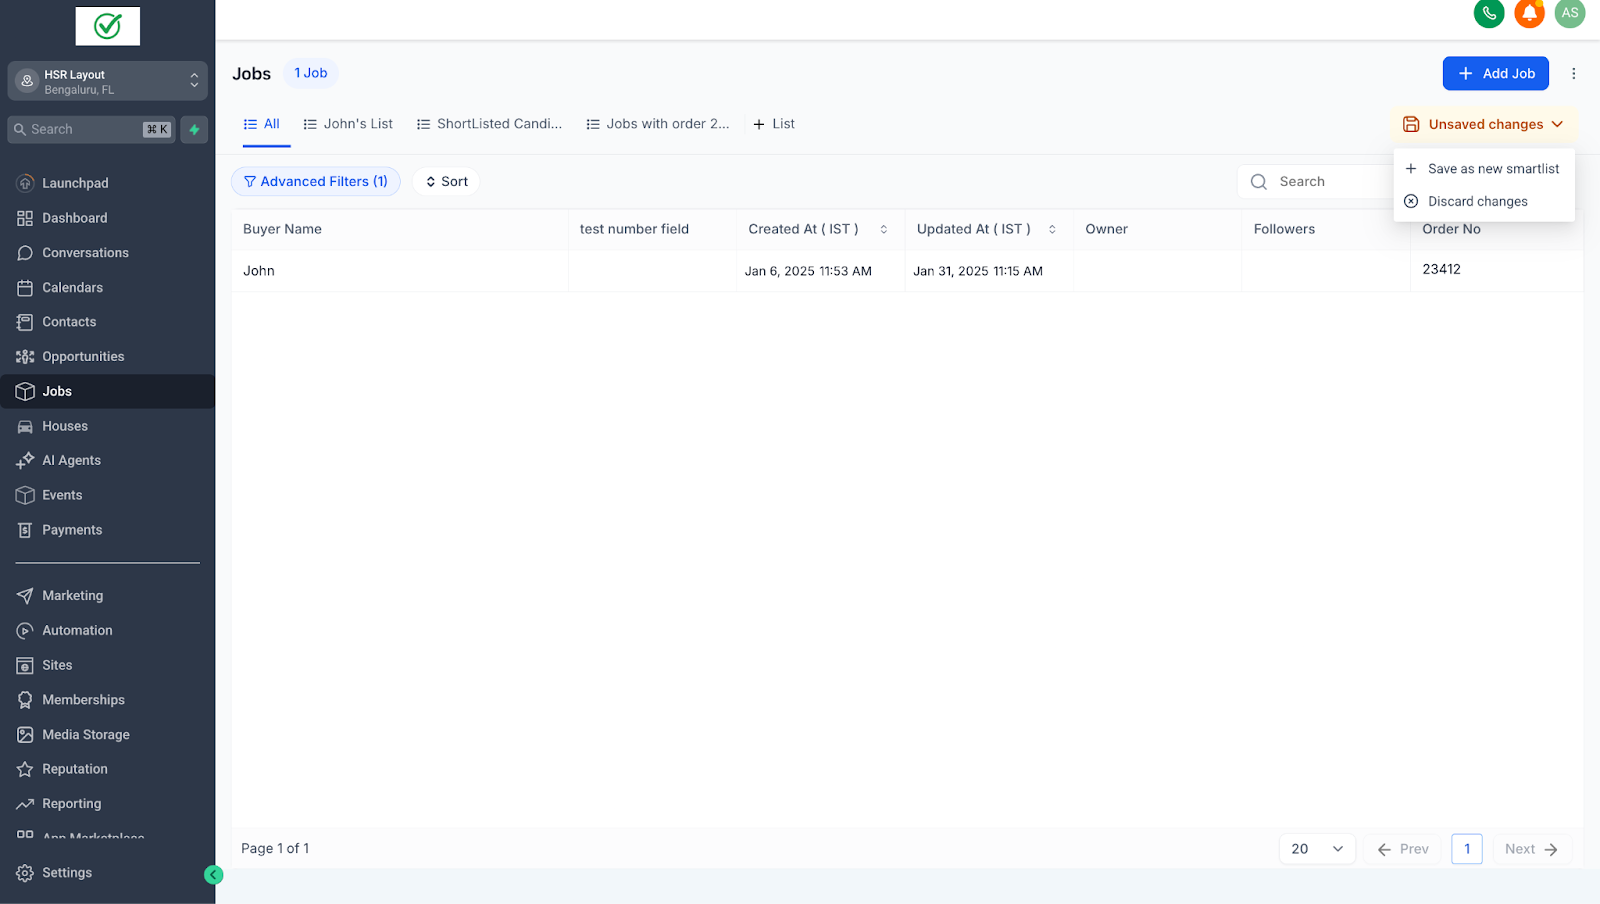
Click Unsaved changes in the top right and then Save as new smart list to create a new view quickly.
-
Search across your smart lists
To find a list easily, click the ••• menu and select Manage smart lists. Use the search field to enter a keyword and find the list you need.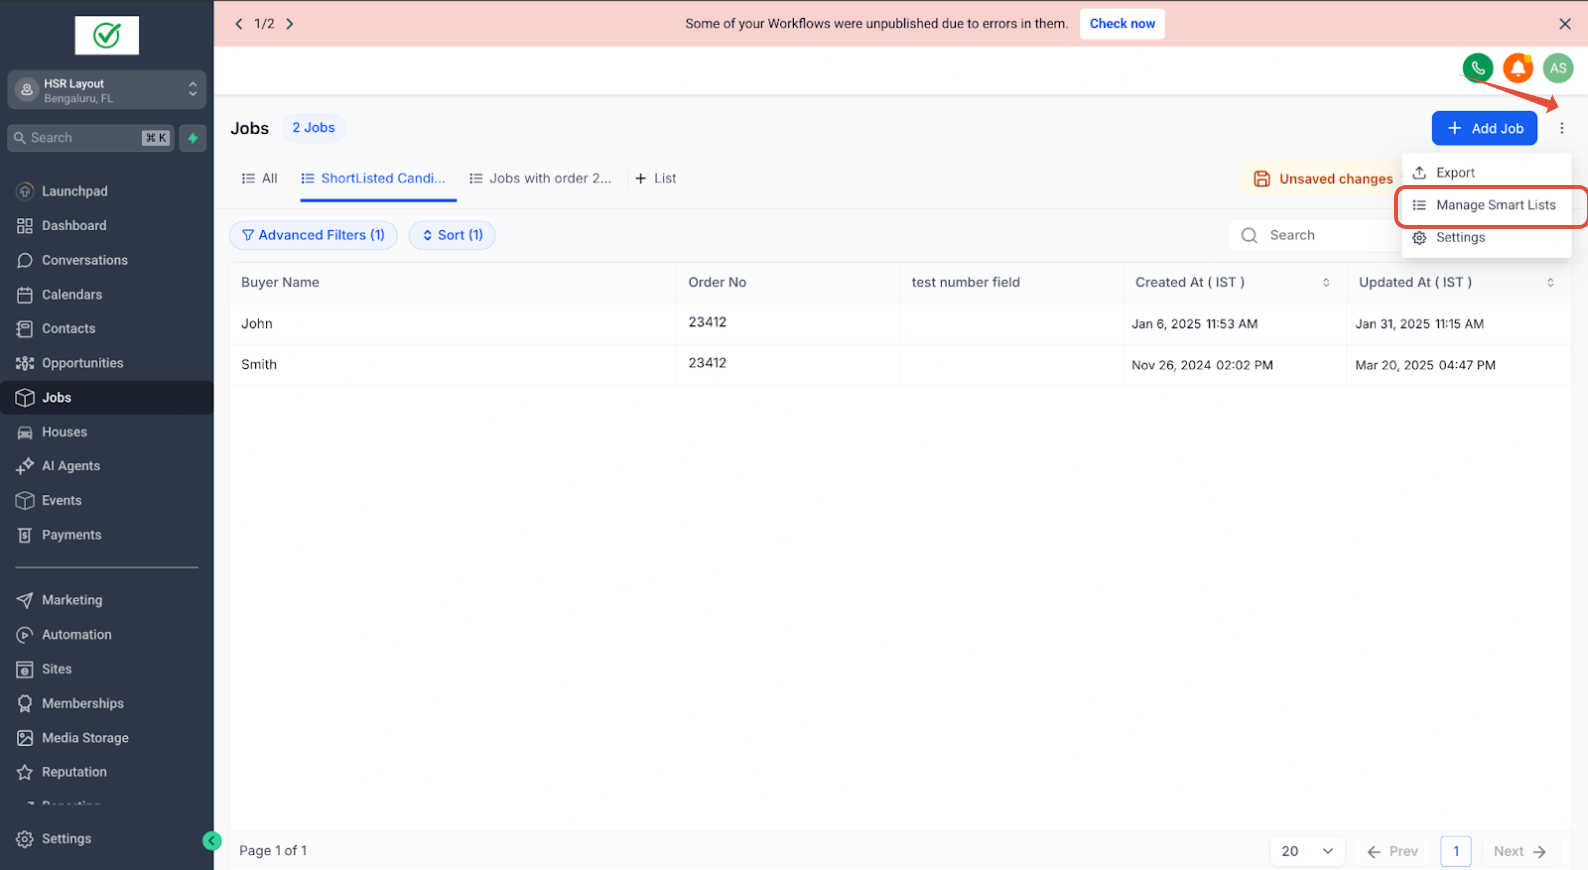
Best practices
- Give your smart lists clear names so you can identify them easily.
- Review and update sharing permissions regularly to keep your data secure.