


Table of contents
- How to import contacts
- How to create new custom fields
- Bulk actions on contacts
- Standard contact fields during import
How to import contacts
Streamlining your communications starts with importing your contacts. Follow these simple steps for a smooth process.
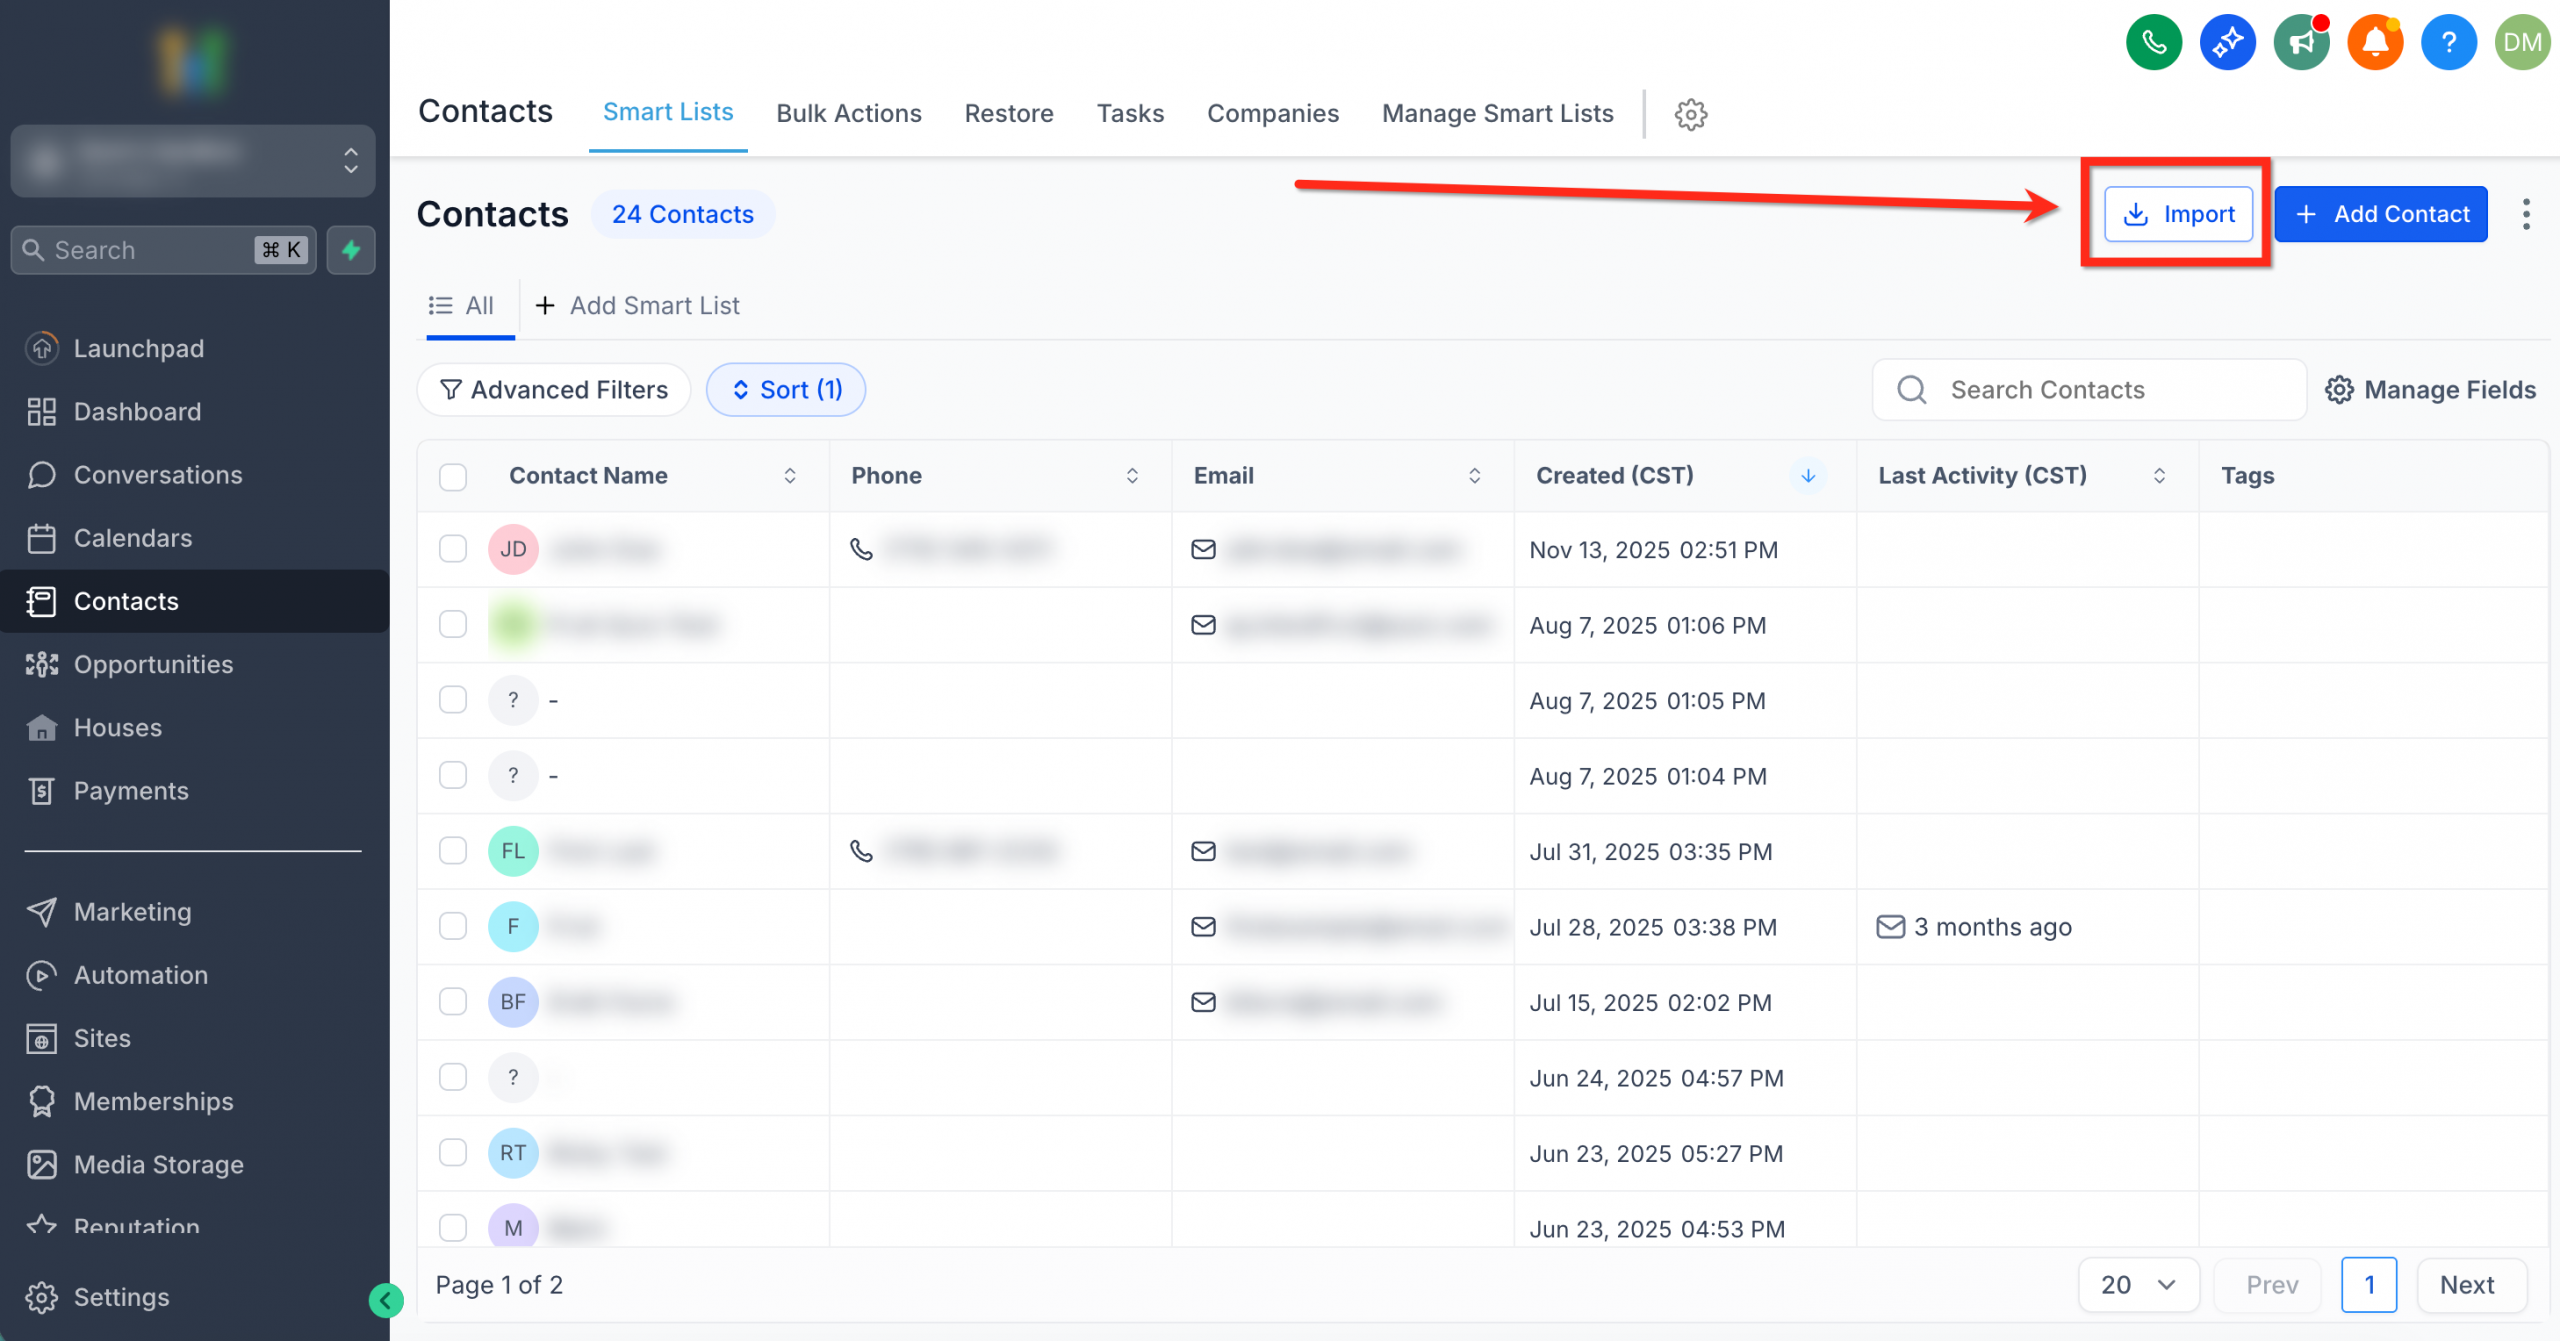
- Go to Contacts.
- Click Import (the icon of an arrow pointing down into a box).
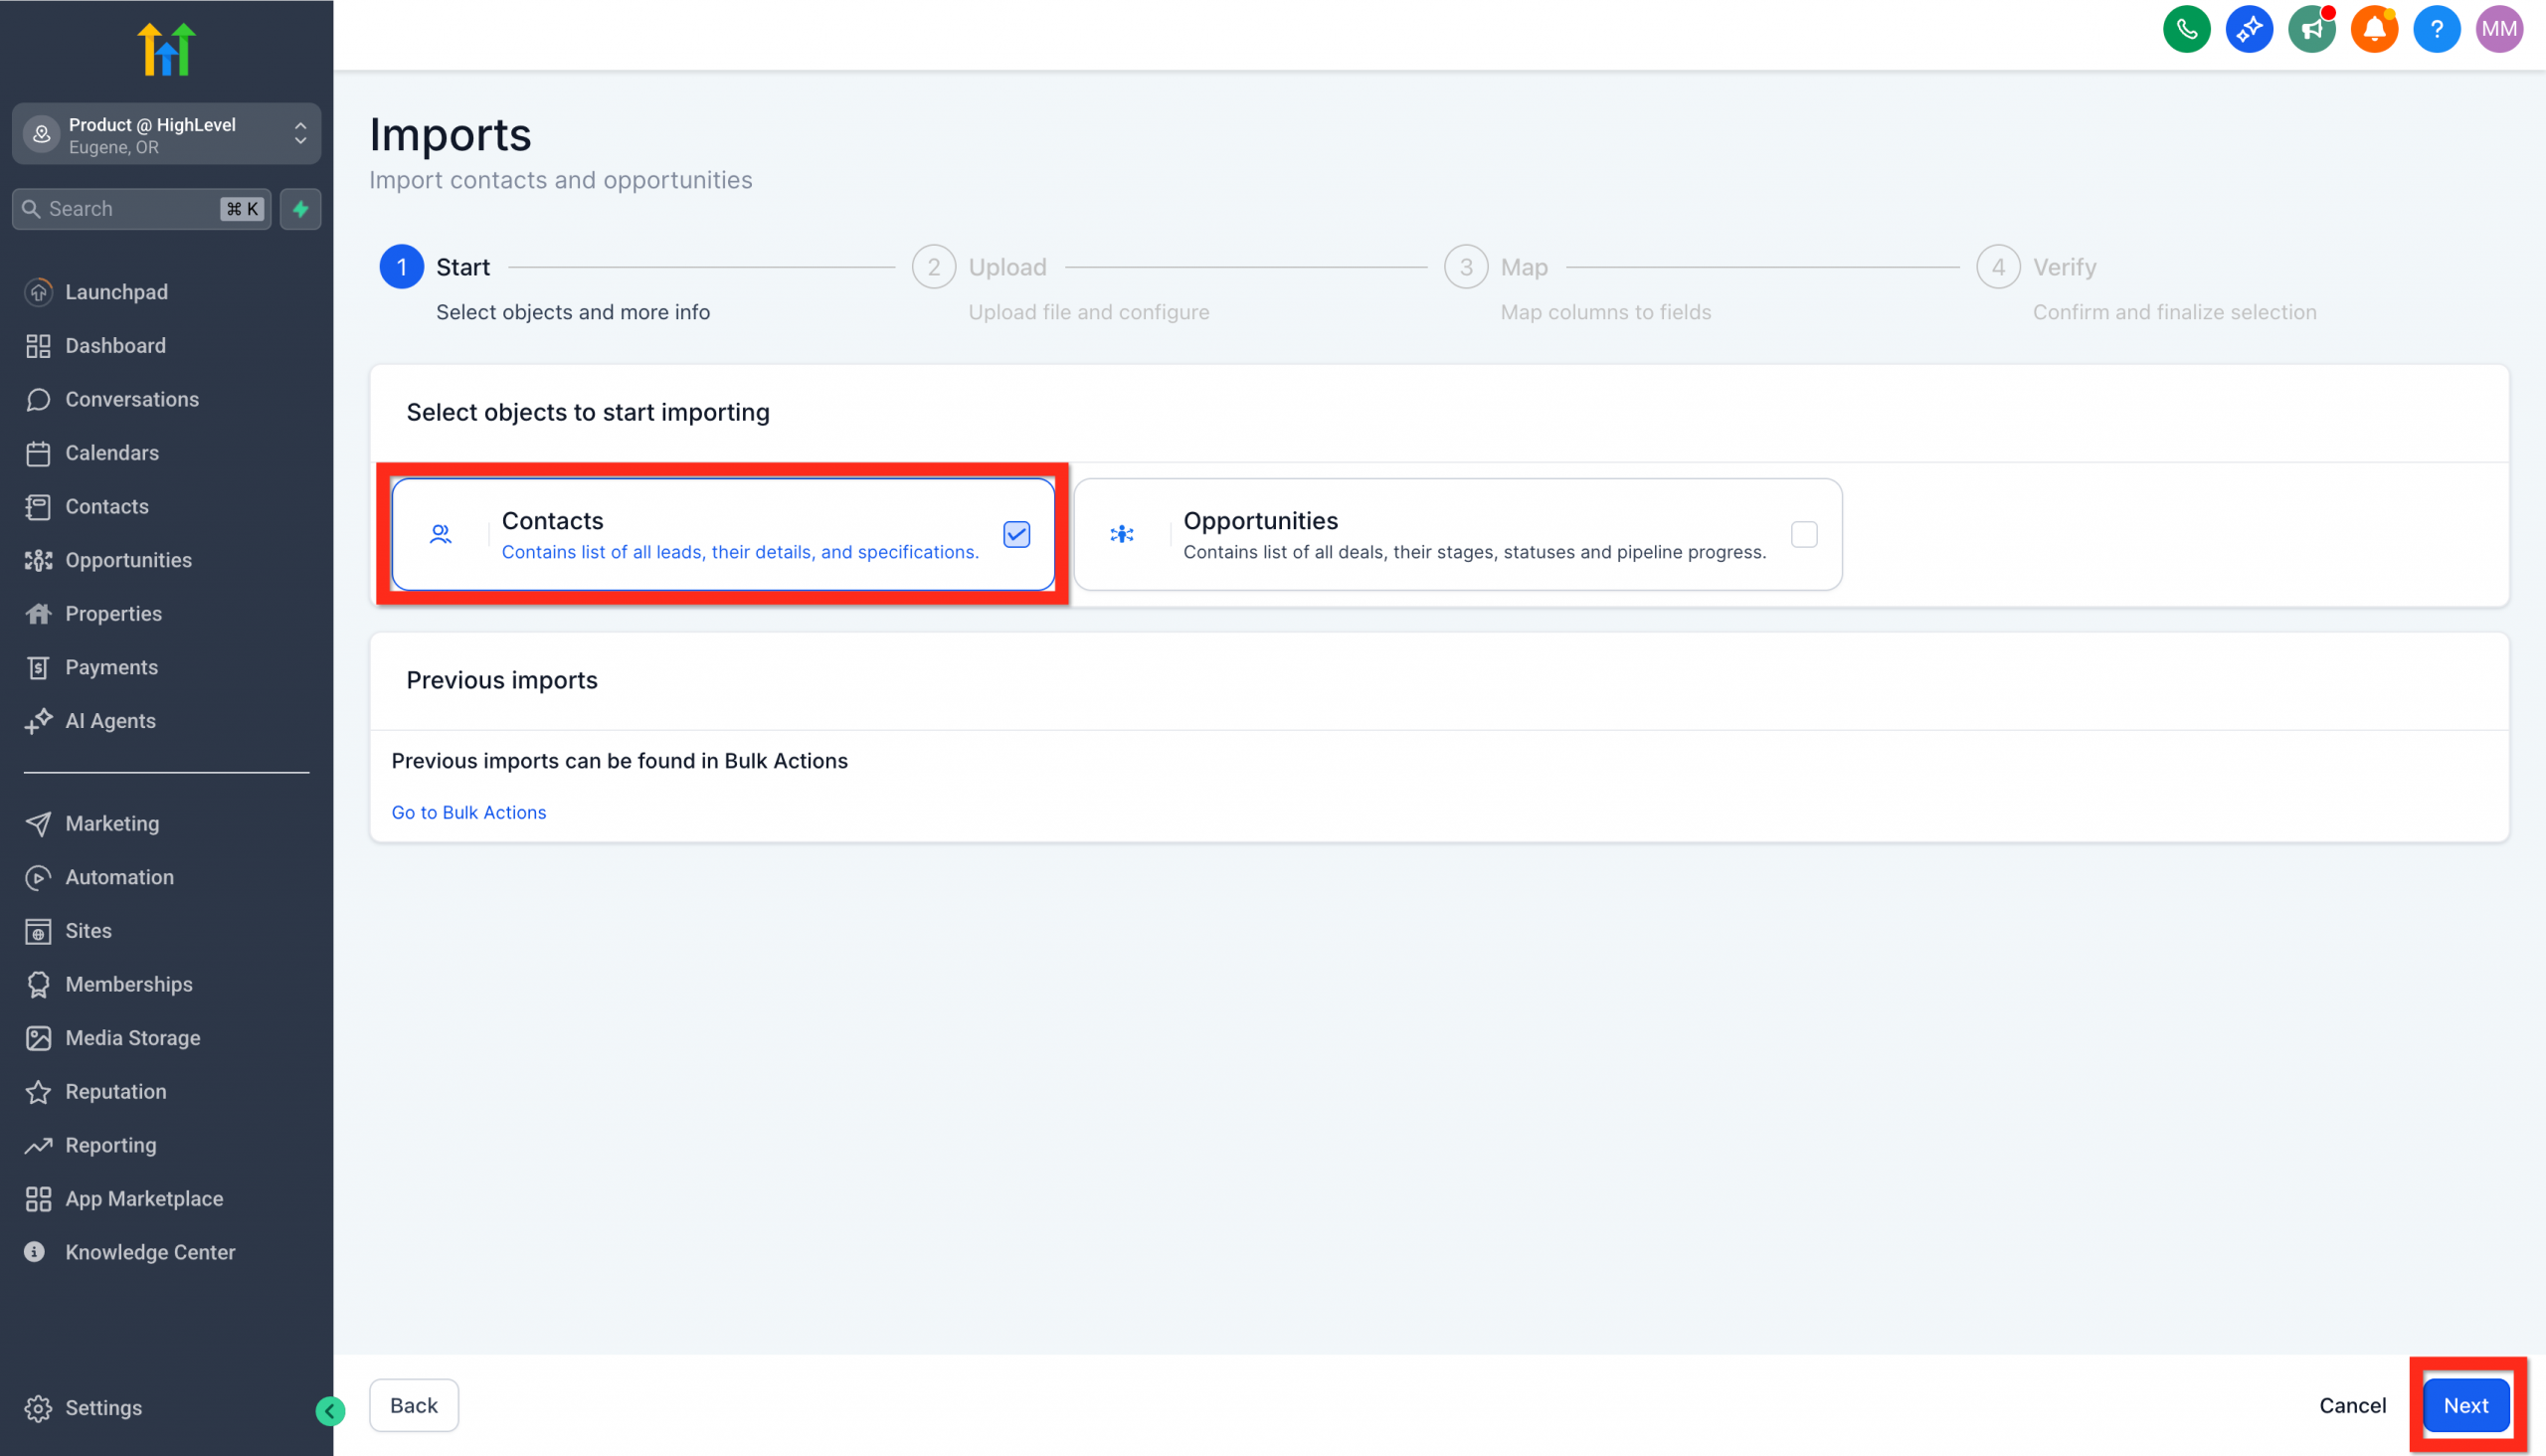
3. On the first import screen, select Contacts and click Next.
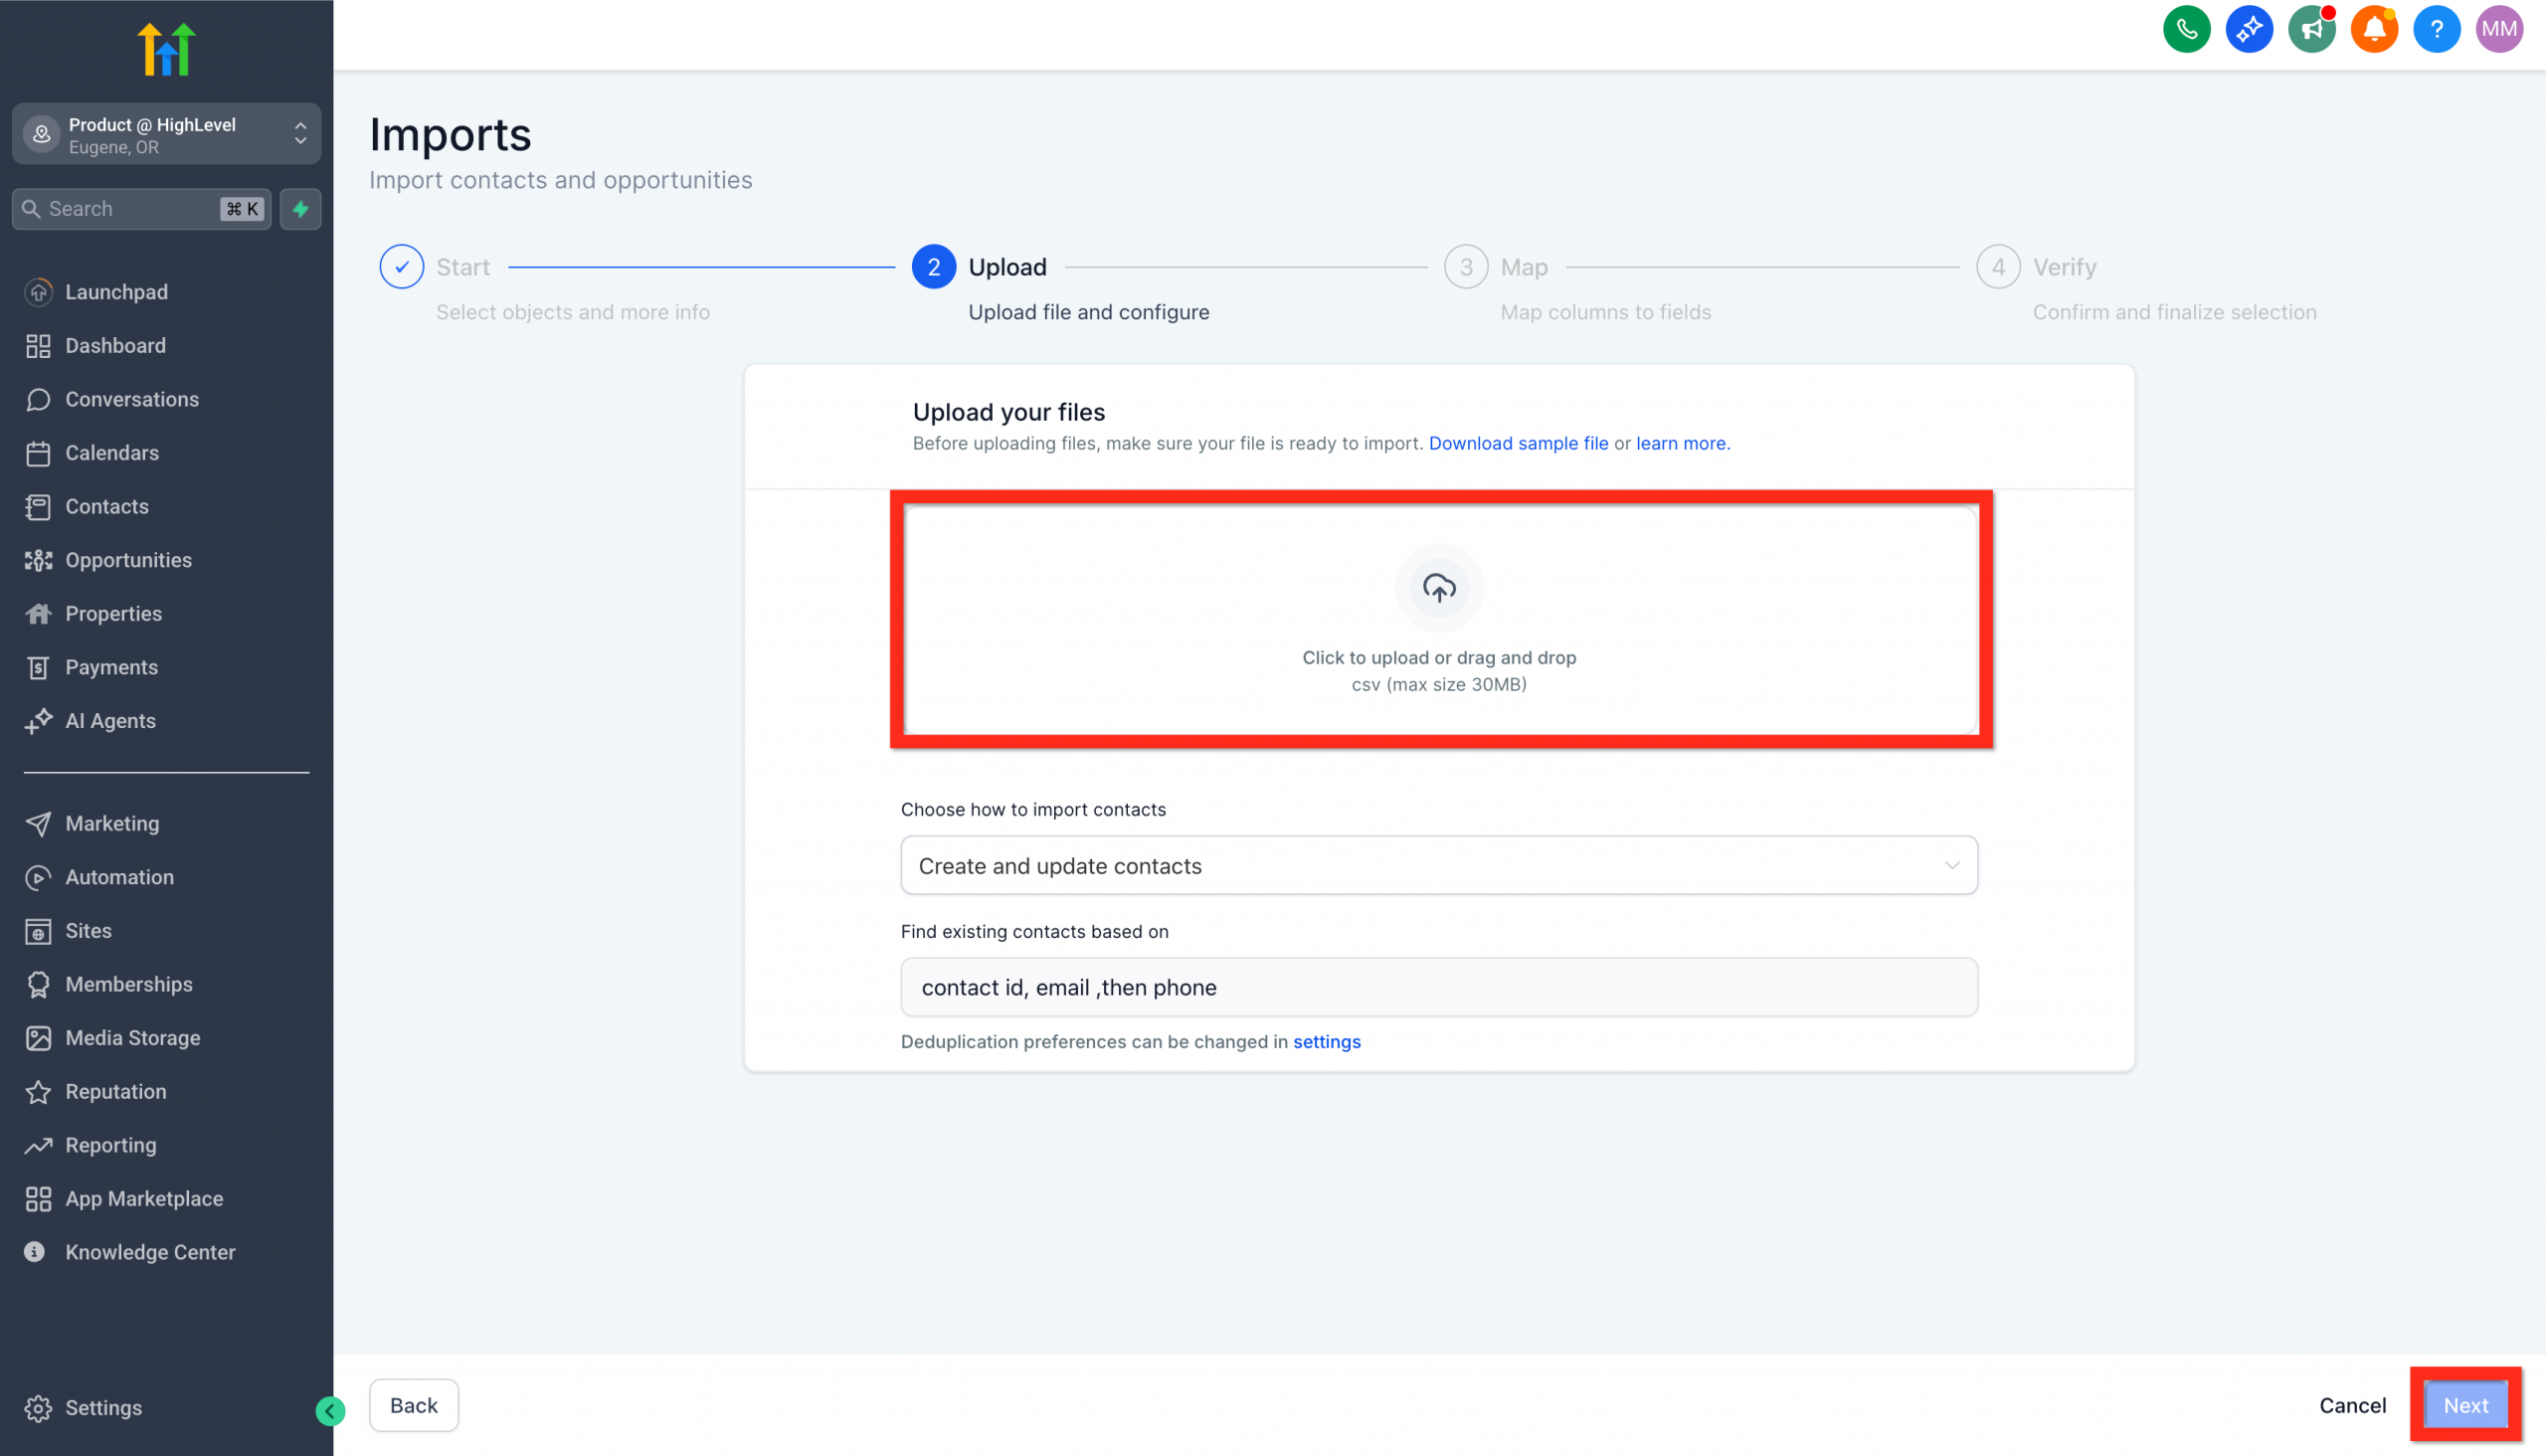
4. Confirm the format of your file.
5. Upload your file (CSV files up to 50MB are supported). To download a sample file with the standard fields, click Download sample file.
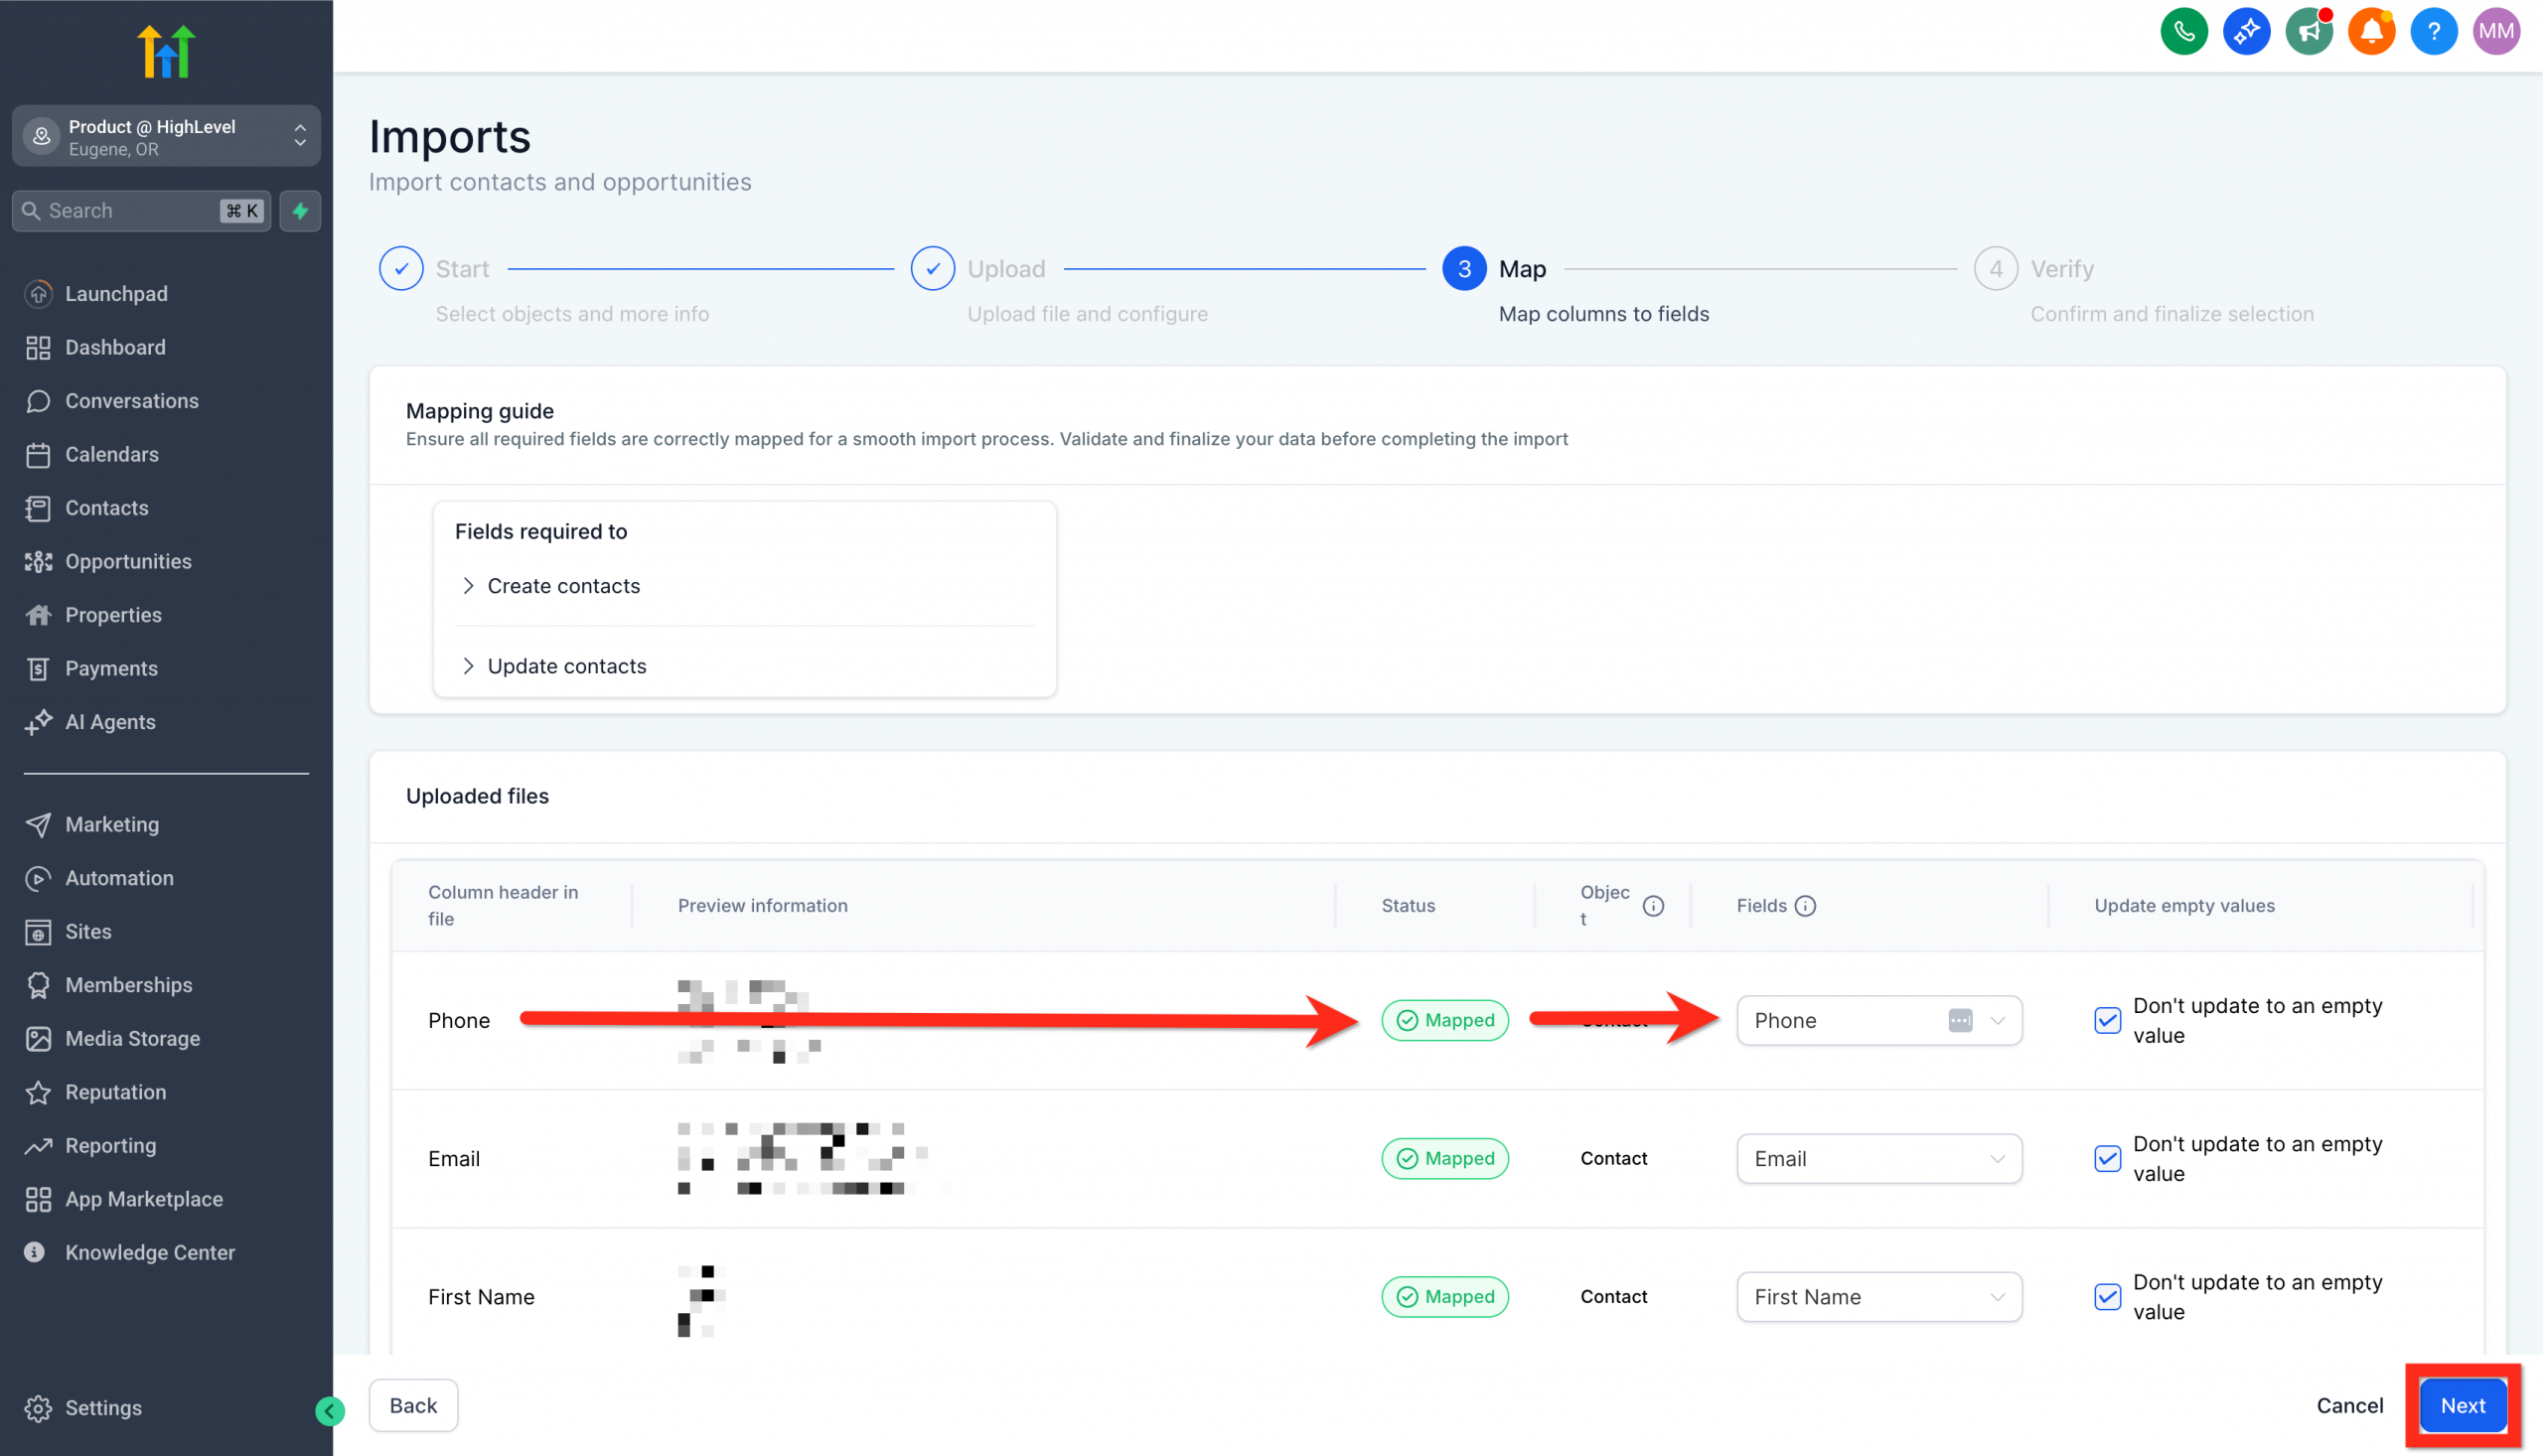
6. Map the columns in your file to the matching Contact fields.
- If you have non-standard data, you can create a new custom field directly from this screen.
- Alternatively, select "Do not import data in unmatched columns".
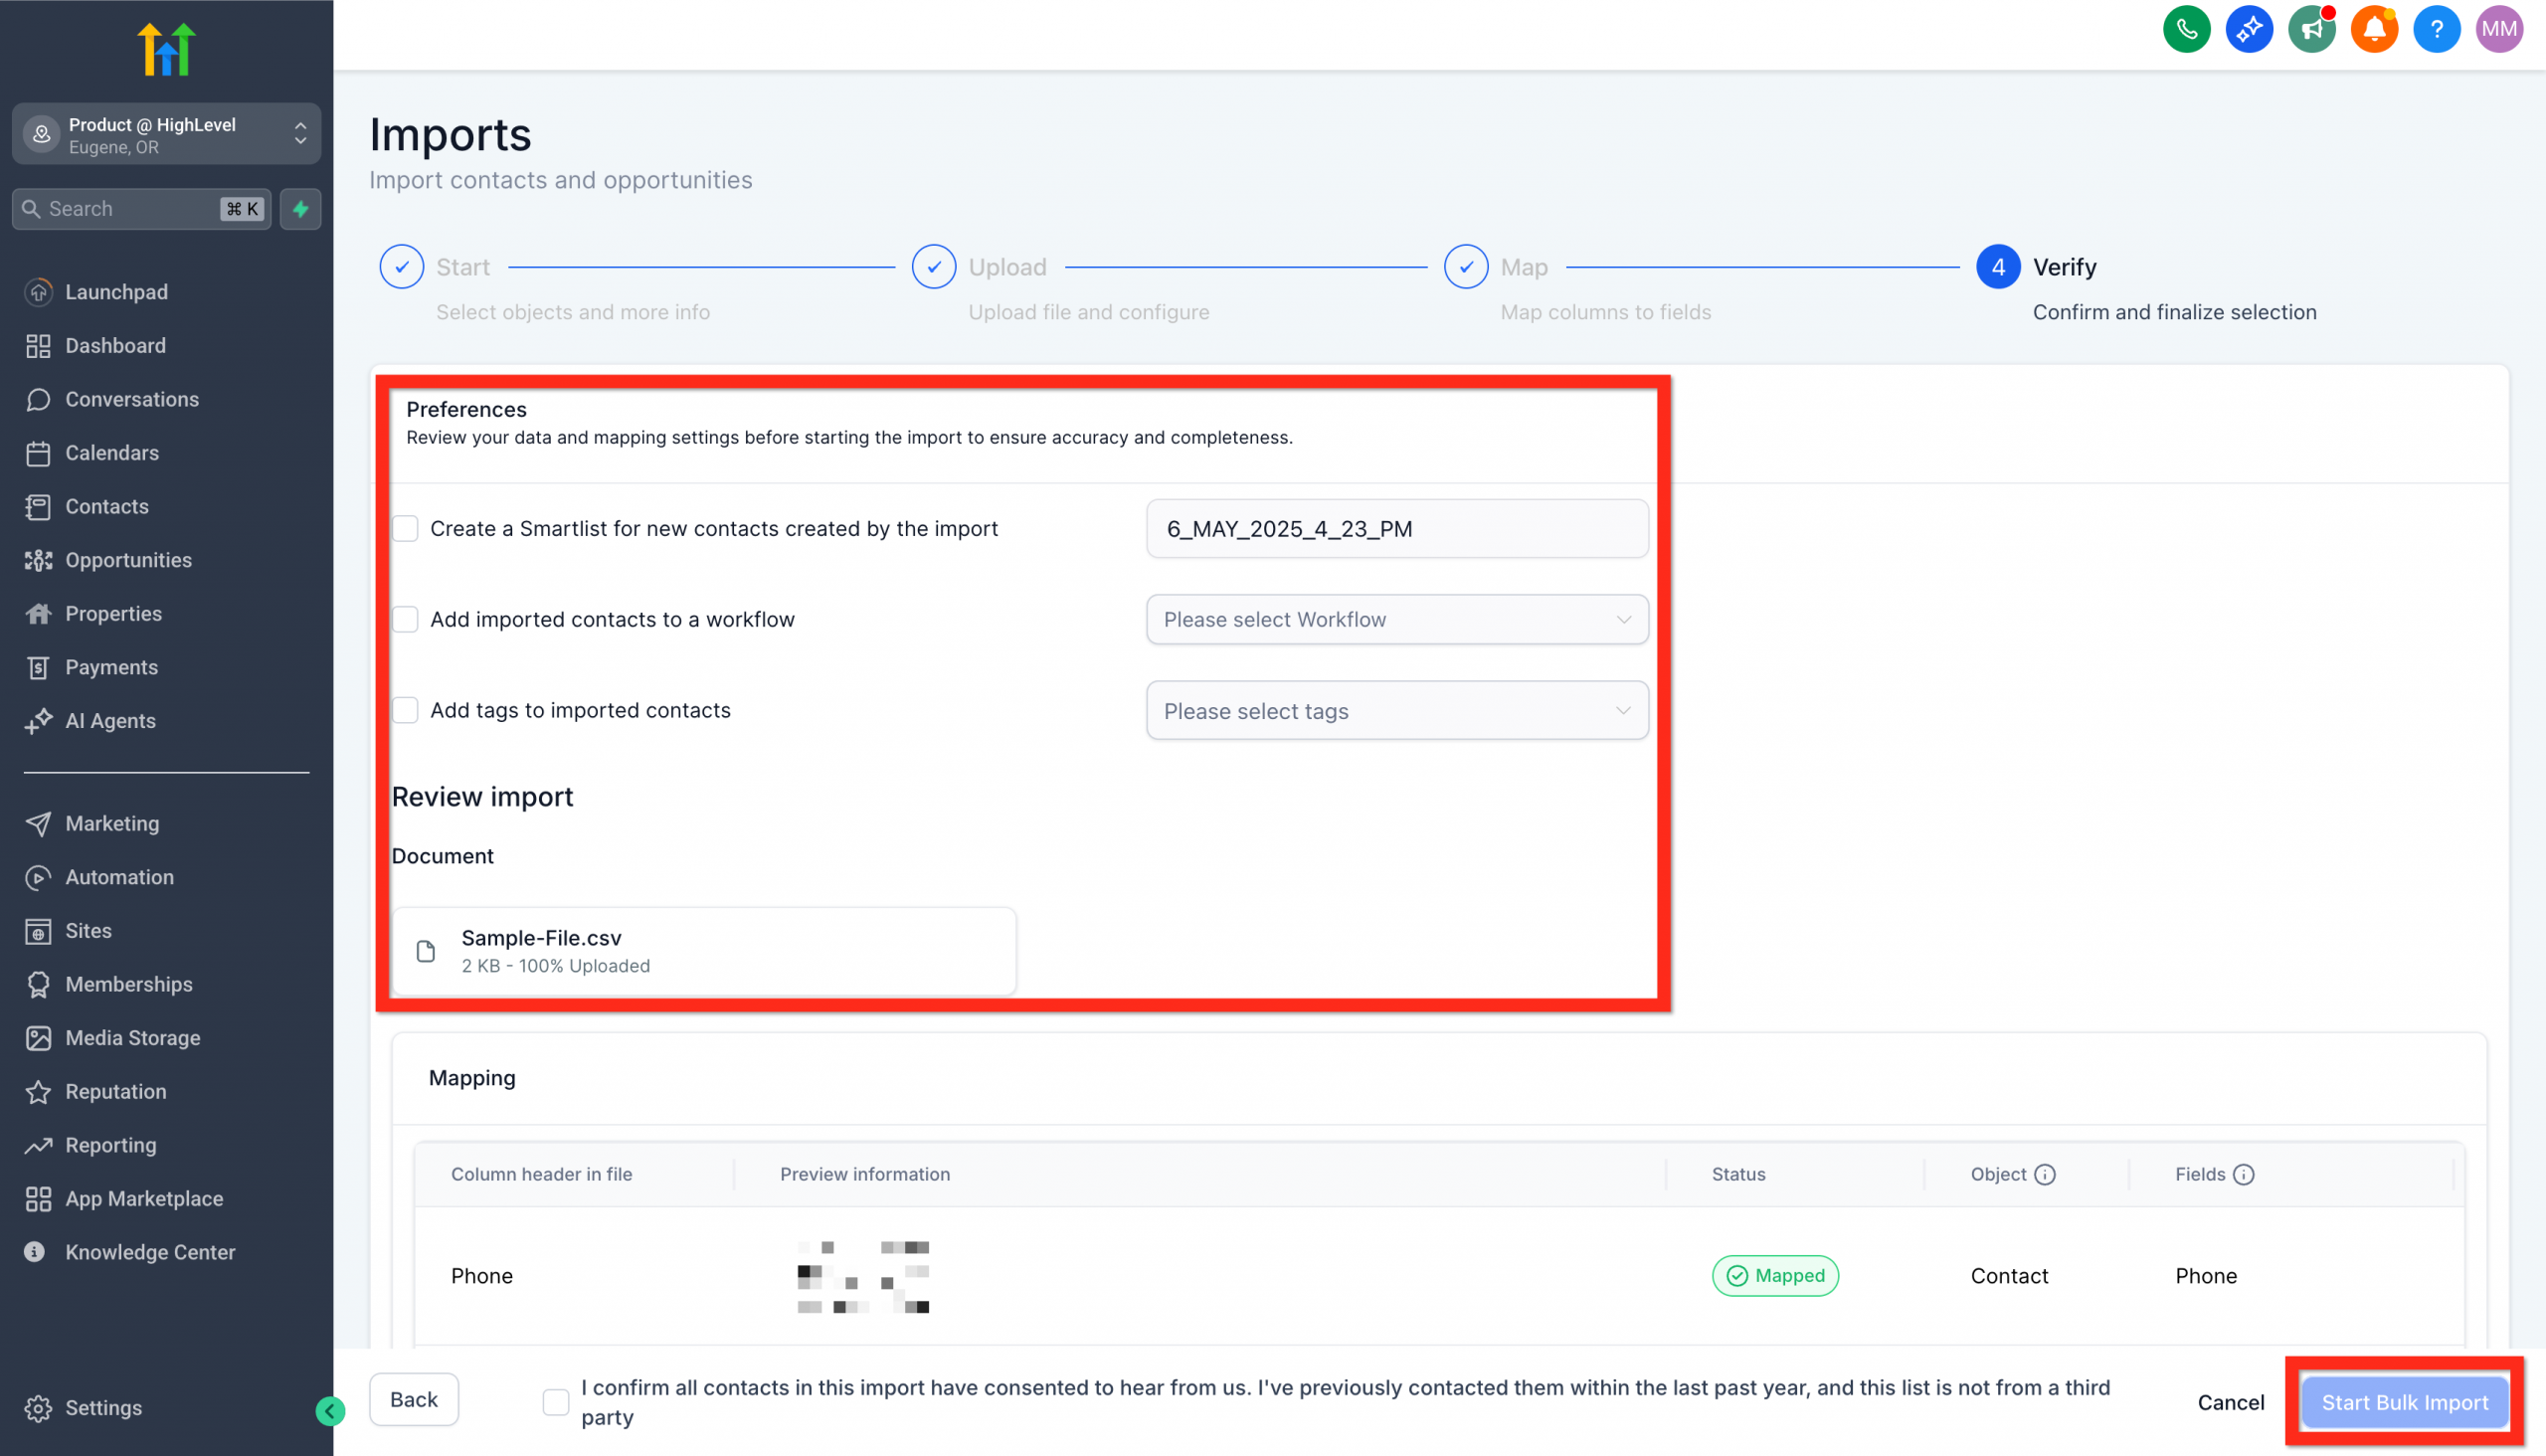
7. Fill in the import details (give it a name, create lists, set consent preferences and so on) and click Bulk import.
8. Wait for the contact import to finish.
You can now start segmenting your audience for targeted communications!
How to create new custom fields
Tailor your contact data to the specific needs of your business. Creating custom fields lets you collect exactly the information you consider valuable.
This allows more precise segmentation and deeper analysis.
Here is how to set up your custom fields:
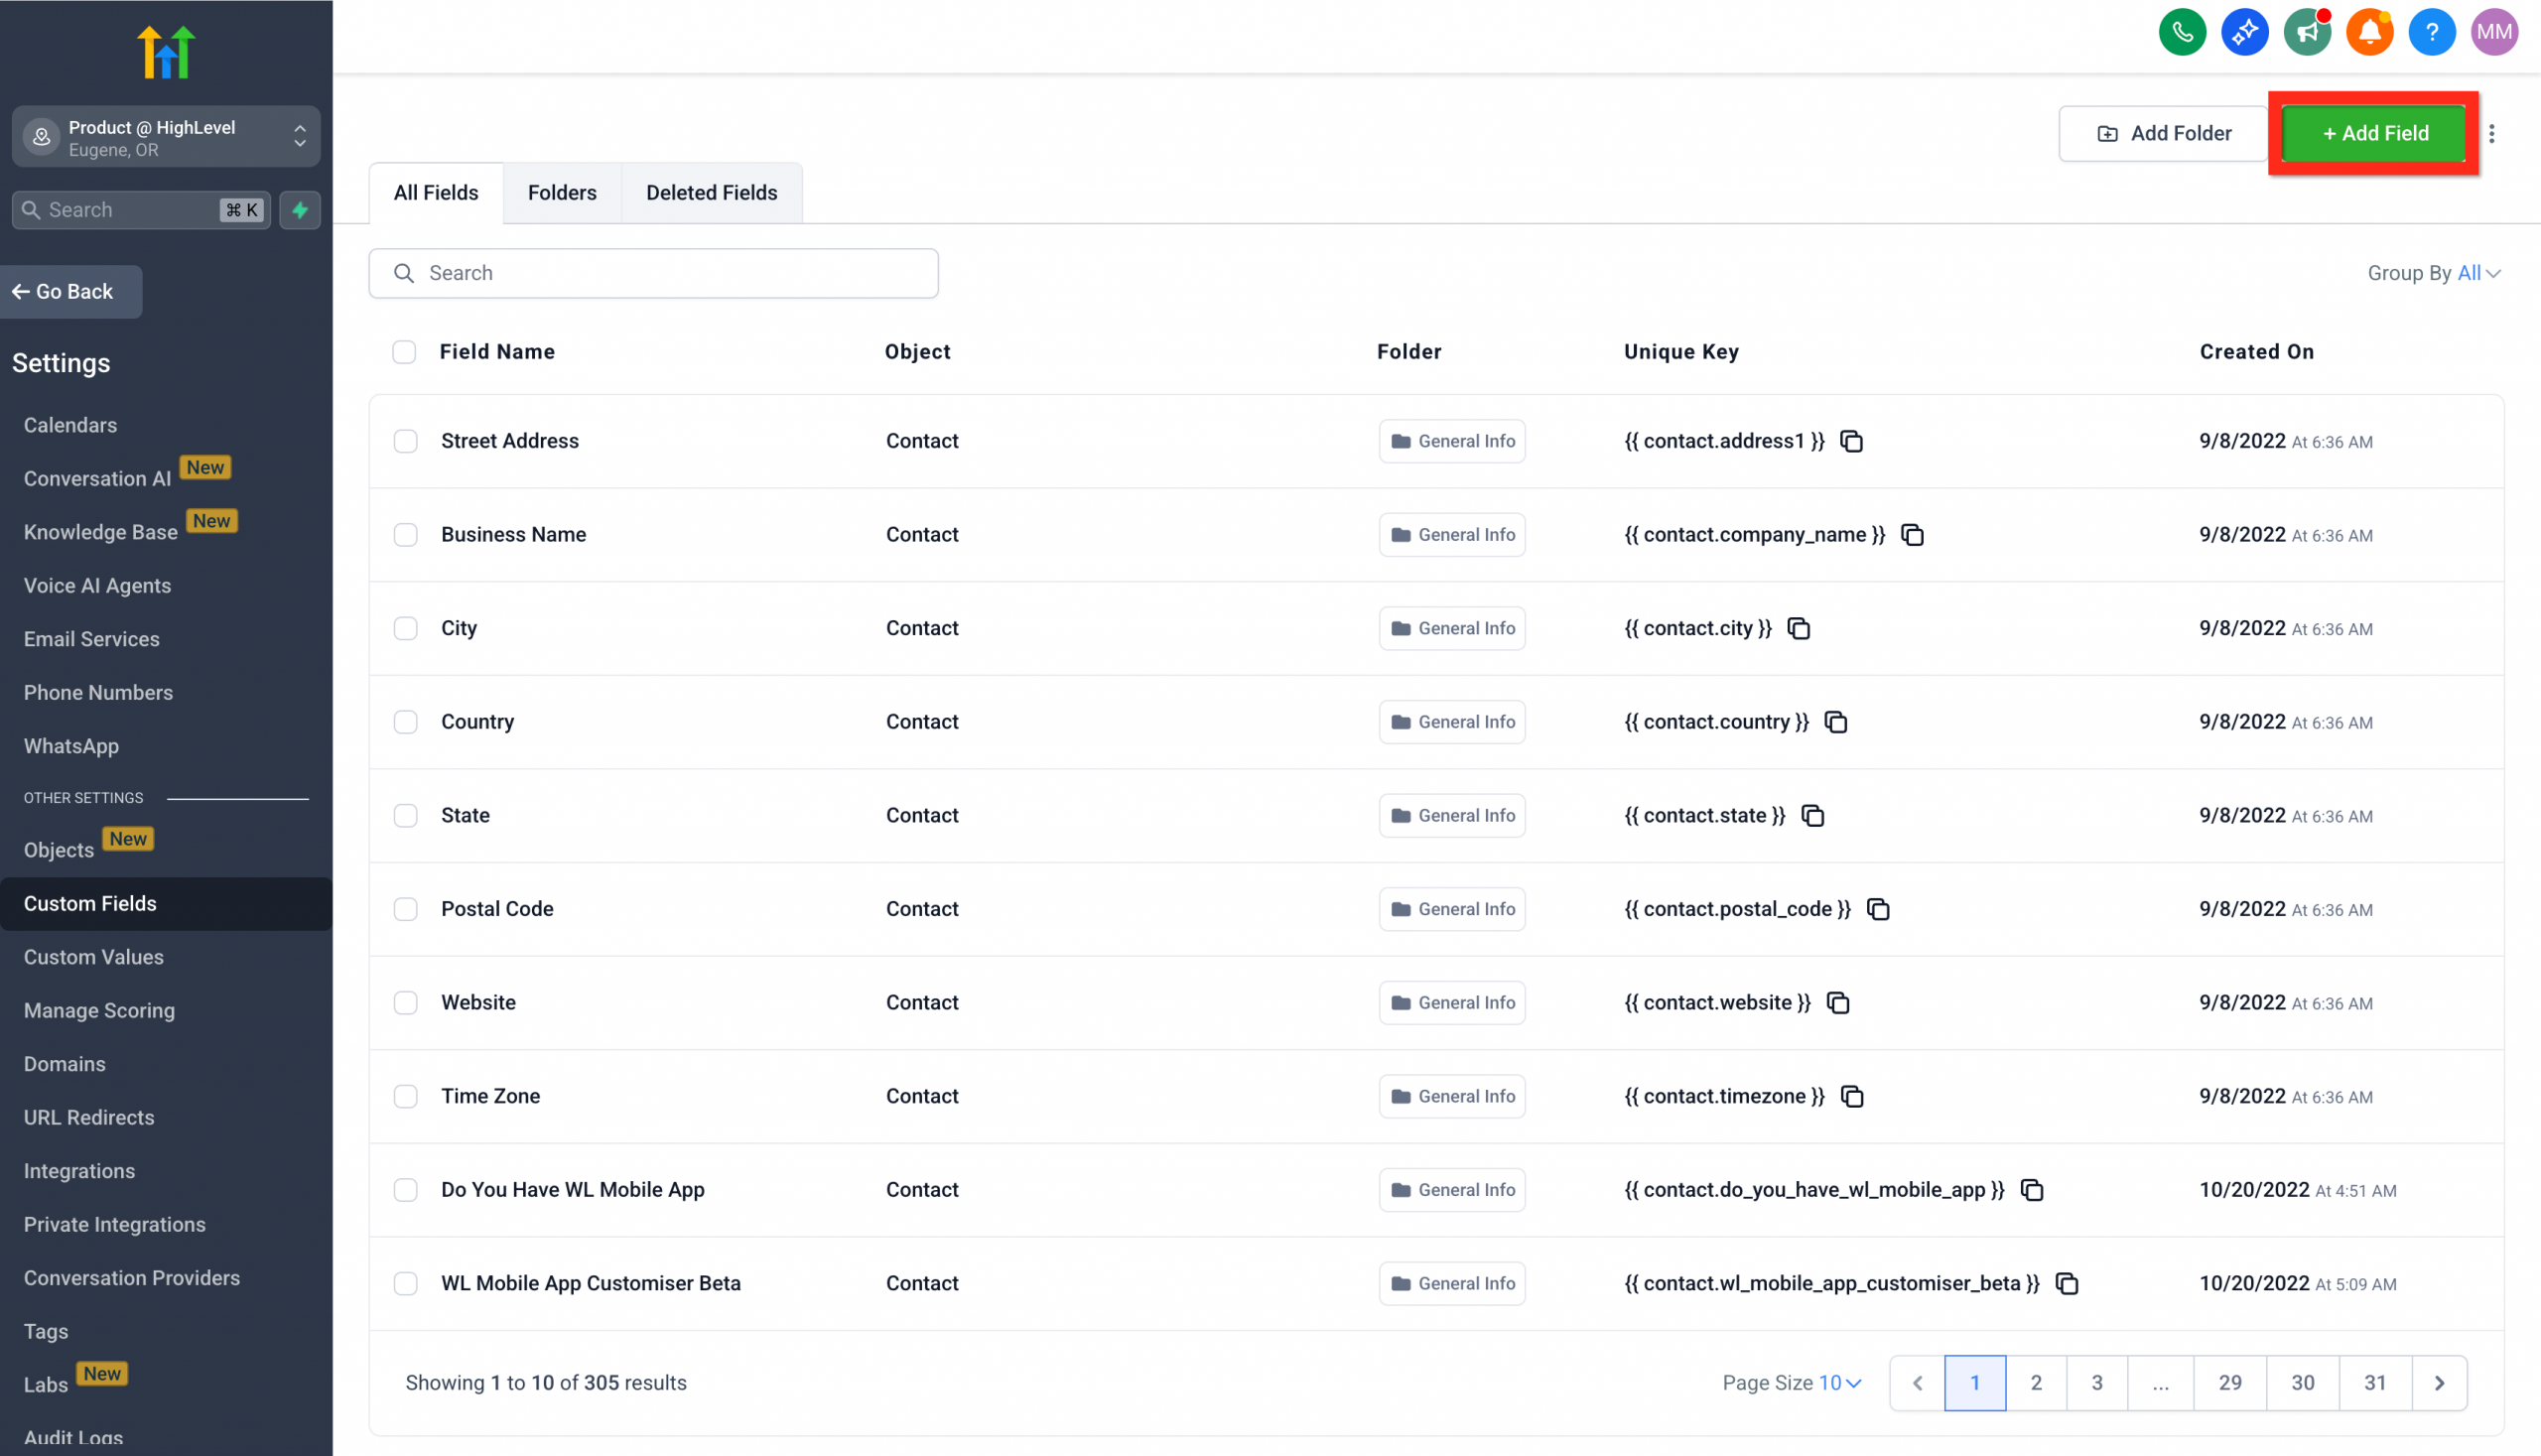
- Go to Settings > Custom fields.
- Click Add field.
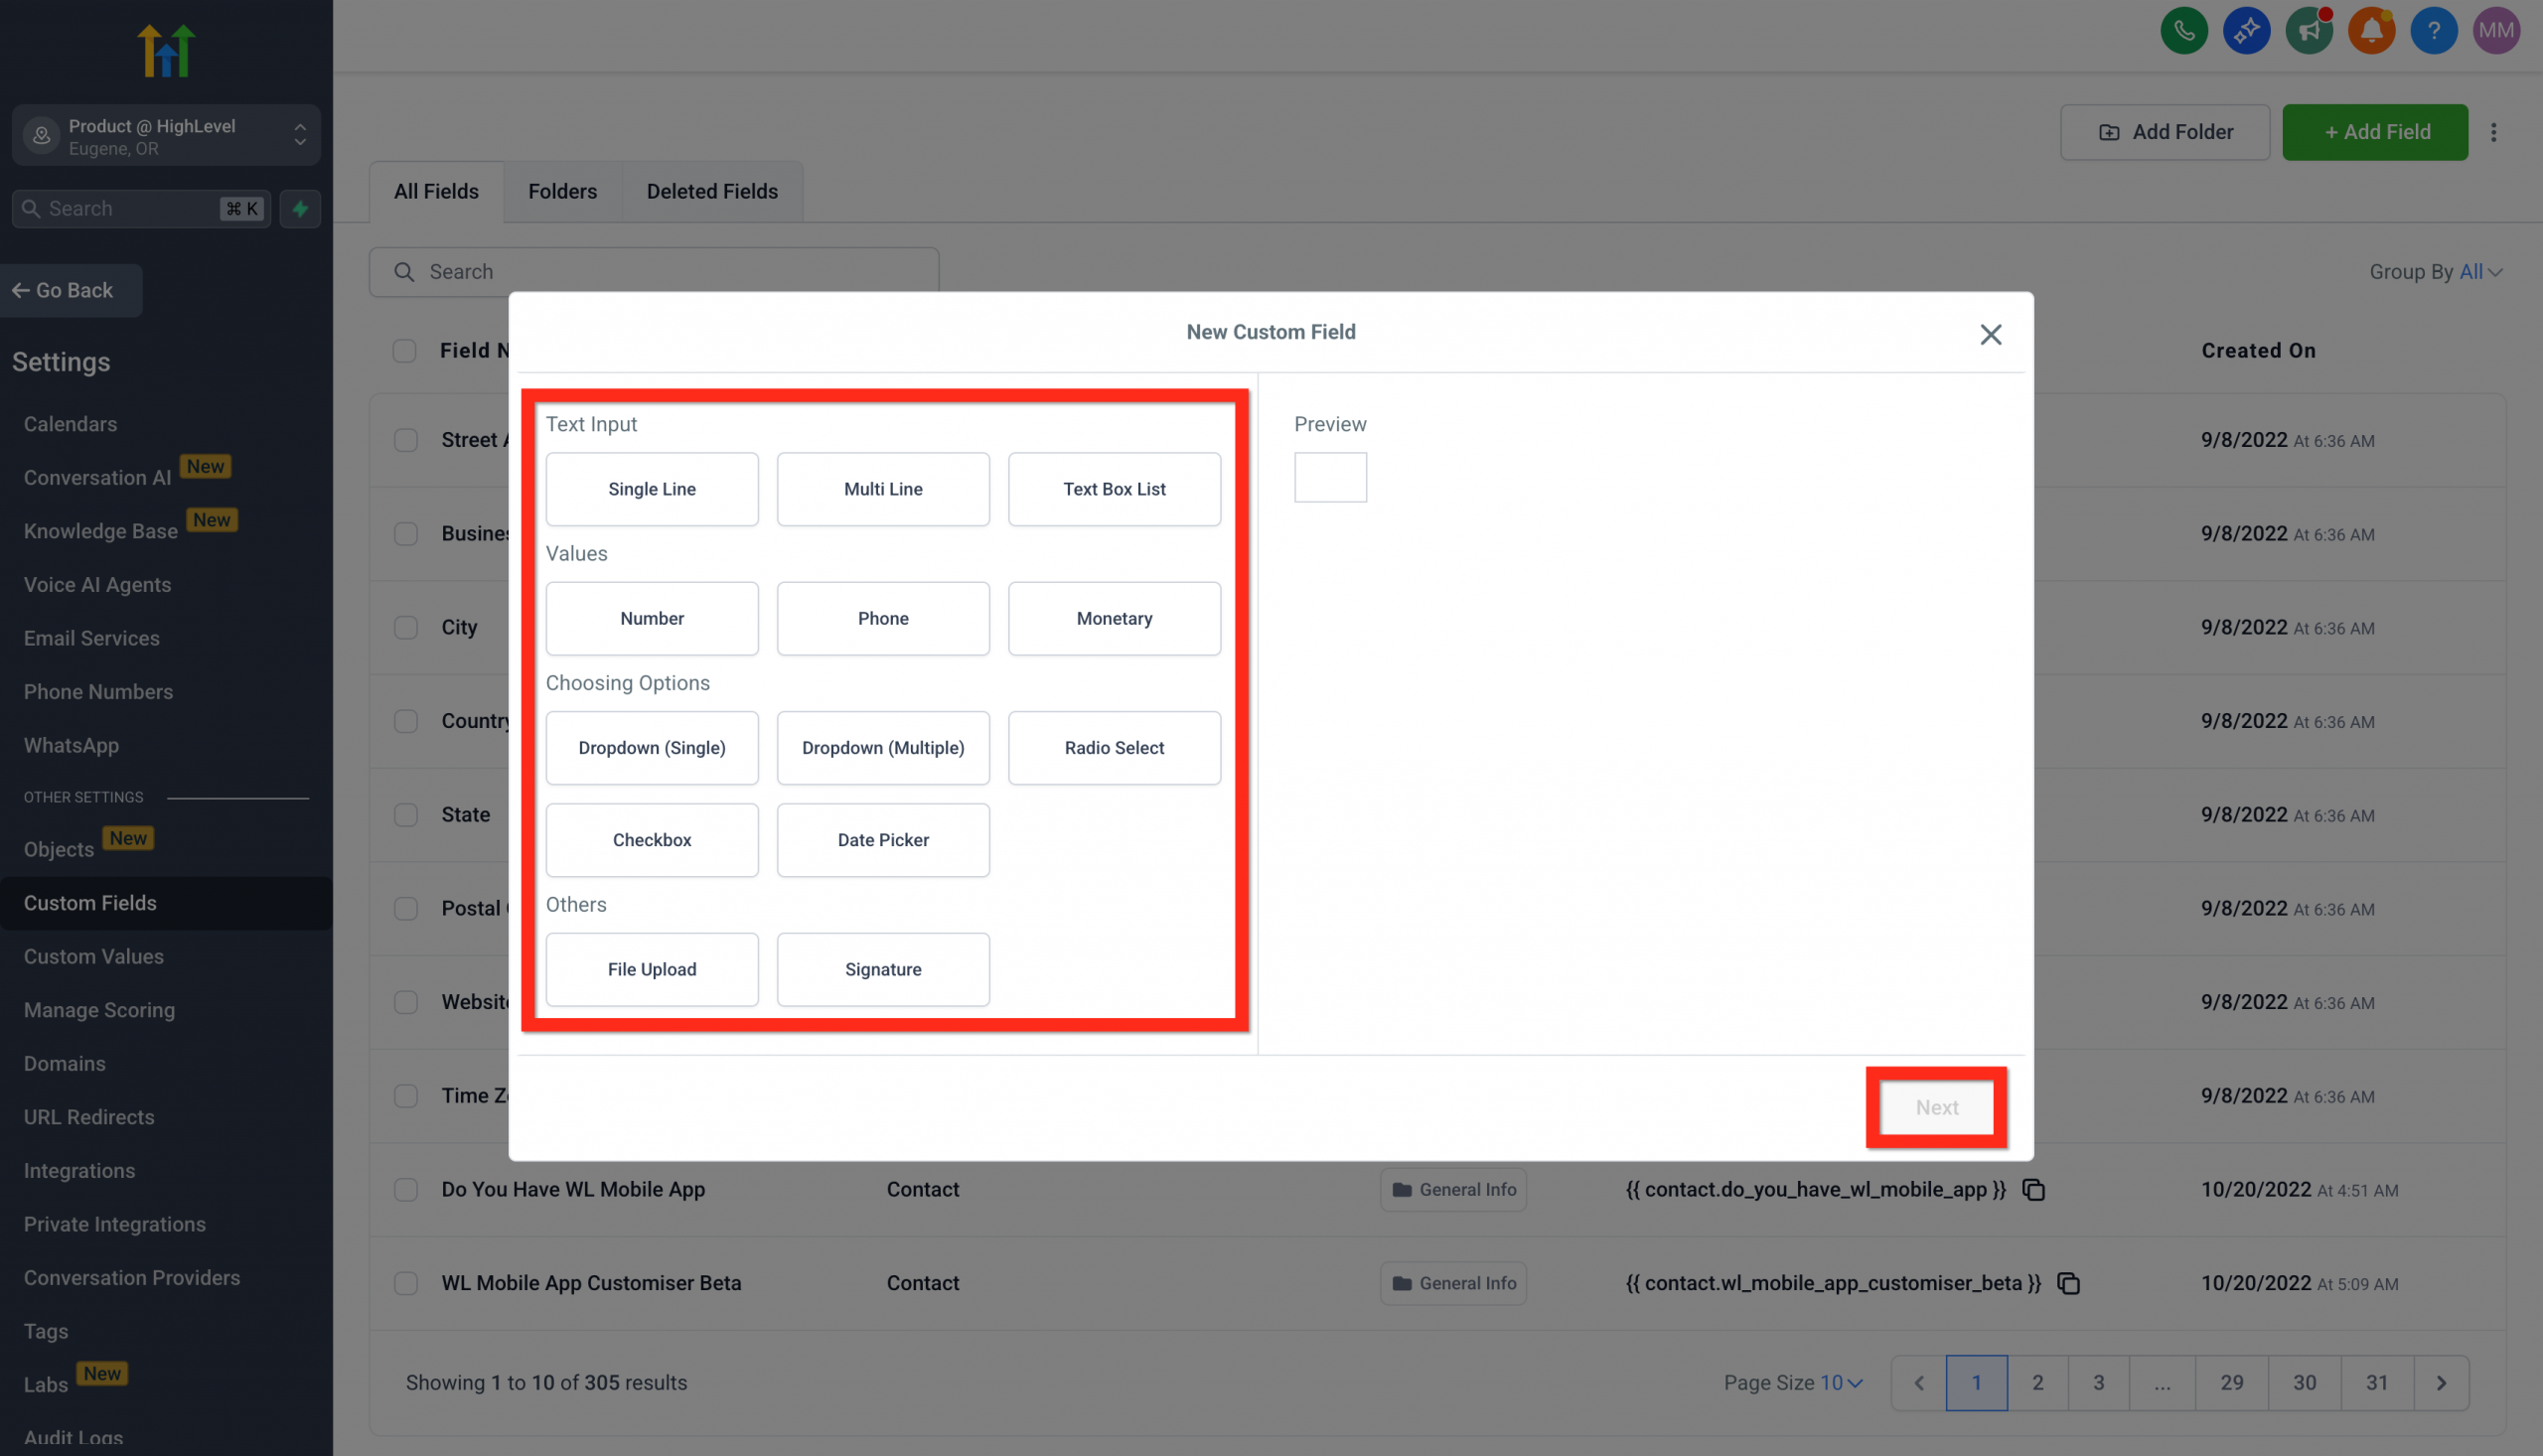
3. Select the type of field you need.
4. Fill in the field details (name, group, placeholder text and so on).
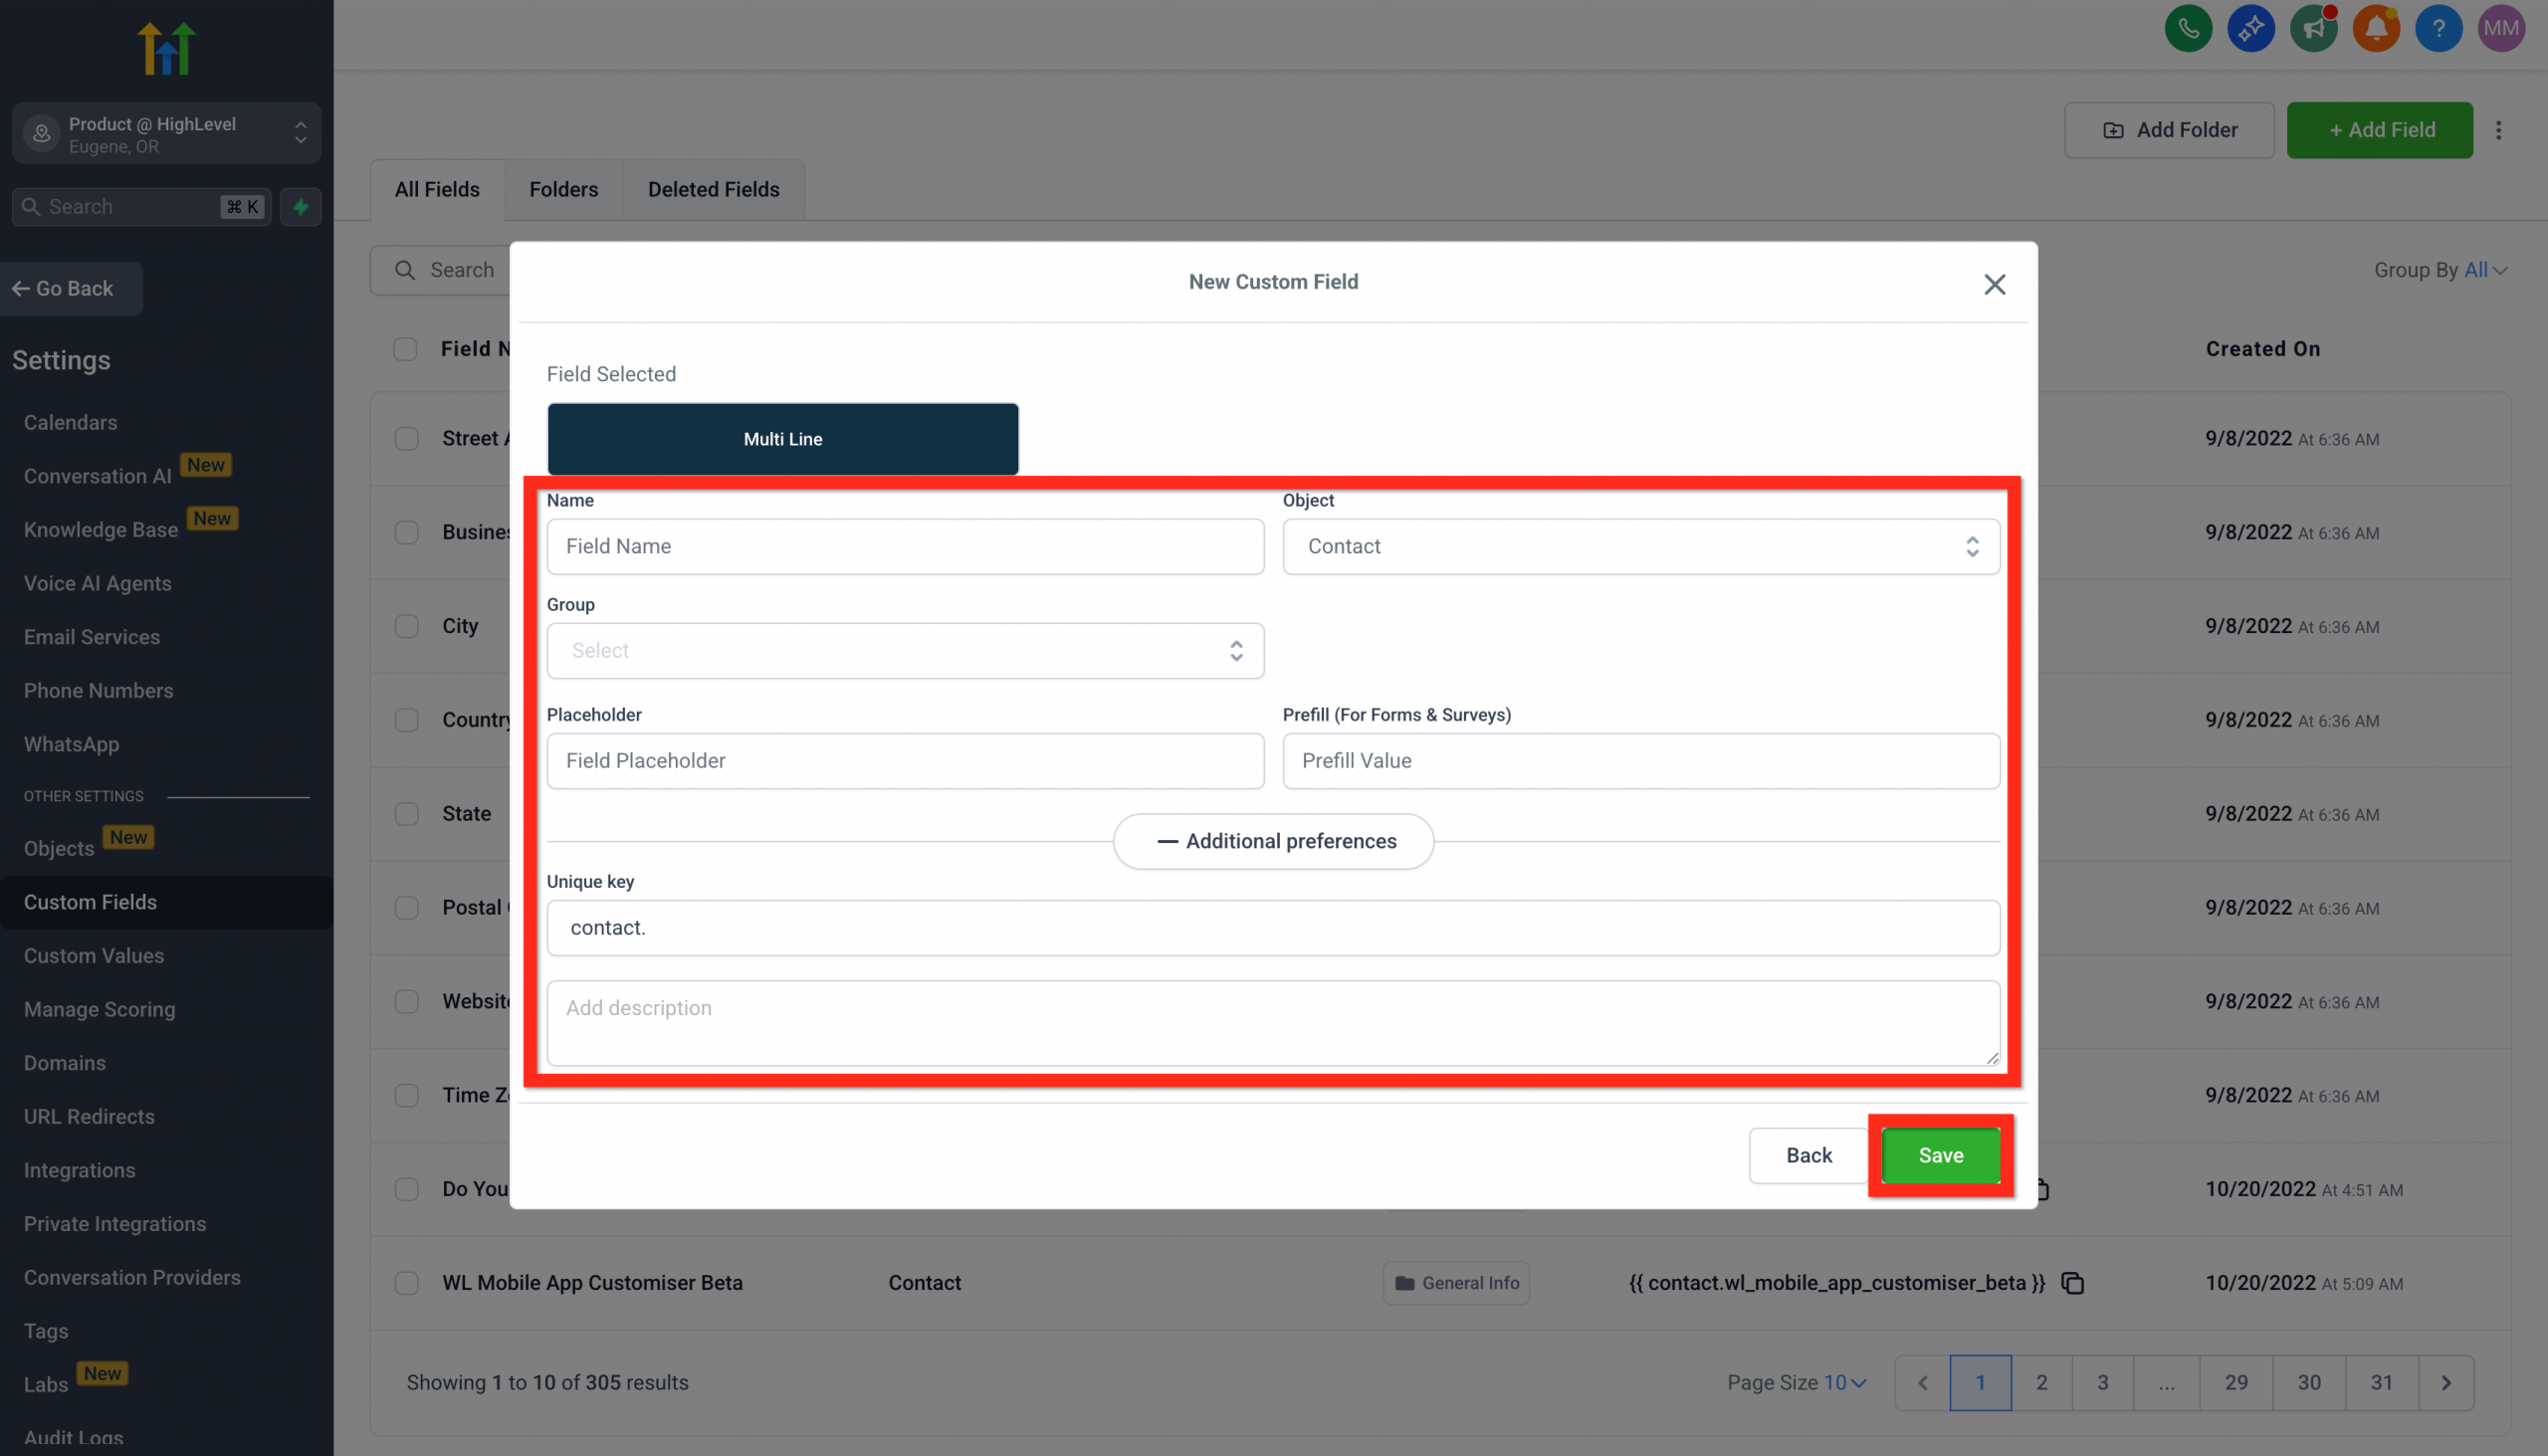
5. Click Save.
You can now make the most of custom fields to improve your campaigns and your messaging!
Bulk actions on contacts
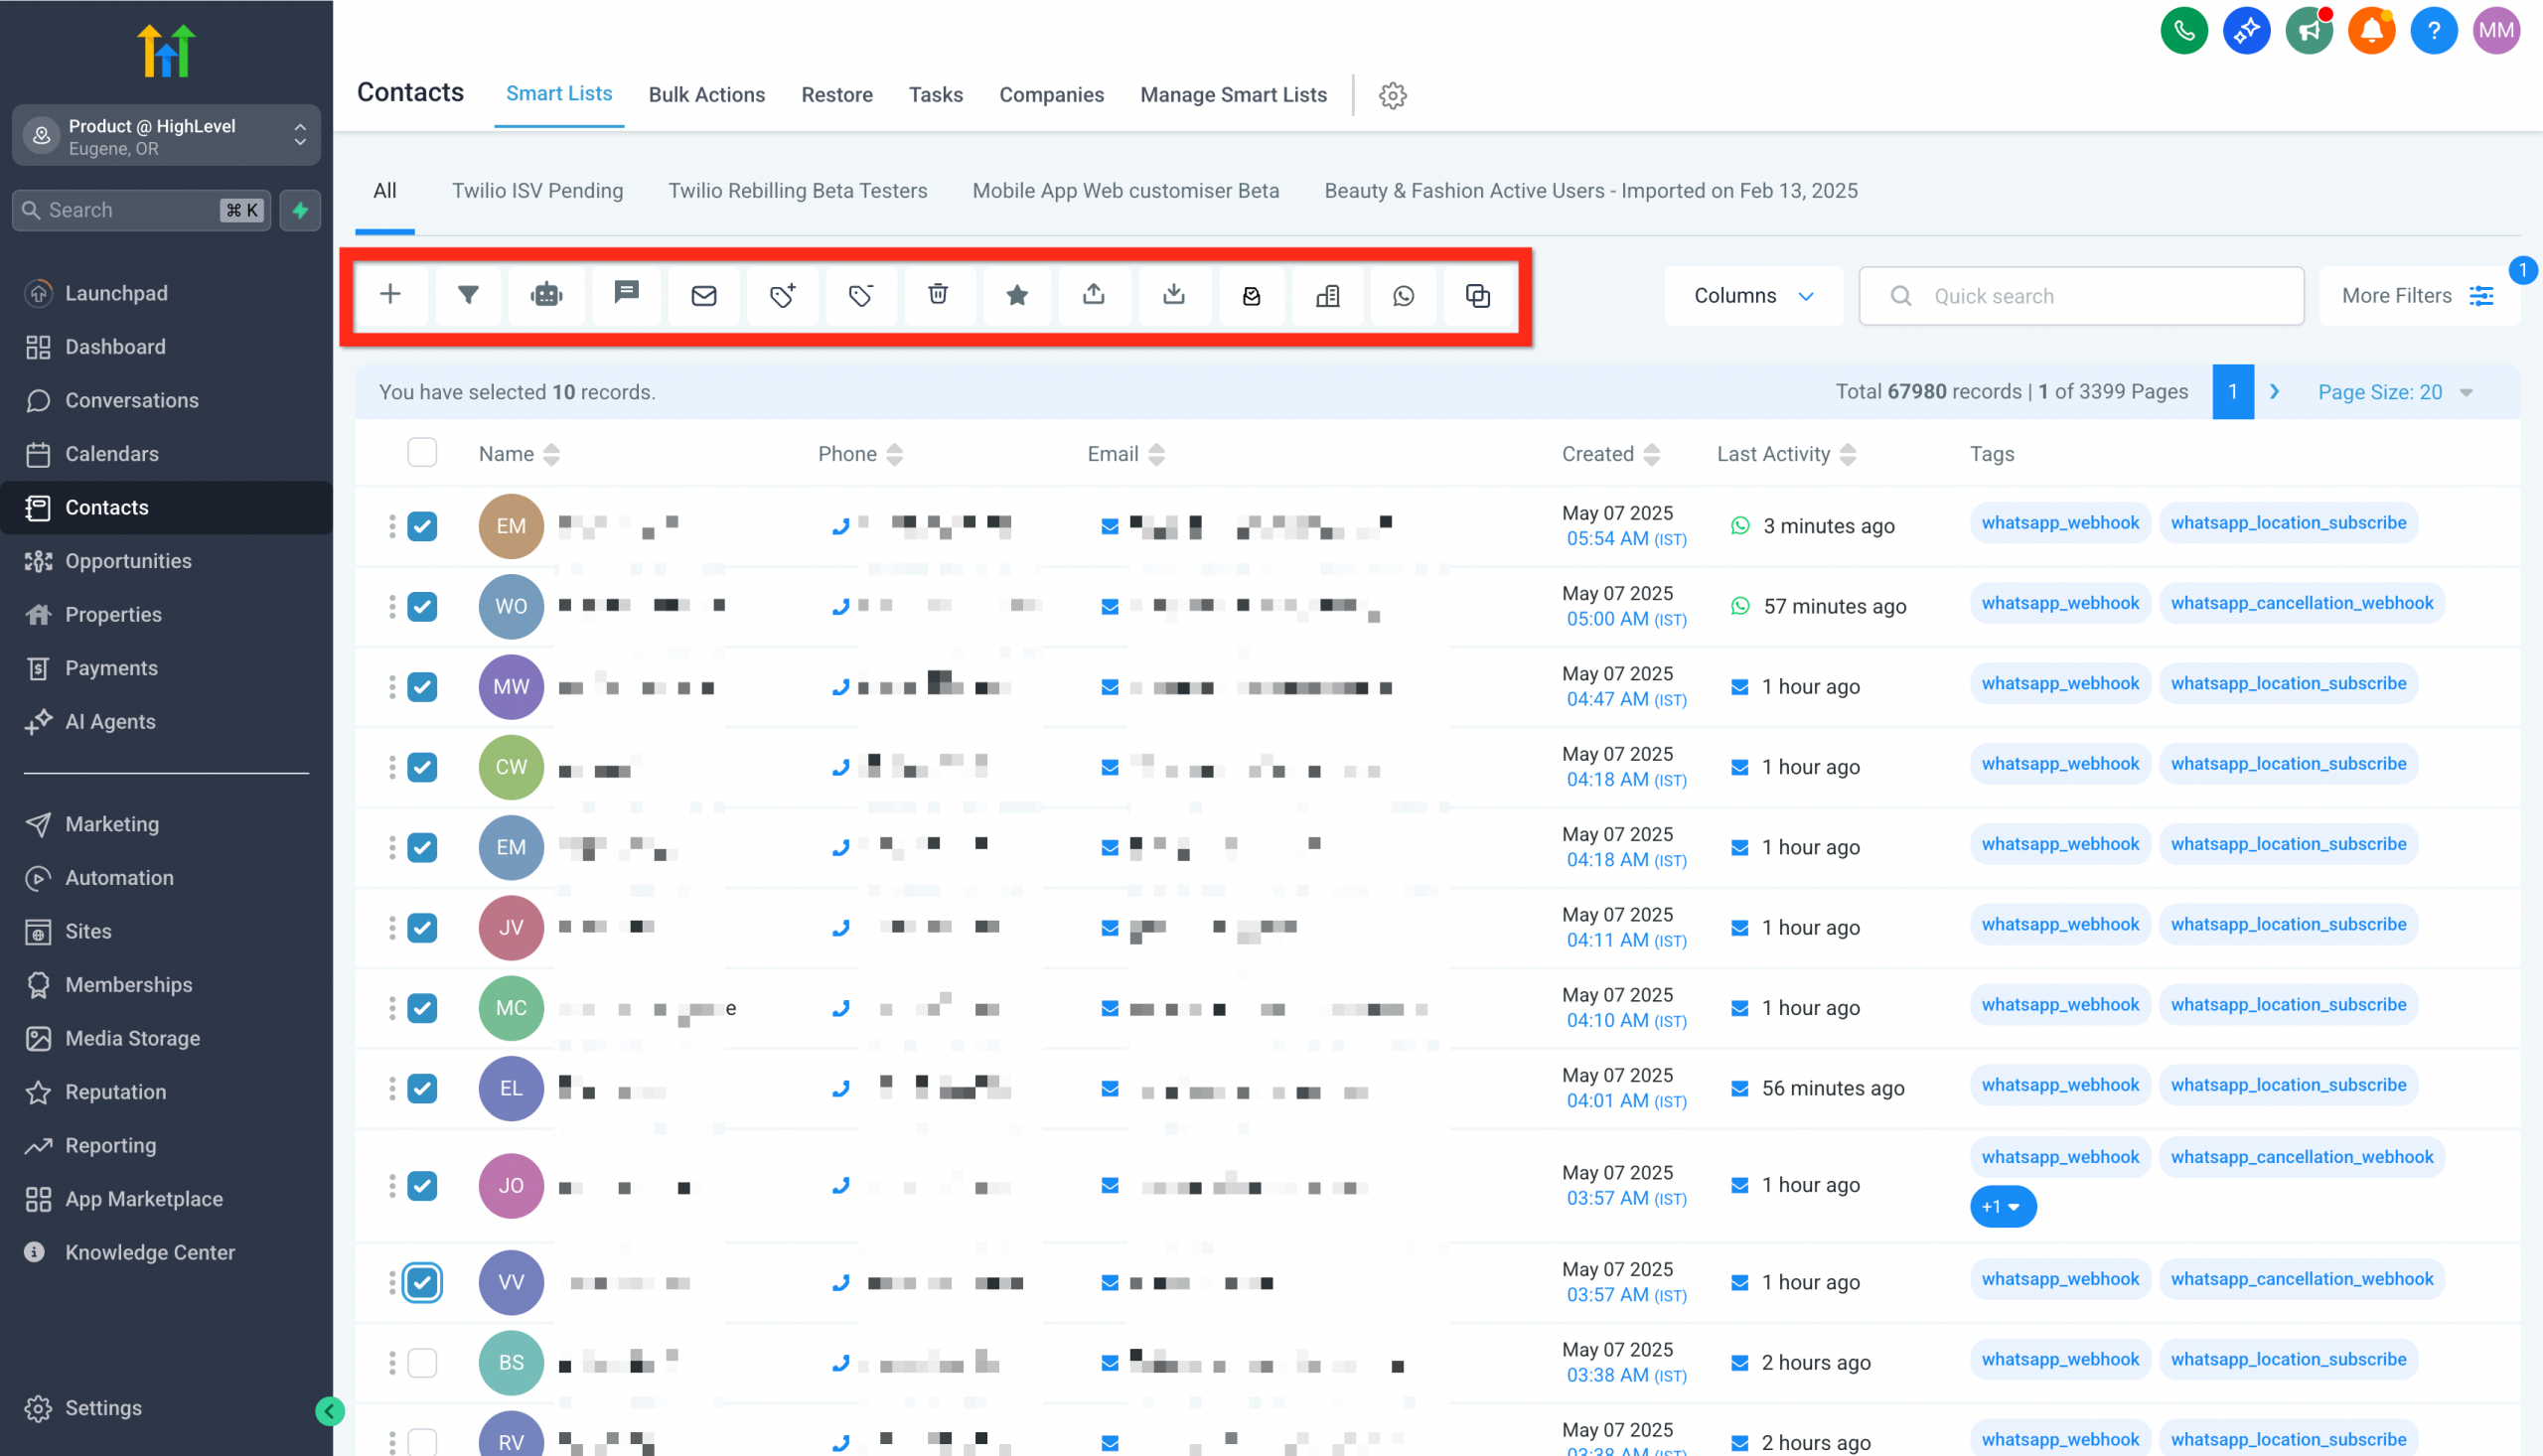
Manage large groups of contacts easily with powerful bulk actions. Whether you need to add tags, send emails or start automations, bulk actions save you time and increase your efficiency.
Here is how to do it:
- Go to Contacts.
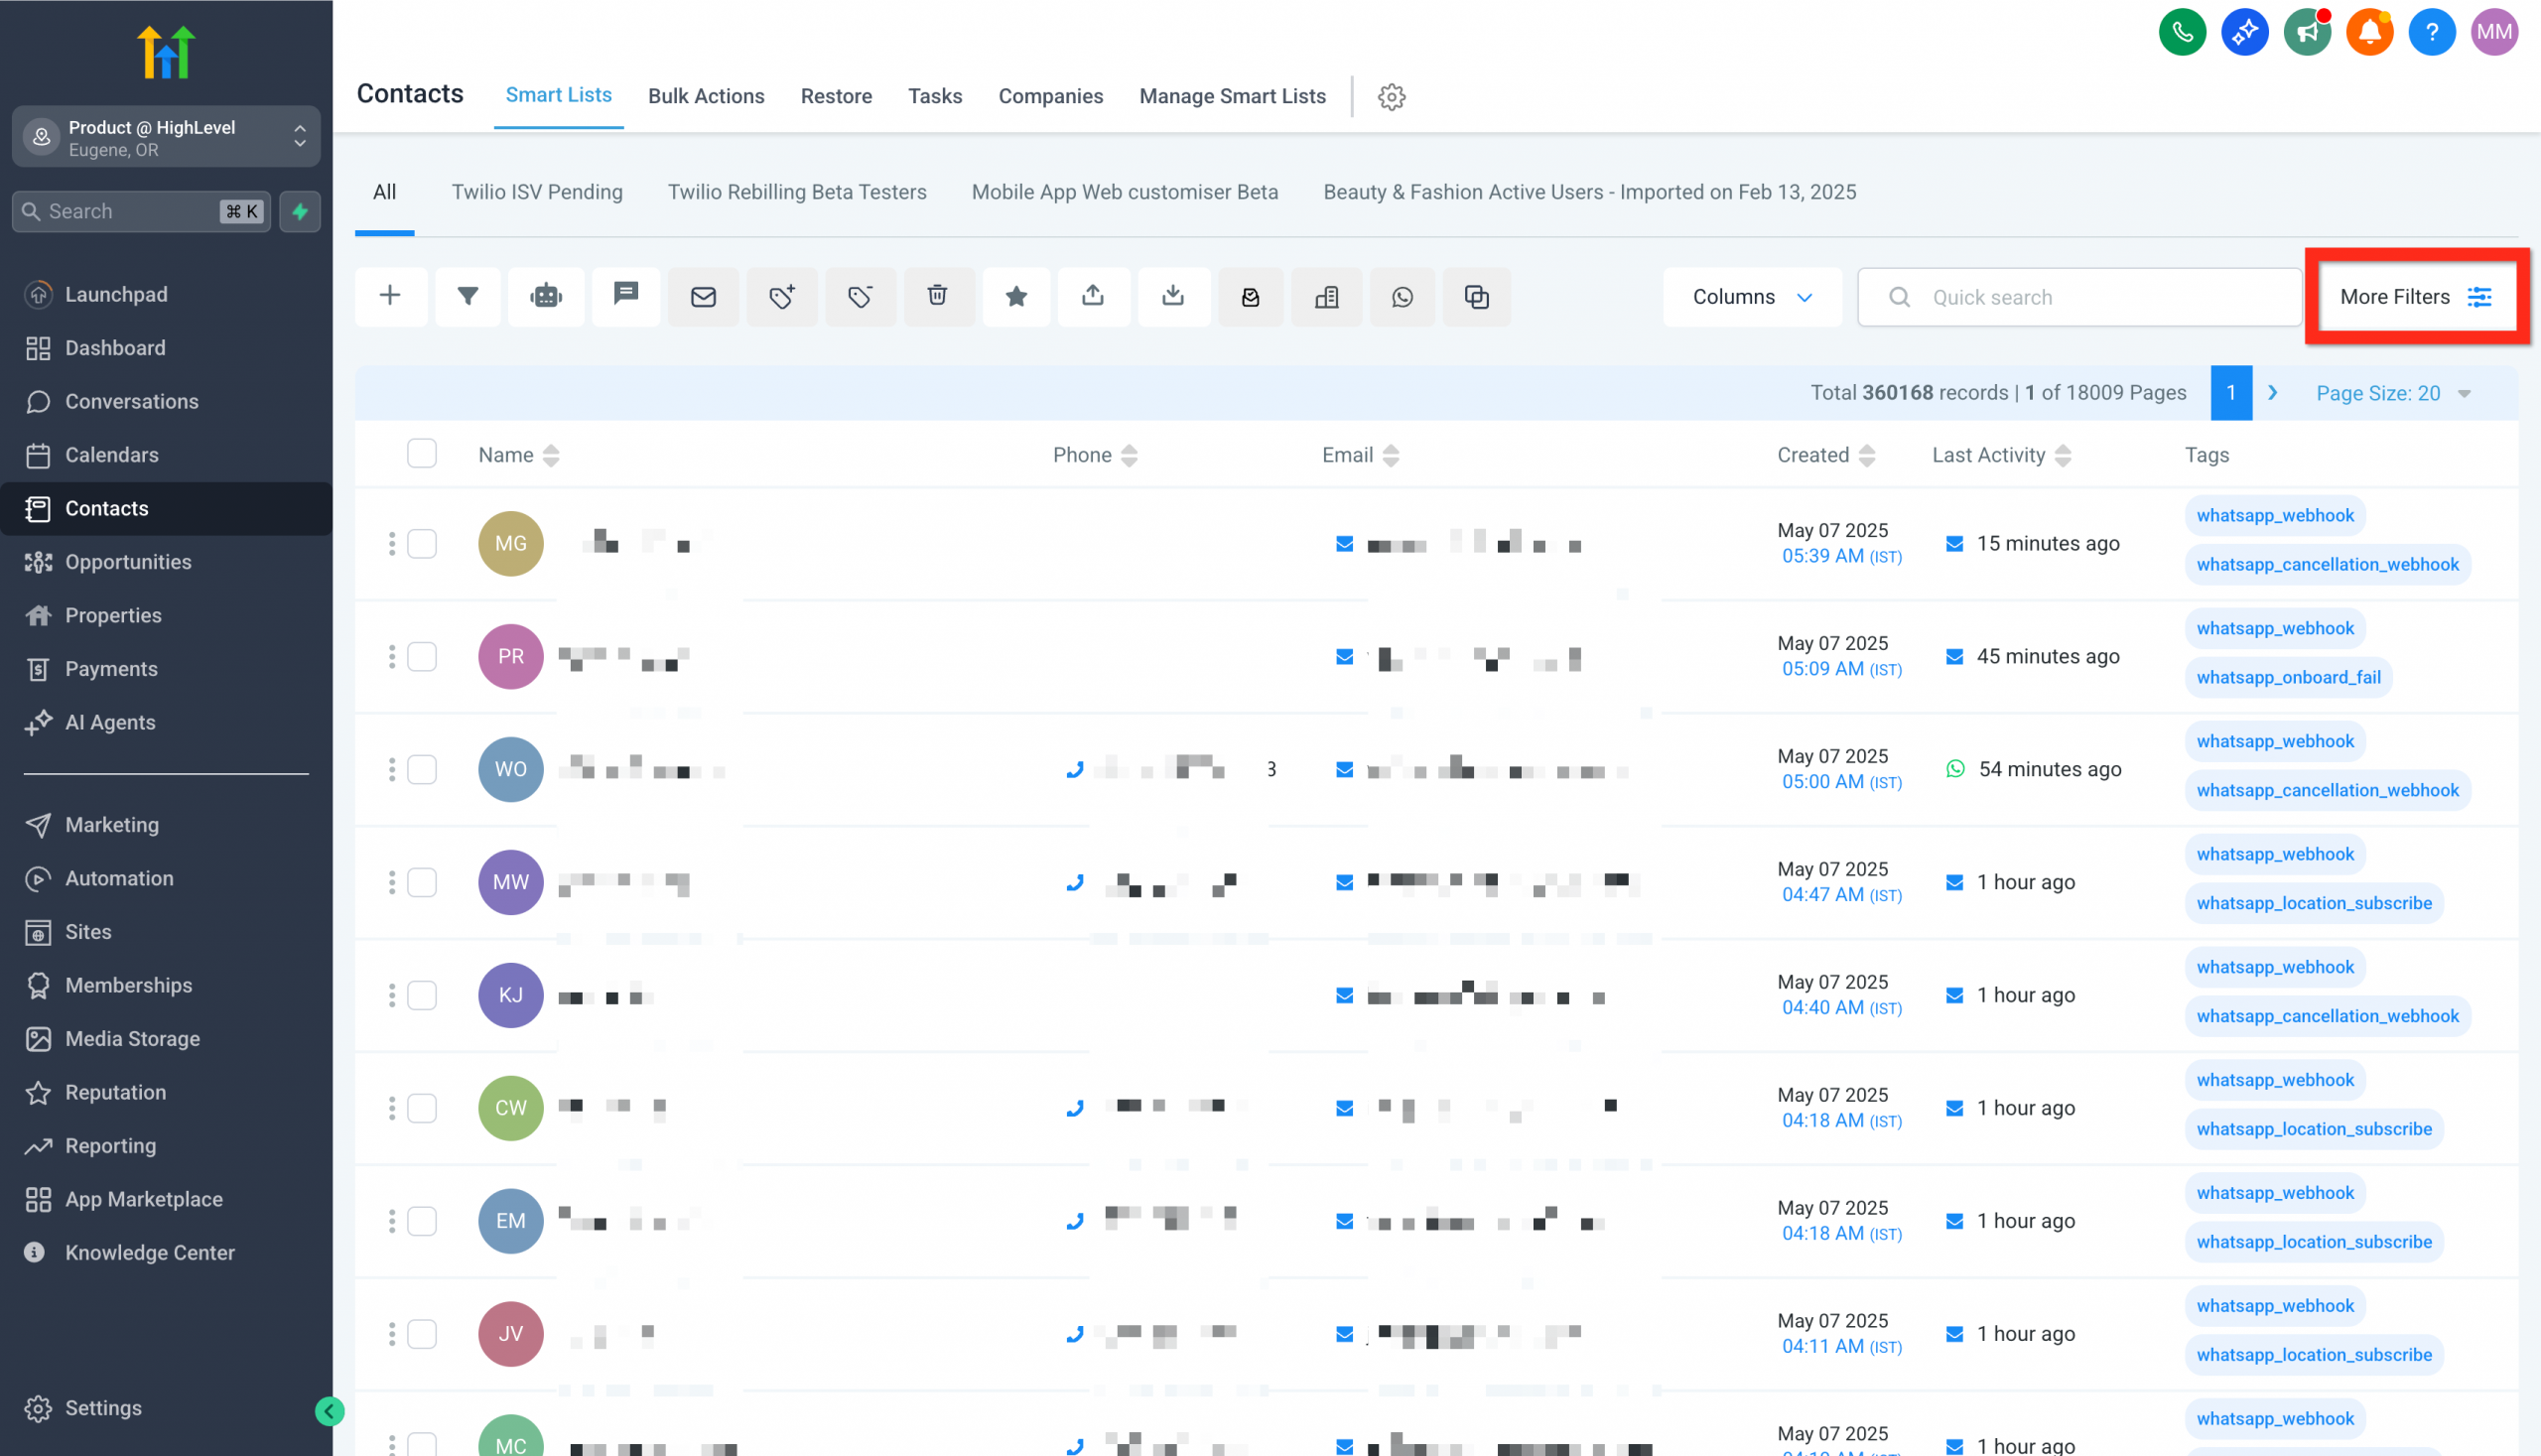
2. Apply filters to segment your audience.
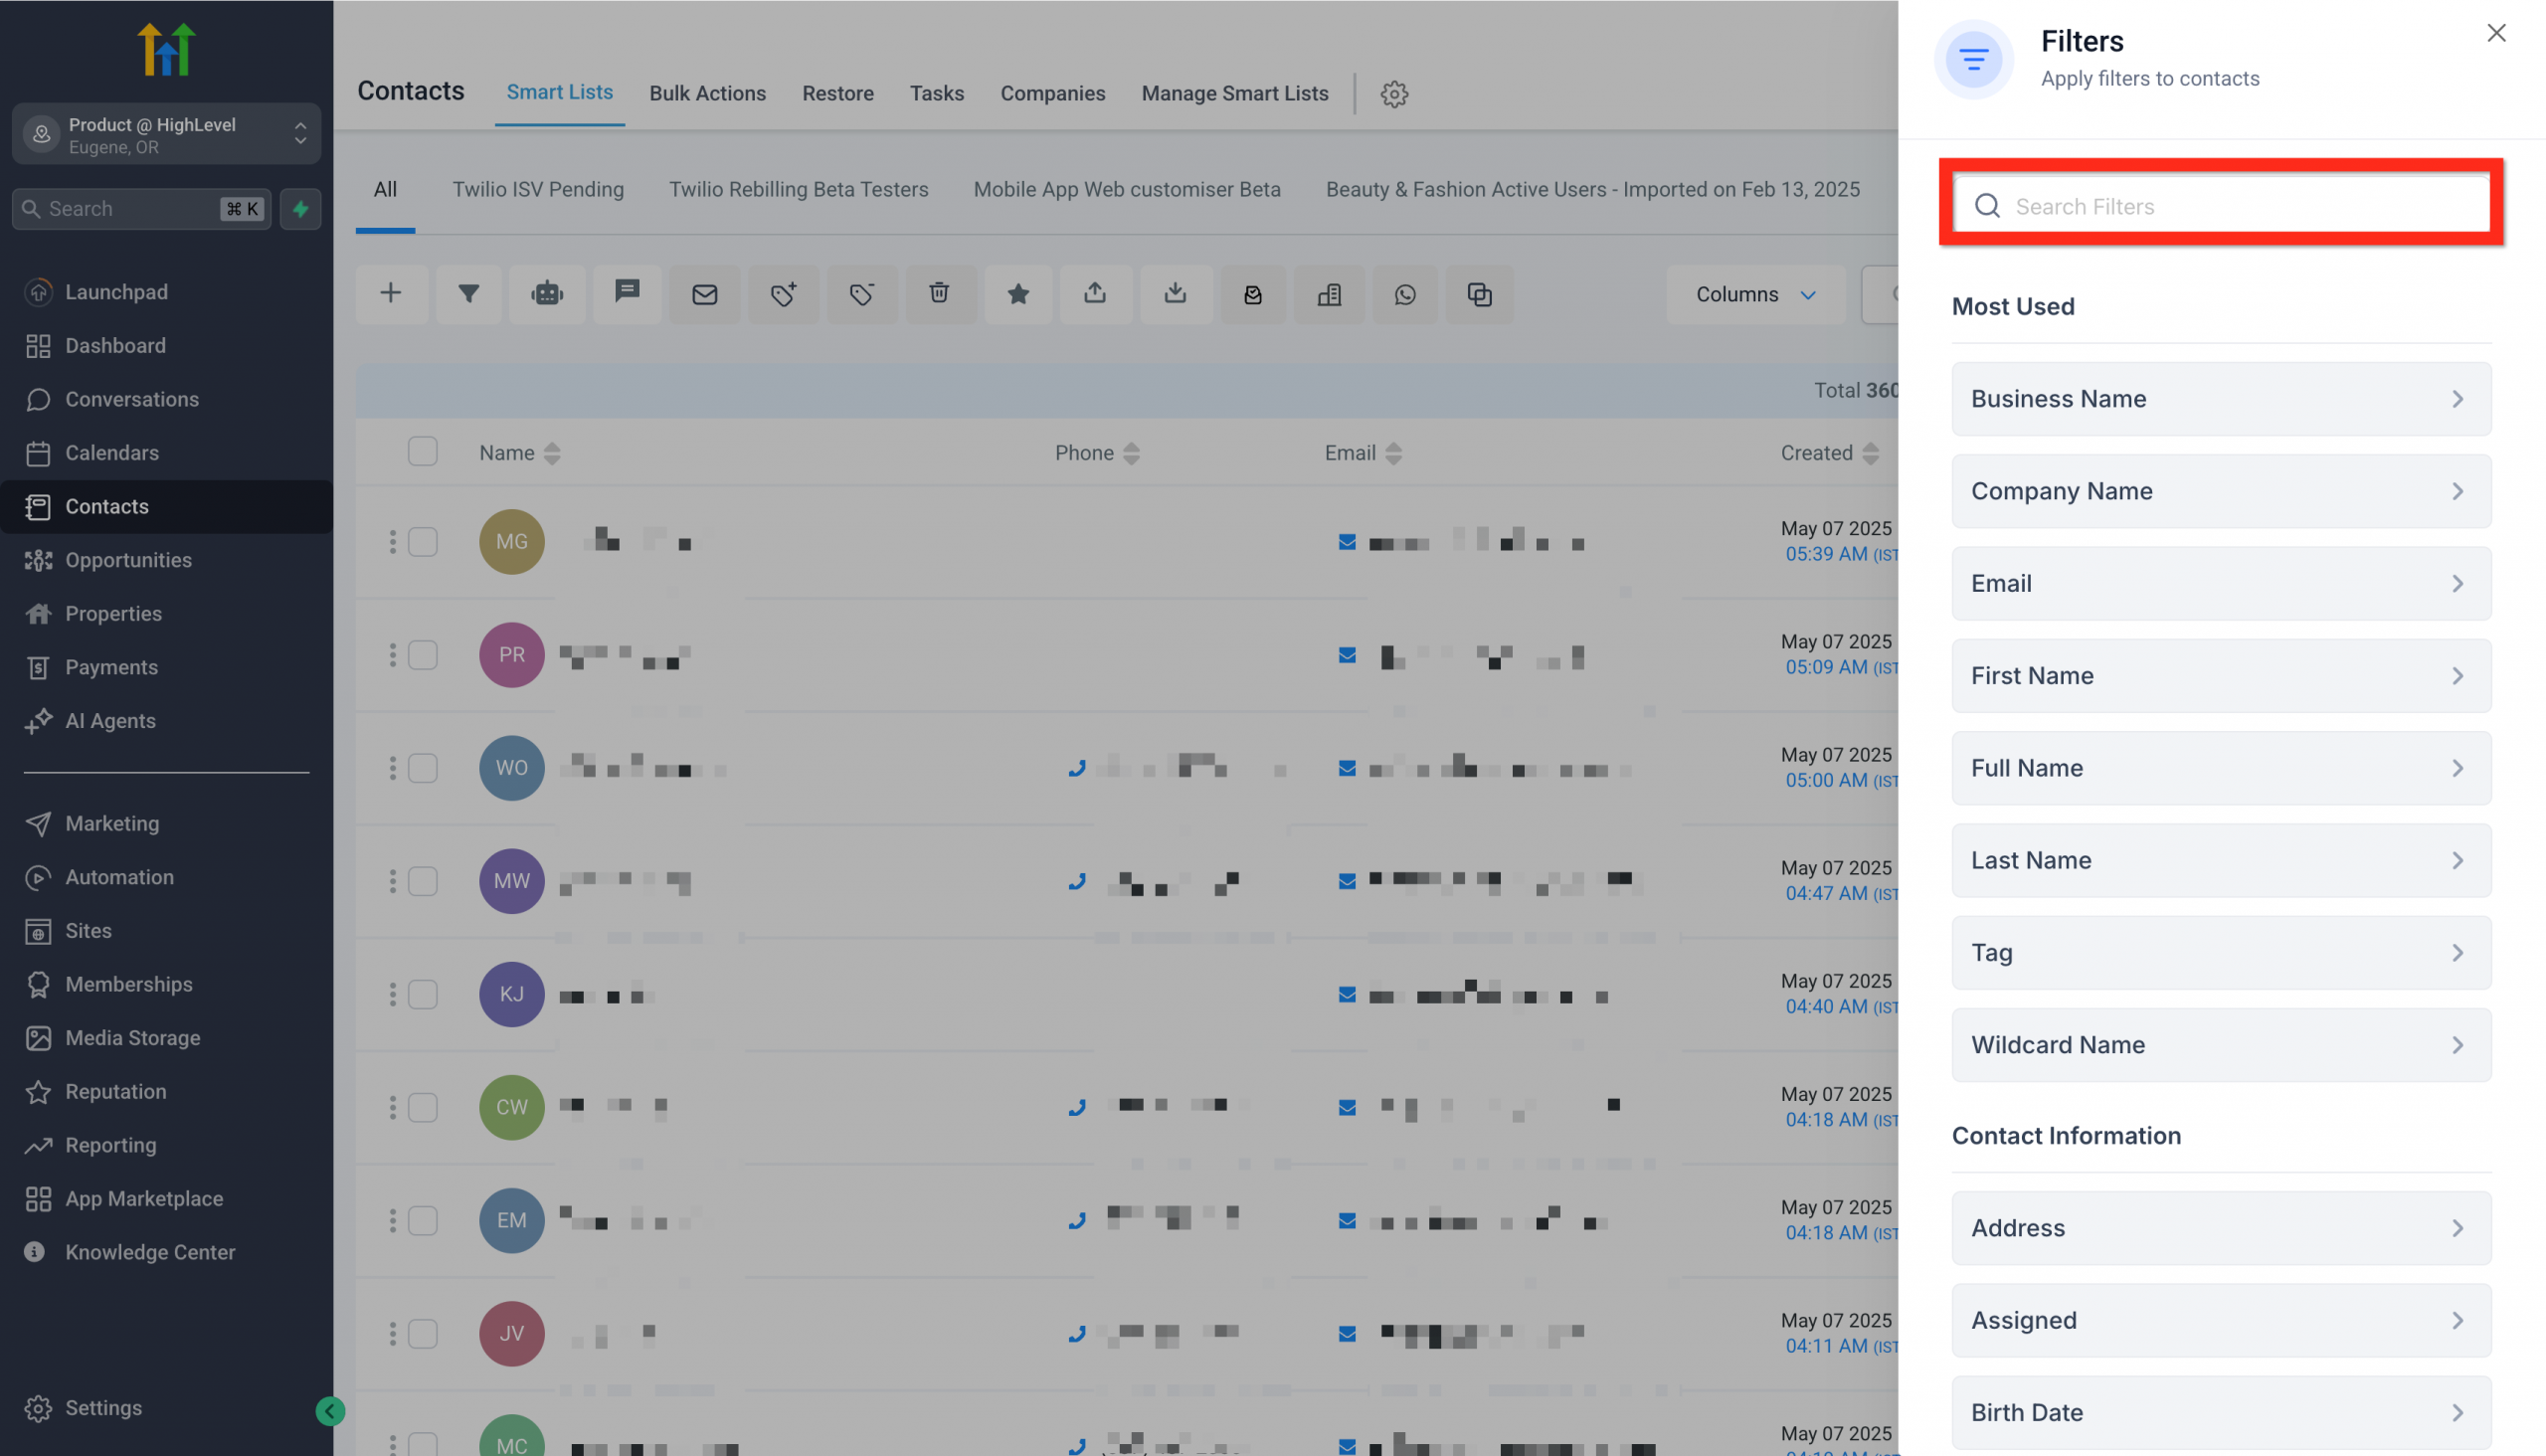
3. Tick the checkboxes next to the contacts you have chosen.
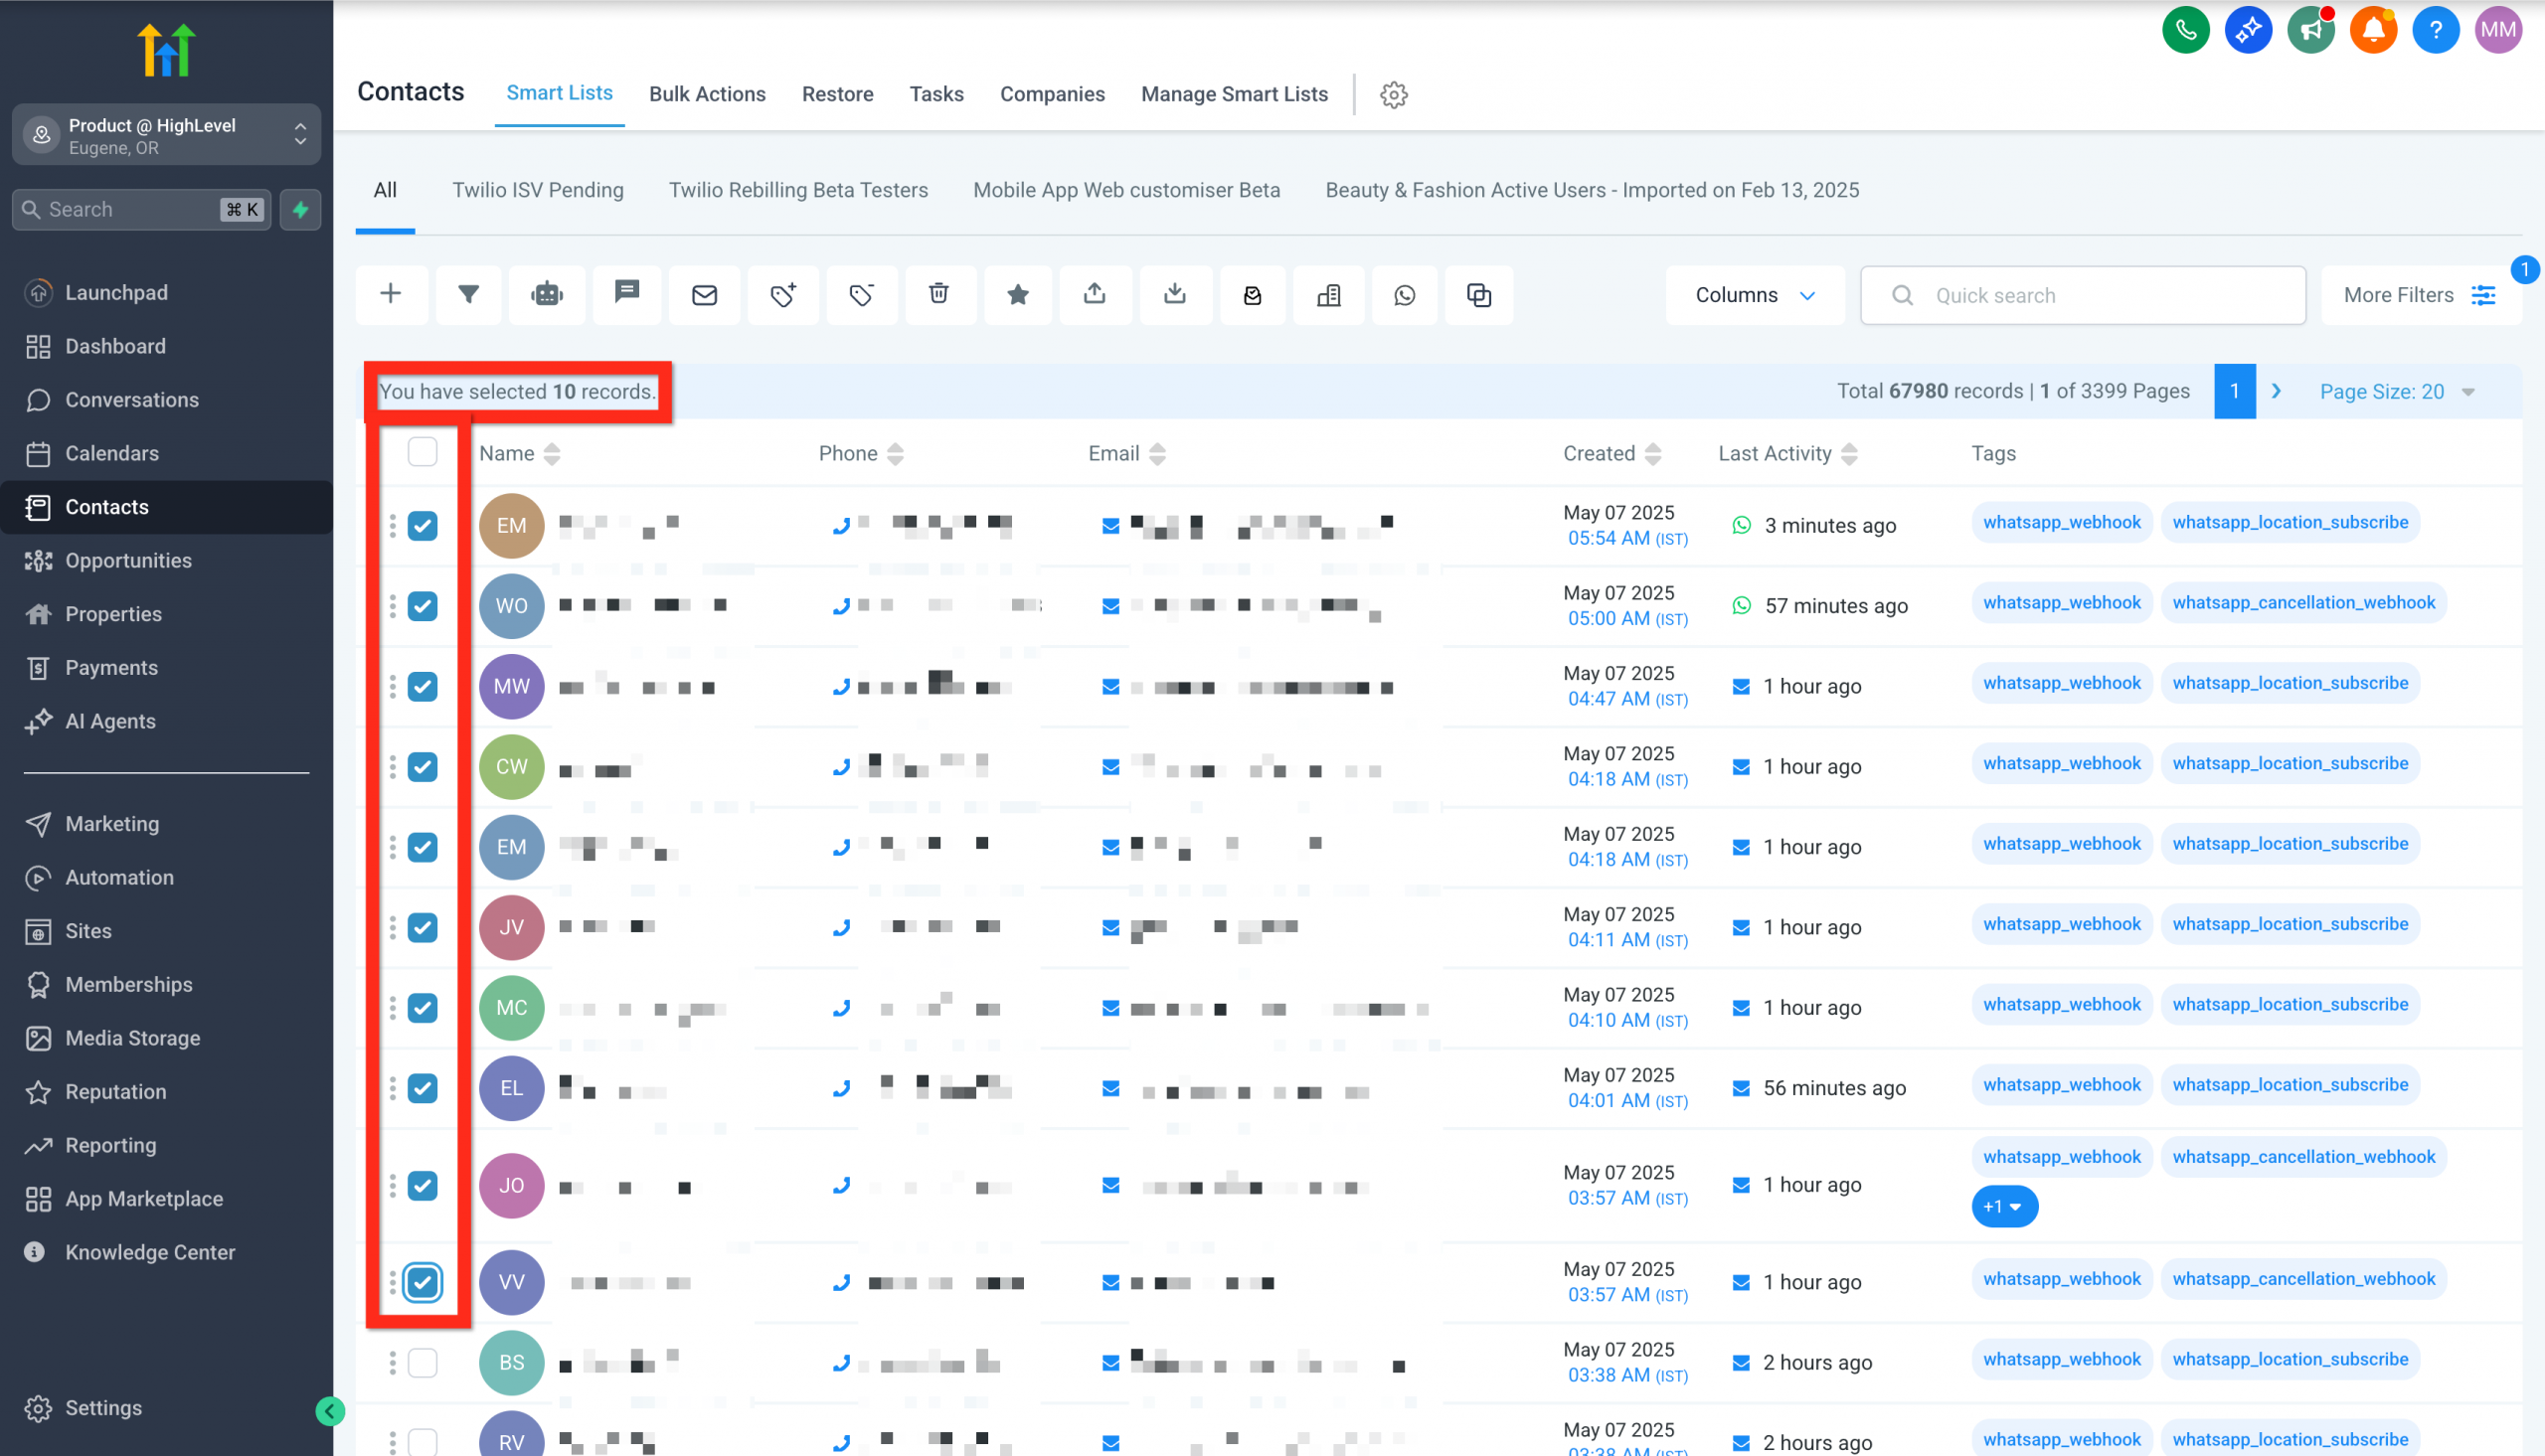
4. Click a bulk action button (for example, Add to automation, Send SMS, Send Email).
Standard contact fields during import
Below is a list of the standard contact fields that can be used during an import:
- Contact ID
- Full name
- First name
- Last name
- Date of birth
- Contact owner
- Contact source
- Contact type
- Company name
- Phone
- Address
- County/State
- City
- Postcode
- Country
- DND (Do not disturb)
- Time zone
- Website
- Additional email
- Additional phones
- Notes