

Table of contents
- Set up your personal booking calendar
- Add yourself as a team member
- Set up automatic reminders
- Integrate your personal calendar
- Share from the calendar header
- Frequently asked questions
Set up your personal booking calendar
Setting up your booking calendar is like having an assistant available 24/7. Imagine waking up to a diary full of appointments without having lifted a finger.
Brilliant, isn’t it? We’ll walk you through the set-up so you can win more appointments and reduce no-shows.
To use Google Calendar for scheduling appointments, you first need to create a personal booking calendar in Futuria CRM. This calendar acts as the foundation for your scheduling rules, letting you configure availability, buffer times, meeting duration and reminders. Even if you use Google Calendar every day, this calendar is required in order to manage how bookings are accepted and displayed inside Futuria CRM.
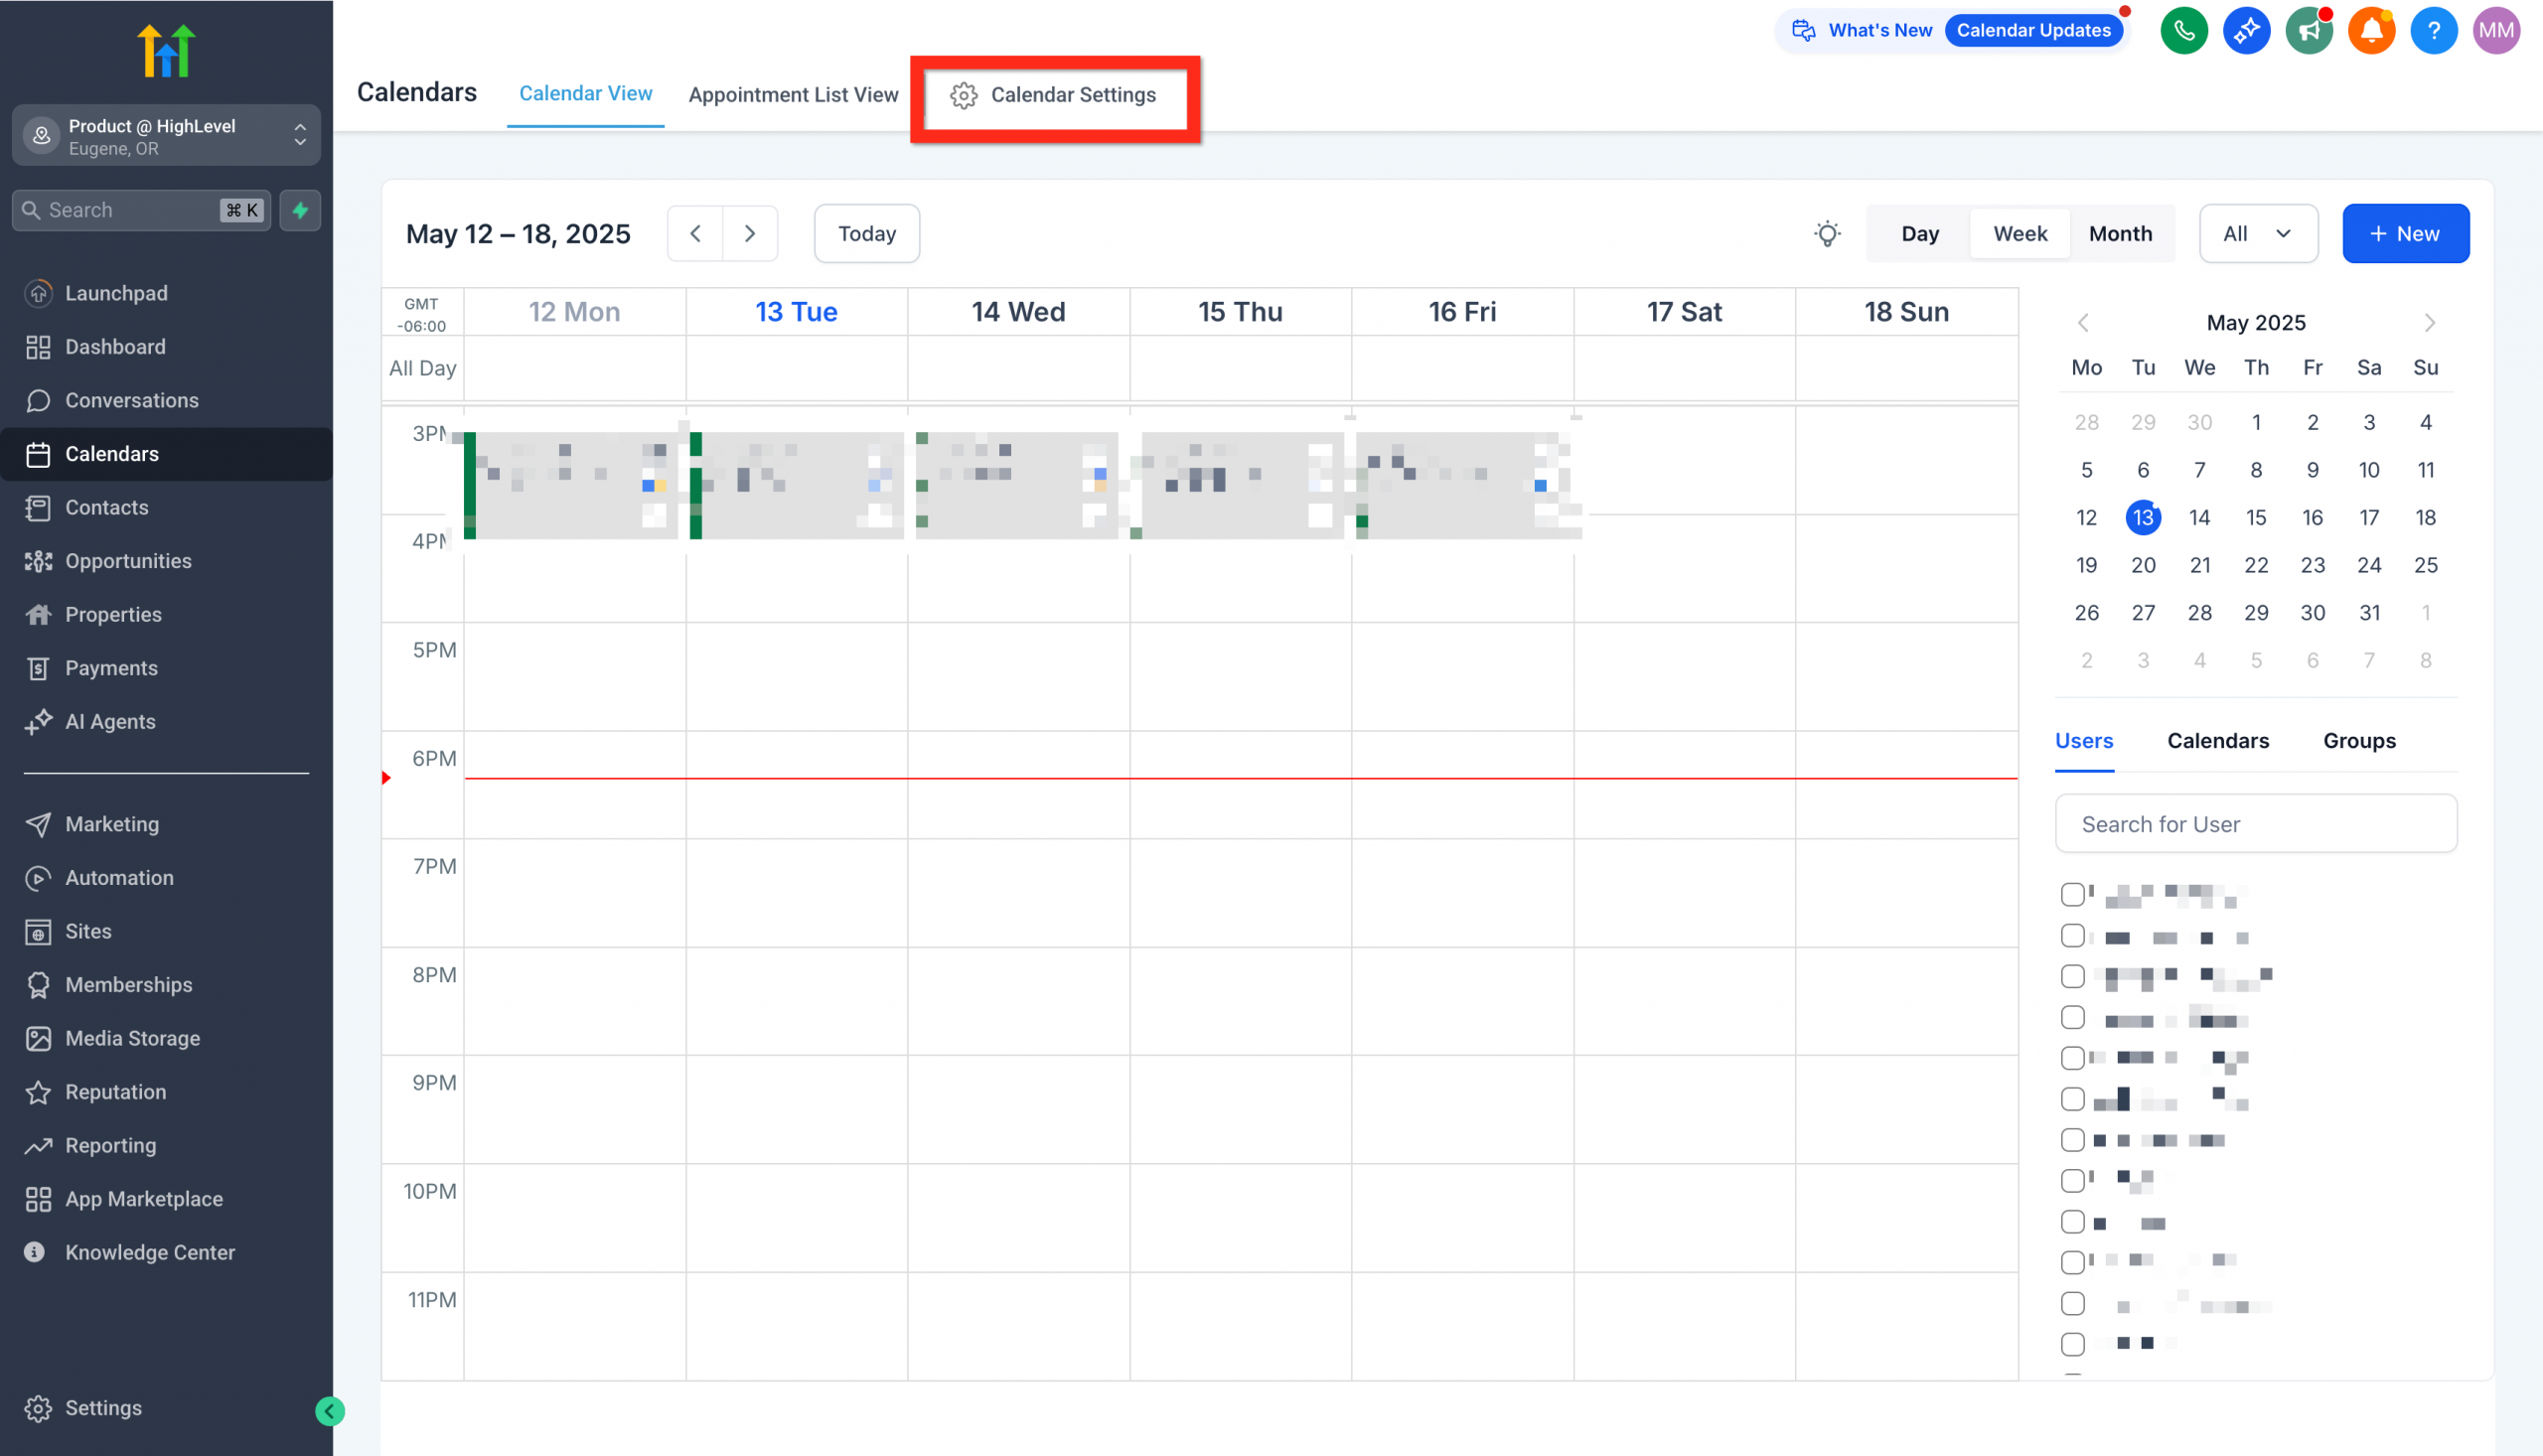
- Go to Calendar > C****alendar settings.
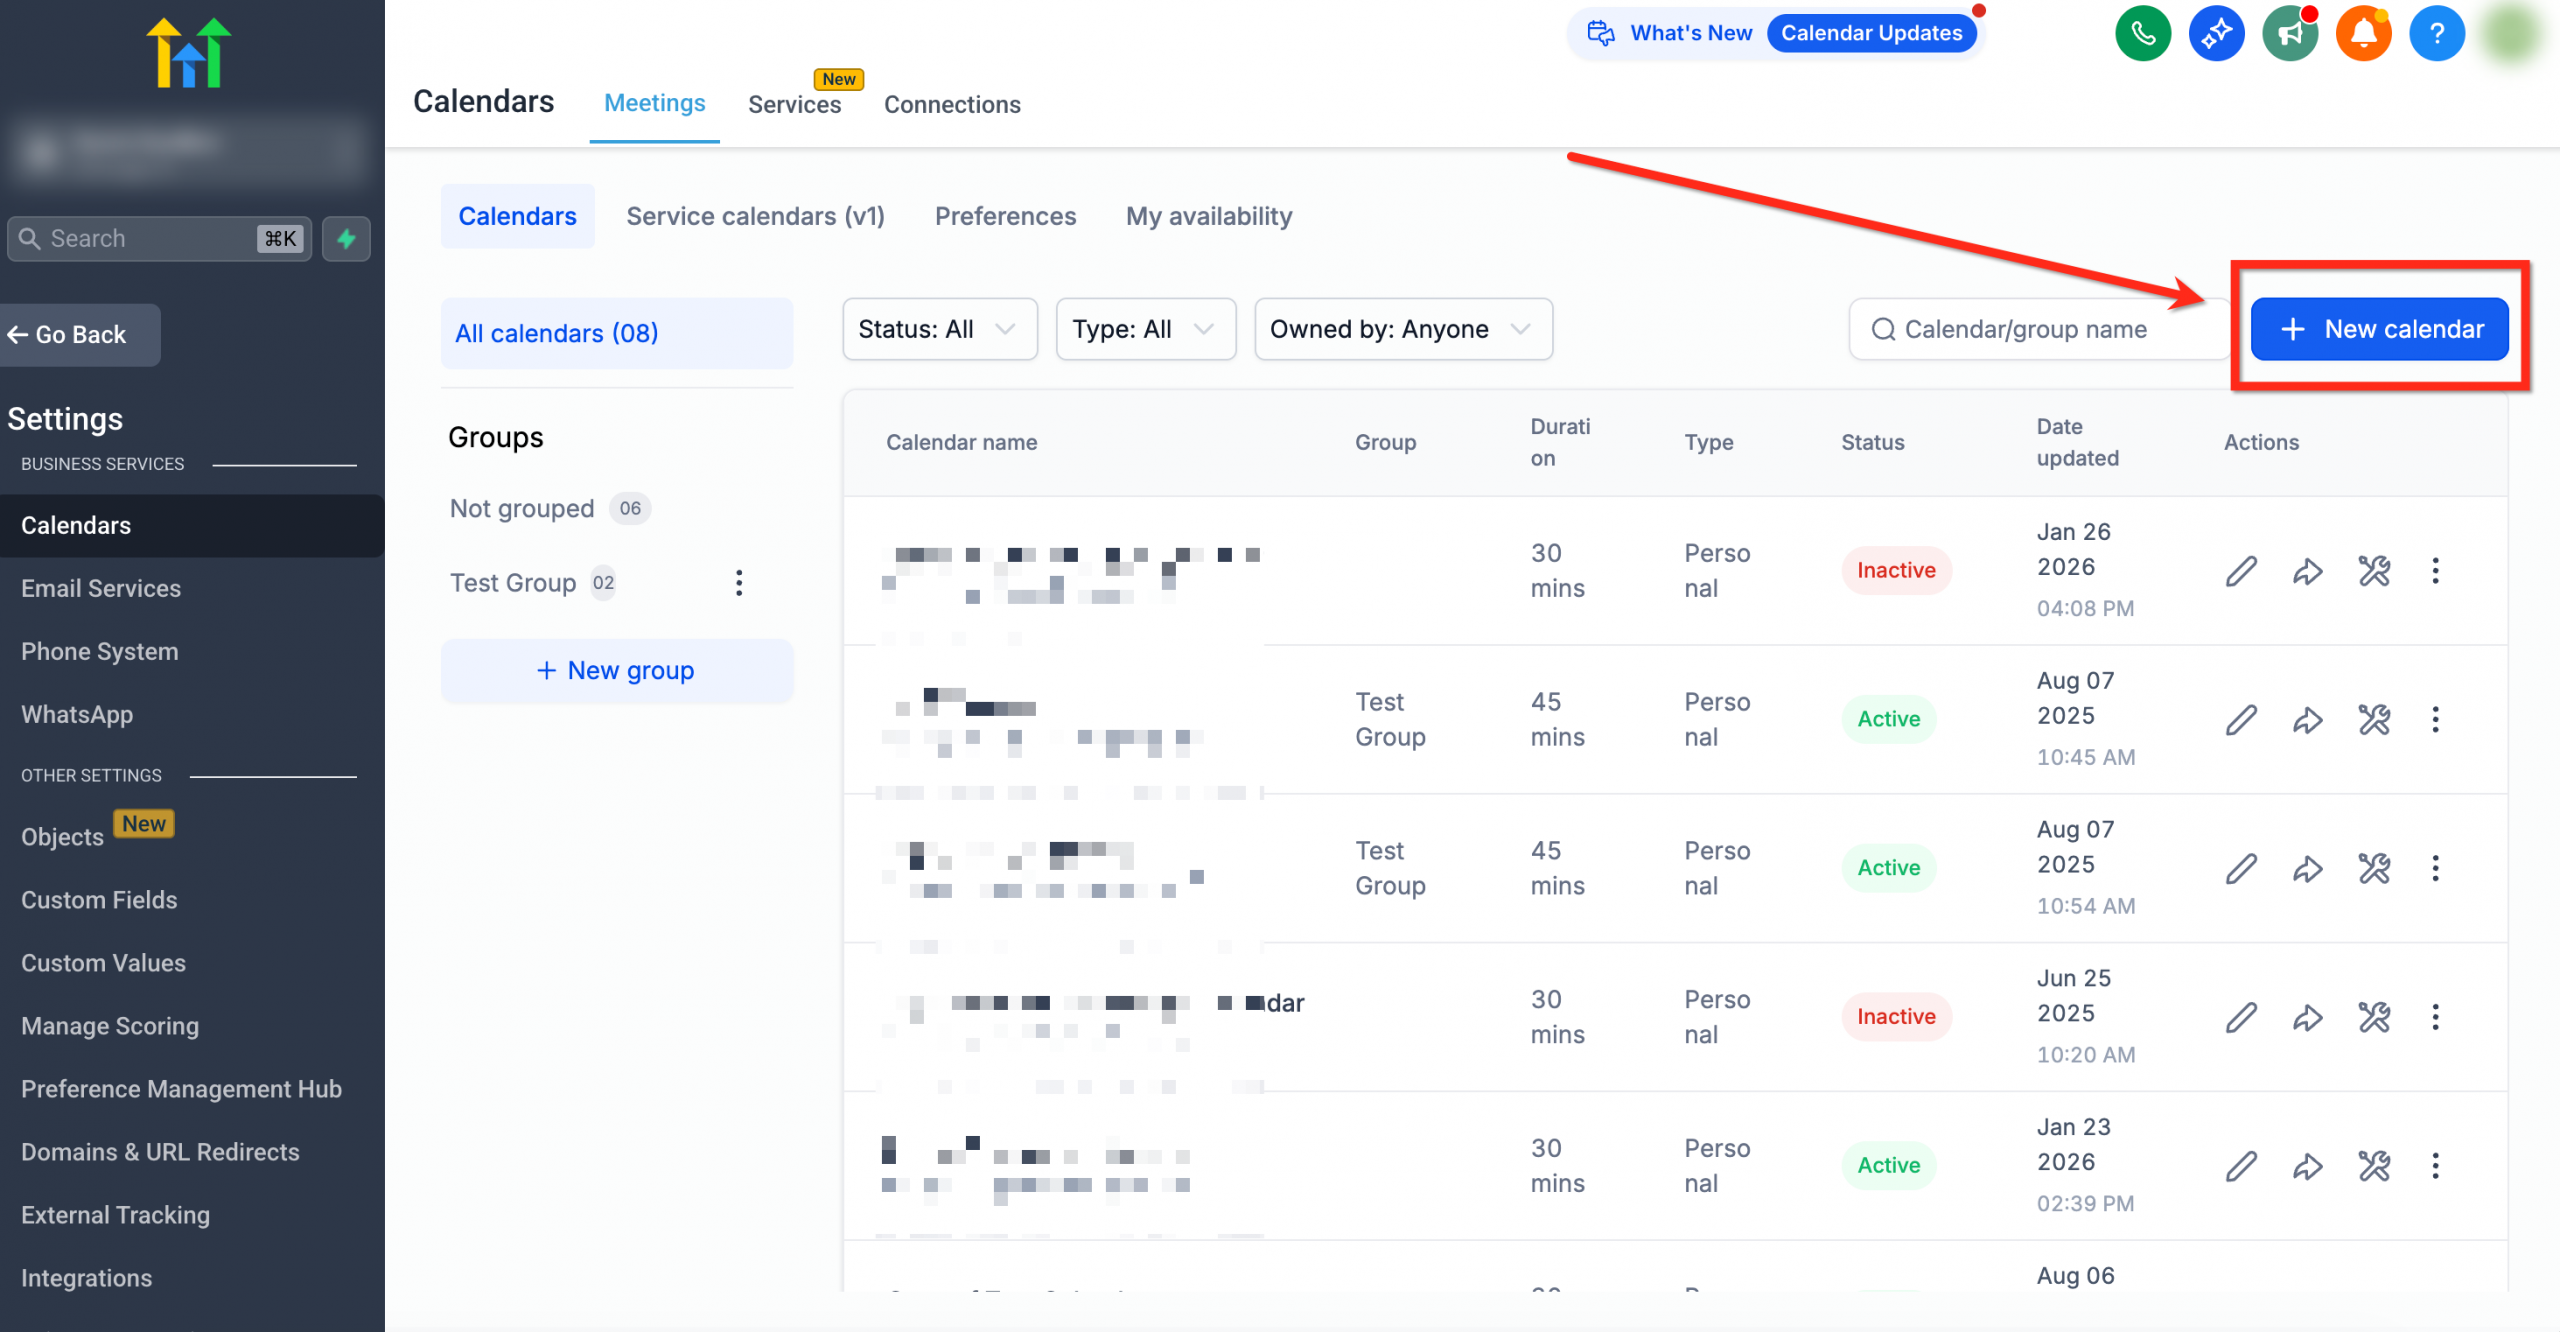
2. Click + New calendar.
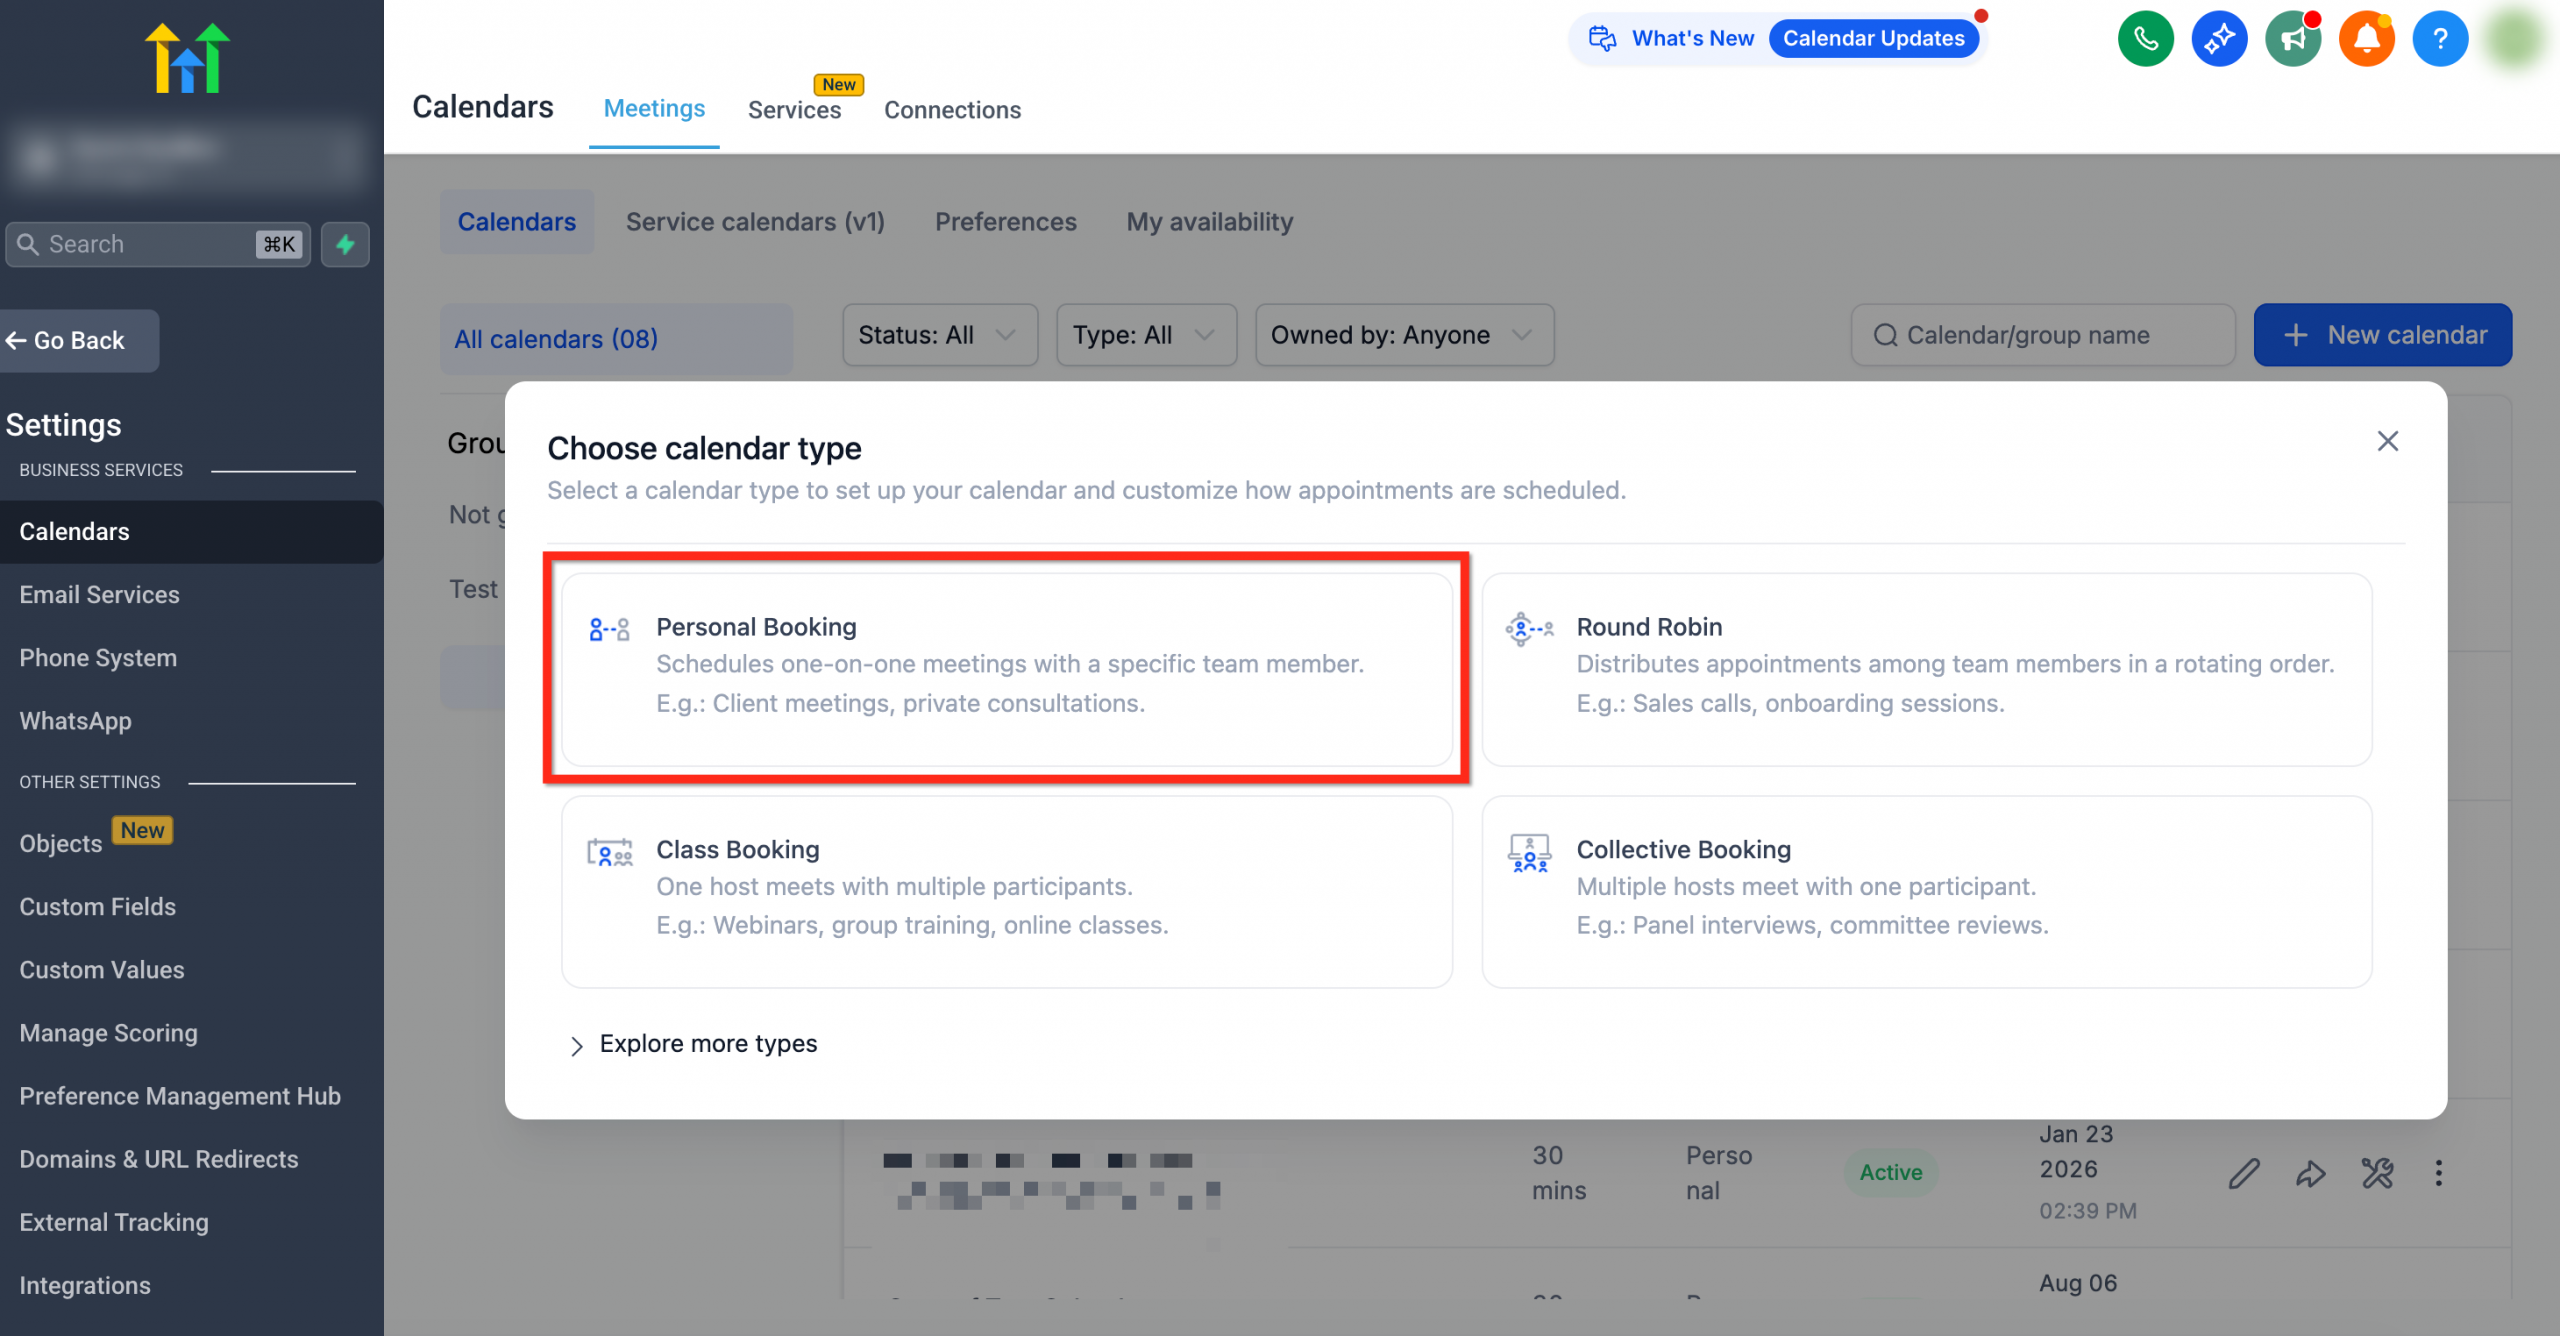
3. Select the calendar type (for one-to-one meetings, choose Personal booking).
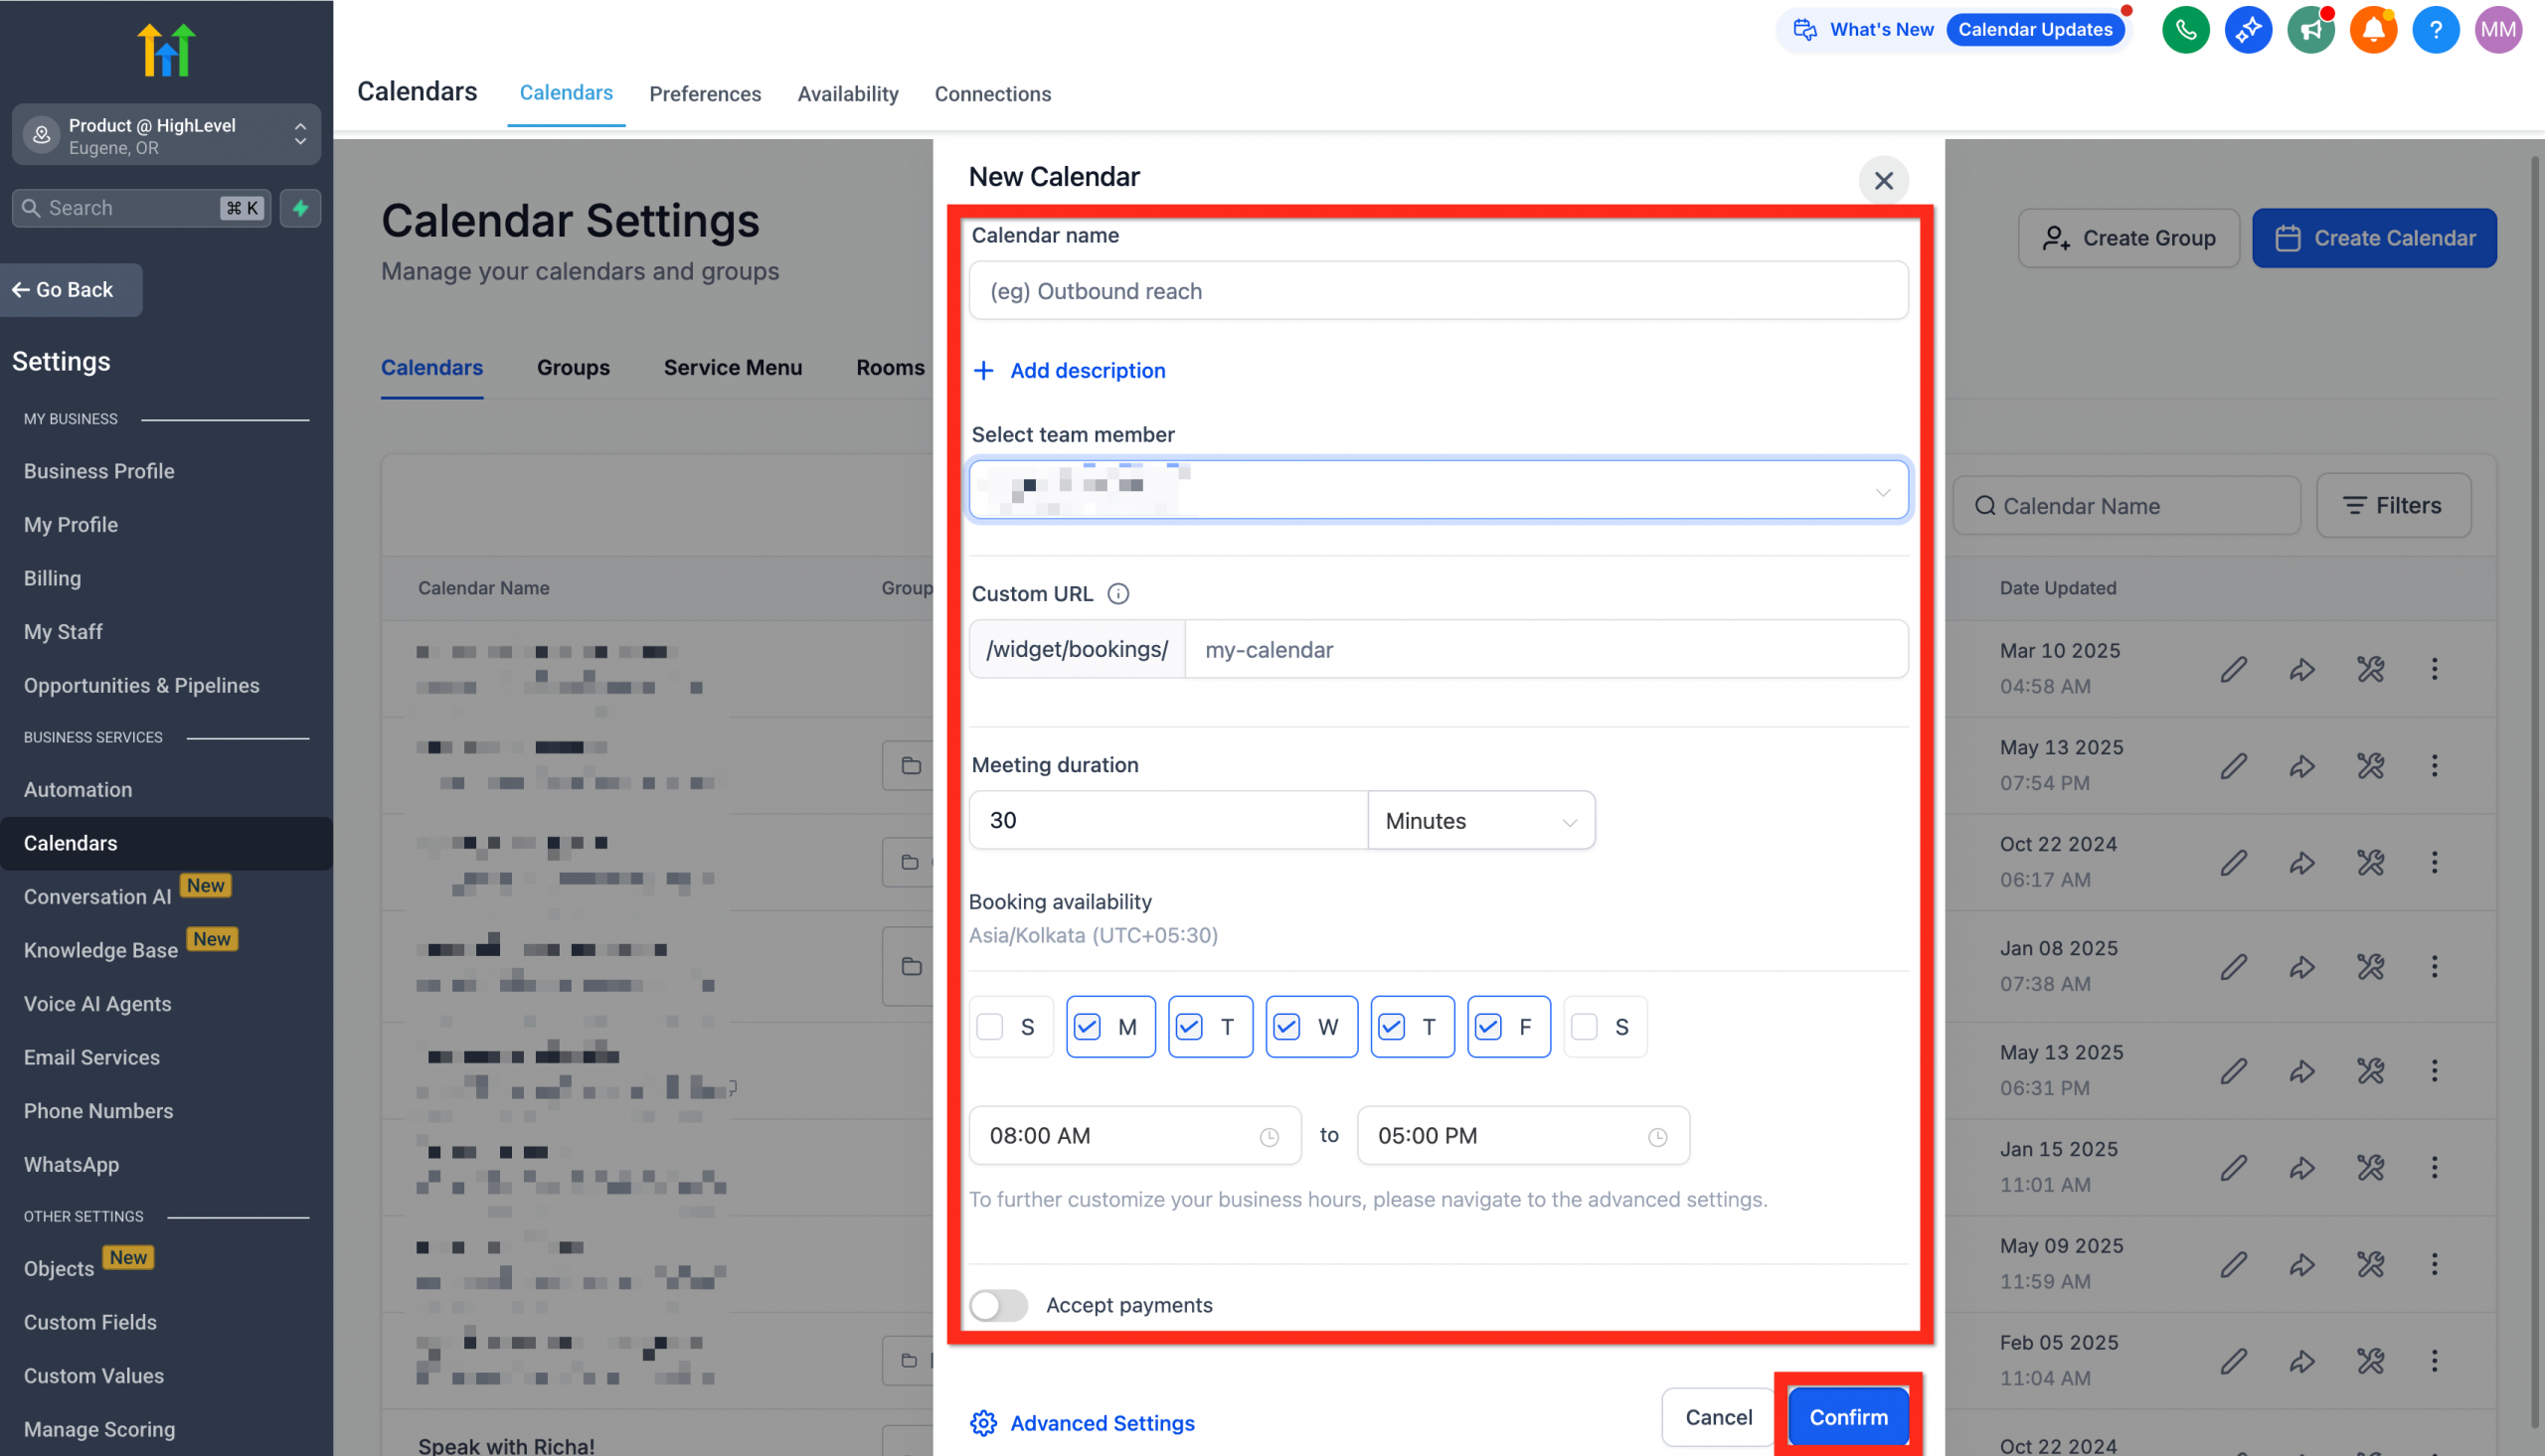
4. Fill in the calendar details (give it a name that is easy to remember, select yourself as the host, check the custom URL, specify the appointment duration and set your availability hours). Then click Confirm.
5. Copy the calendar link or the embed code.
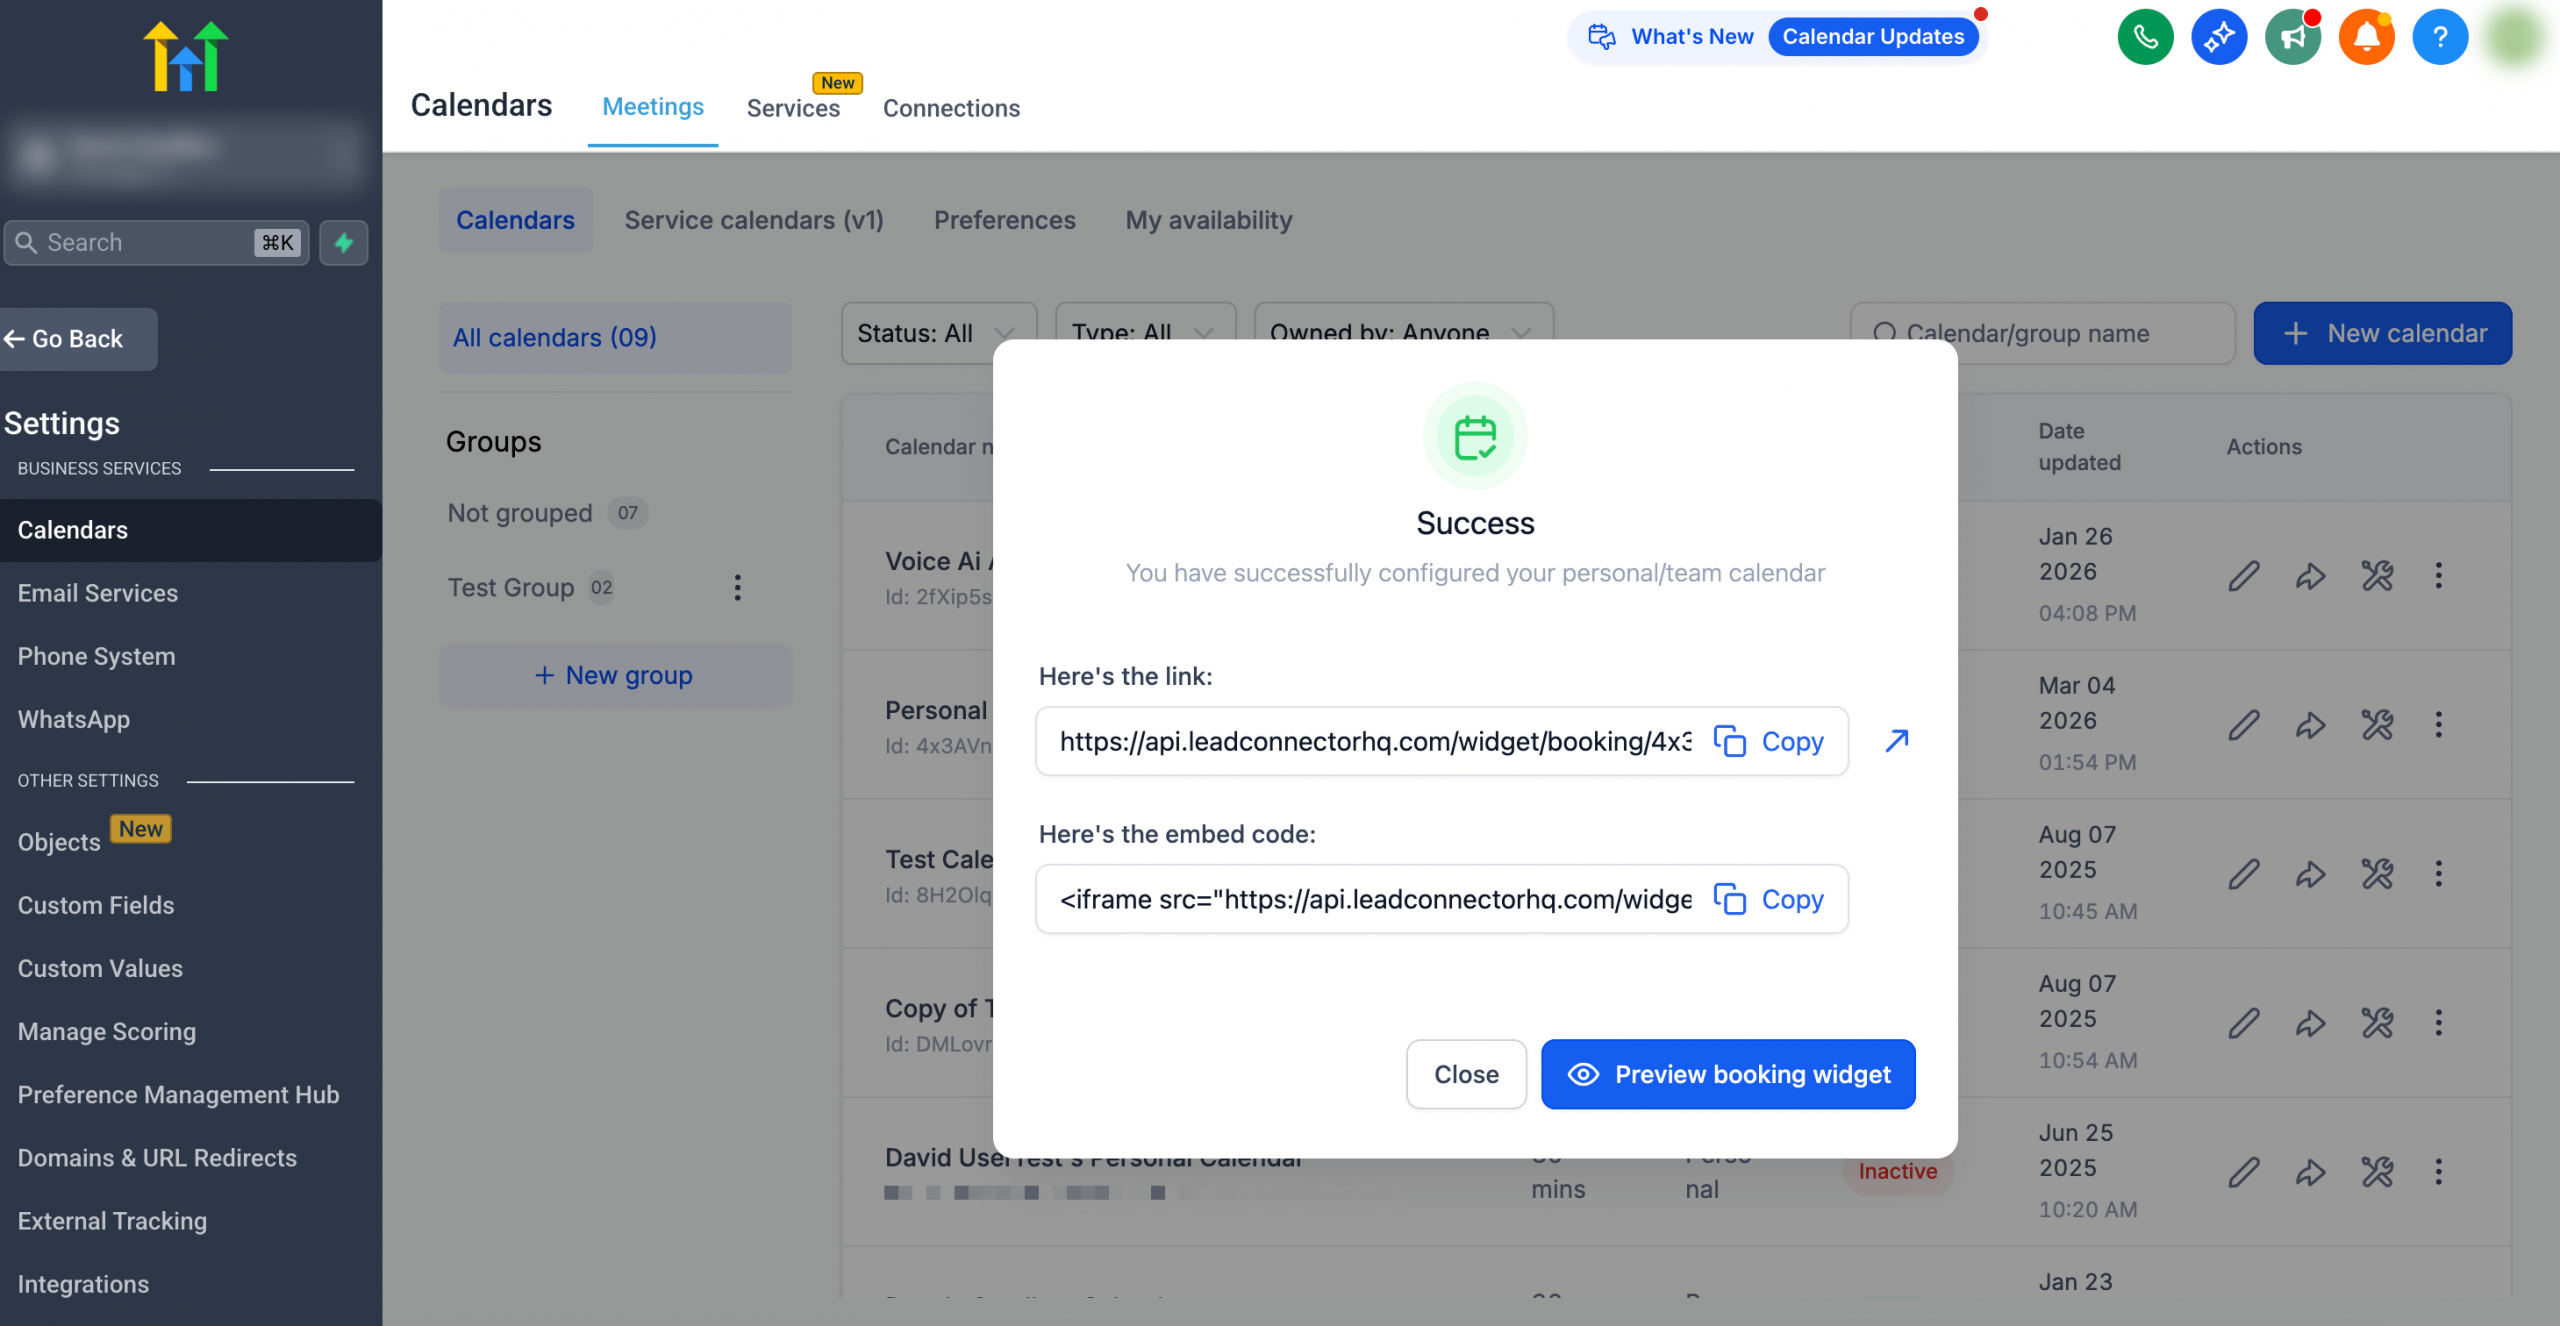
6. Share the calendar link and start taking bookings!
Next, you can customise the look of the calendar so it matches your brand, making it even more appealing.
Add yourself as a team member
Even if you work on your own, adding yourself as a team member makes sure everything runs smoothly. It is like giving yourself VIP access to your own scheduling system.
- Go to Settings > My staff.
- Click Add user.
- Add yourself and save the details.
Next, you can set specific permissions for yourself or for other team members, streamlining your workflow.
Set up automatic reminders
Automatic reminders mean fewer missed appointments and happier customers. They are like a gentle nudge from your calendar reminding customers that you are meeting soon.
- Go to Automations.
- Click Create workflow and select Recipe.
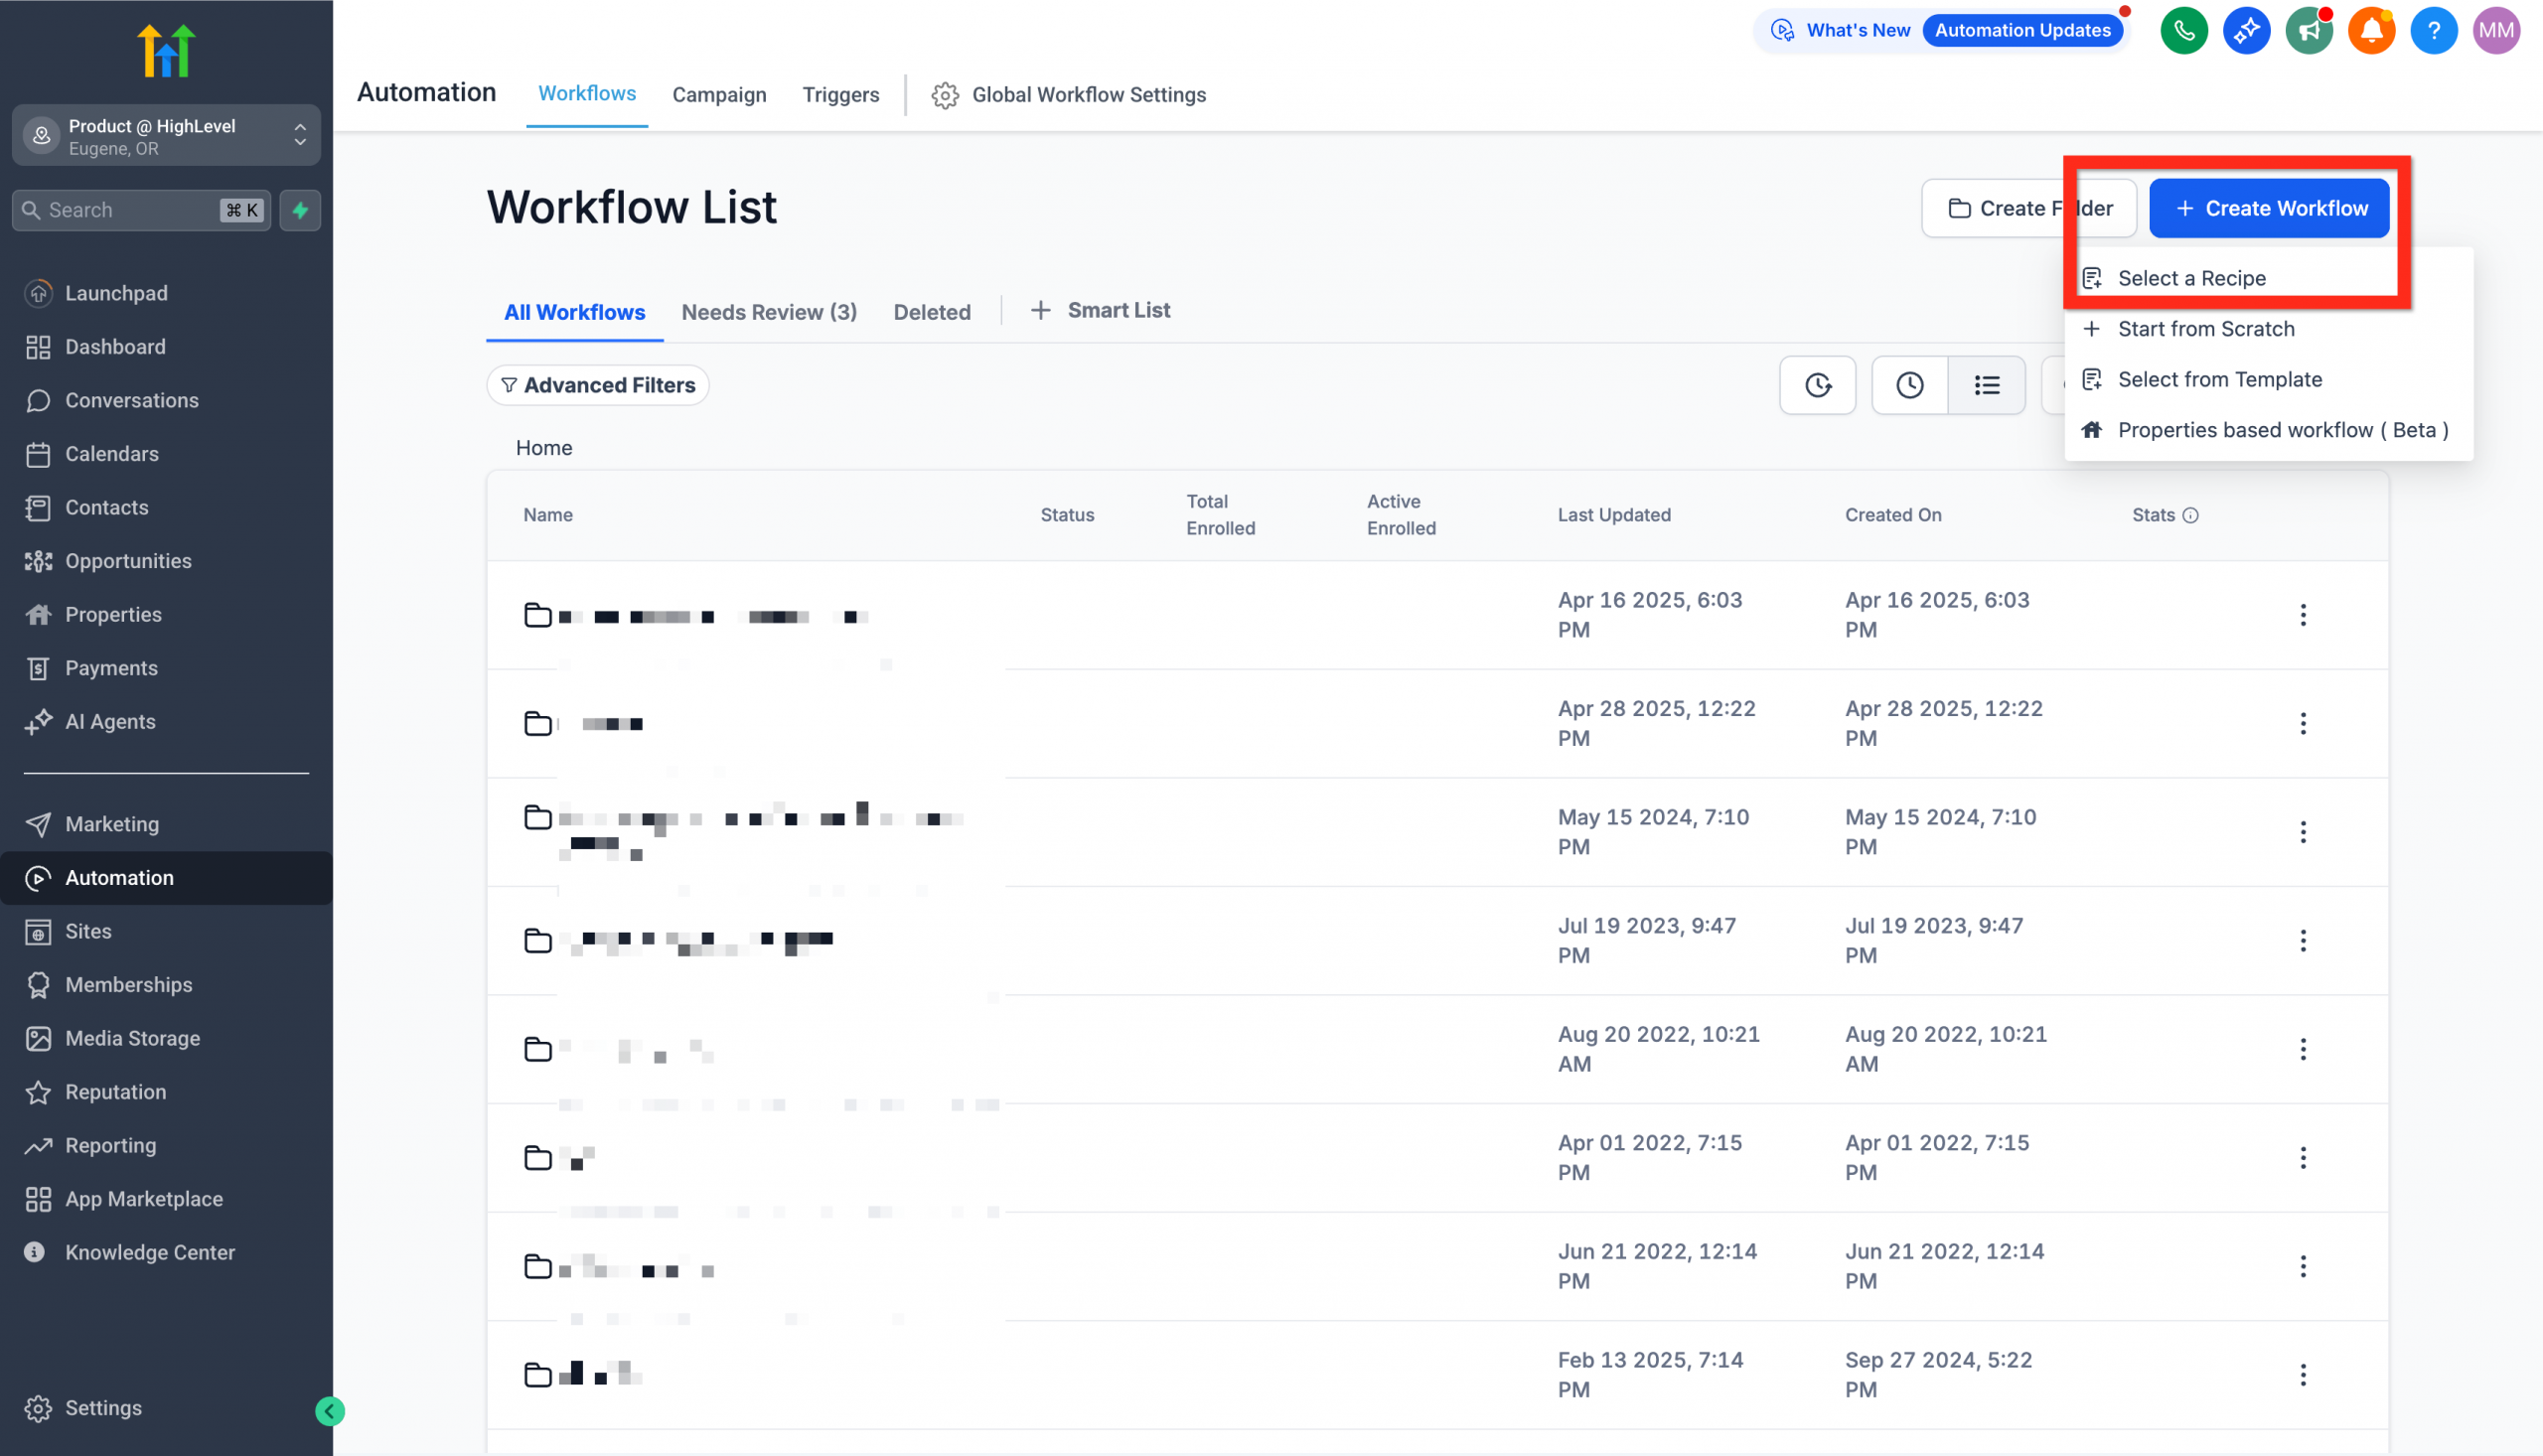
3. Choose the Appointment confirmation + Reminders recipe.
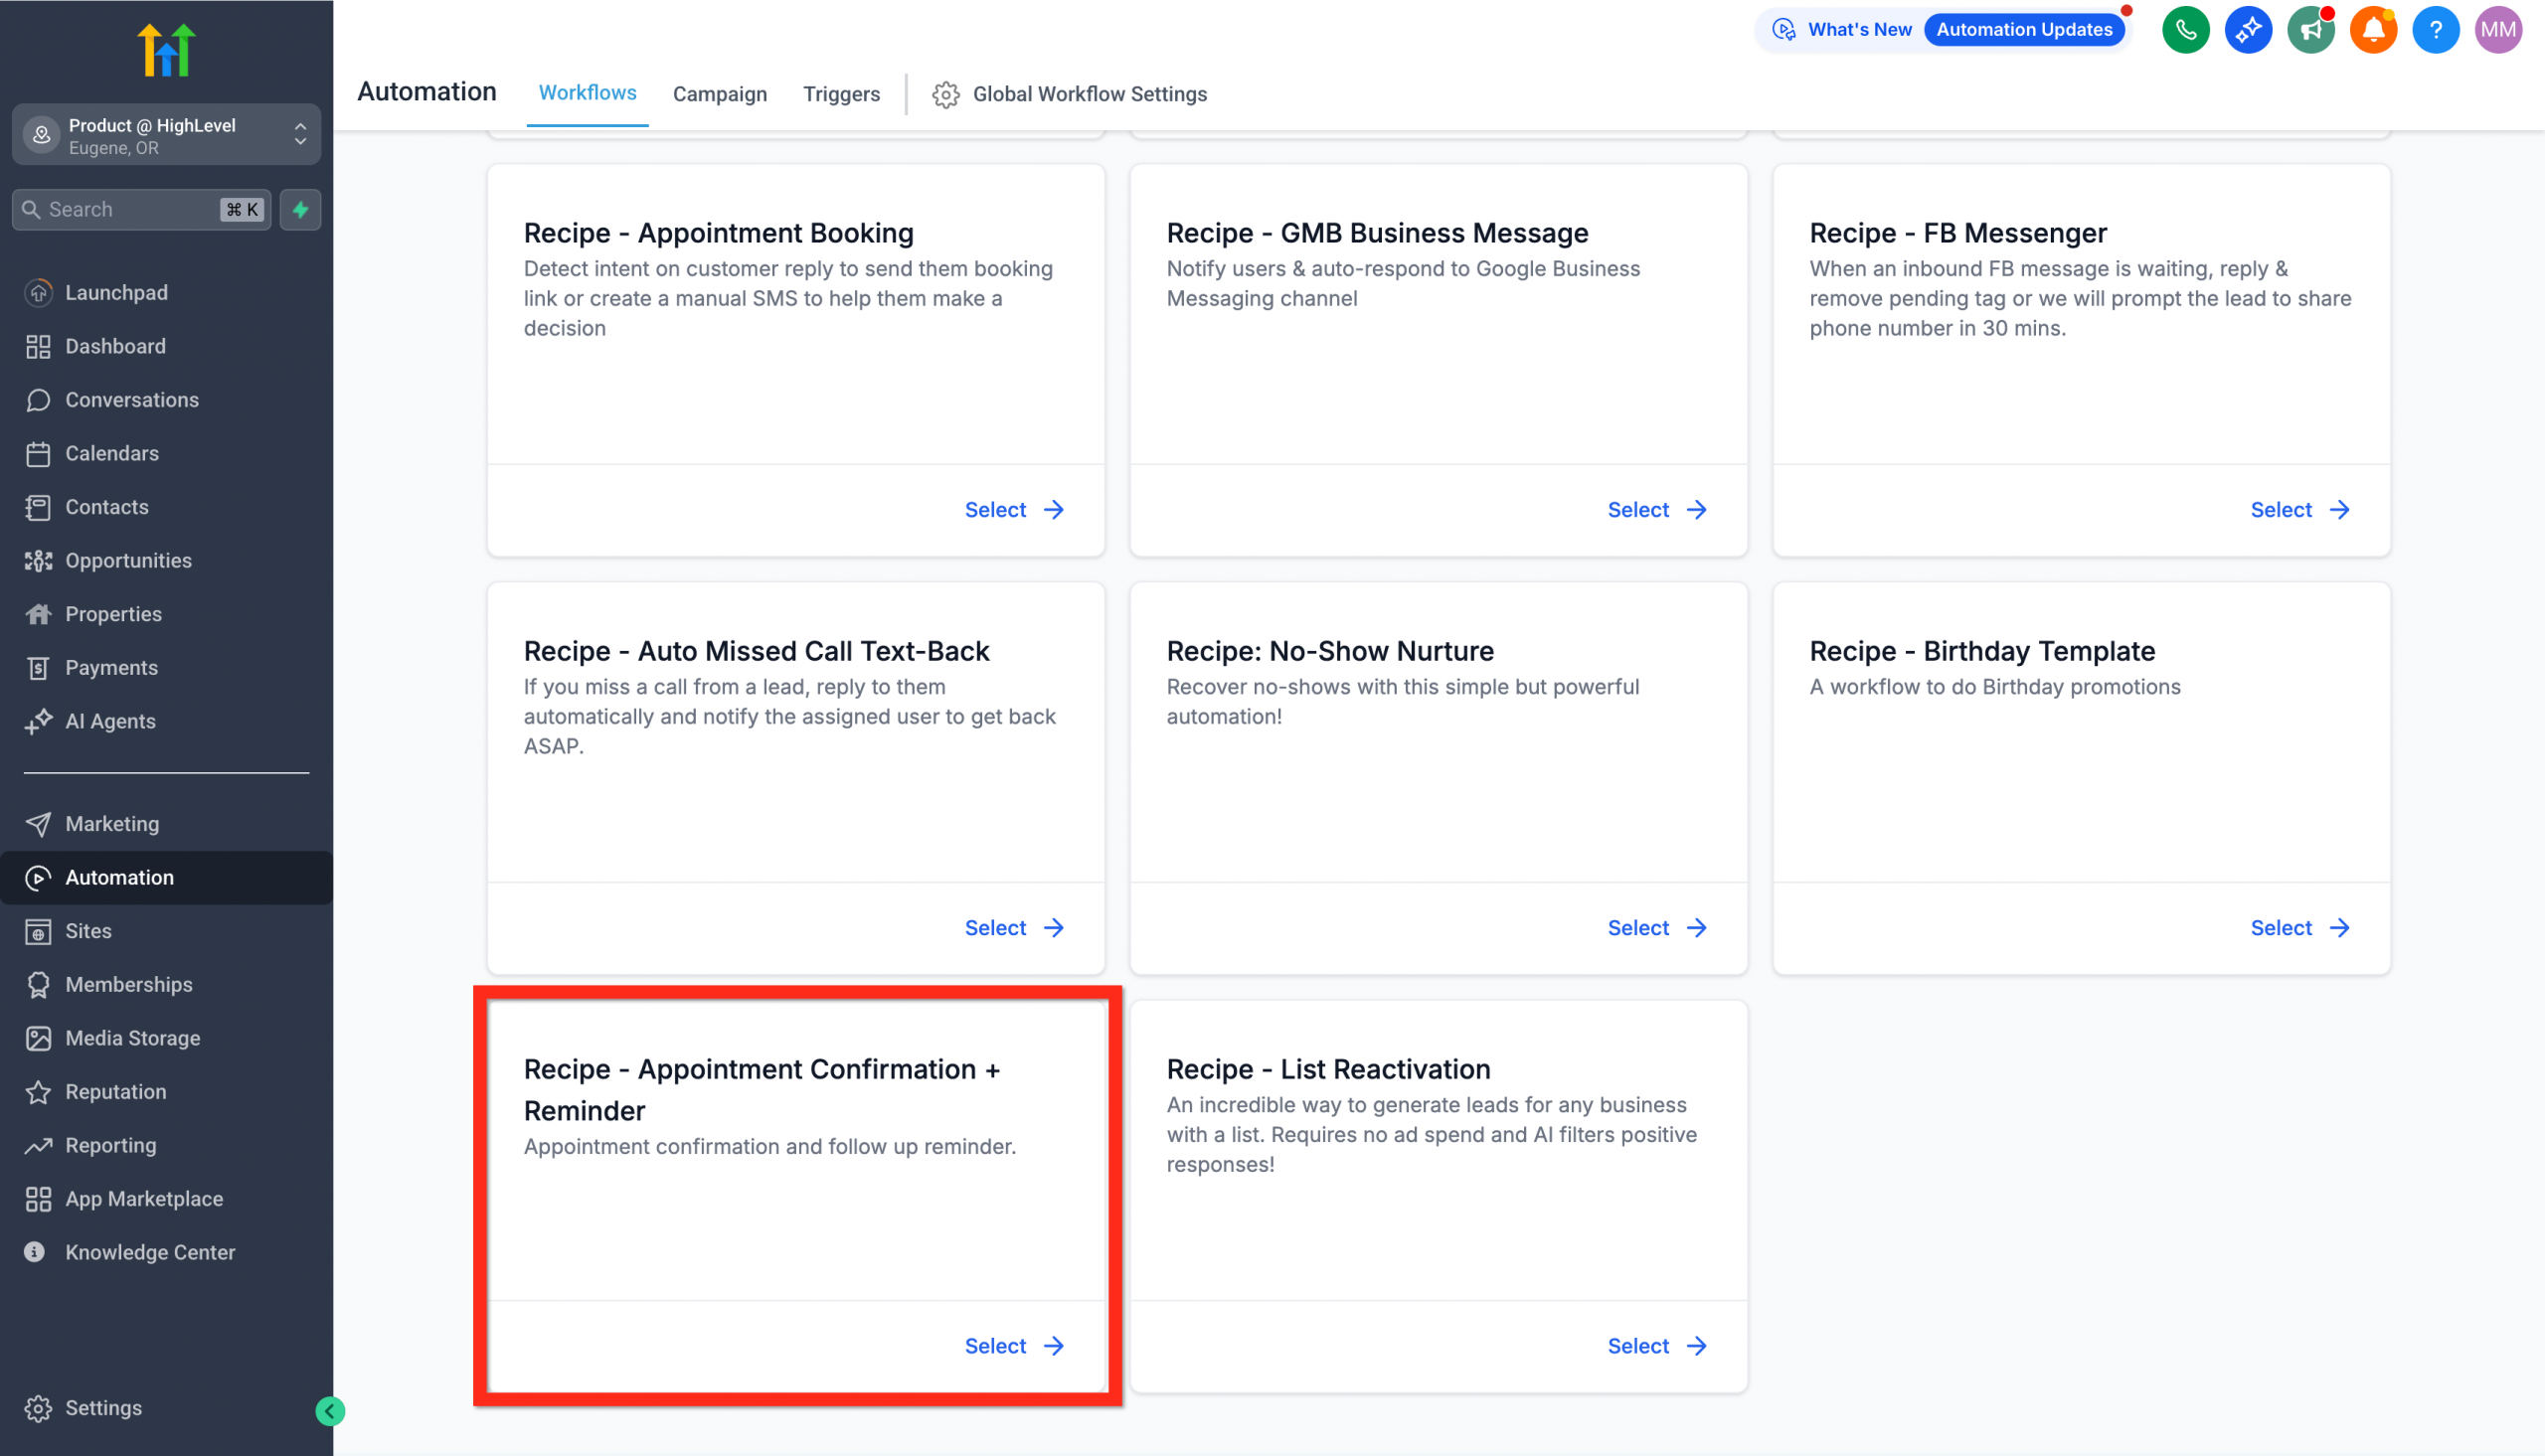
4. Edit the Confirmation email action.
5. Update the meeting link (Zoom, Google Meet, and so on) and click Save action.
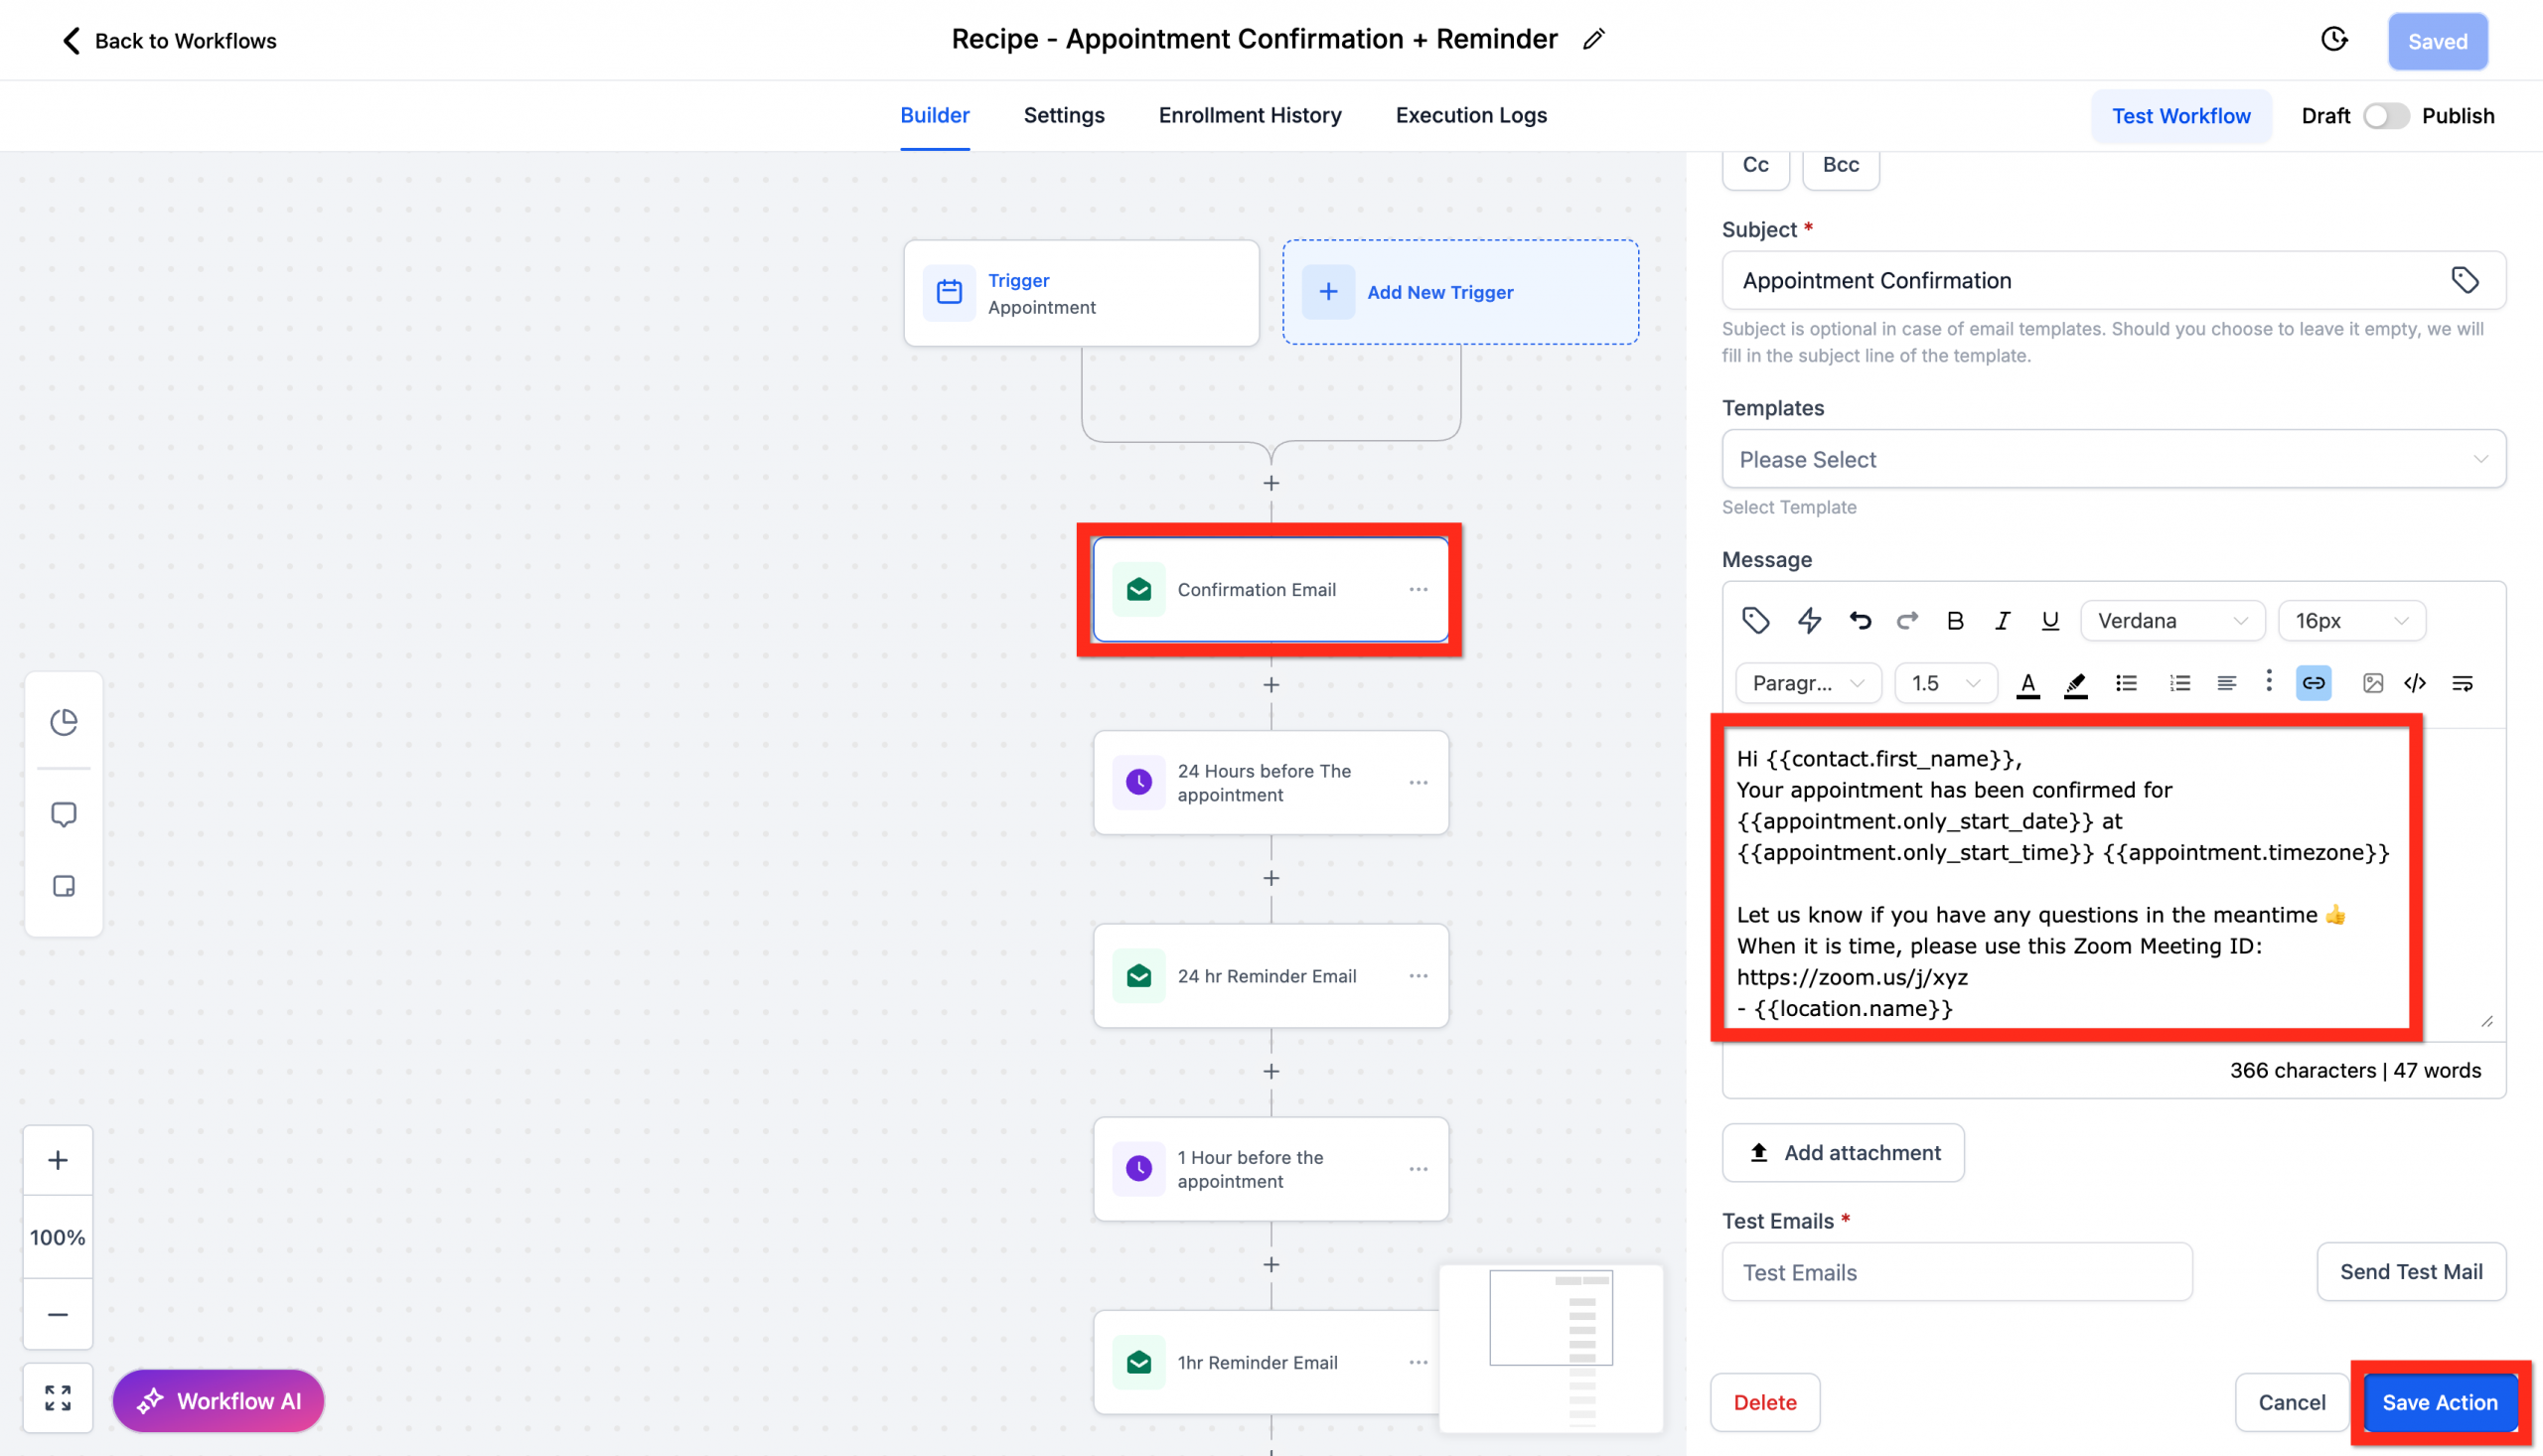
6. Review all the actions.
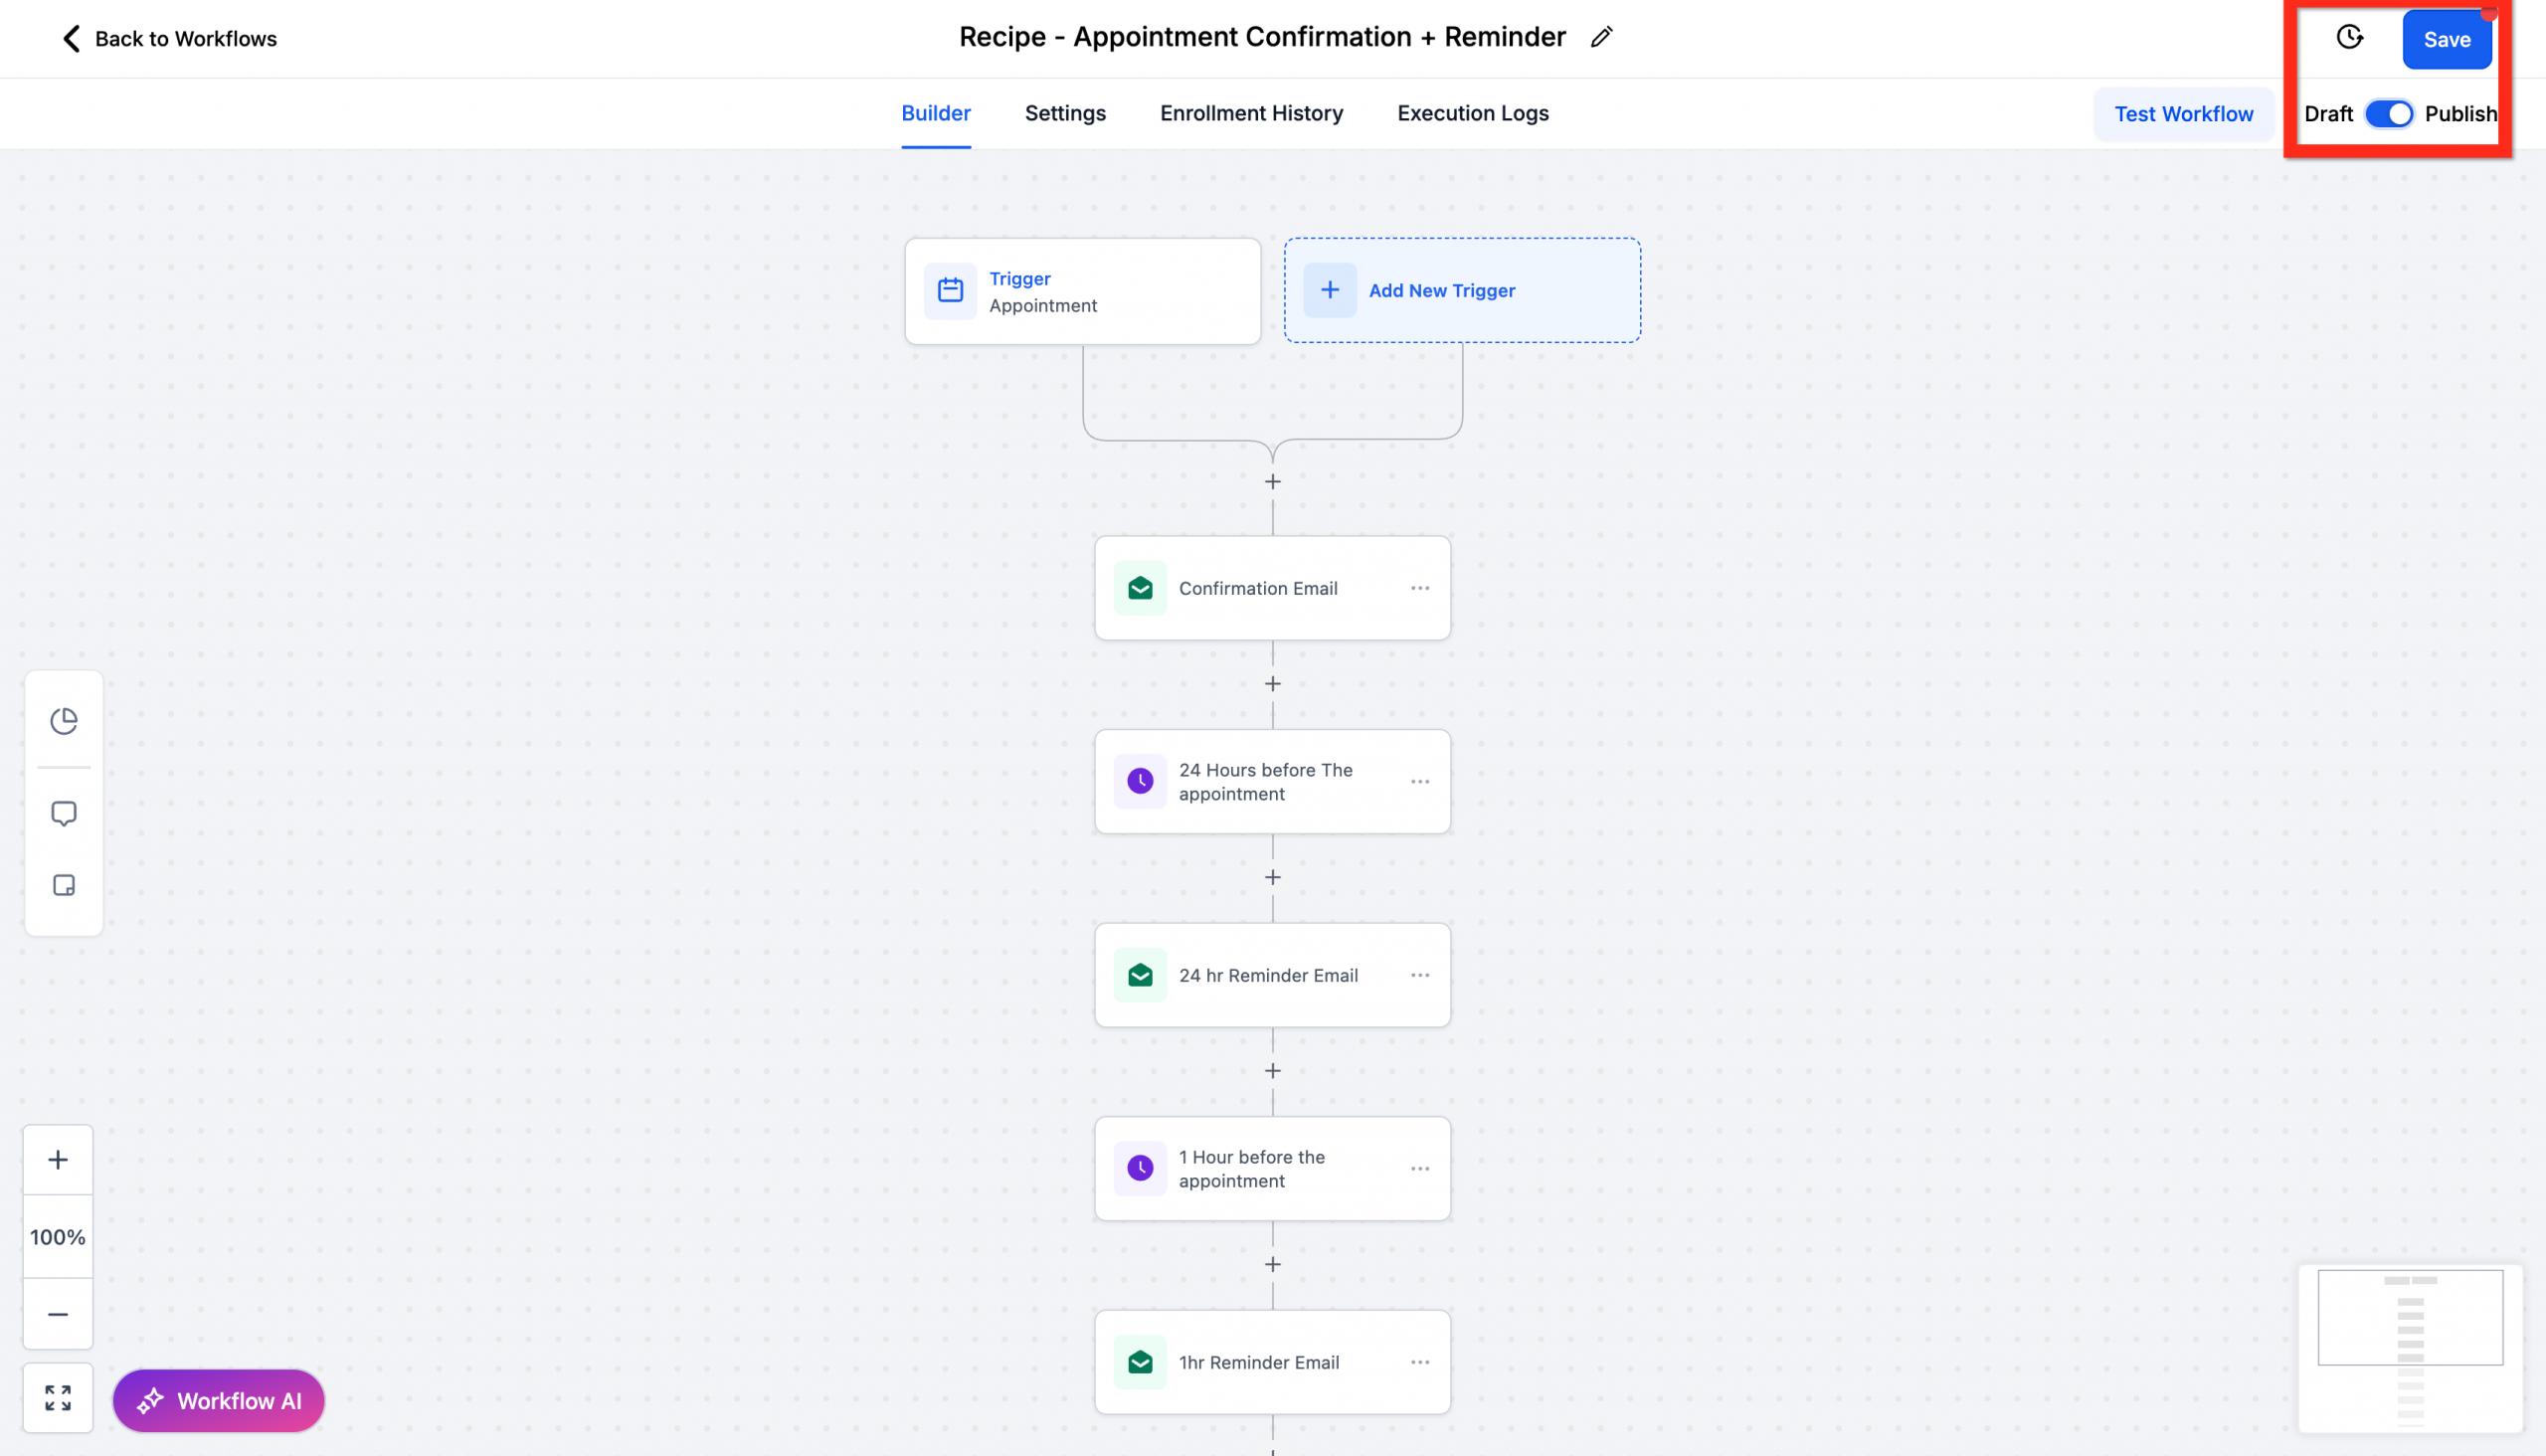
7. Click Publish.
8. Click Save.
Next, consider personalising the reminders with tailored messages to build stronger relationships with your customers.
Integrate your personal calendar
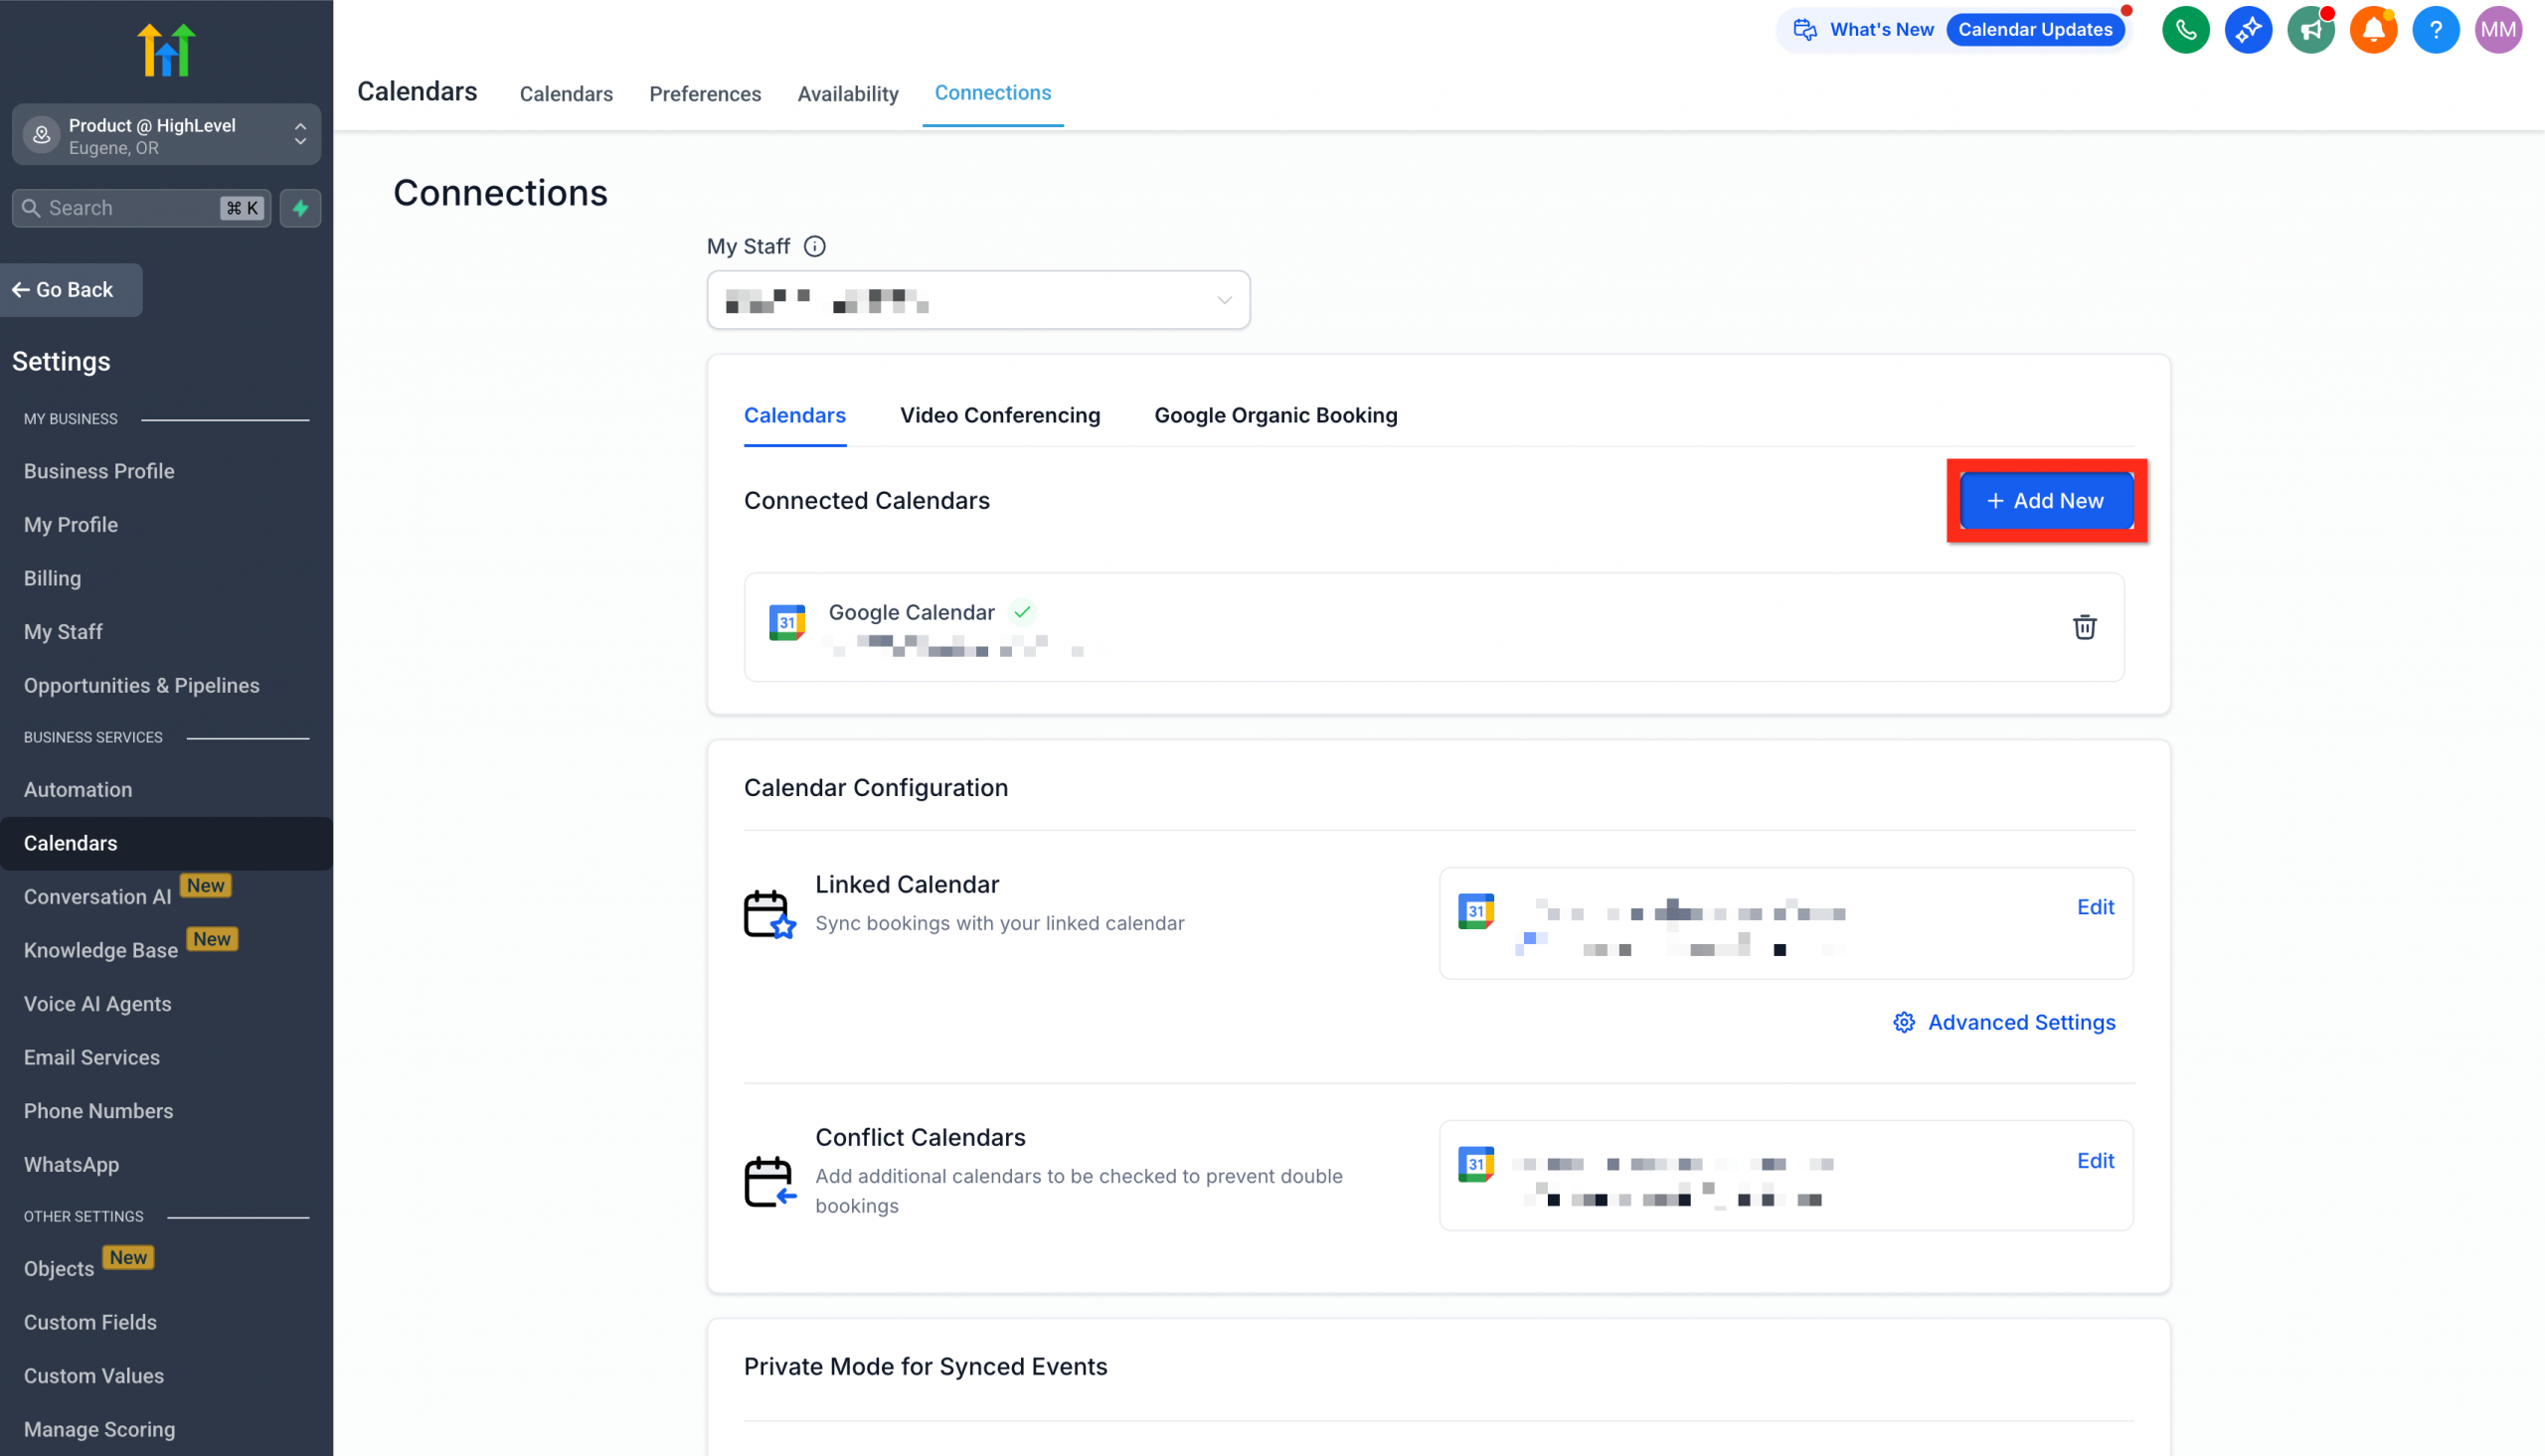
Connecting your booking system with your personal calendar keeps everything in sync. No more double bookings or missed meetings, just flawless organisation.
- Go to Calendars > Calendar settings.
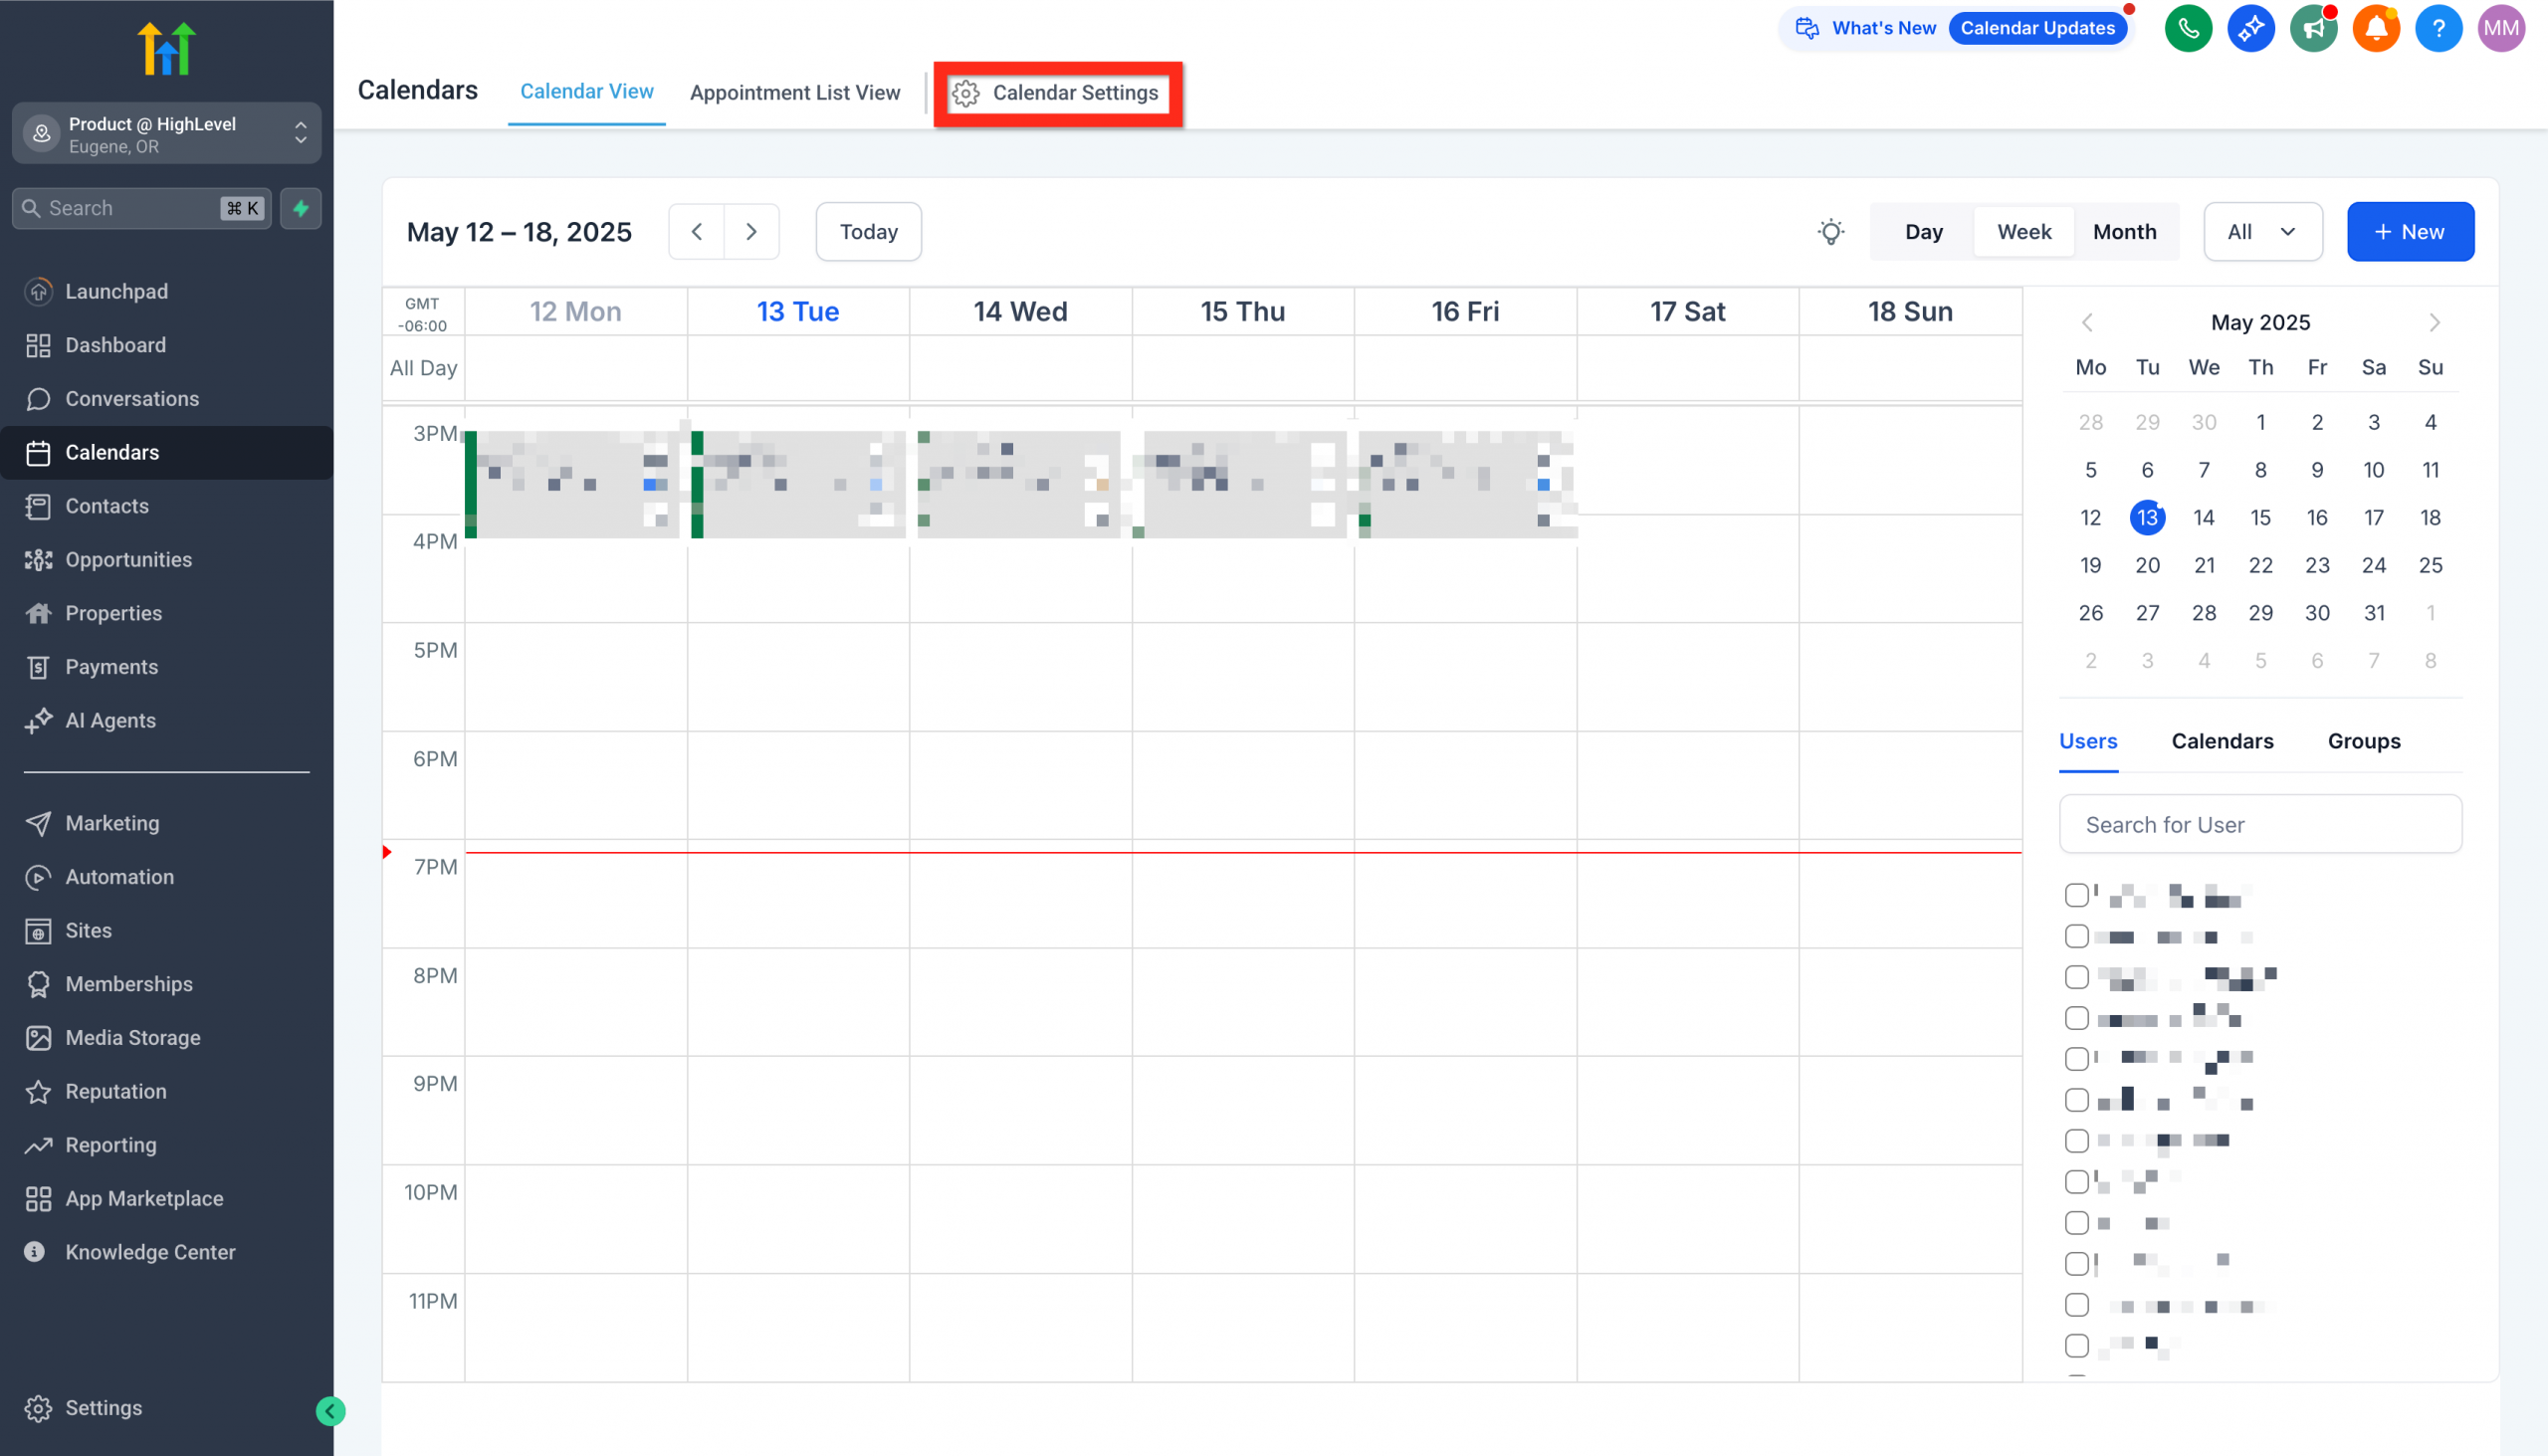
2. Select the Connections tab and click Add new to connect your personal calendar.
3. Then select the Video conferencing tab and click Add new to connect your preferred conferencing tool.
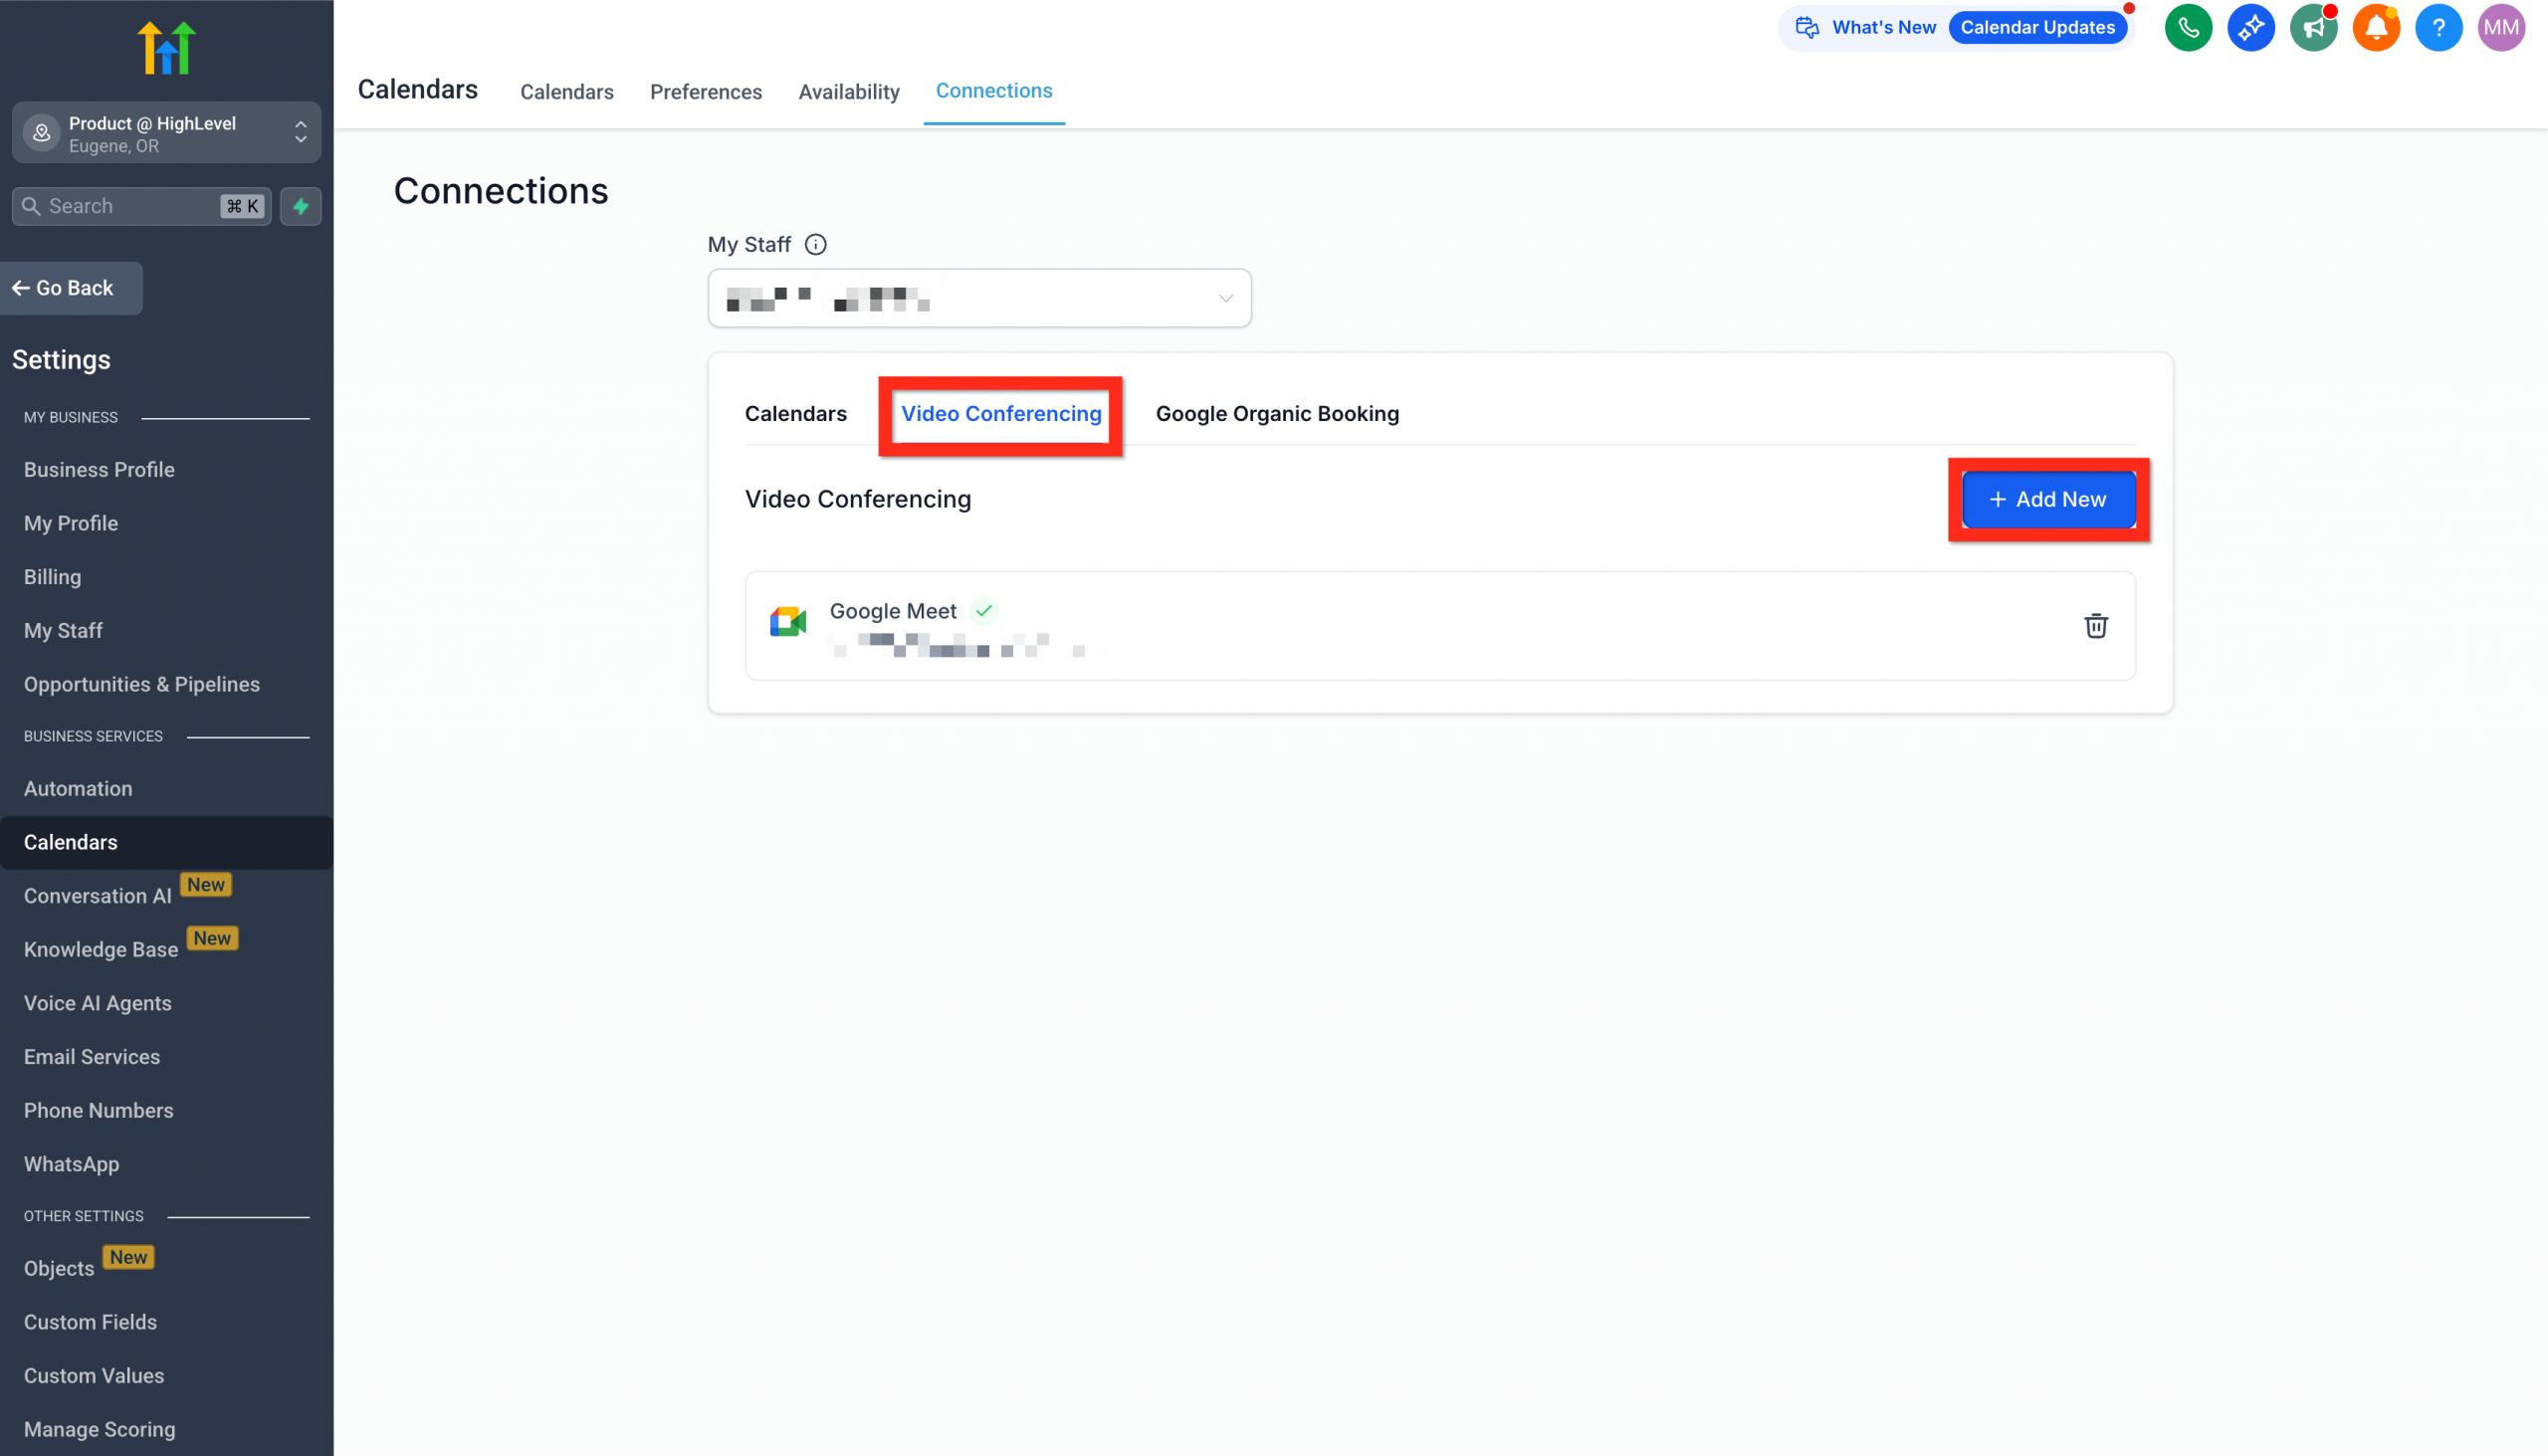
Next, check that your integrations are syncing correctly so you can enjoy seamless scheduling!
Share from the calendar header
Sharing directly from the calendar you are editing saves time and avoids copy-and-paste mistakes.
Use the Share button
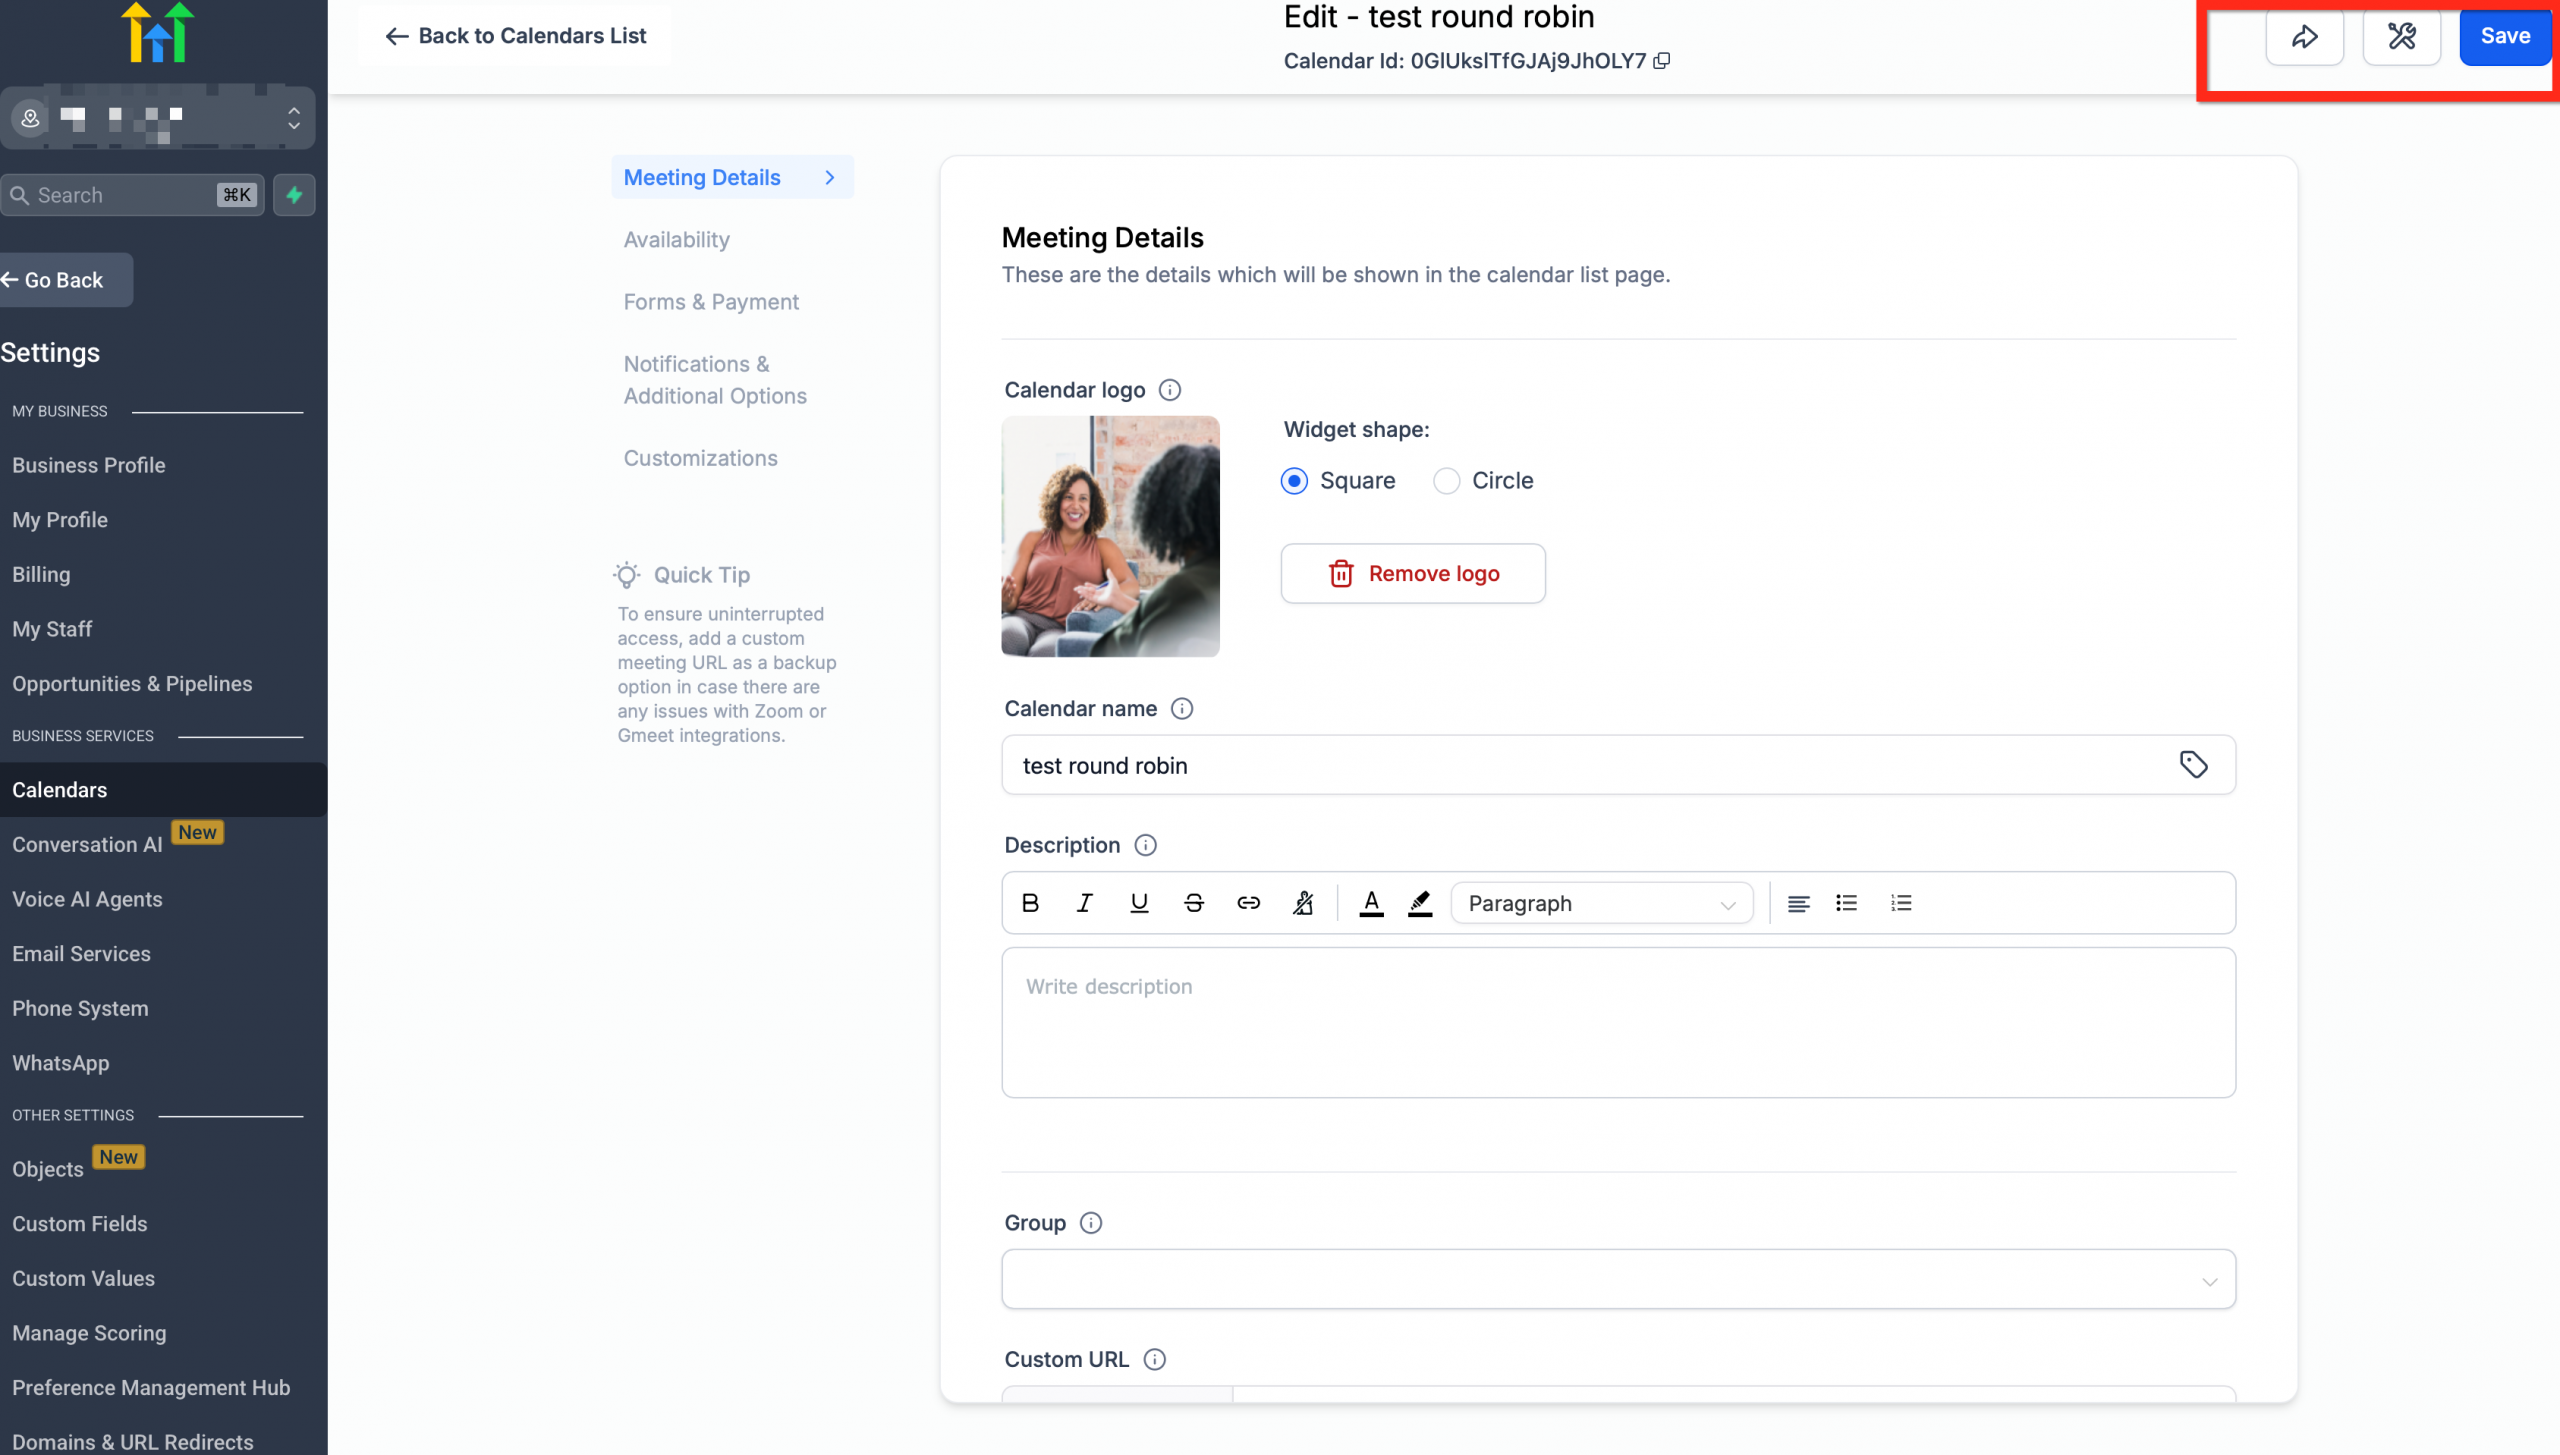
Open Settings → Calendars → [Your calendar] and click Share in the header at the top right to:
- Copy your booking link
- Create a One-off link
- Get the embed code
- Preview the calendar as visitors see it
Frequently asked questions
Where do I find my booking link now?
Open Settings → Calendars → [Your calendar] and click Share in the header at the top right. Click Copy link.
How do I generate a one-off link?
Click Share in the header and select One-off link, then follow the instructions to create and copy it.
Where is the embed code for my website?
Click Share in the header and choose Embed code to copy the HTML snippet.
Can I preview the calendar as a visitor?
Yes. Click Share and select Preview (or open the copied link in an incognito browsing window).
What does the “Calendar troubleshooting” feature do?
It runs a diagnostic to check for configuration and availability problems and guides you towards the fixes.
Do these buttons change existing links?
No. They only offer quick actions; your booking link stays the same, unless you create a new one-off link.