


Table of contents
- Introduction
- Use cases
- Step-by-step guide
- Step 1: Open the integration settings
- Step 2: Choose an embed layout type
- Set a custom modal height
- Step 3: Configure the trigger options
- Step 4: Set the activation options
- Step 5: Set the deactivation options
- Step 6: Copy and embed the form
- FAQ
Introduction
The embed options for forms give users advanced control over how and when forms appear on their websites or funnels. This feature offers the flexibility to manage form behaviour dynamically, including advanced options for activation and deactivation based on specific conditions.
Although embed codes are static once they have been added to a website, any change you make to the form, such as layout, triggers or deactivation settings, requires you to generate and replace the embed code for the changes to take effect. These options let you align your forms with your objectives, such as improving the user experience, running time-limited campaigns or collecting leads more effectively.
Use cases
-
Time-limited campaigns - Deactivate forms after a specific number of views to create a sense of urgency or exclusivity, for example for limited-time offers or seasonal promotions.
-
Lead management - Deactivate forms after a certain number of submissions to control the volume of incoming leads, making sure your team can handle every enquiry effectively.
Step-by-step guide
Step 1: Open the integration settings
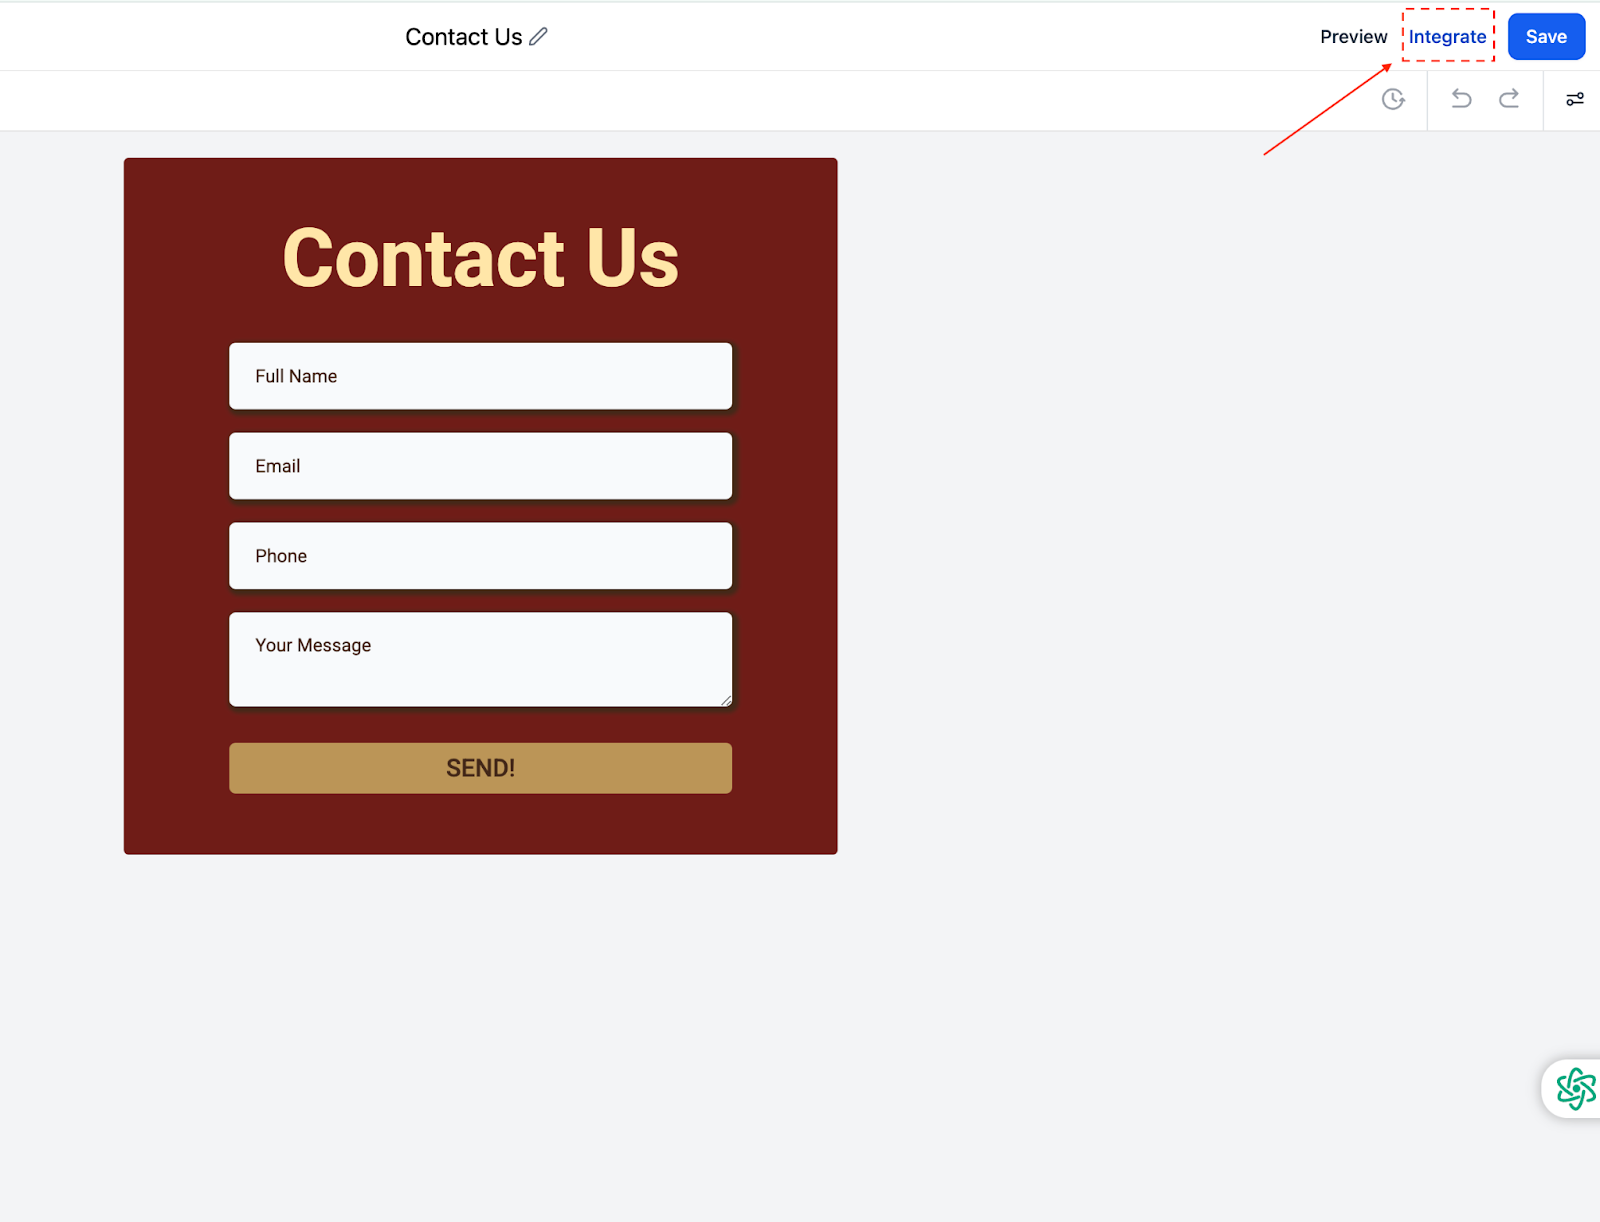
Go to the form's integration settings. Once you have created a form, click the "Integrate" button.
The following screen will appear.
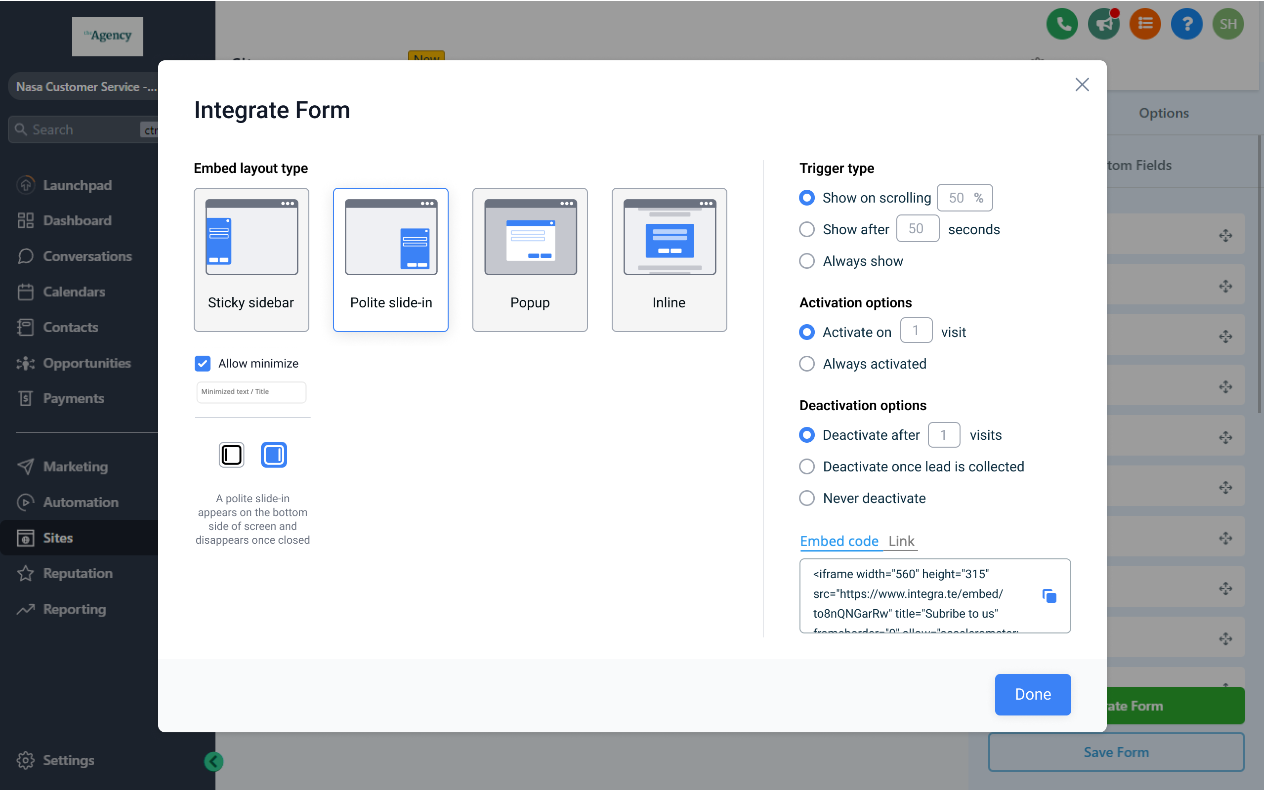
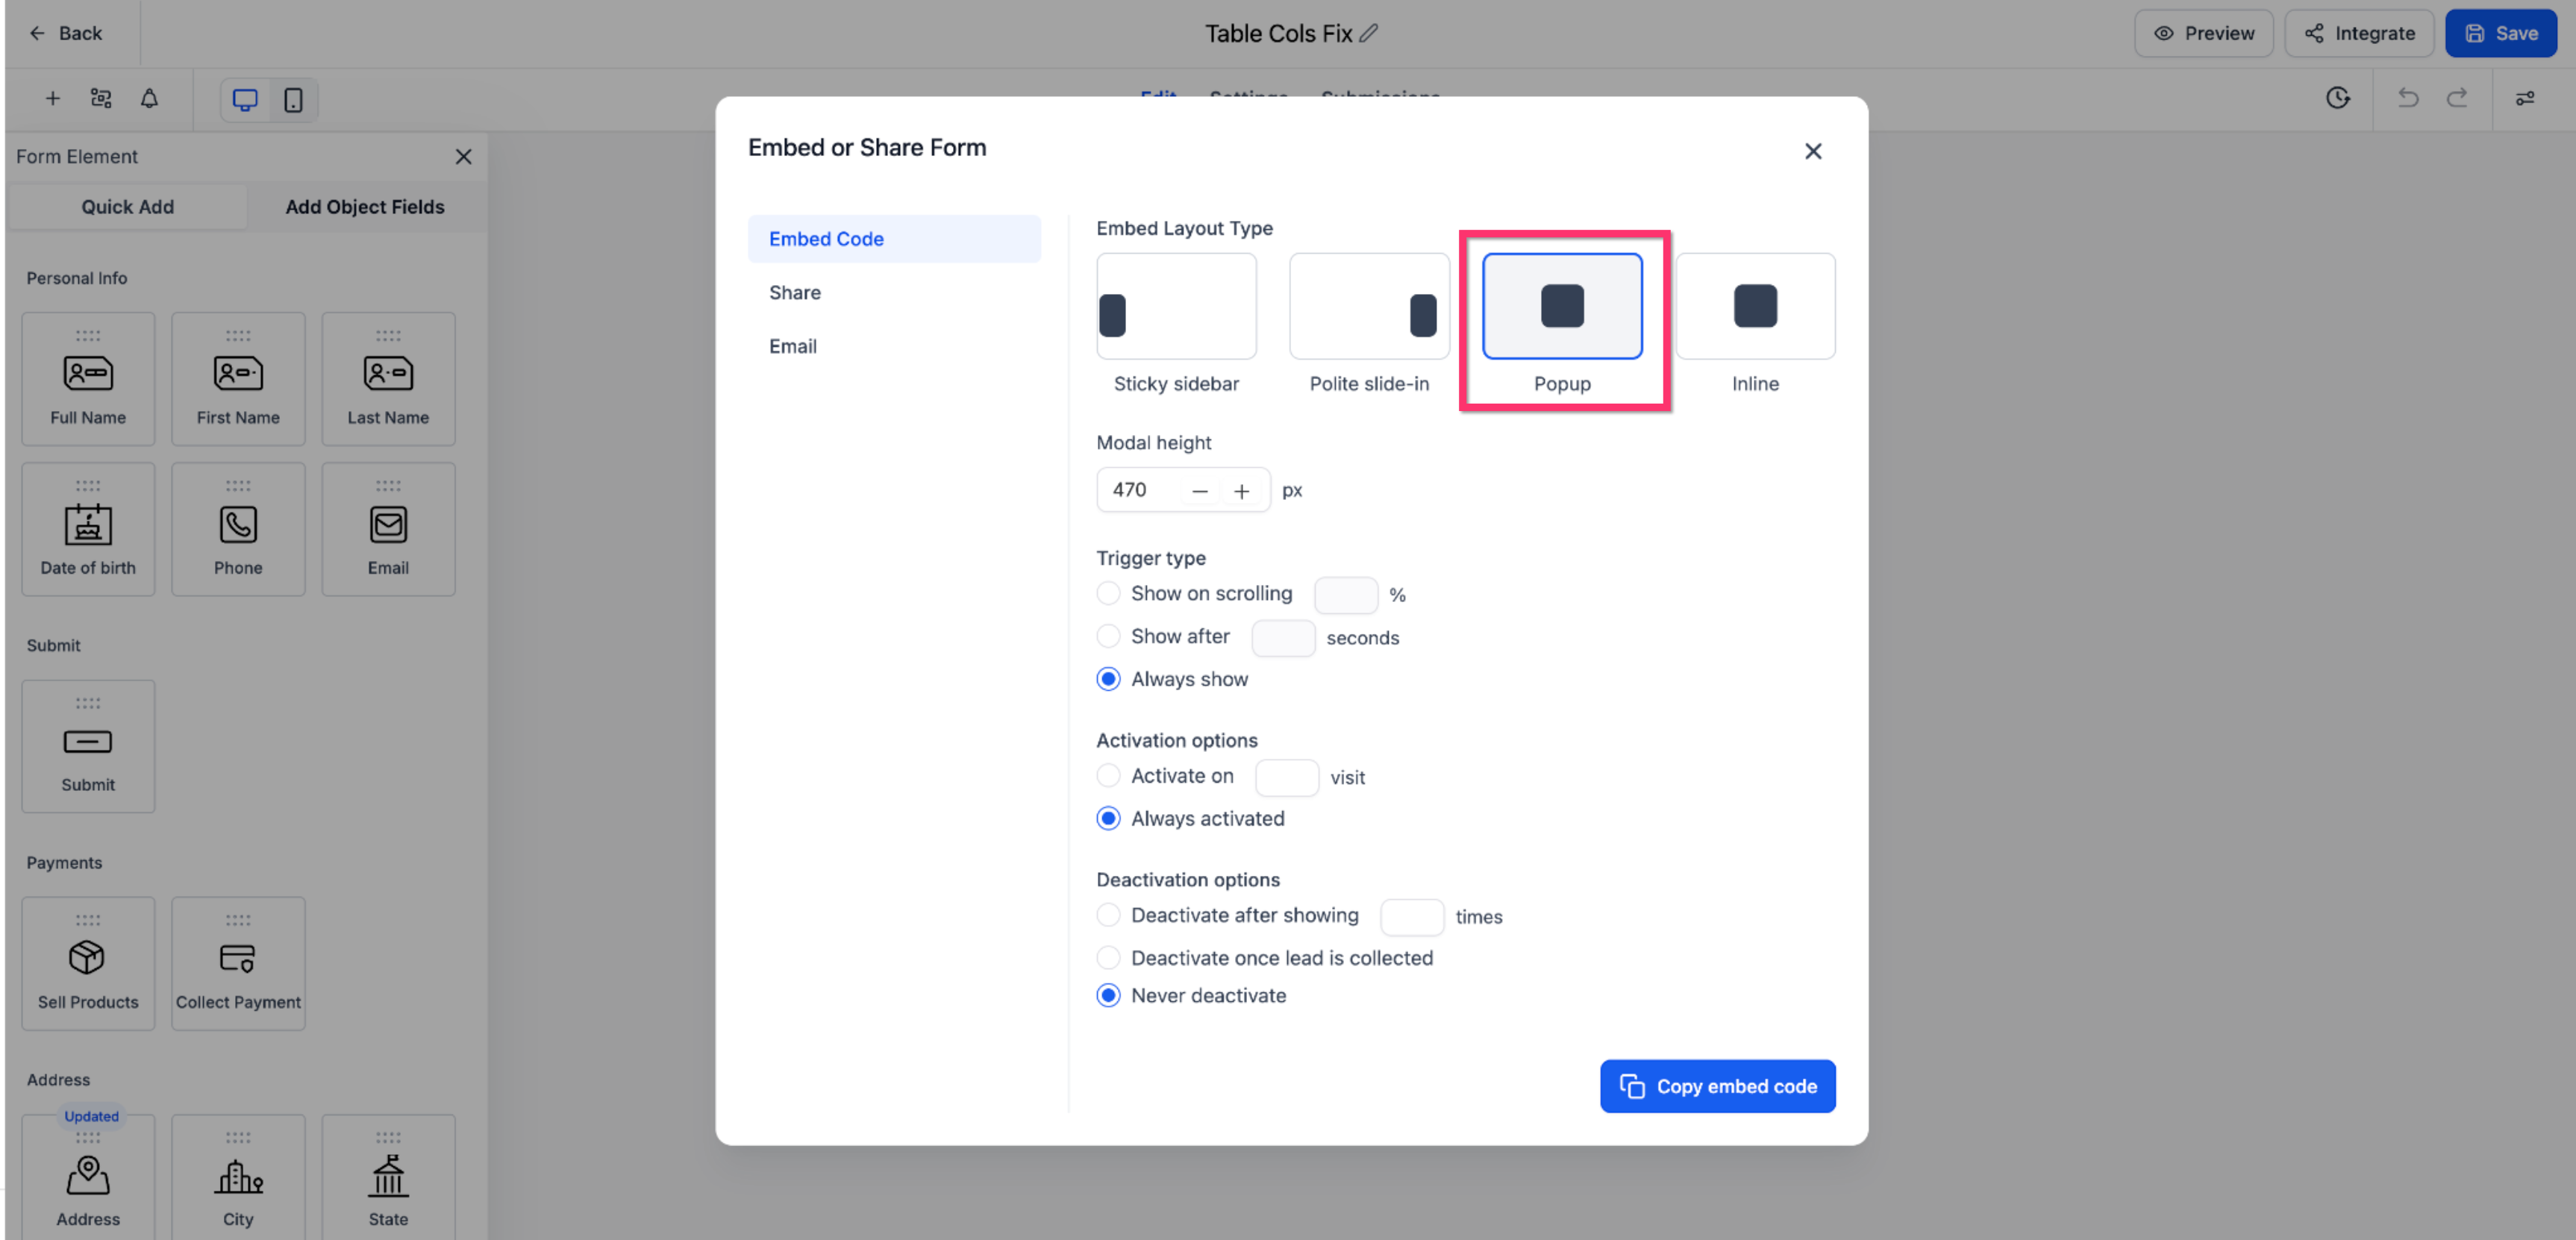
Here is a step-by-step guide on how to use all the features shown in the screenshot, including the layout types and the activation and deactivation options.
Step 2: Choose an embed layout type
You can select how the form will appear on your website or funnel. The options include:
-
Sticky sidebar - The form appears as a fixed element on the left or right of the screen, staying visible as the user scrolls the page. It can be minimised or maximised as required.
Maximised
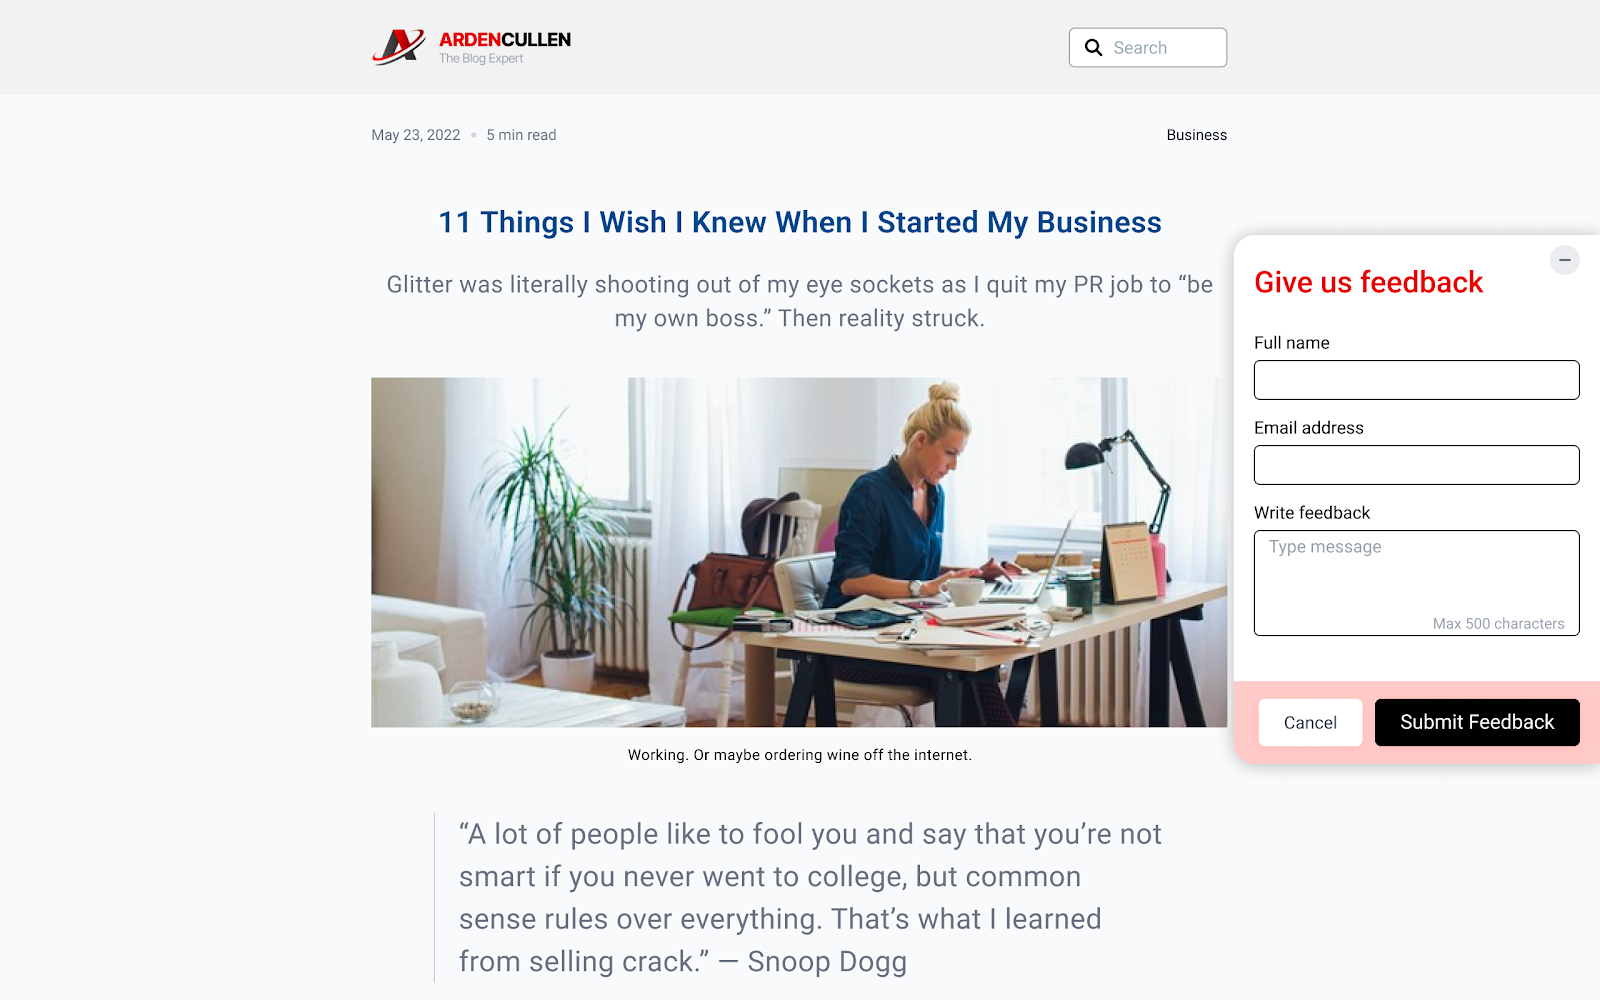
Minimised

-
Discreet slide-in: The form slides in from the left or the right of the screen, catching the user's attention in a non-invasive way. It can also be minimised so it does not disturb browsing.
Maximised:
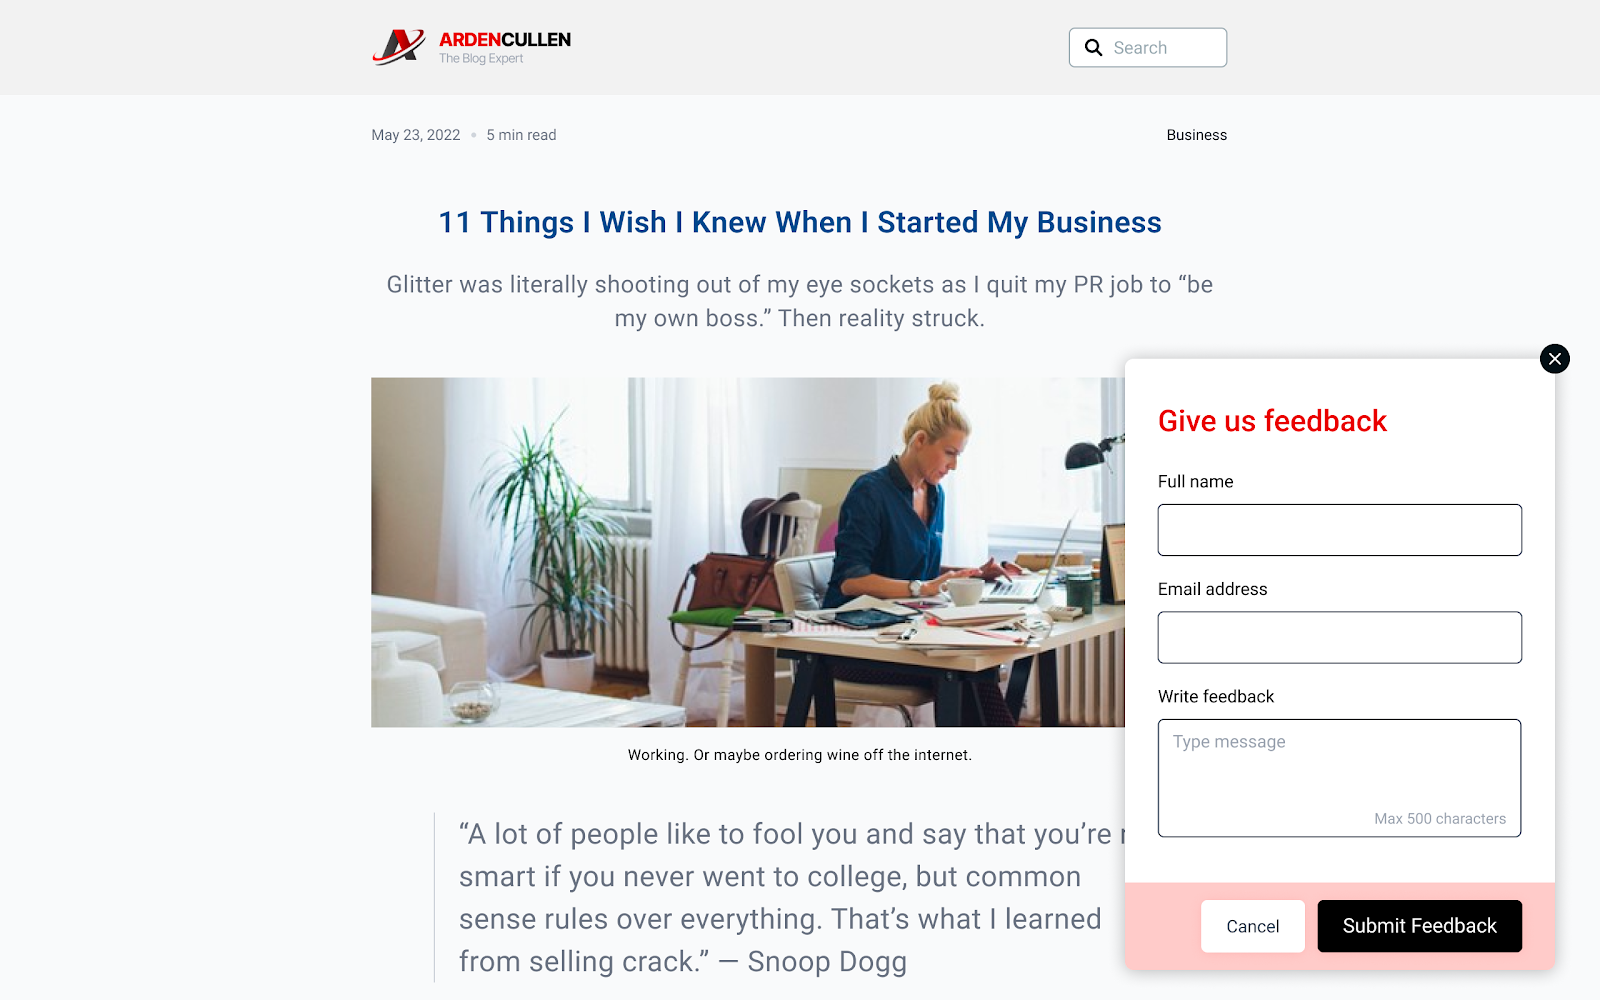
Minimised:

-
Popup - The form appears in a modal window that overlays the page content. It captures attention immediately but has to be closed to view the content underneath.
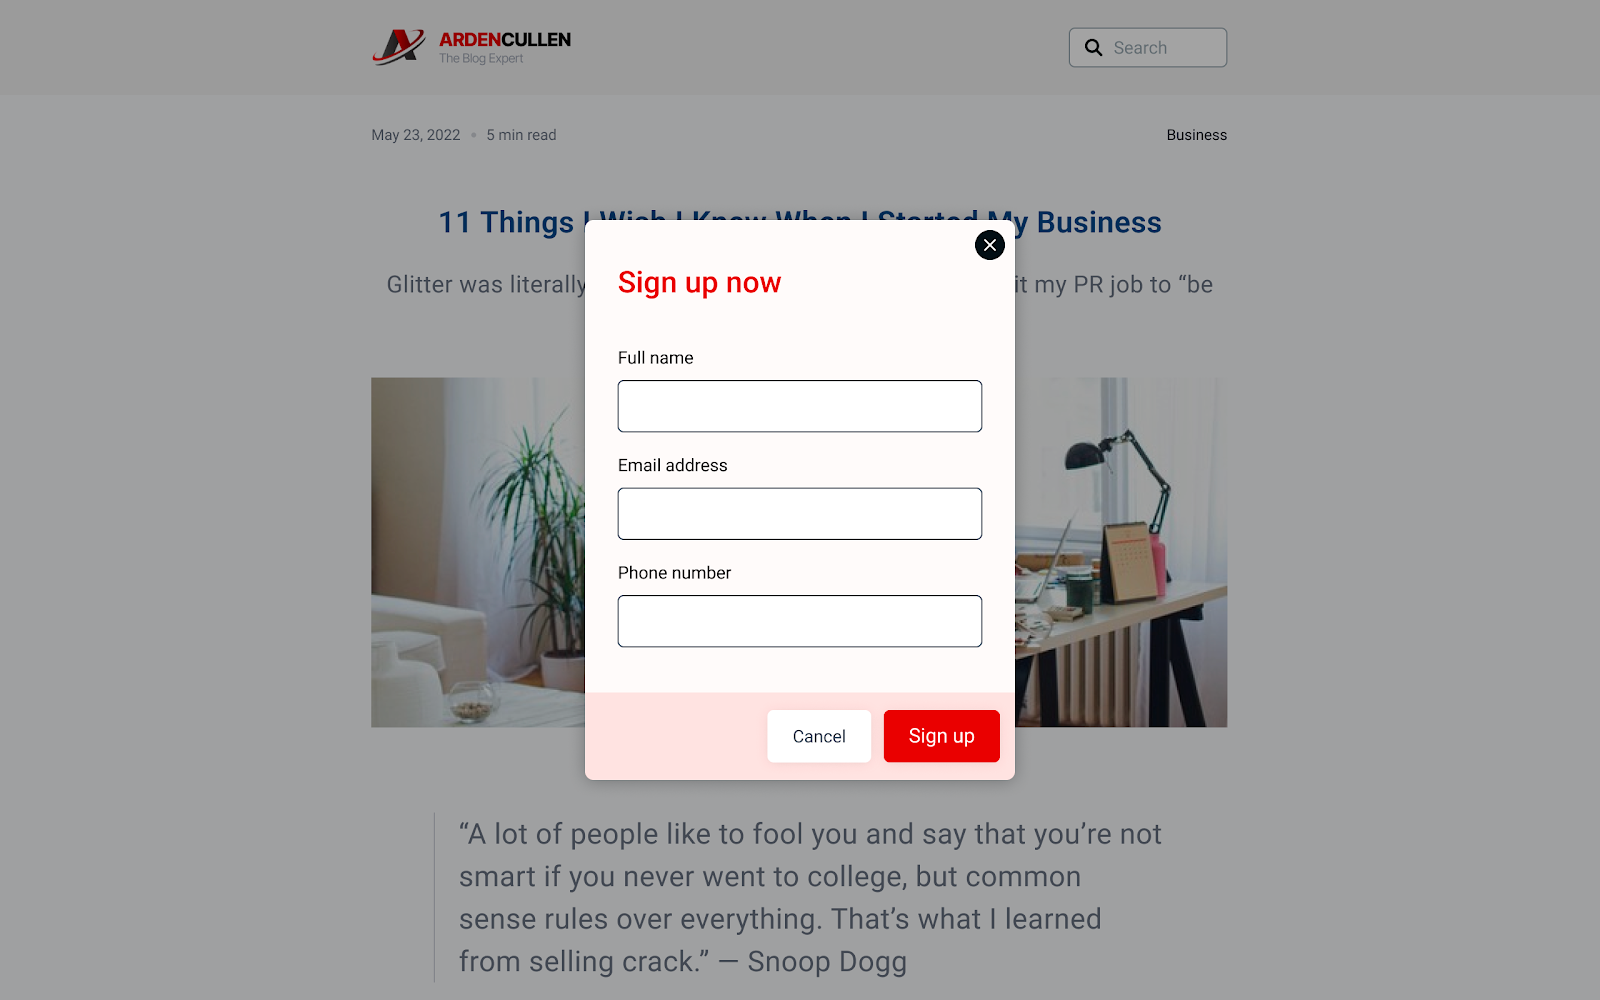
-
Inline: The form is embedded directly into the page content as a native element. It does not interrupt the user experience.
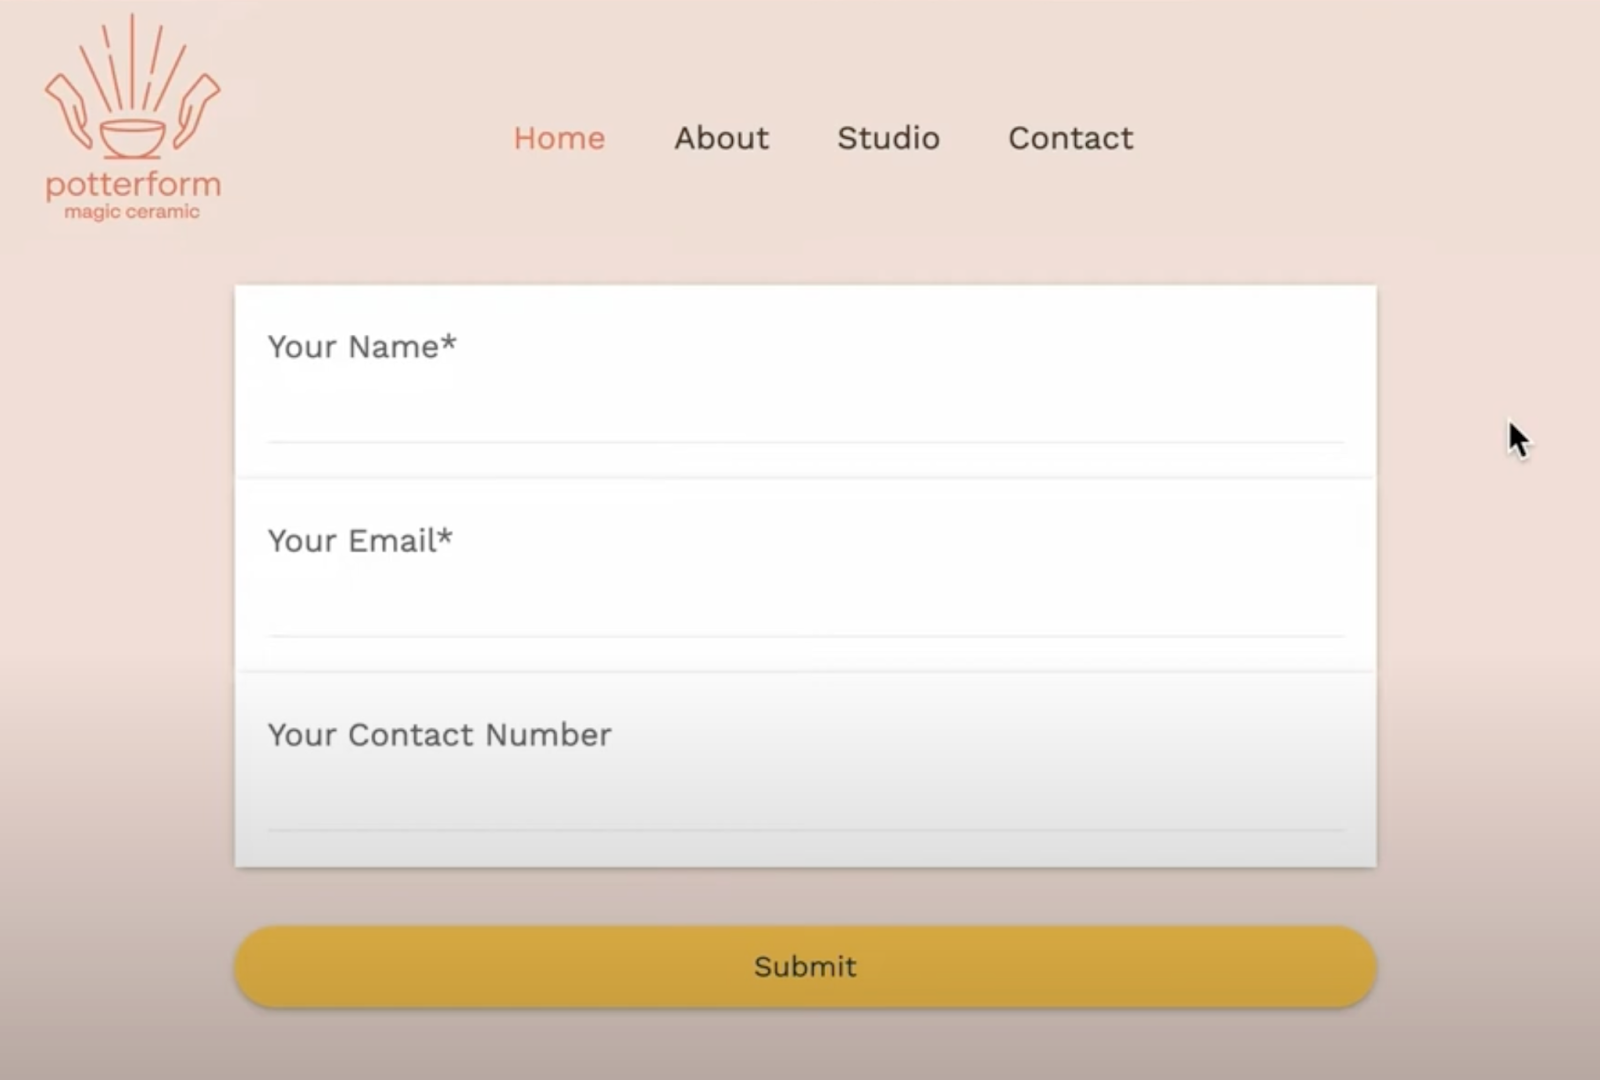
Set a custom modal height
The custom modal height gives you greater control over how embedded forms appear on external pages. This helps prevent non-inline forms from looking too large or spilling out of the host page, while leaving the behaviour of existing embeds unchanged.
You can set a modal height for these layout types:
- Popup
- Discreet slide-in
- Sticky sidebar
The Inline layout does not show this option.
How to configure the modal height
- Open your form and click Integrate once the form has loaded.
- Select Embed code.
- Choose one of these layouts:
- Popup
- Discreet slide-in
- Sticky sidebar
- Enter the height you want in the Modal height field.
- Click Copy embed code and paste it onto your website.
Important details
- The default modal height is 500 px.
- The field accepts any whole number equal to or greater than 1.
- Existing embeds without this setting will continue to work as before.
- The field is hidden for Inline layouts.
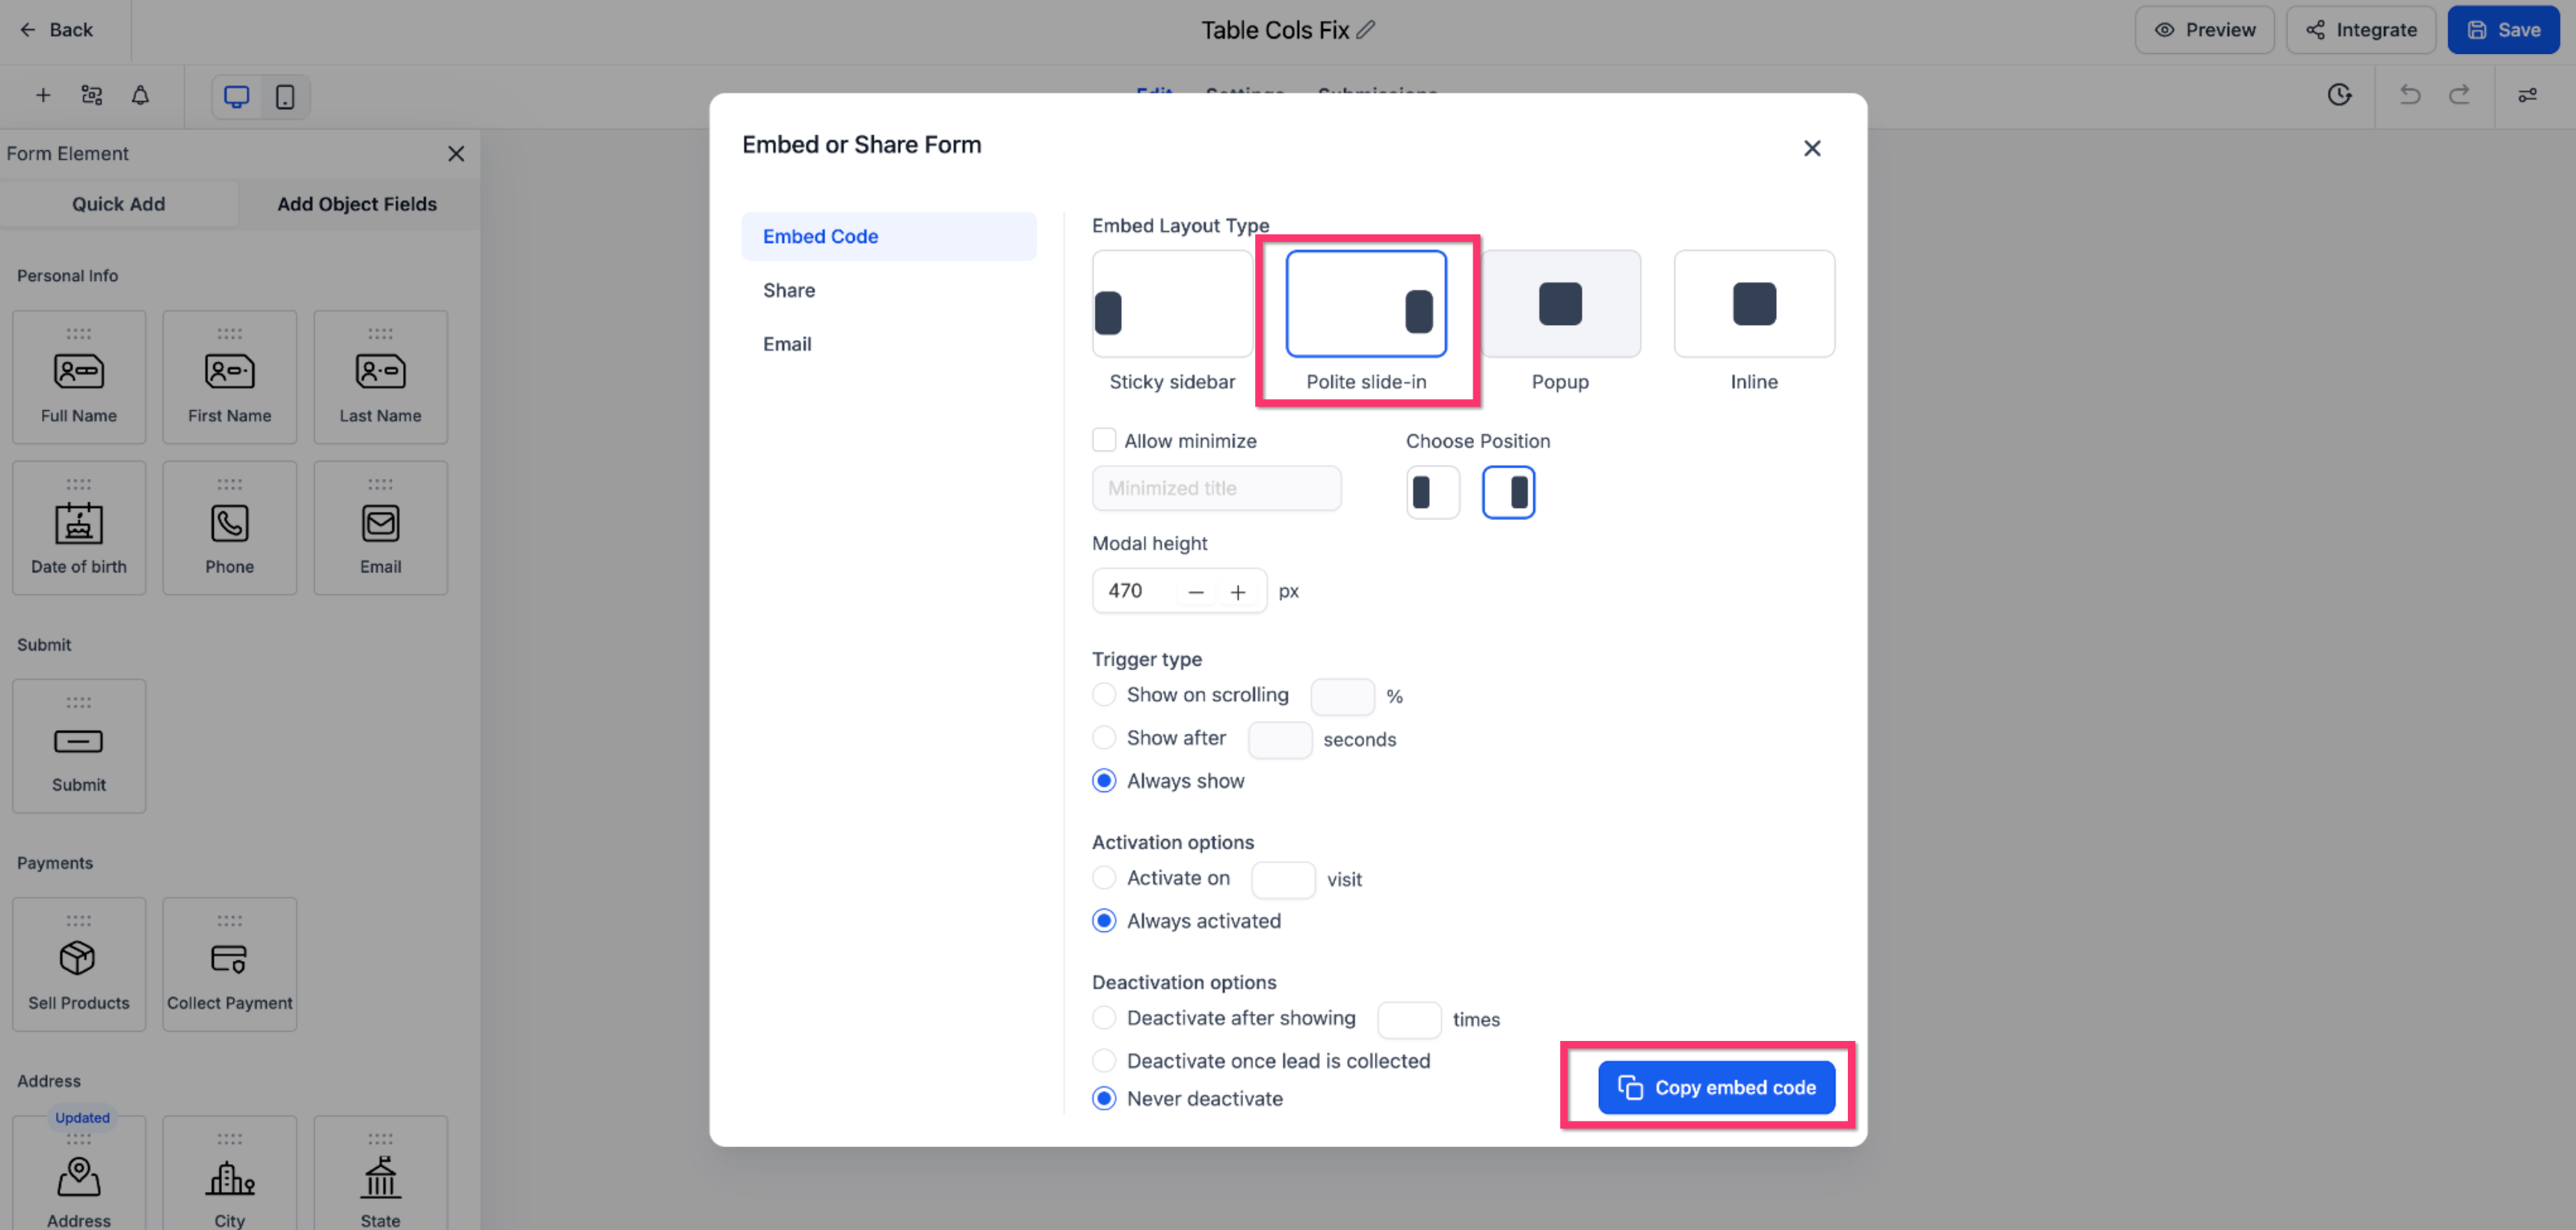
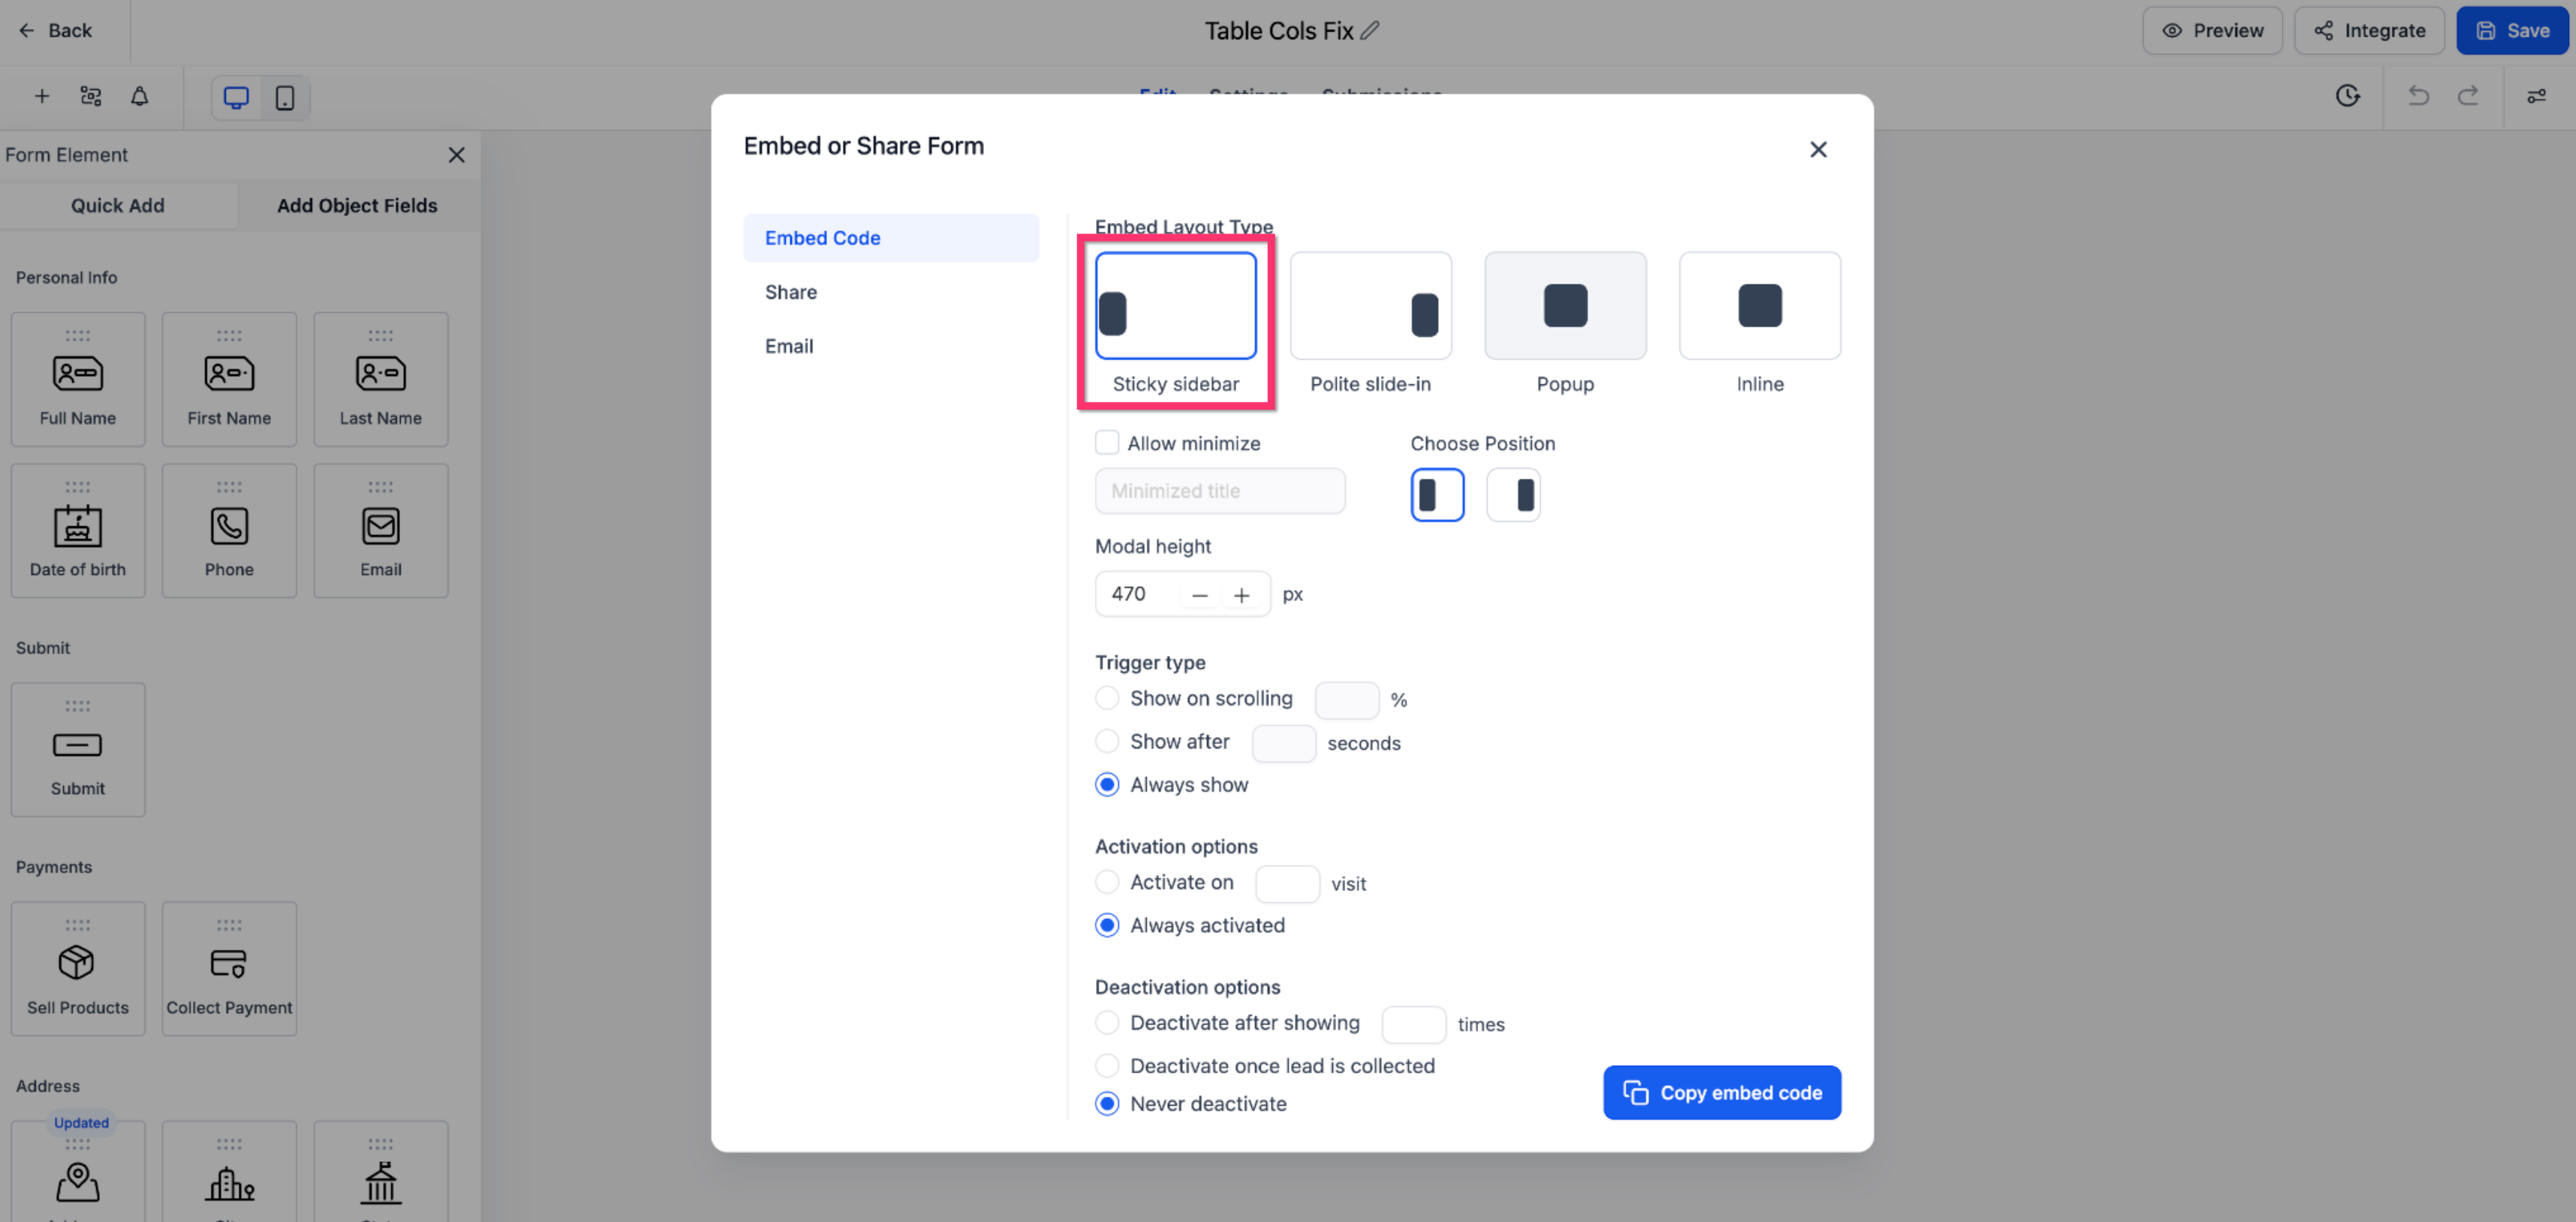
Step 3: Configure the trigger options
The trigger options control when the form appears. Select one of the following:
-
Show after scrolling [X]% → The form appears once the user has scrolled a certain percentage of the page (e.g. 50%).
-
Show after [X] seconds → The form appears after a delay (e.g. 5 seconds).
-
Always show → The form is always visible and does not depend on user interaction.
Step 4: Set the activation options
Define when the form should become active:
-
Activate on visit [X] → The form is only displayed once the user has visited the page a set number of times (e.g. on their third visit).
-
Always active → The form stays active at all times.
Step 5: Set the deactivation options
Decide when the form should stop being displayed:
-
Deactivate after showing it [X] times → Stops displaying the form once it has been shown a specific number of times (e.g. 3 times).
-
Deactivate once the lead has been collected → The form deactivates automatically once the user submits their information.
-
Never deactivate → The form stays active and visible indefinitely.
Step 6: Copy and embed the form
-
Click "Copy embed code" to get the HTML code for embedding the form on your website.
- Paste this code into your website's HTML wherever you want the form to appear.
-
Alternatively, click "Copy form link" to get a direct URL to the form.
- Use this link in emails, on social media or on other platforms where you want users to reach the form.
FAQ
How do the triggers and the deactivation options work together?
The triggers determine when the form appears (for example, after a delay or a scroll). The deactivation options control when the form stops appearing (for example, after a specific number of views or once a lead has been collected). Both can work at the same time to create a dynamic user experience.
Do I need to update existing embed codes for the new features to work?
Yes, to use the new embed options (for example, triggers or deactivation), you need to update the integration by generating a new embed code from the "Integrate form" section and replacing the old code on your site.
Can embedded forms work dynamically if I change the options?
Embed codes are static once they have been added to a website. This means any change you make to the form requires you to generate and replace the embed code with the updated version for the changes to take effect.