


Table of contents
- How to create a new contact
- How to edit an existing contact
- How to delete an existing contact
- How to create new custom fields
How to create a new contact
Add your first contact effortlessly and start building meaningful relationships straight away. Building your network starts with this simple step.
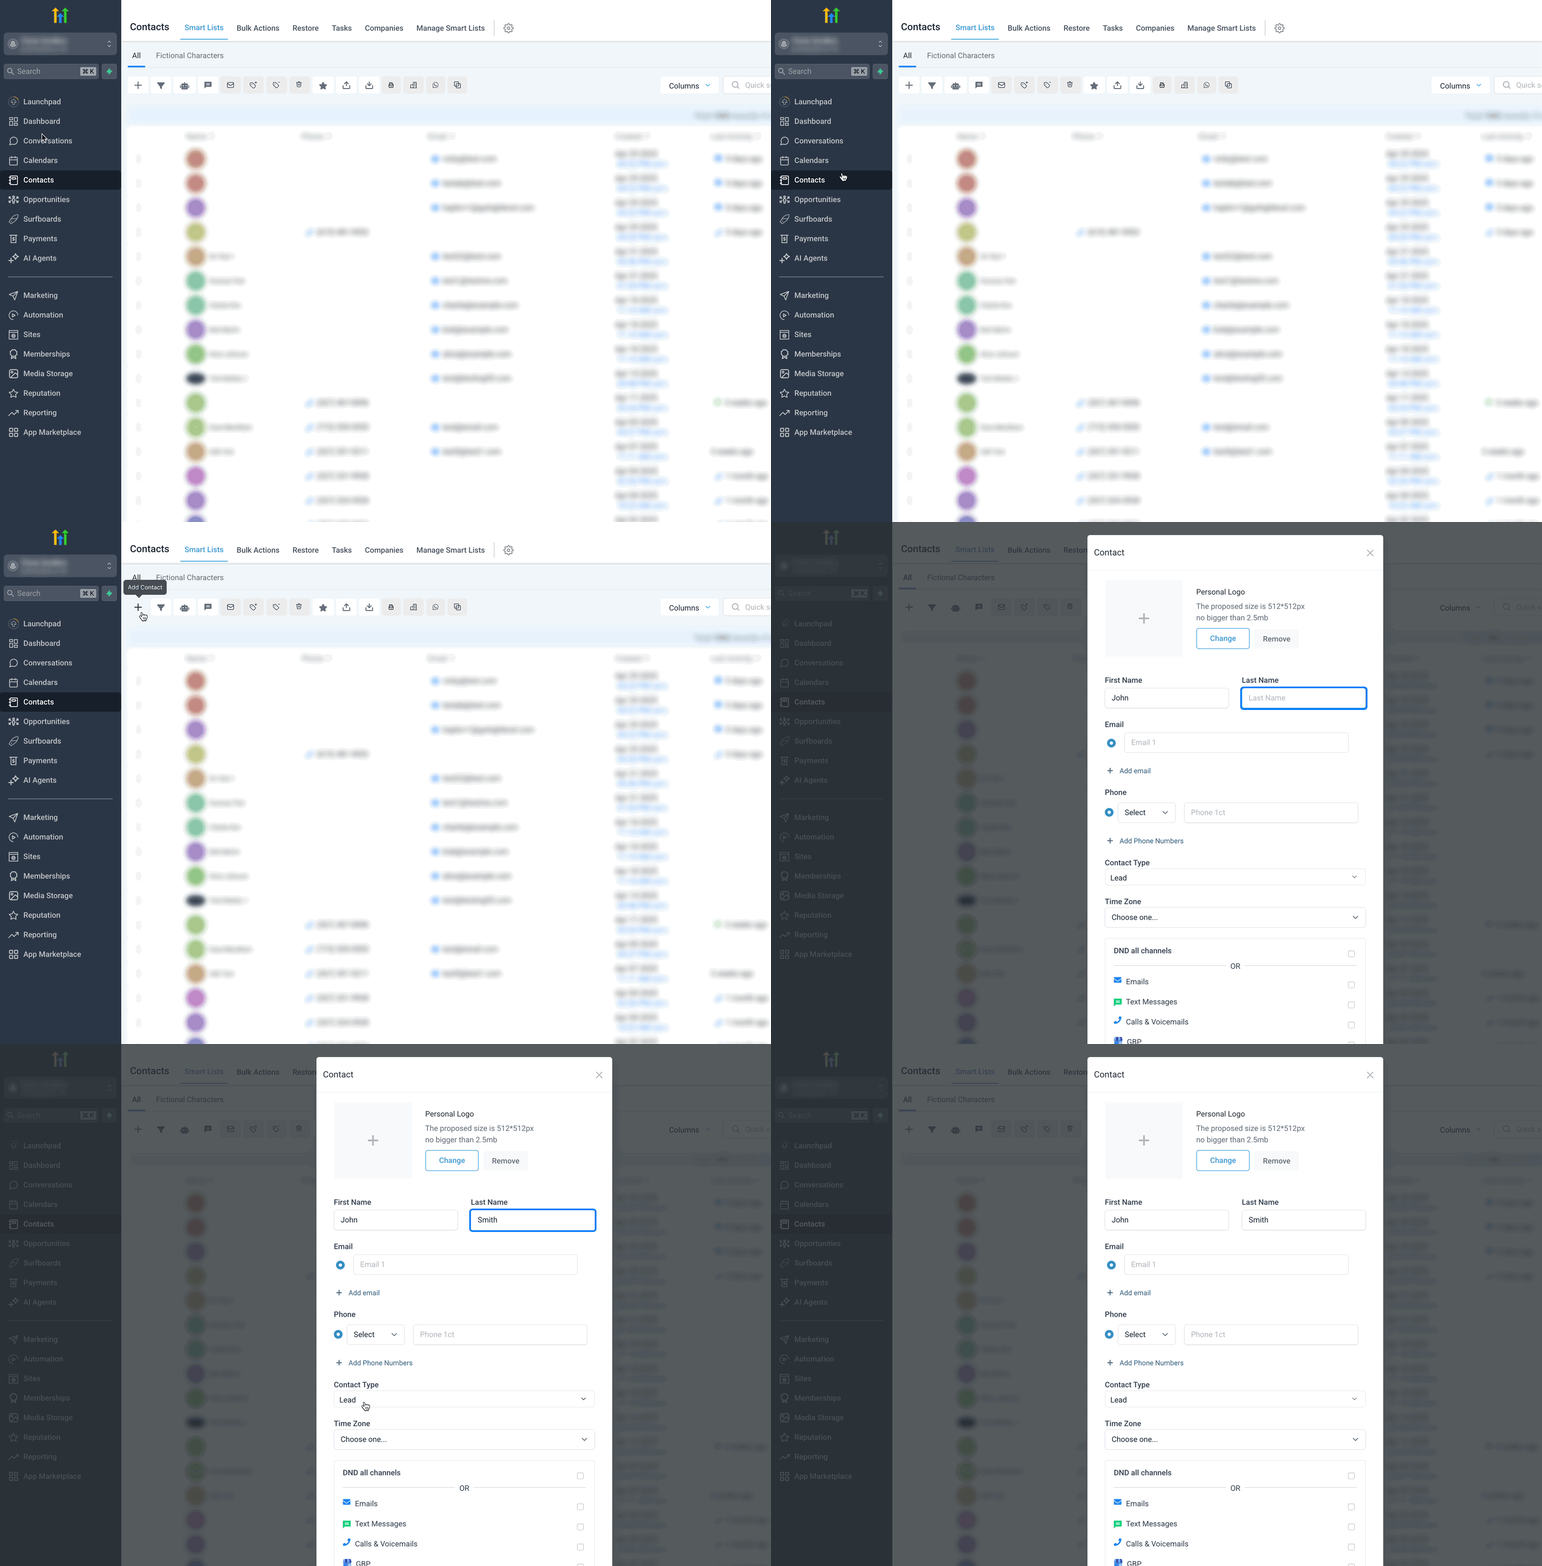
- Go to Contacts in the main menu.
- Click the Add contact button.
- Enter the contact details (name, email, phone number and so on). Remember, the more information you provide, the easier it will be to personalise your communications. If you cannot see the field you need, you can create it by following the steps for custom fields.
- Click Save.
Did you know? When a new lead fills in a form or a survey, a new contact is created automatically!
How to edit an existing contact
Keep your contact information up to date and accurate. Editing contacts is quick and simple, so your data is always correct.
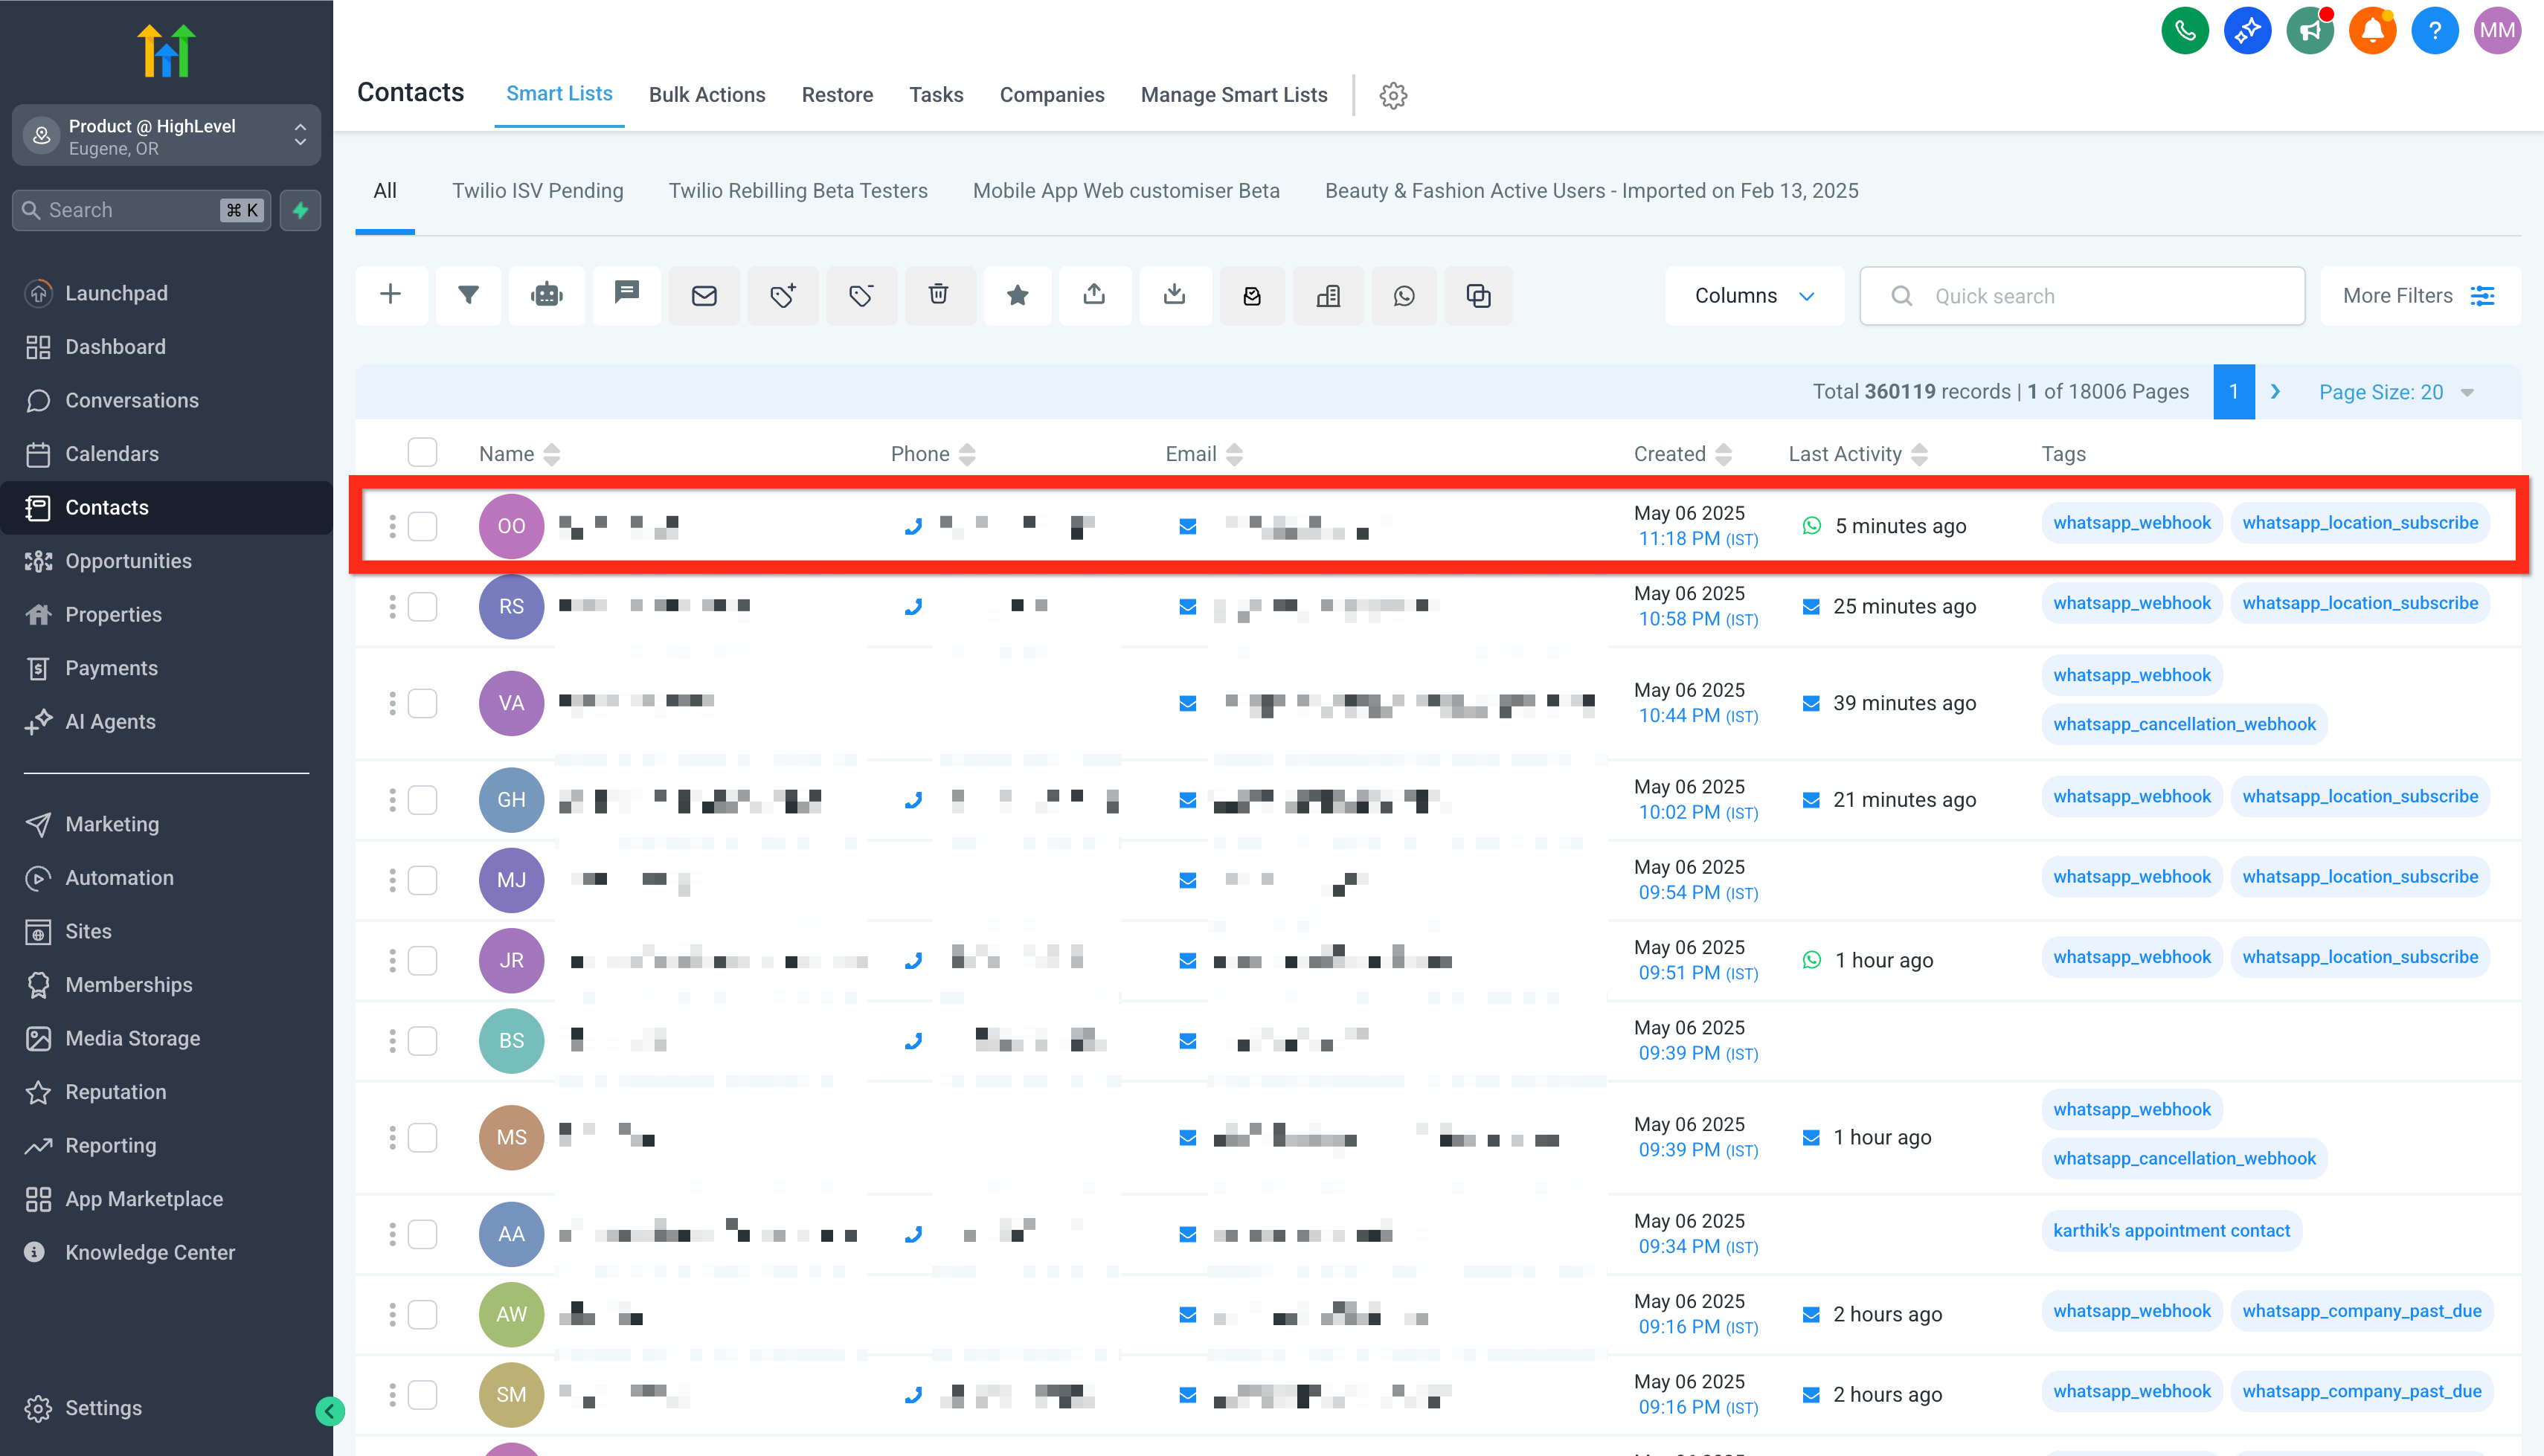
- Go to Contacts.
- Click a contact’s row to open the contact record you want to edit.
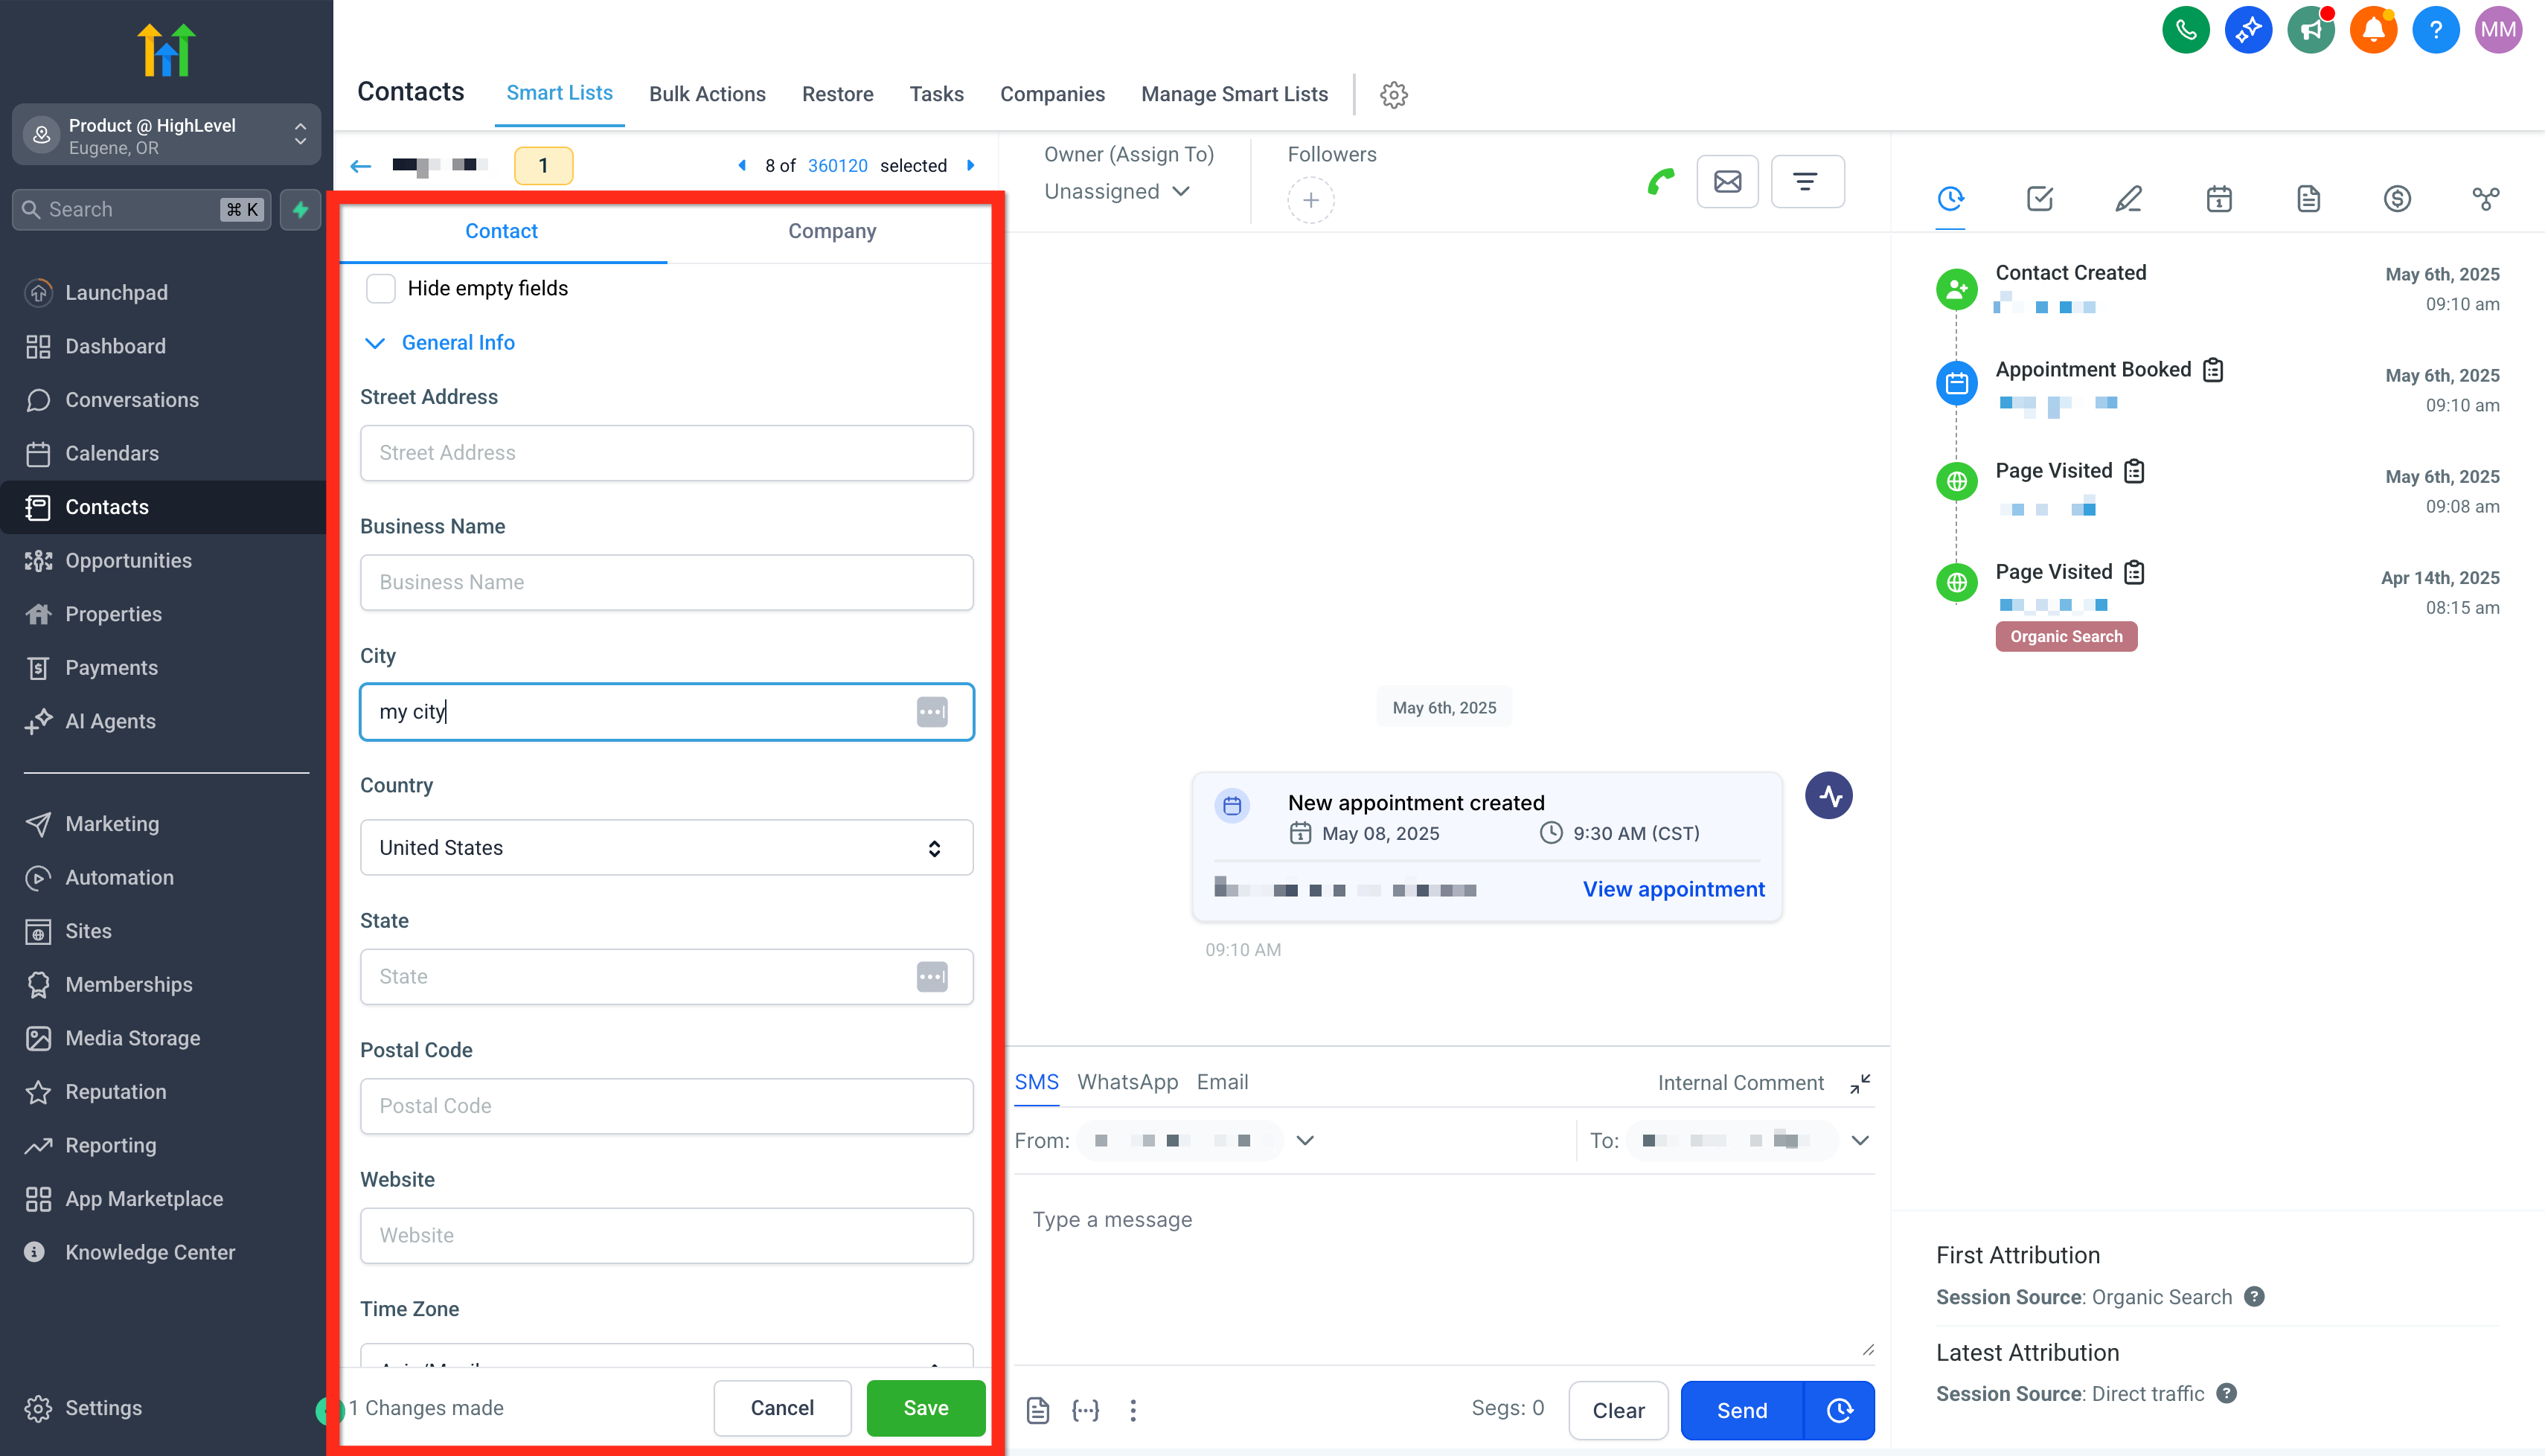
3. Make the changes you need in the left-hand column.
If you cannot find a specific field, you can create it as a custom field. Click Save to apply your changes.
How to delete an existing contact
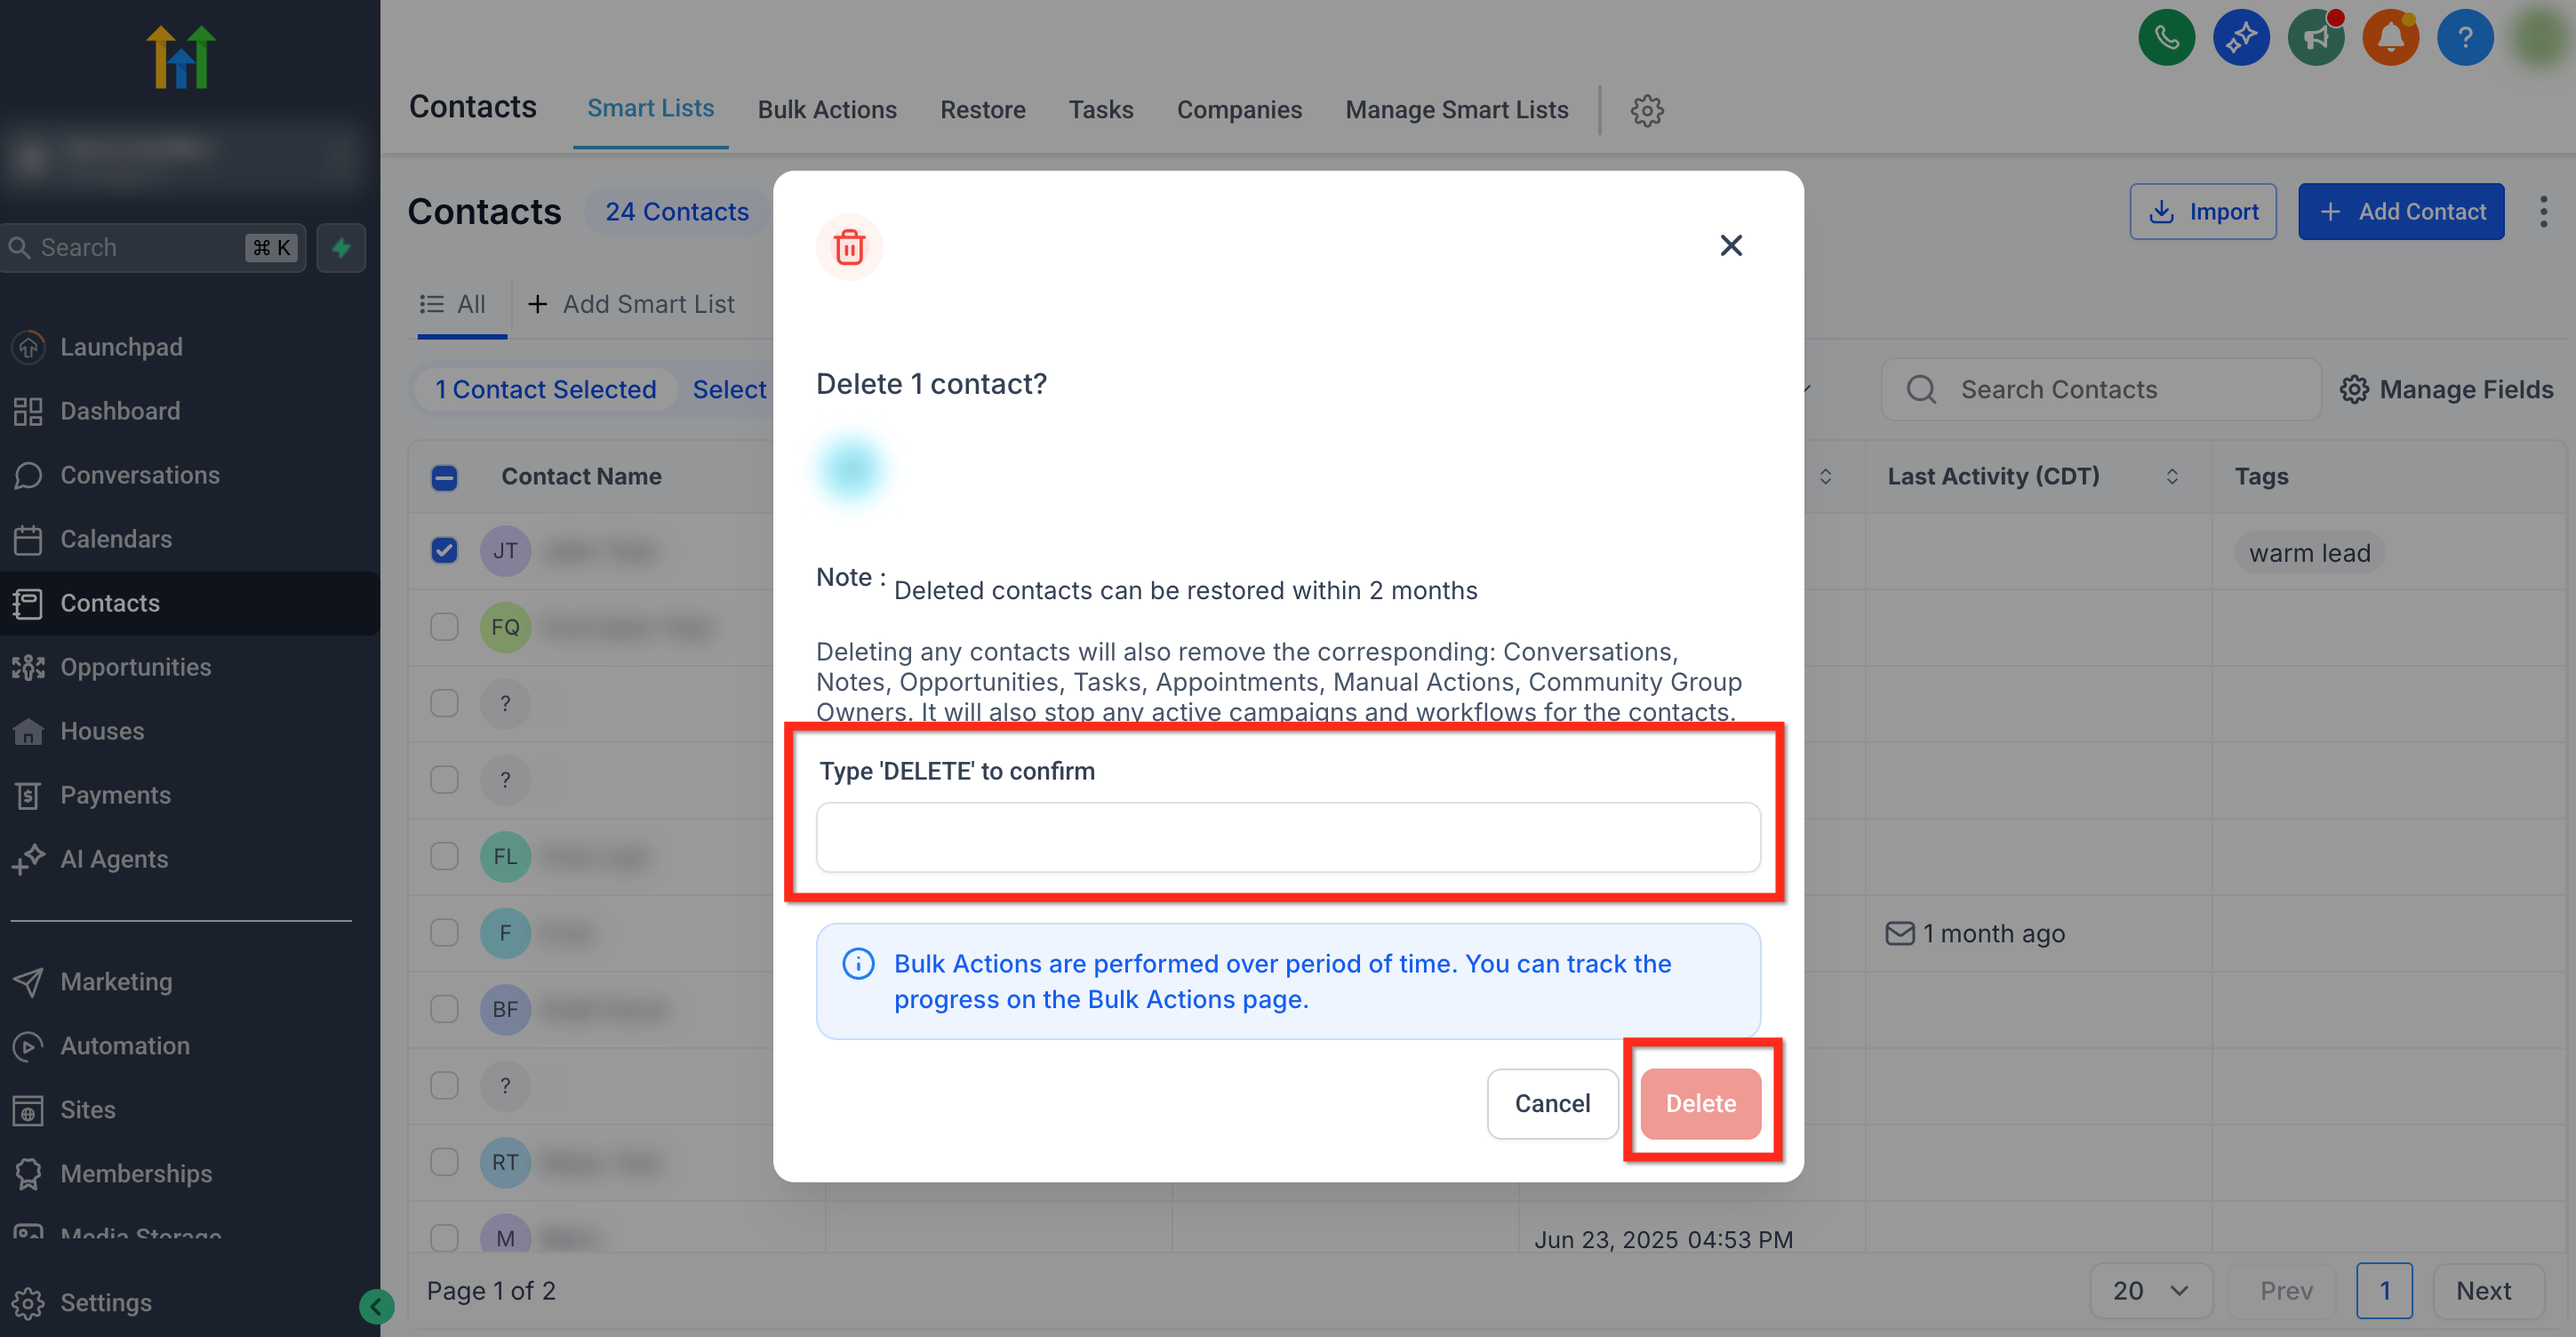
Deleting a contact will also remove the conversations, notes, opportunities, tasks, appointments and manual actions associated with it. It will also stop every campaign and workflow that is active for that contact.
Deleted contacts can be restored within 2 months. Follow these steps to delete a contact:
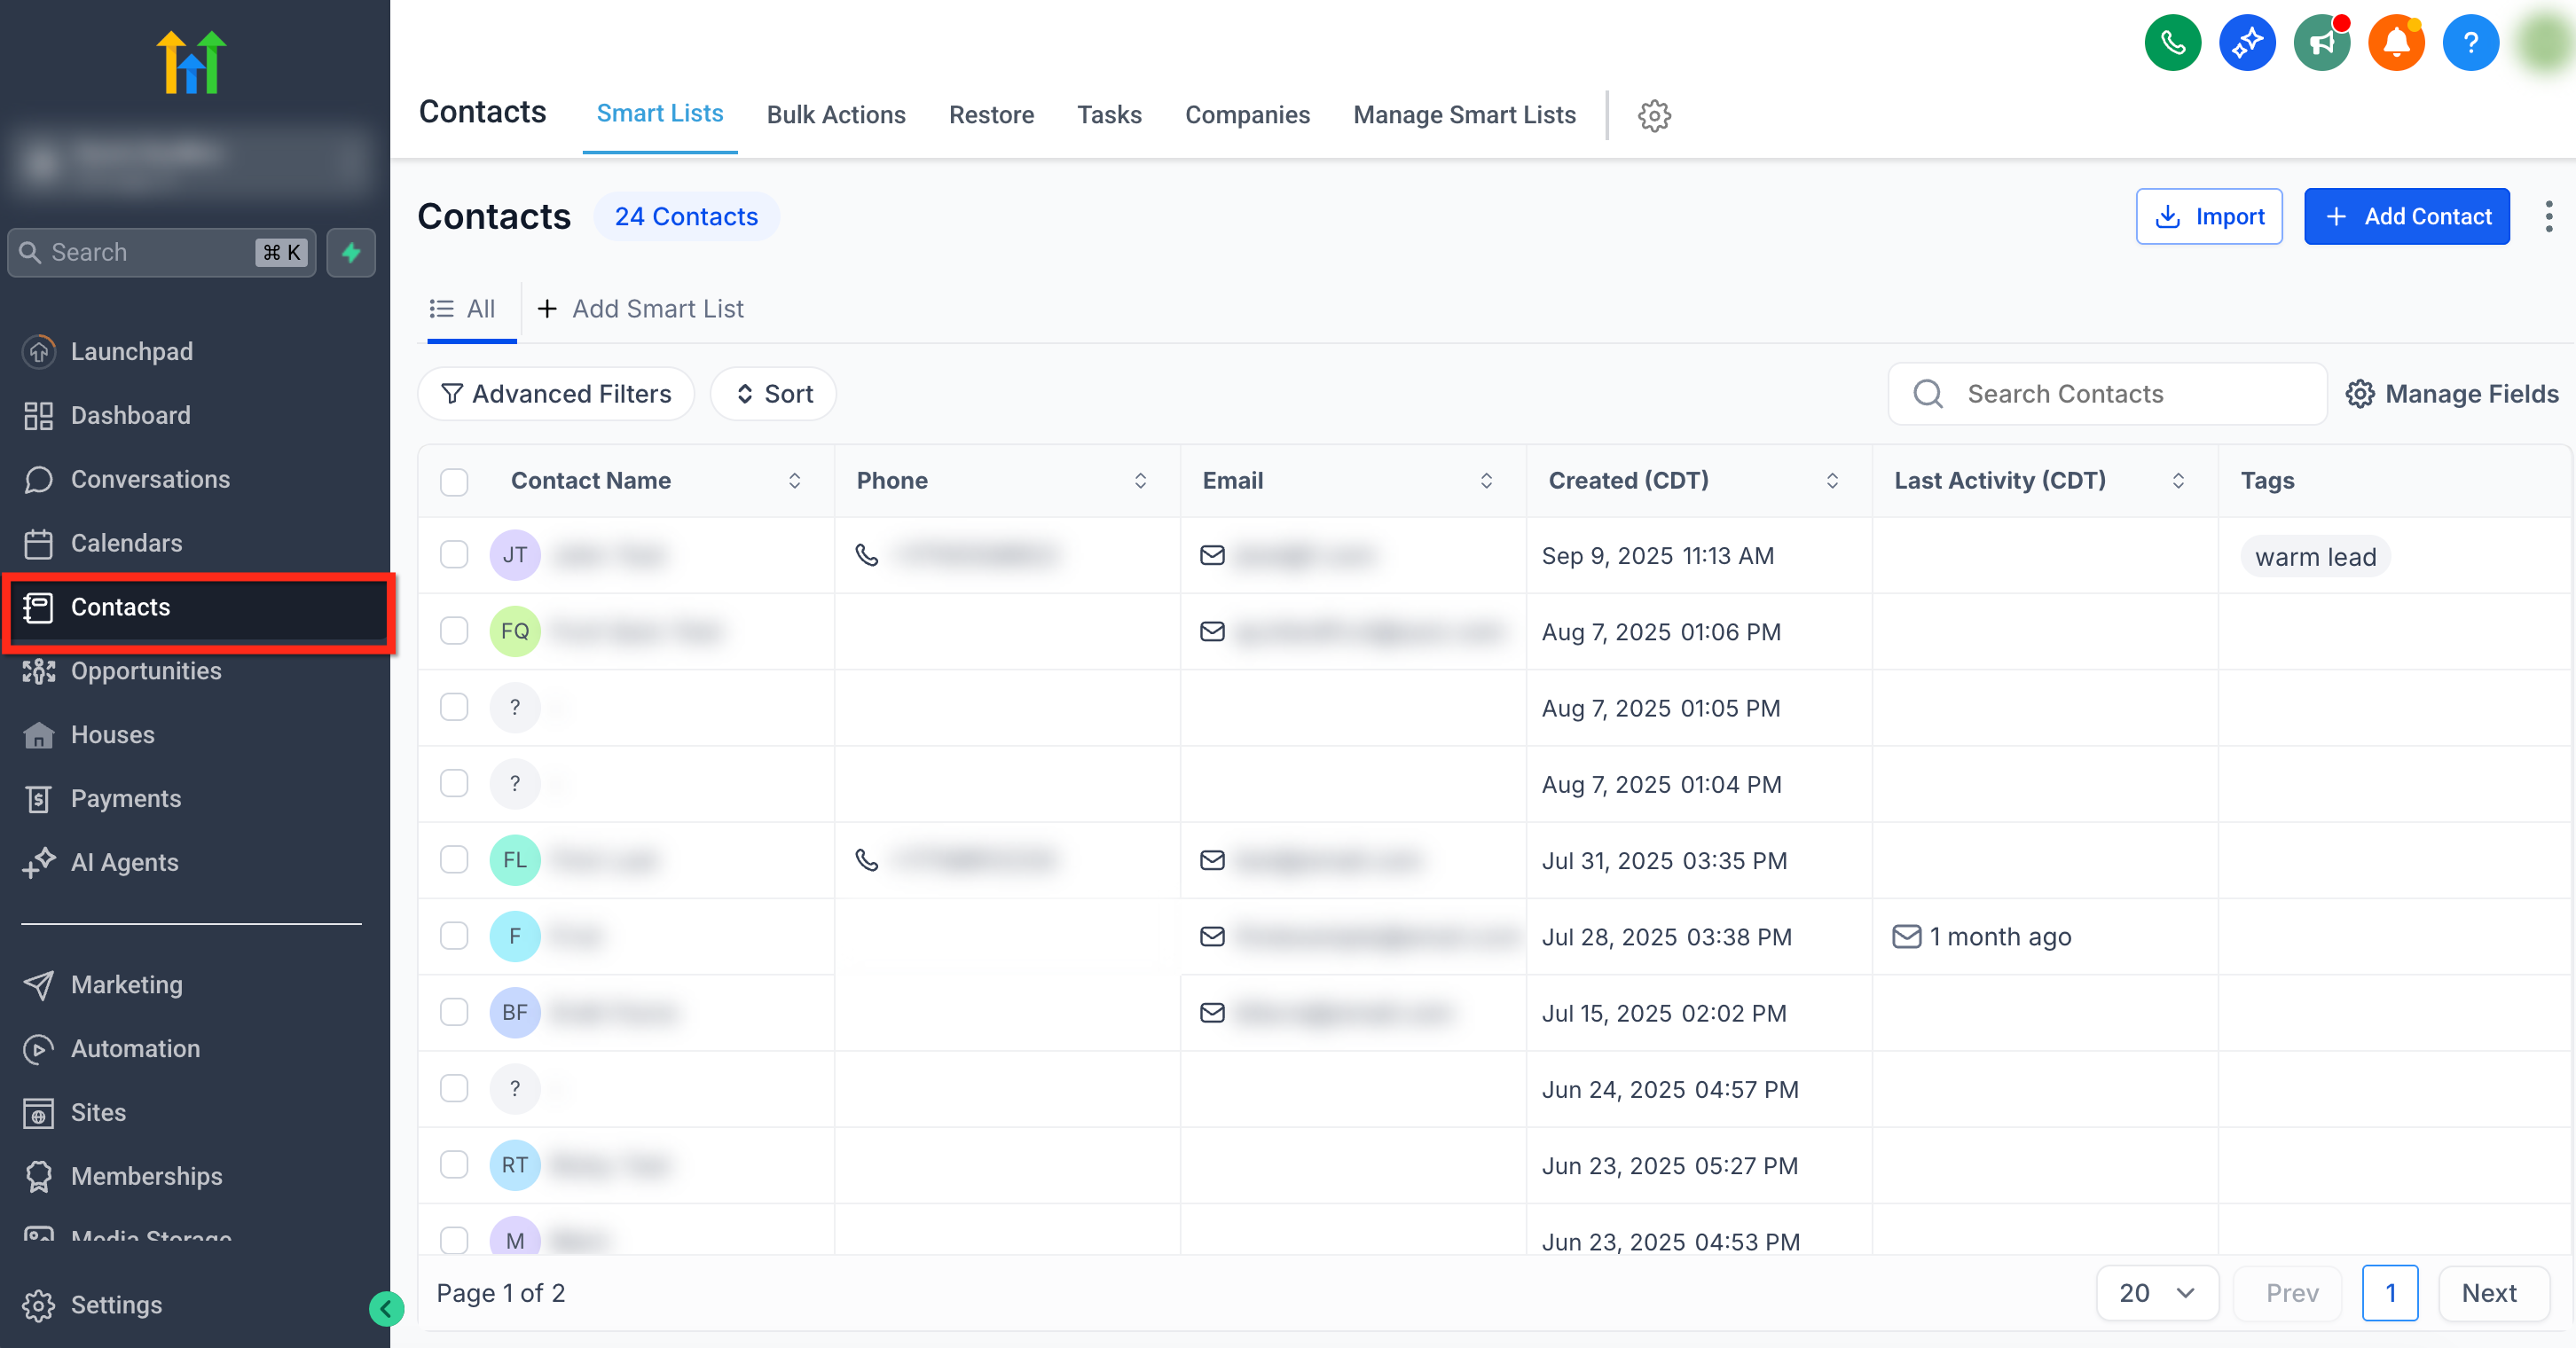
- Go to Contacts in the main menu.
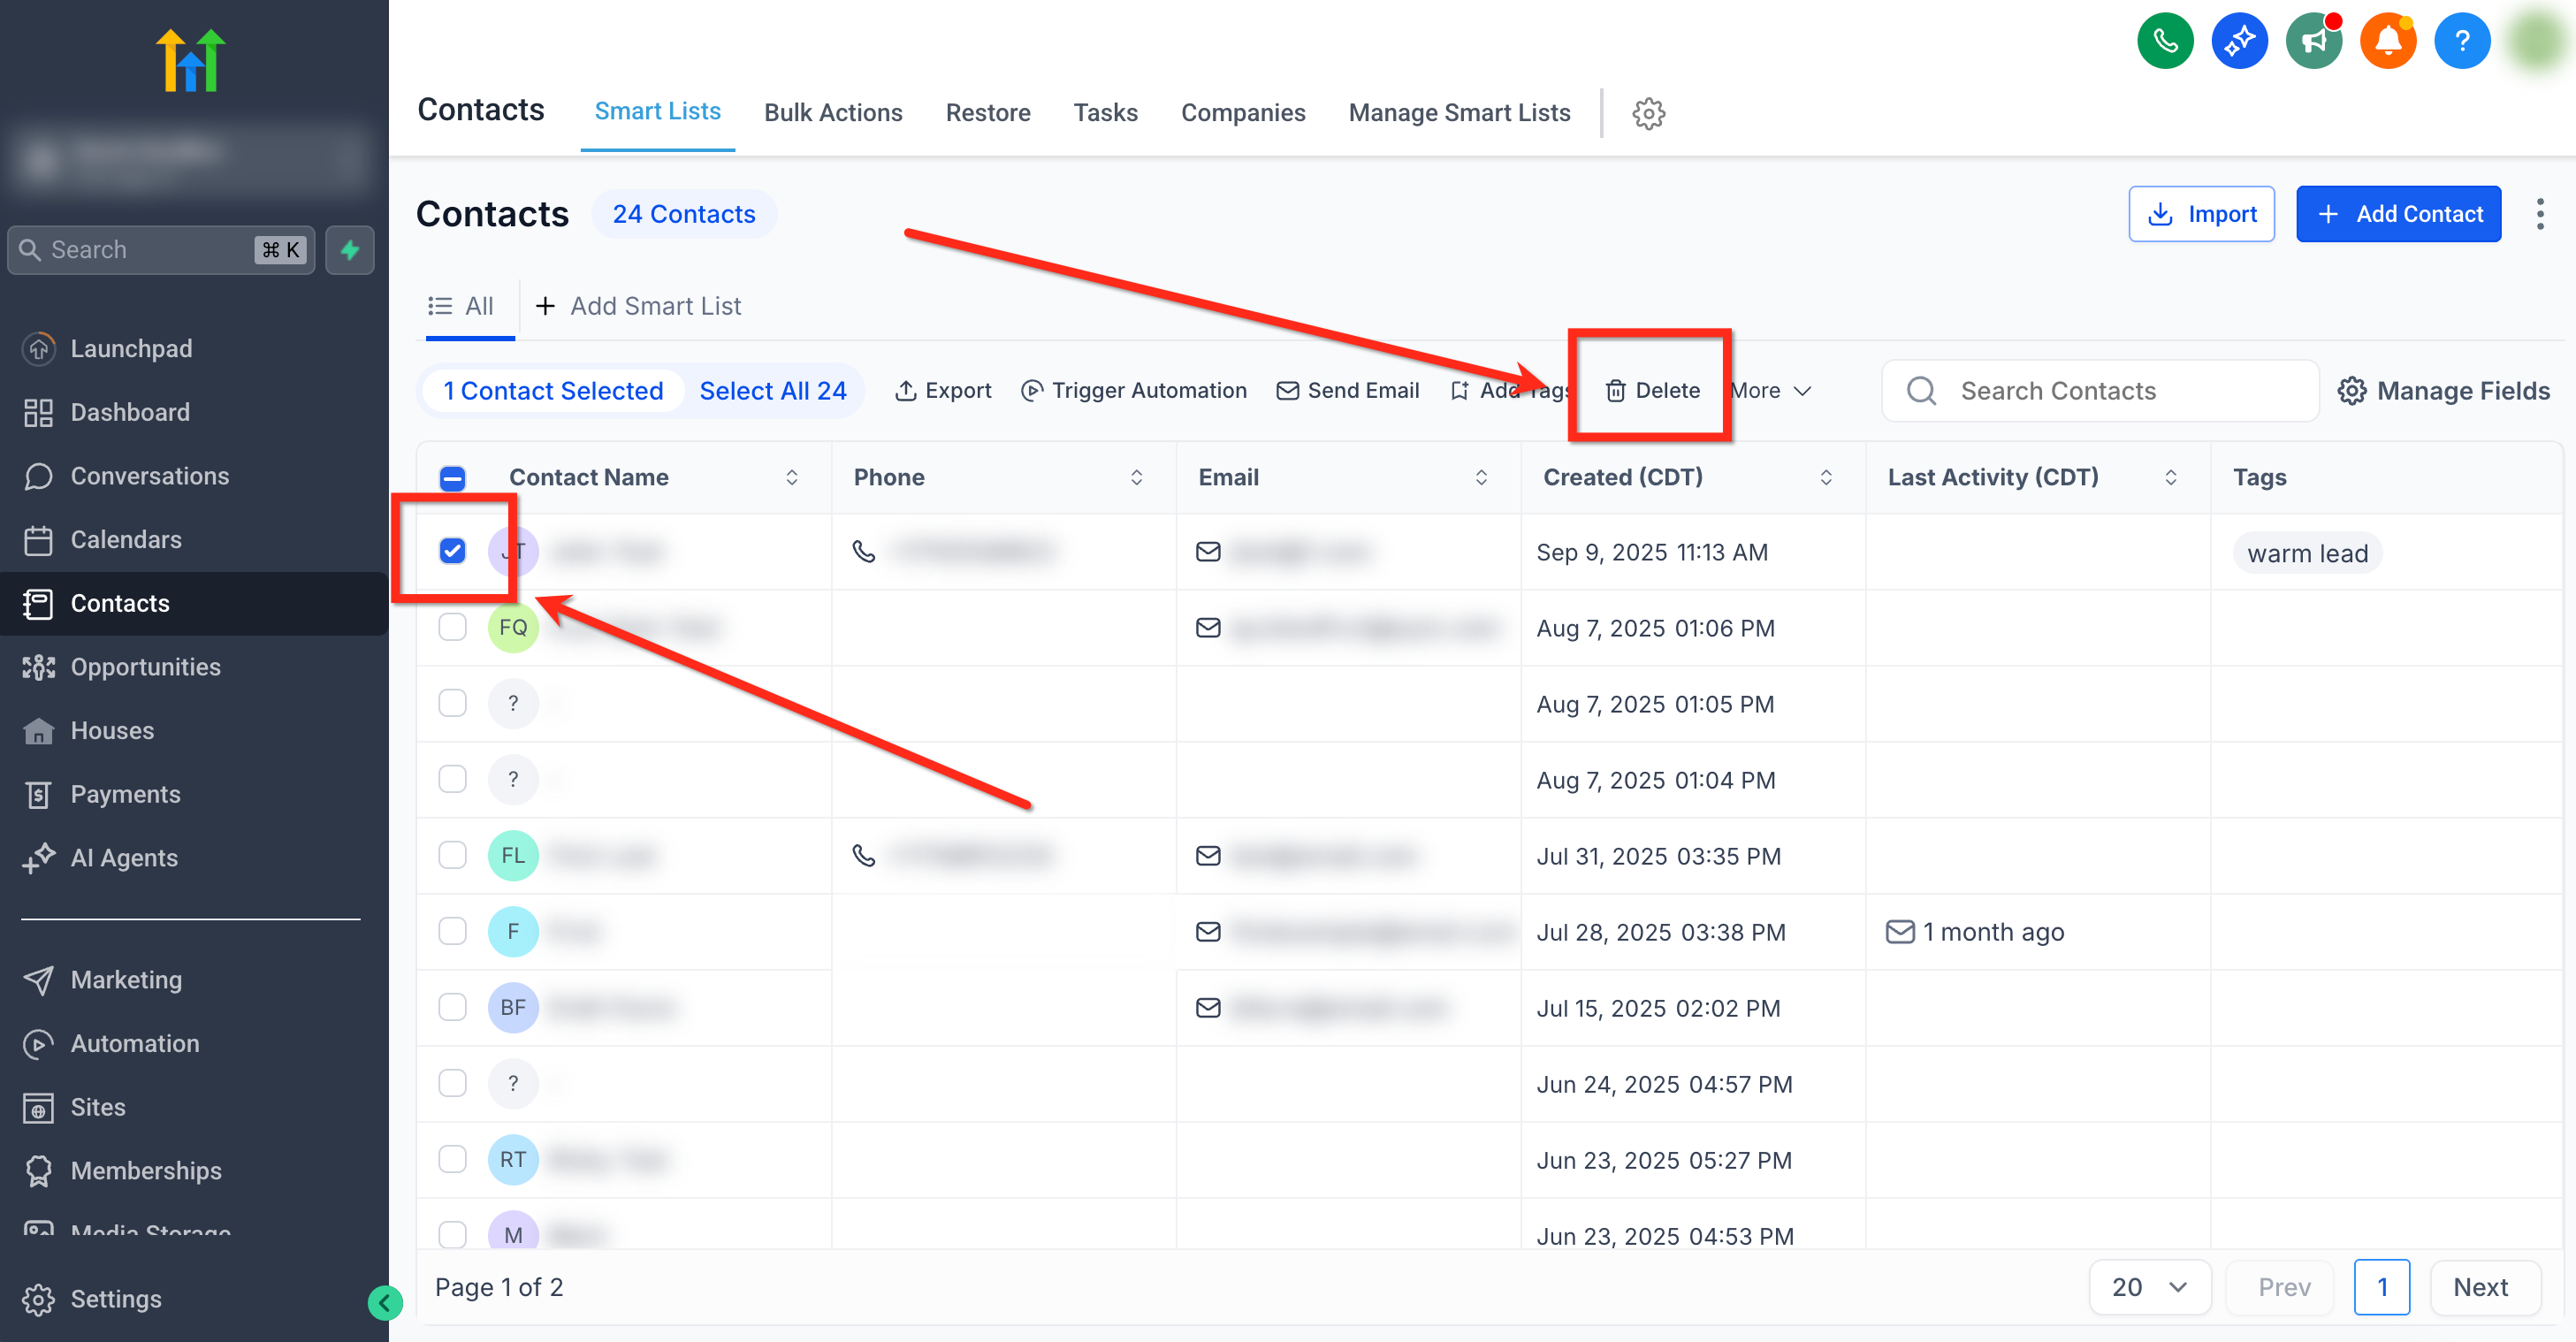
- Select the contact you want to delete using the tick box to the left of the name. Then click the Delete button.
- Confirm the action by typing DELETE in the pop-up window. Finally, click the Delete button.
How to create new custom fields
Custom fields let you adapt your contact database to the specific needs of your business. Easily keep track of the data that matters most to you and your team.
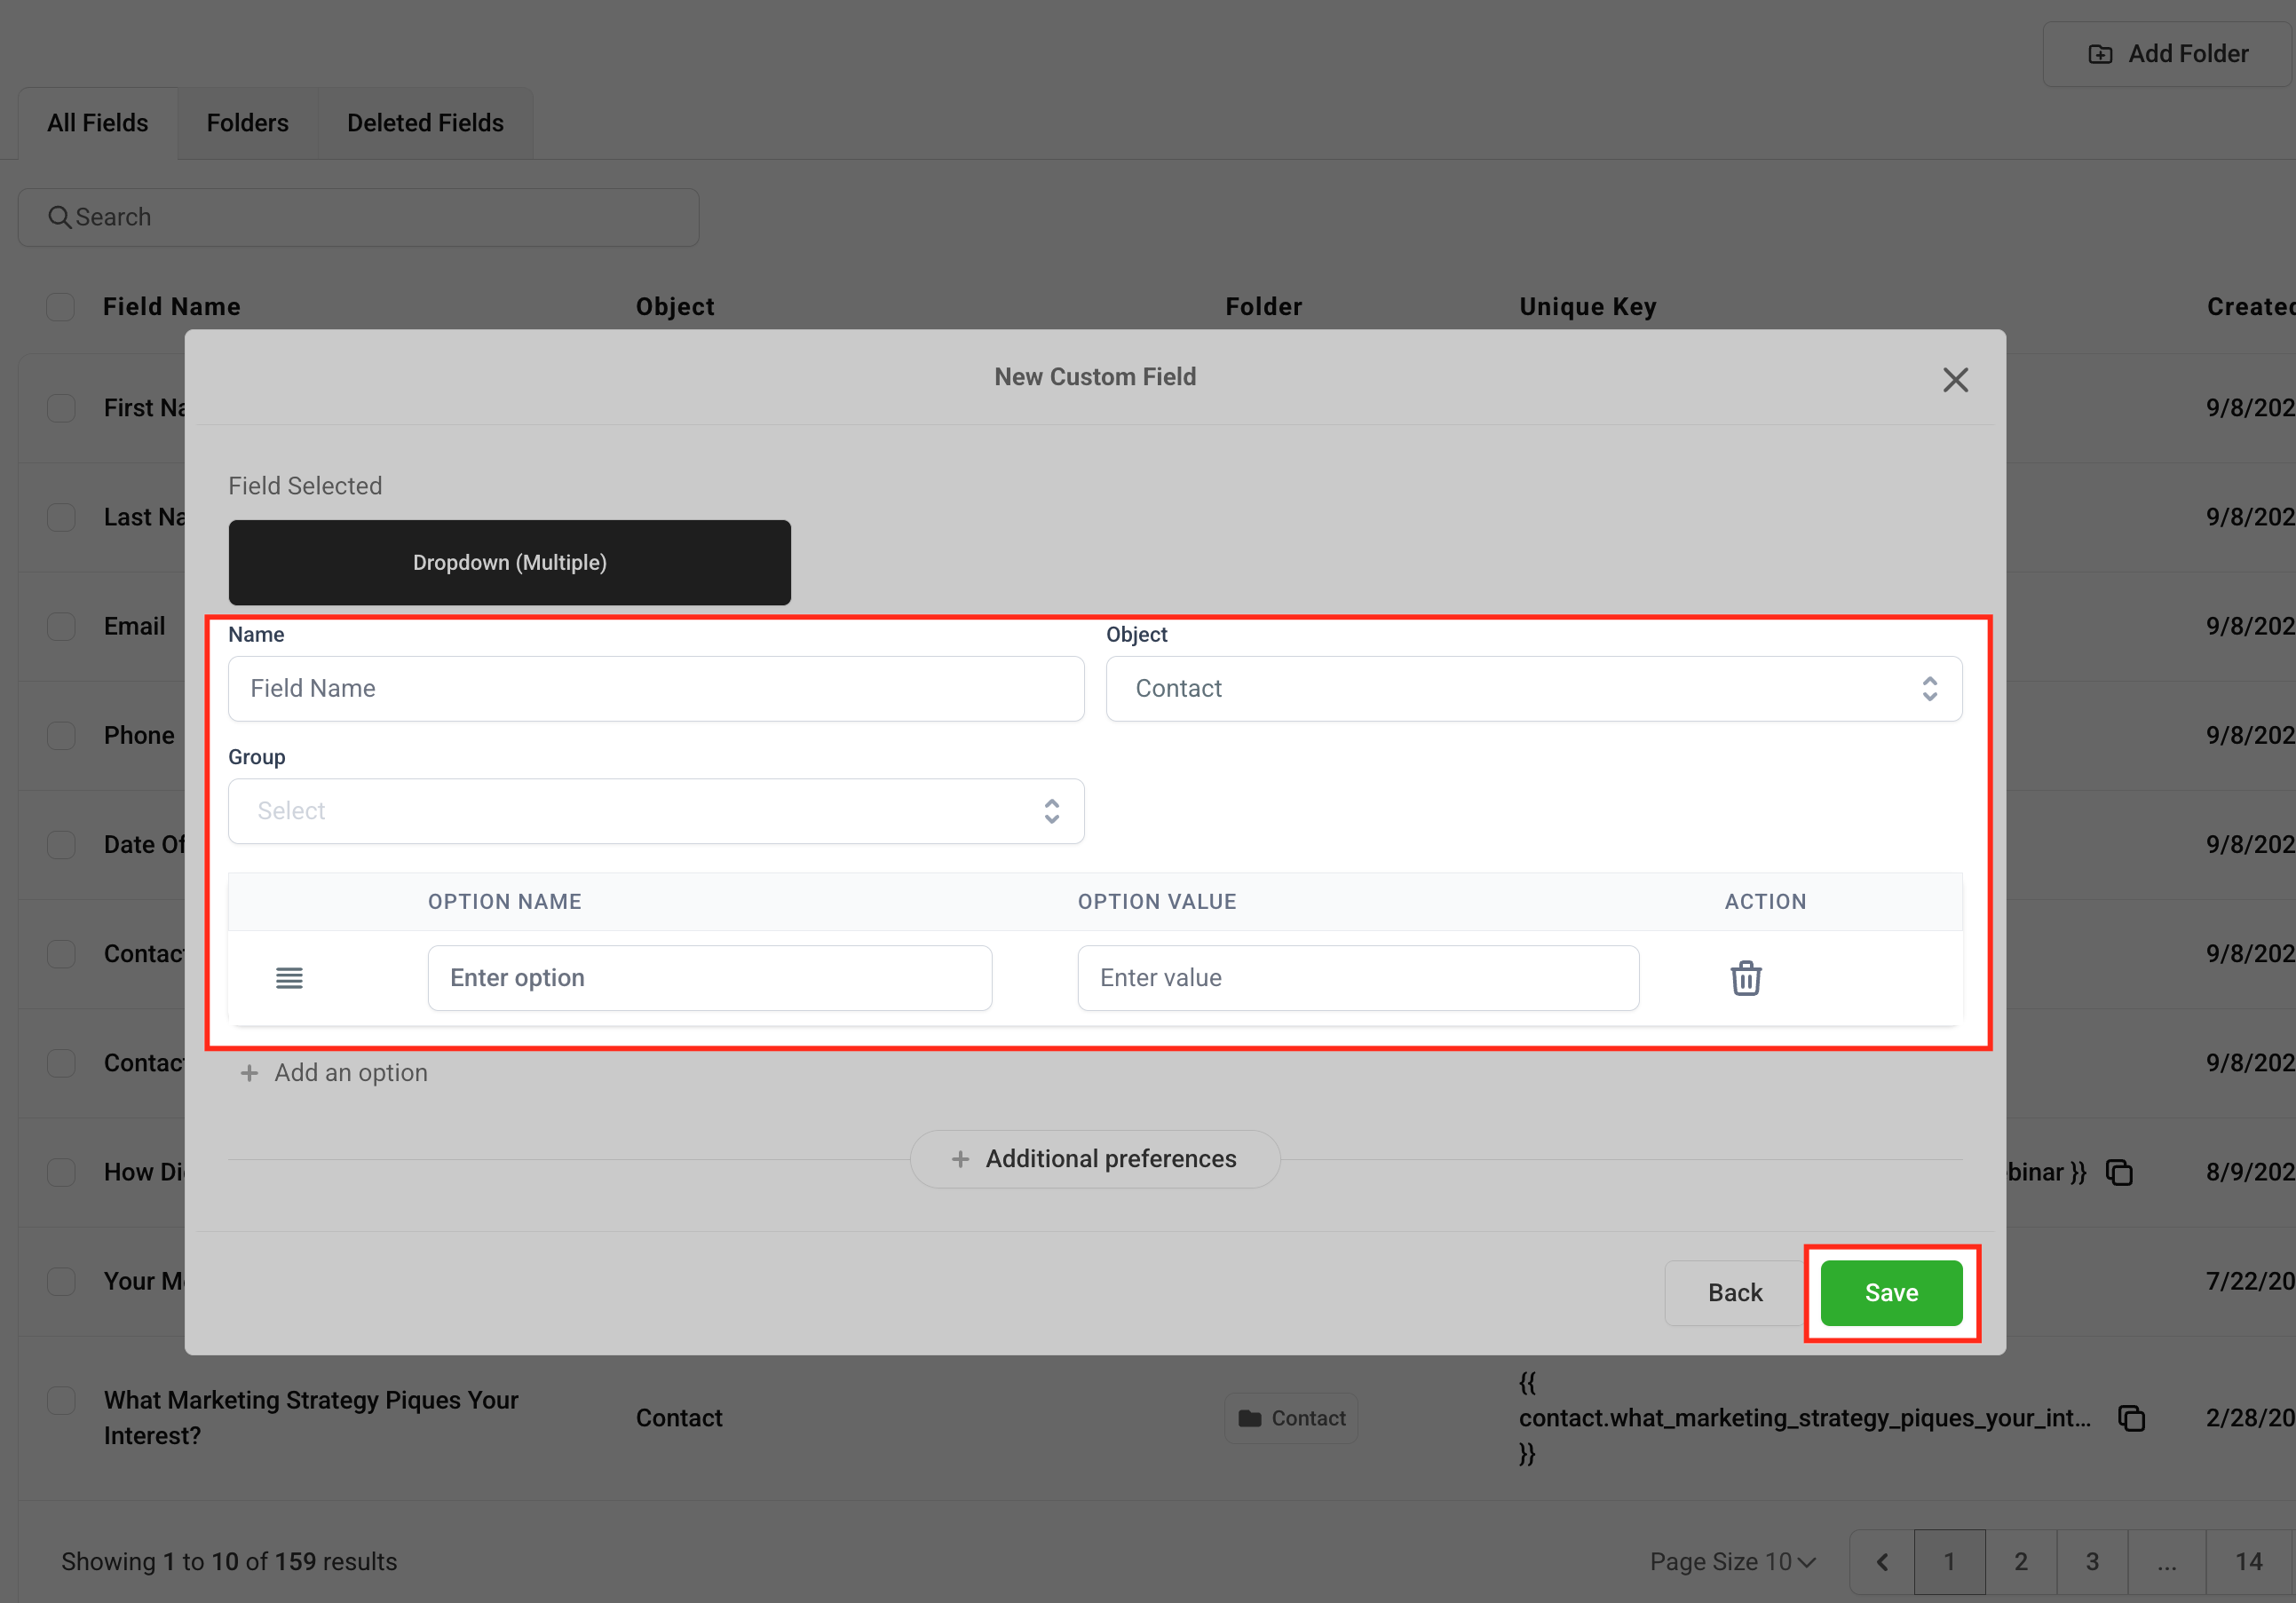
- Go to Settings > Custom fields.
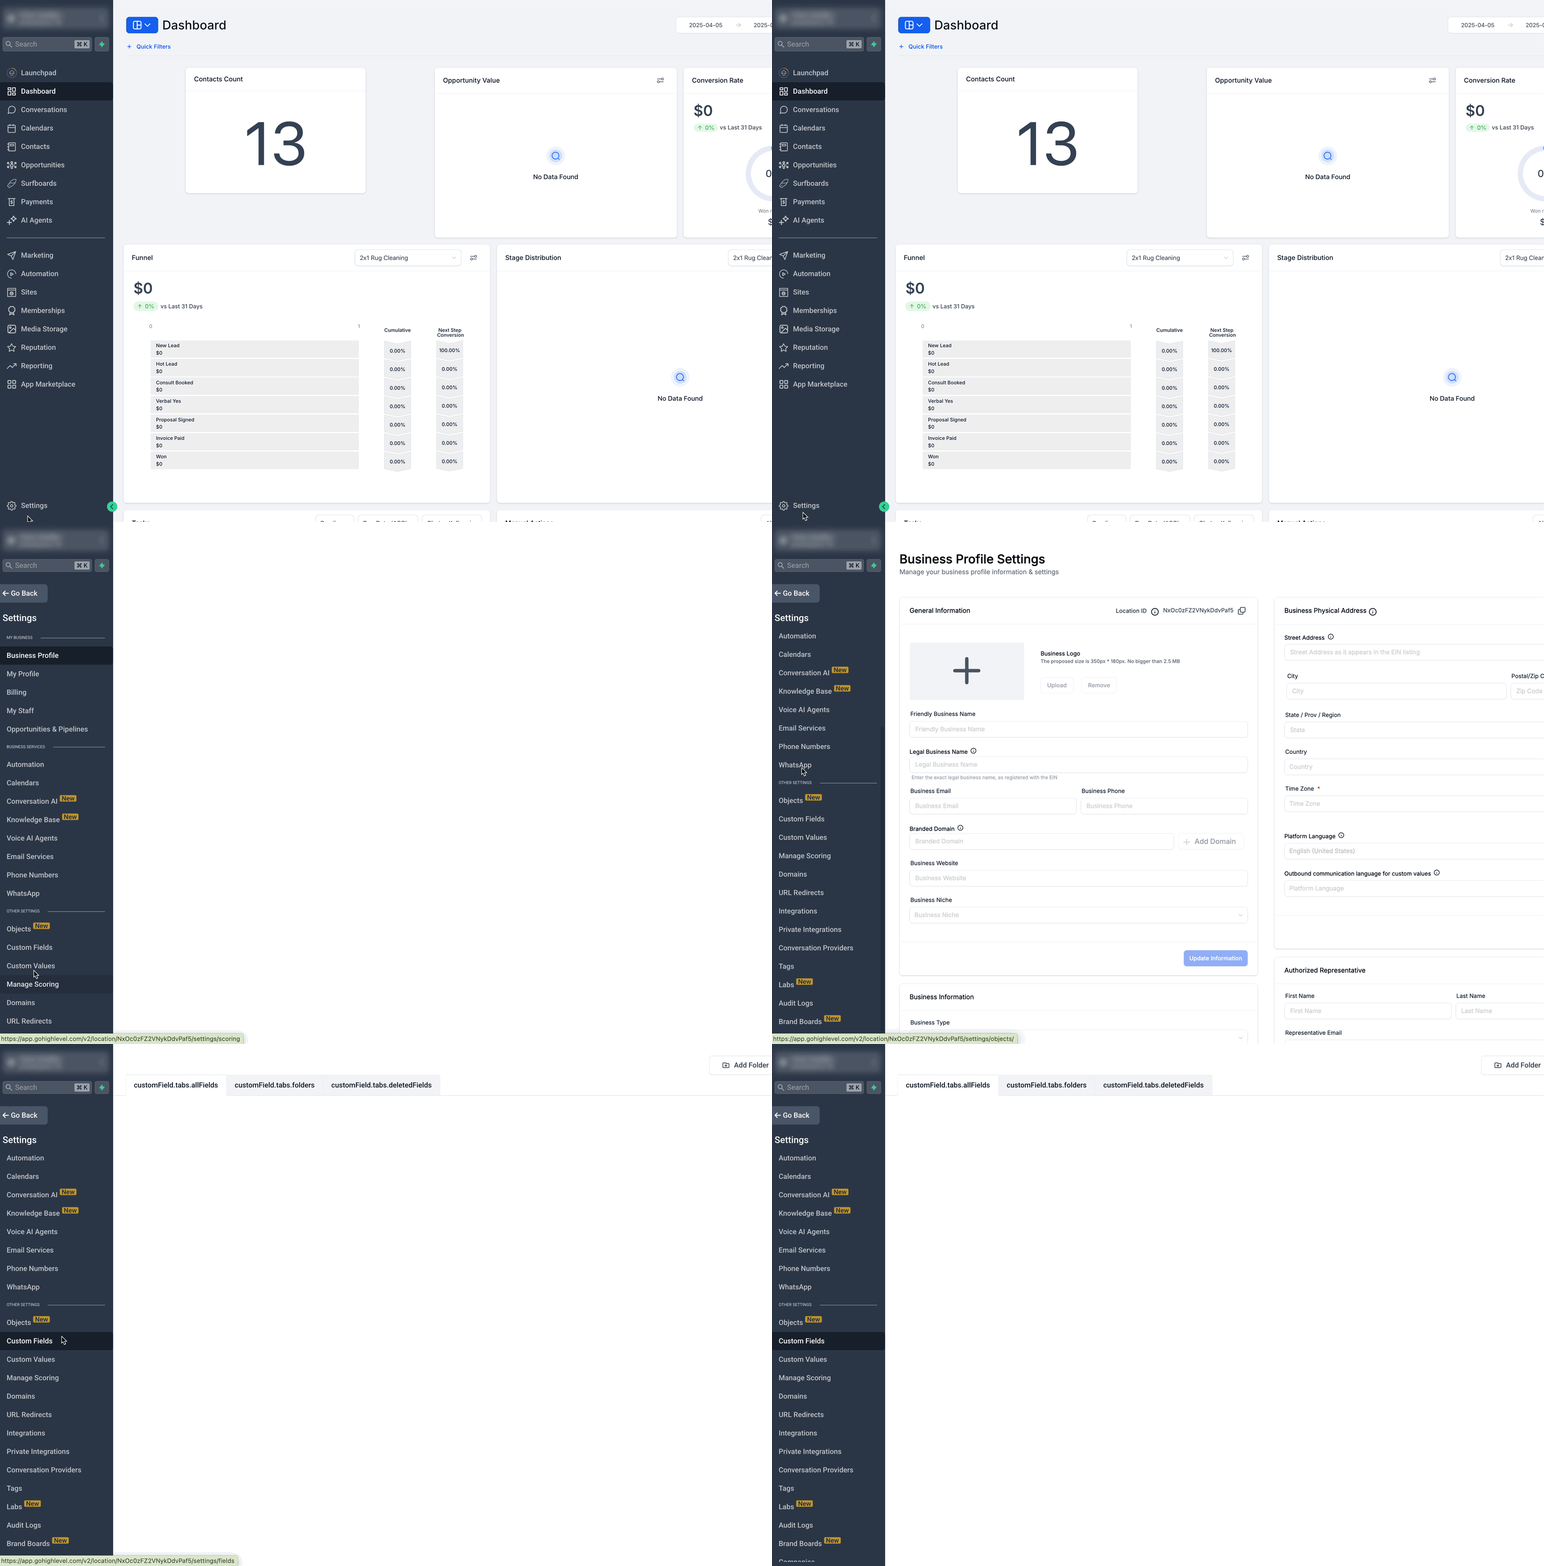
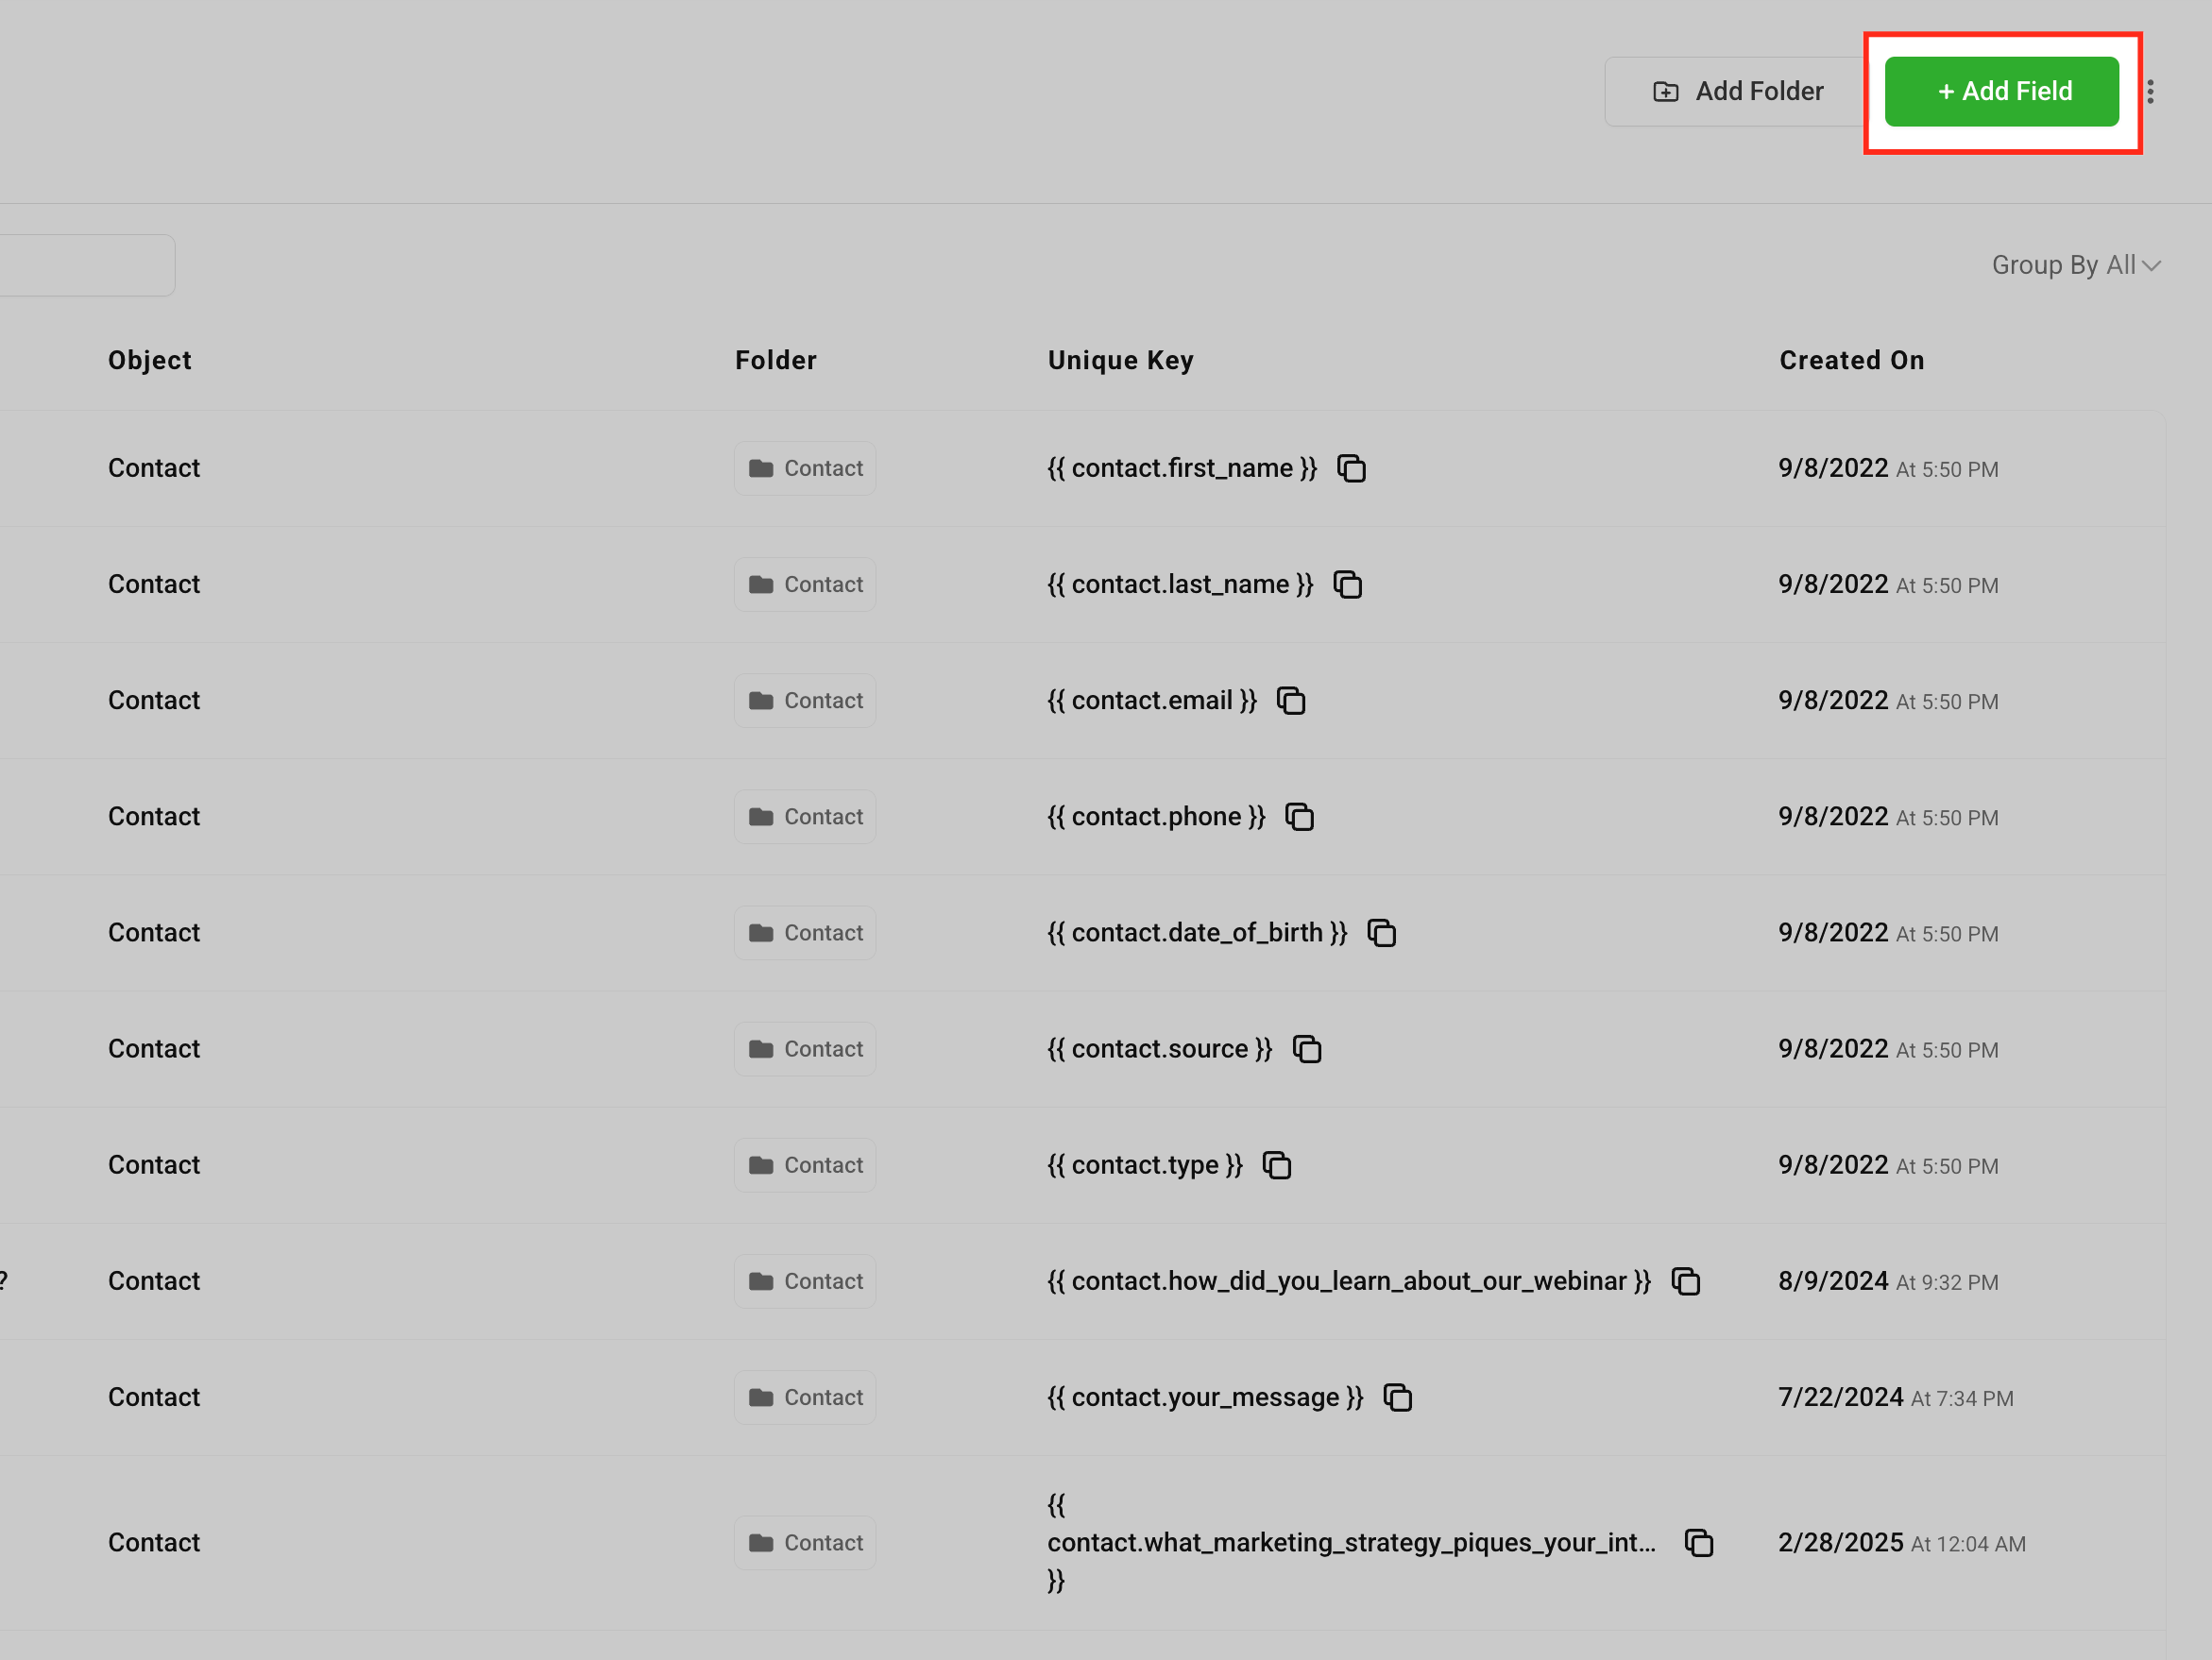
2. Click Add field.
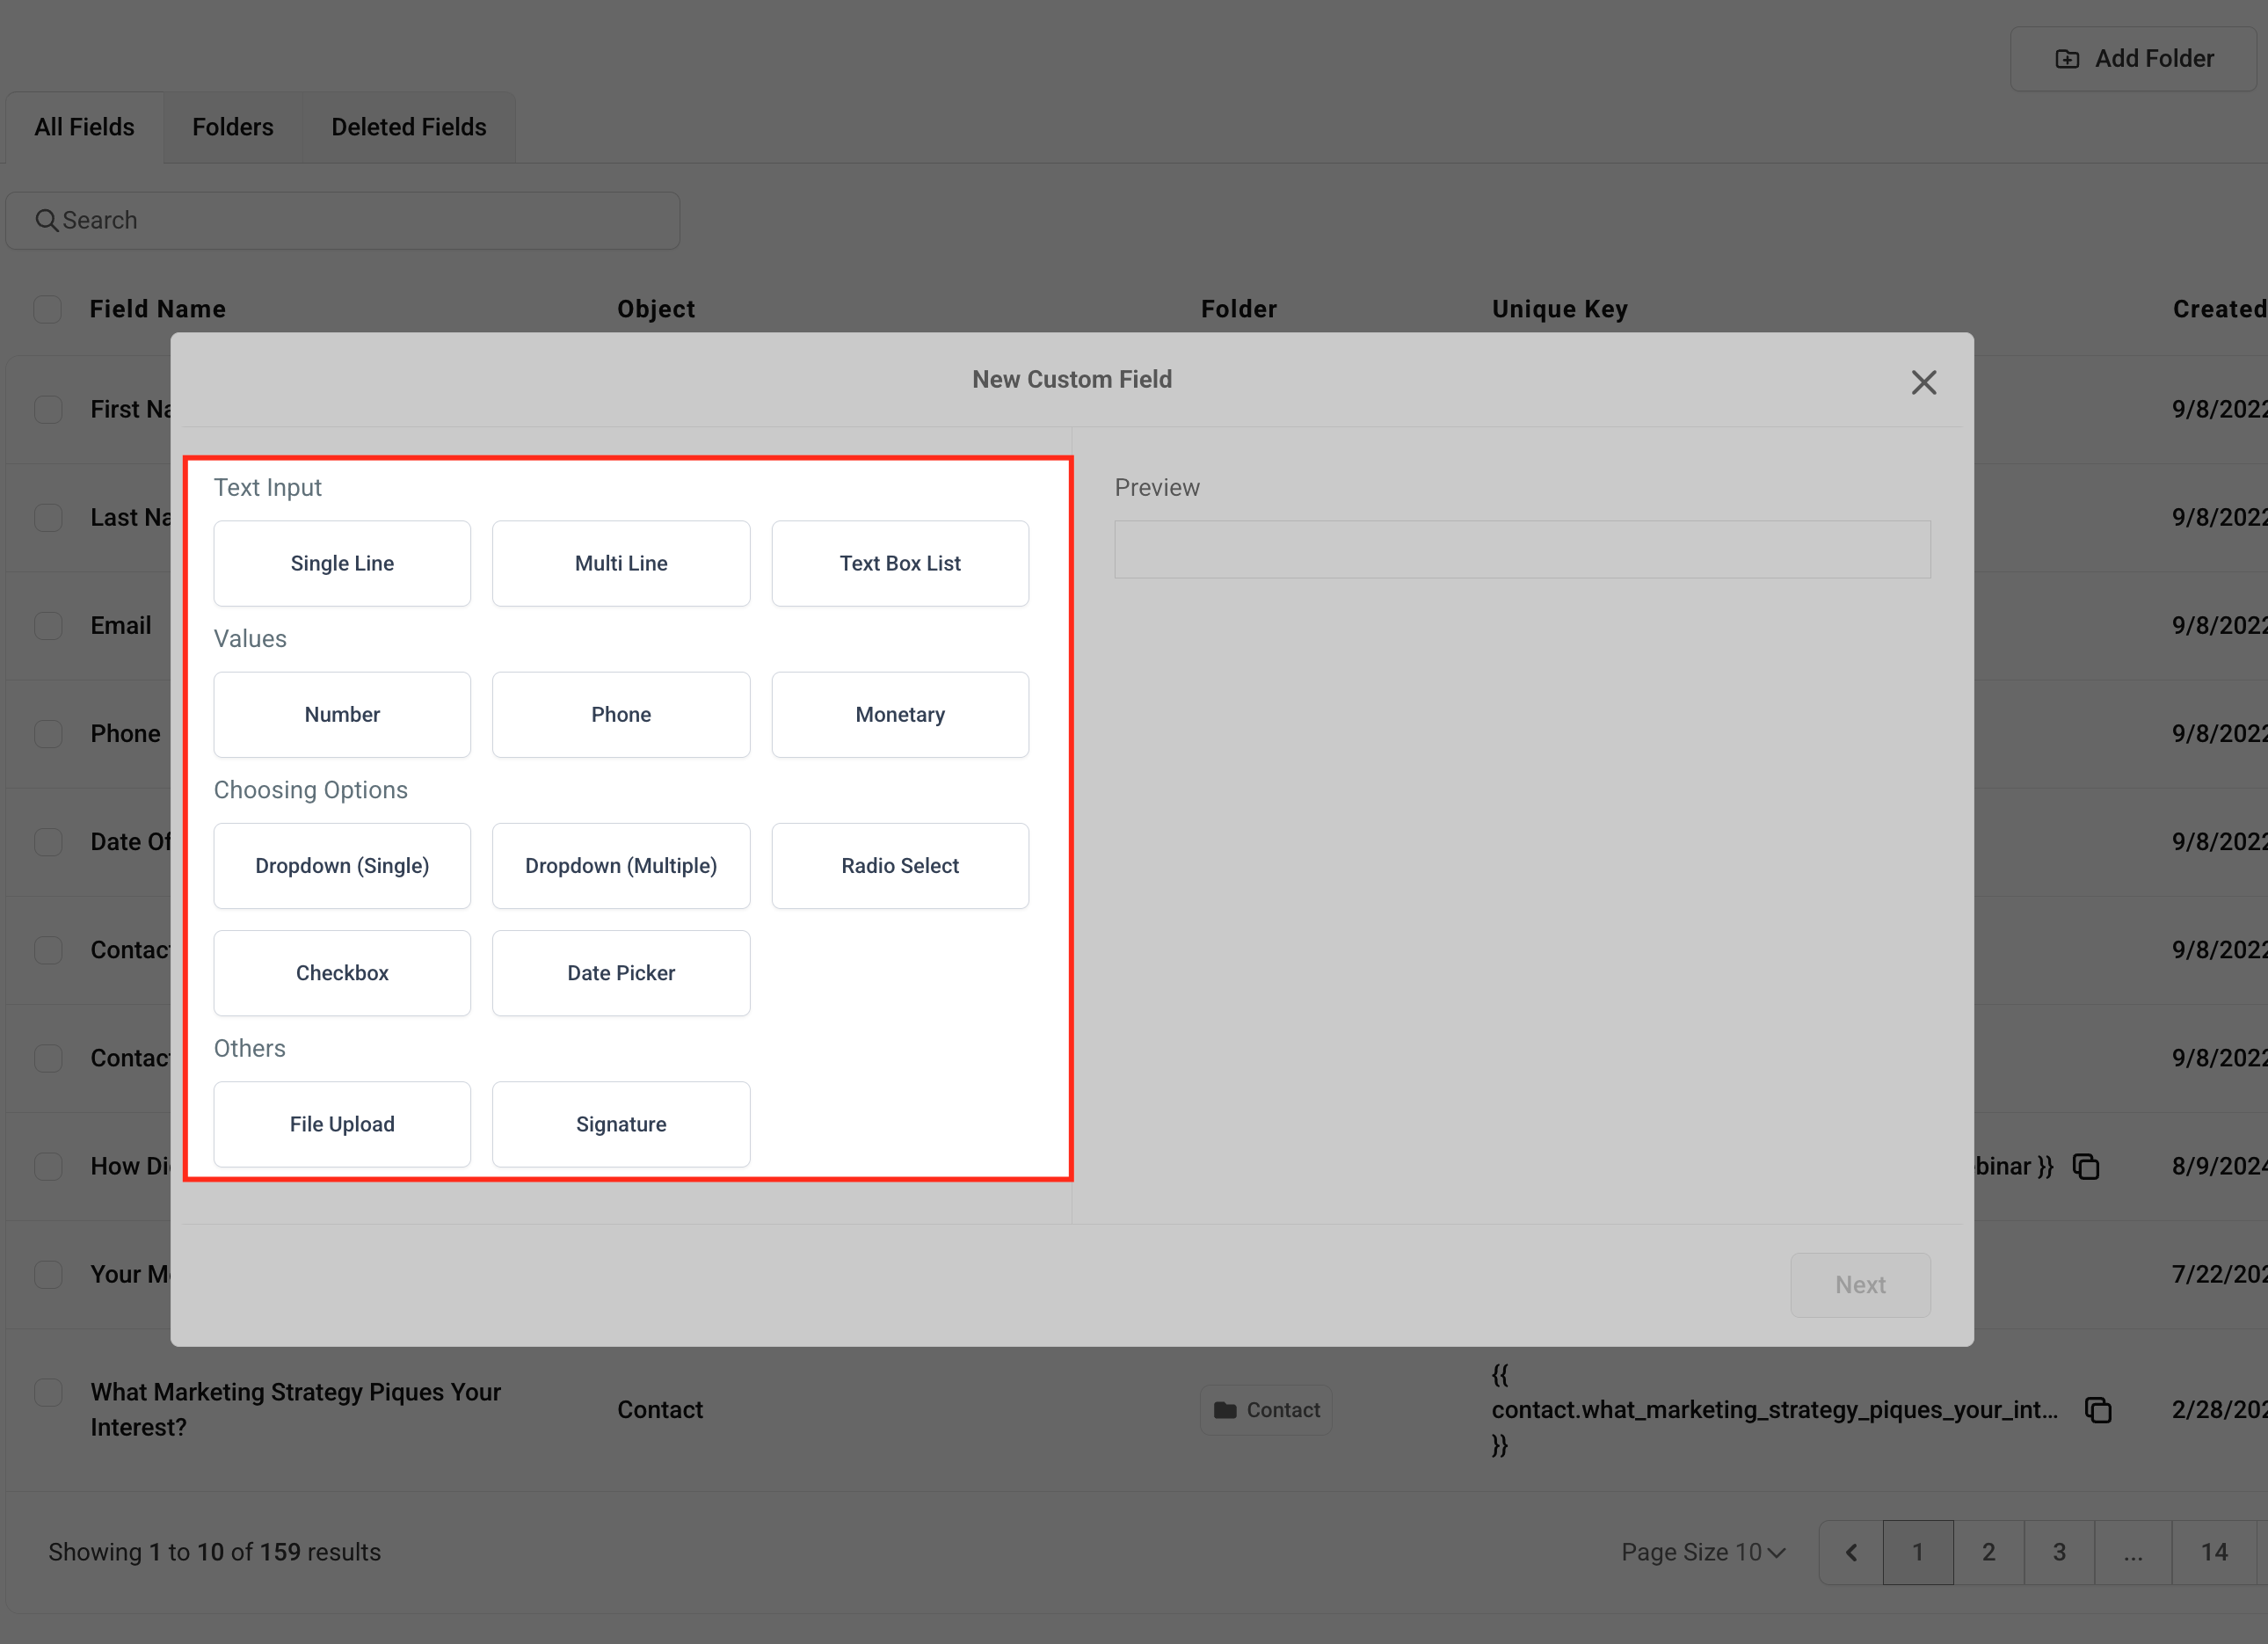
3. Choose the type of field you want to create (for example text, drop-down menu, date).
4. Complete the field details (name, group, placeholder text and so on).
This helps make sure your team understands exactly what information is required. Click Save.