



Organising your sales pipeline can look complicated, but think of it as setting up your workspace for success: everything has its place and nothing gets lost.
With a structured pipeline, you can track leads effortlessly, automate follow-ups and close deals faster. Ready to organise your sales? Let’s get started!
Table of contents
- Create a sales pipeline
- Import contacts as opportunities
- Create an opportunity manually
- Create an opportunity through automation
Create a sales pipeline
Setting up a new sales pipeline is child’s play and helps you see exactly where each lead sits in your sales process. Here is how easy it is to get started:
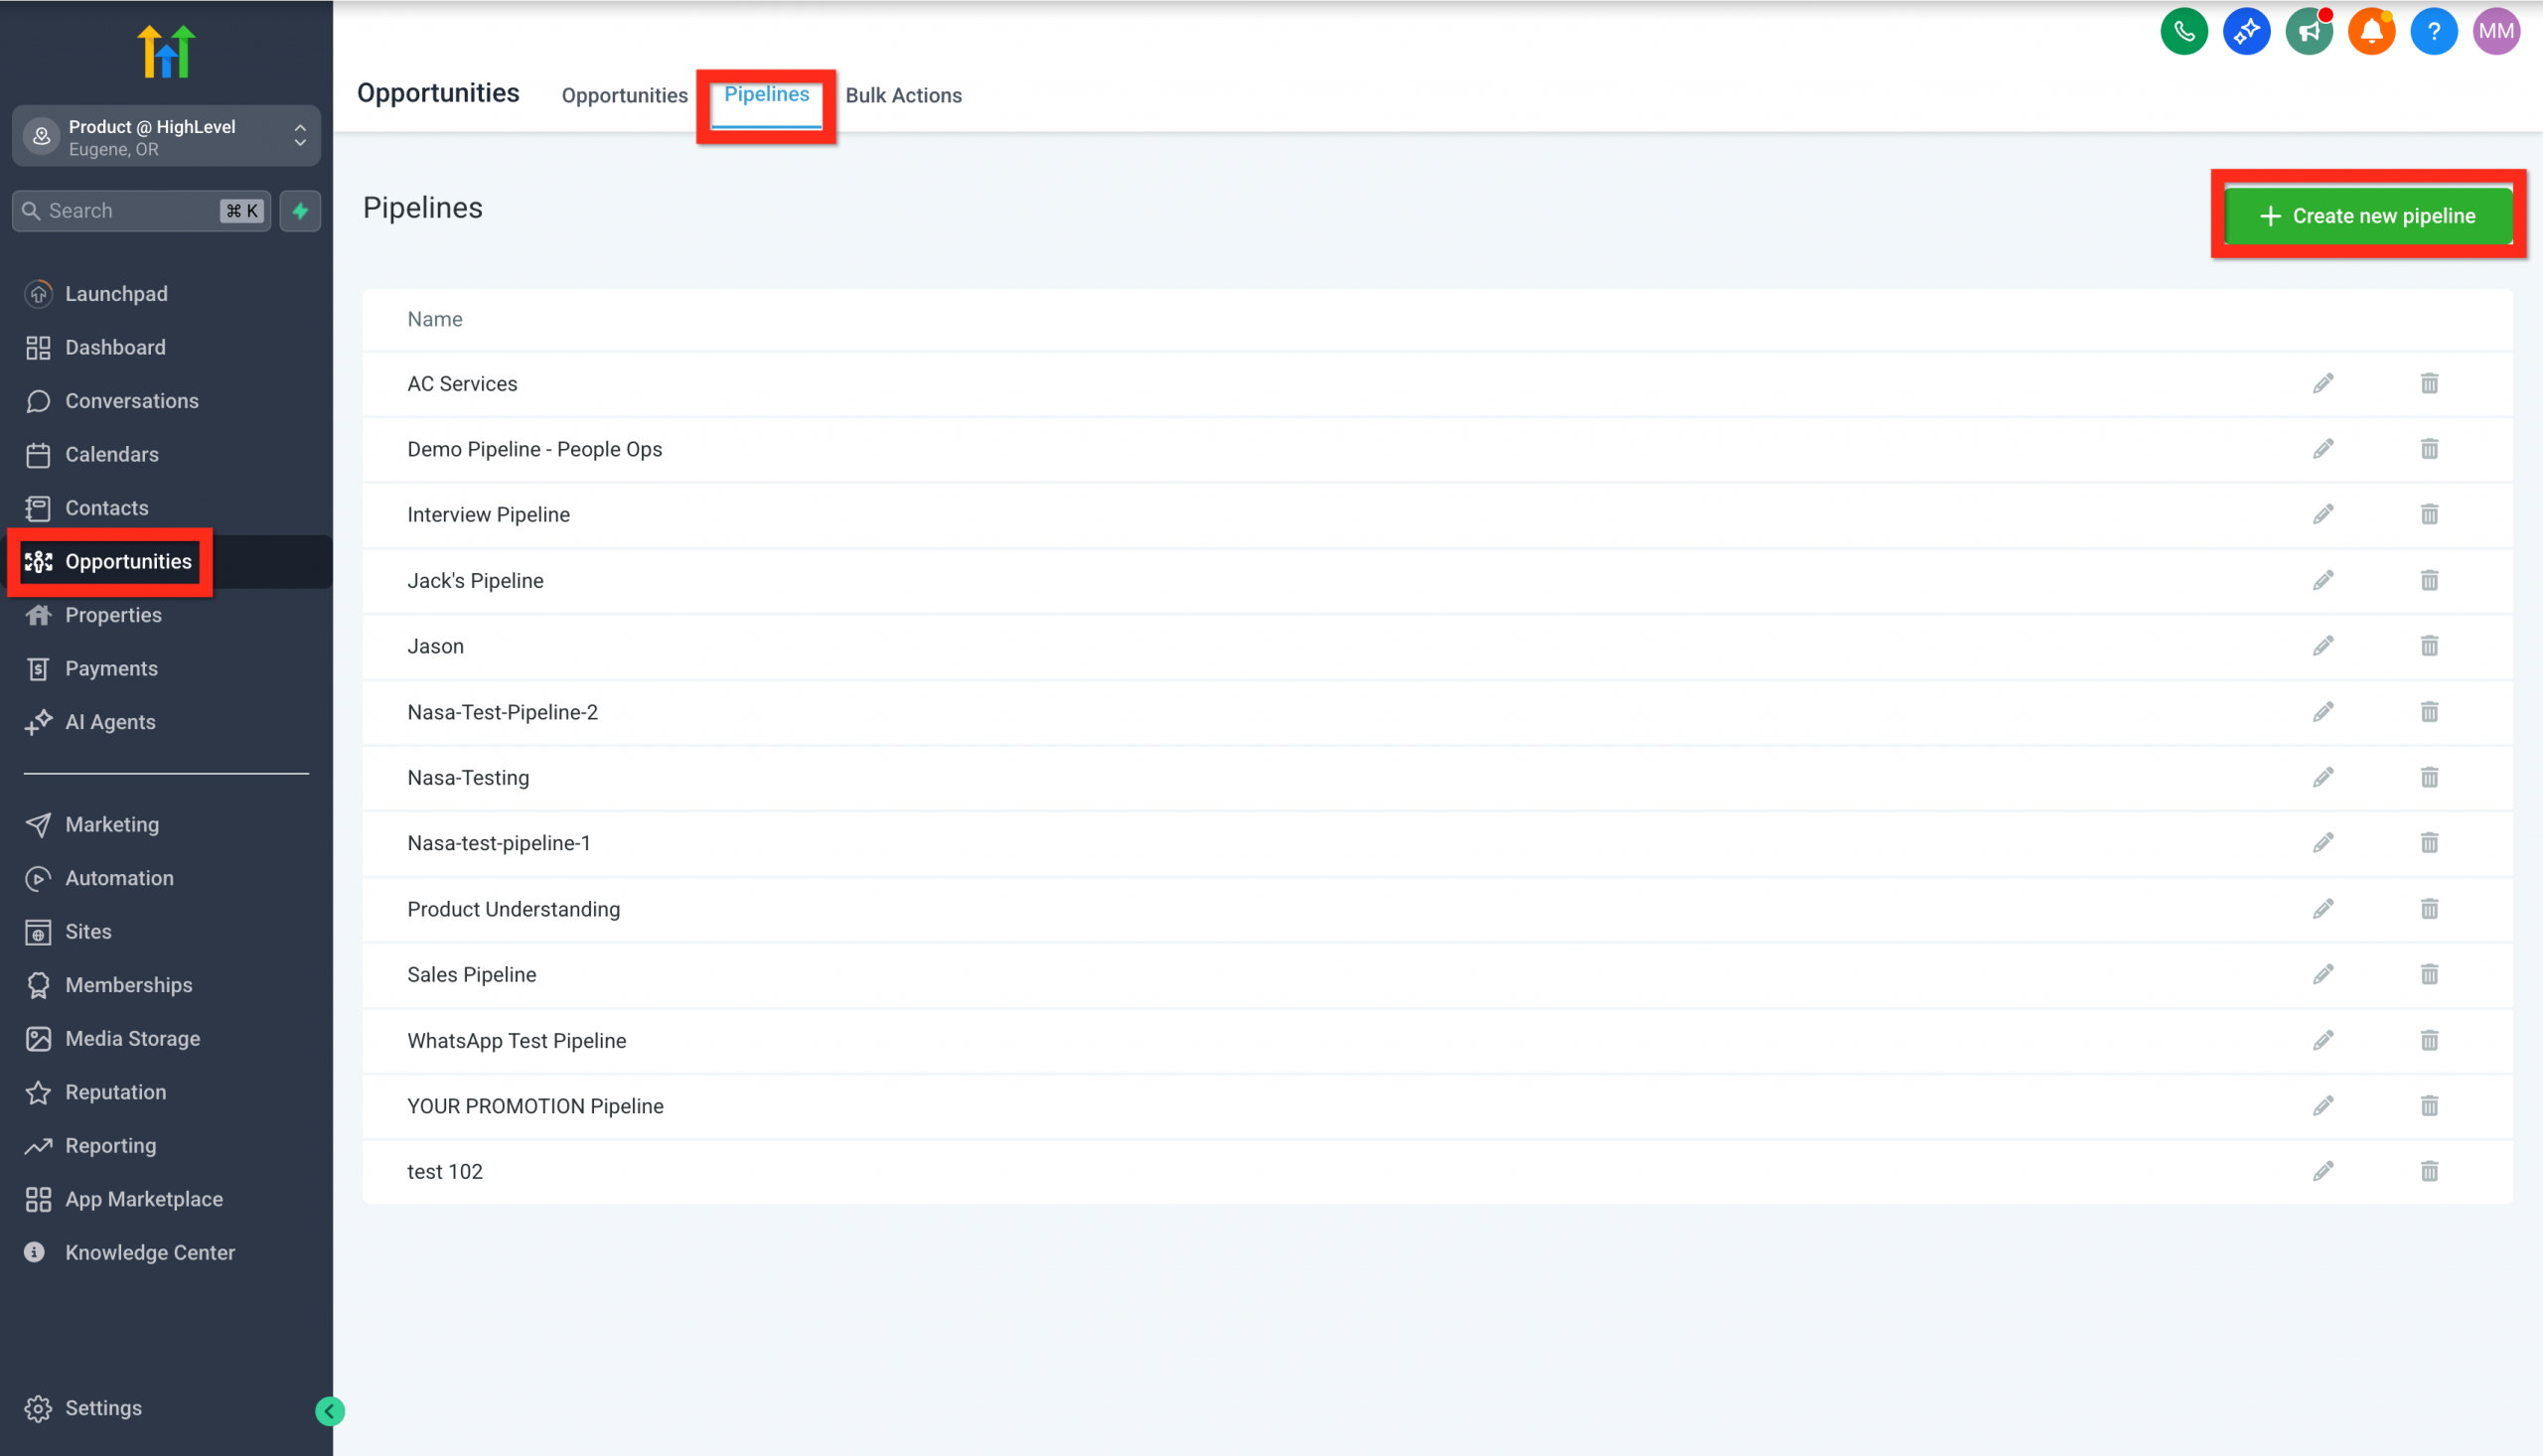
- Go to Opportunities.
- Click Pipelines.
- Click Create new pipeline.
- Enter the details (name, stages and so on) and click Save.
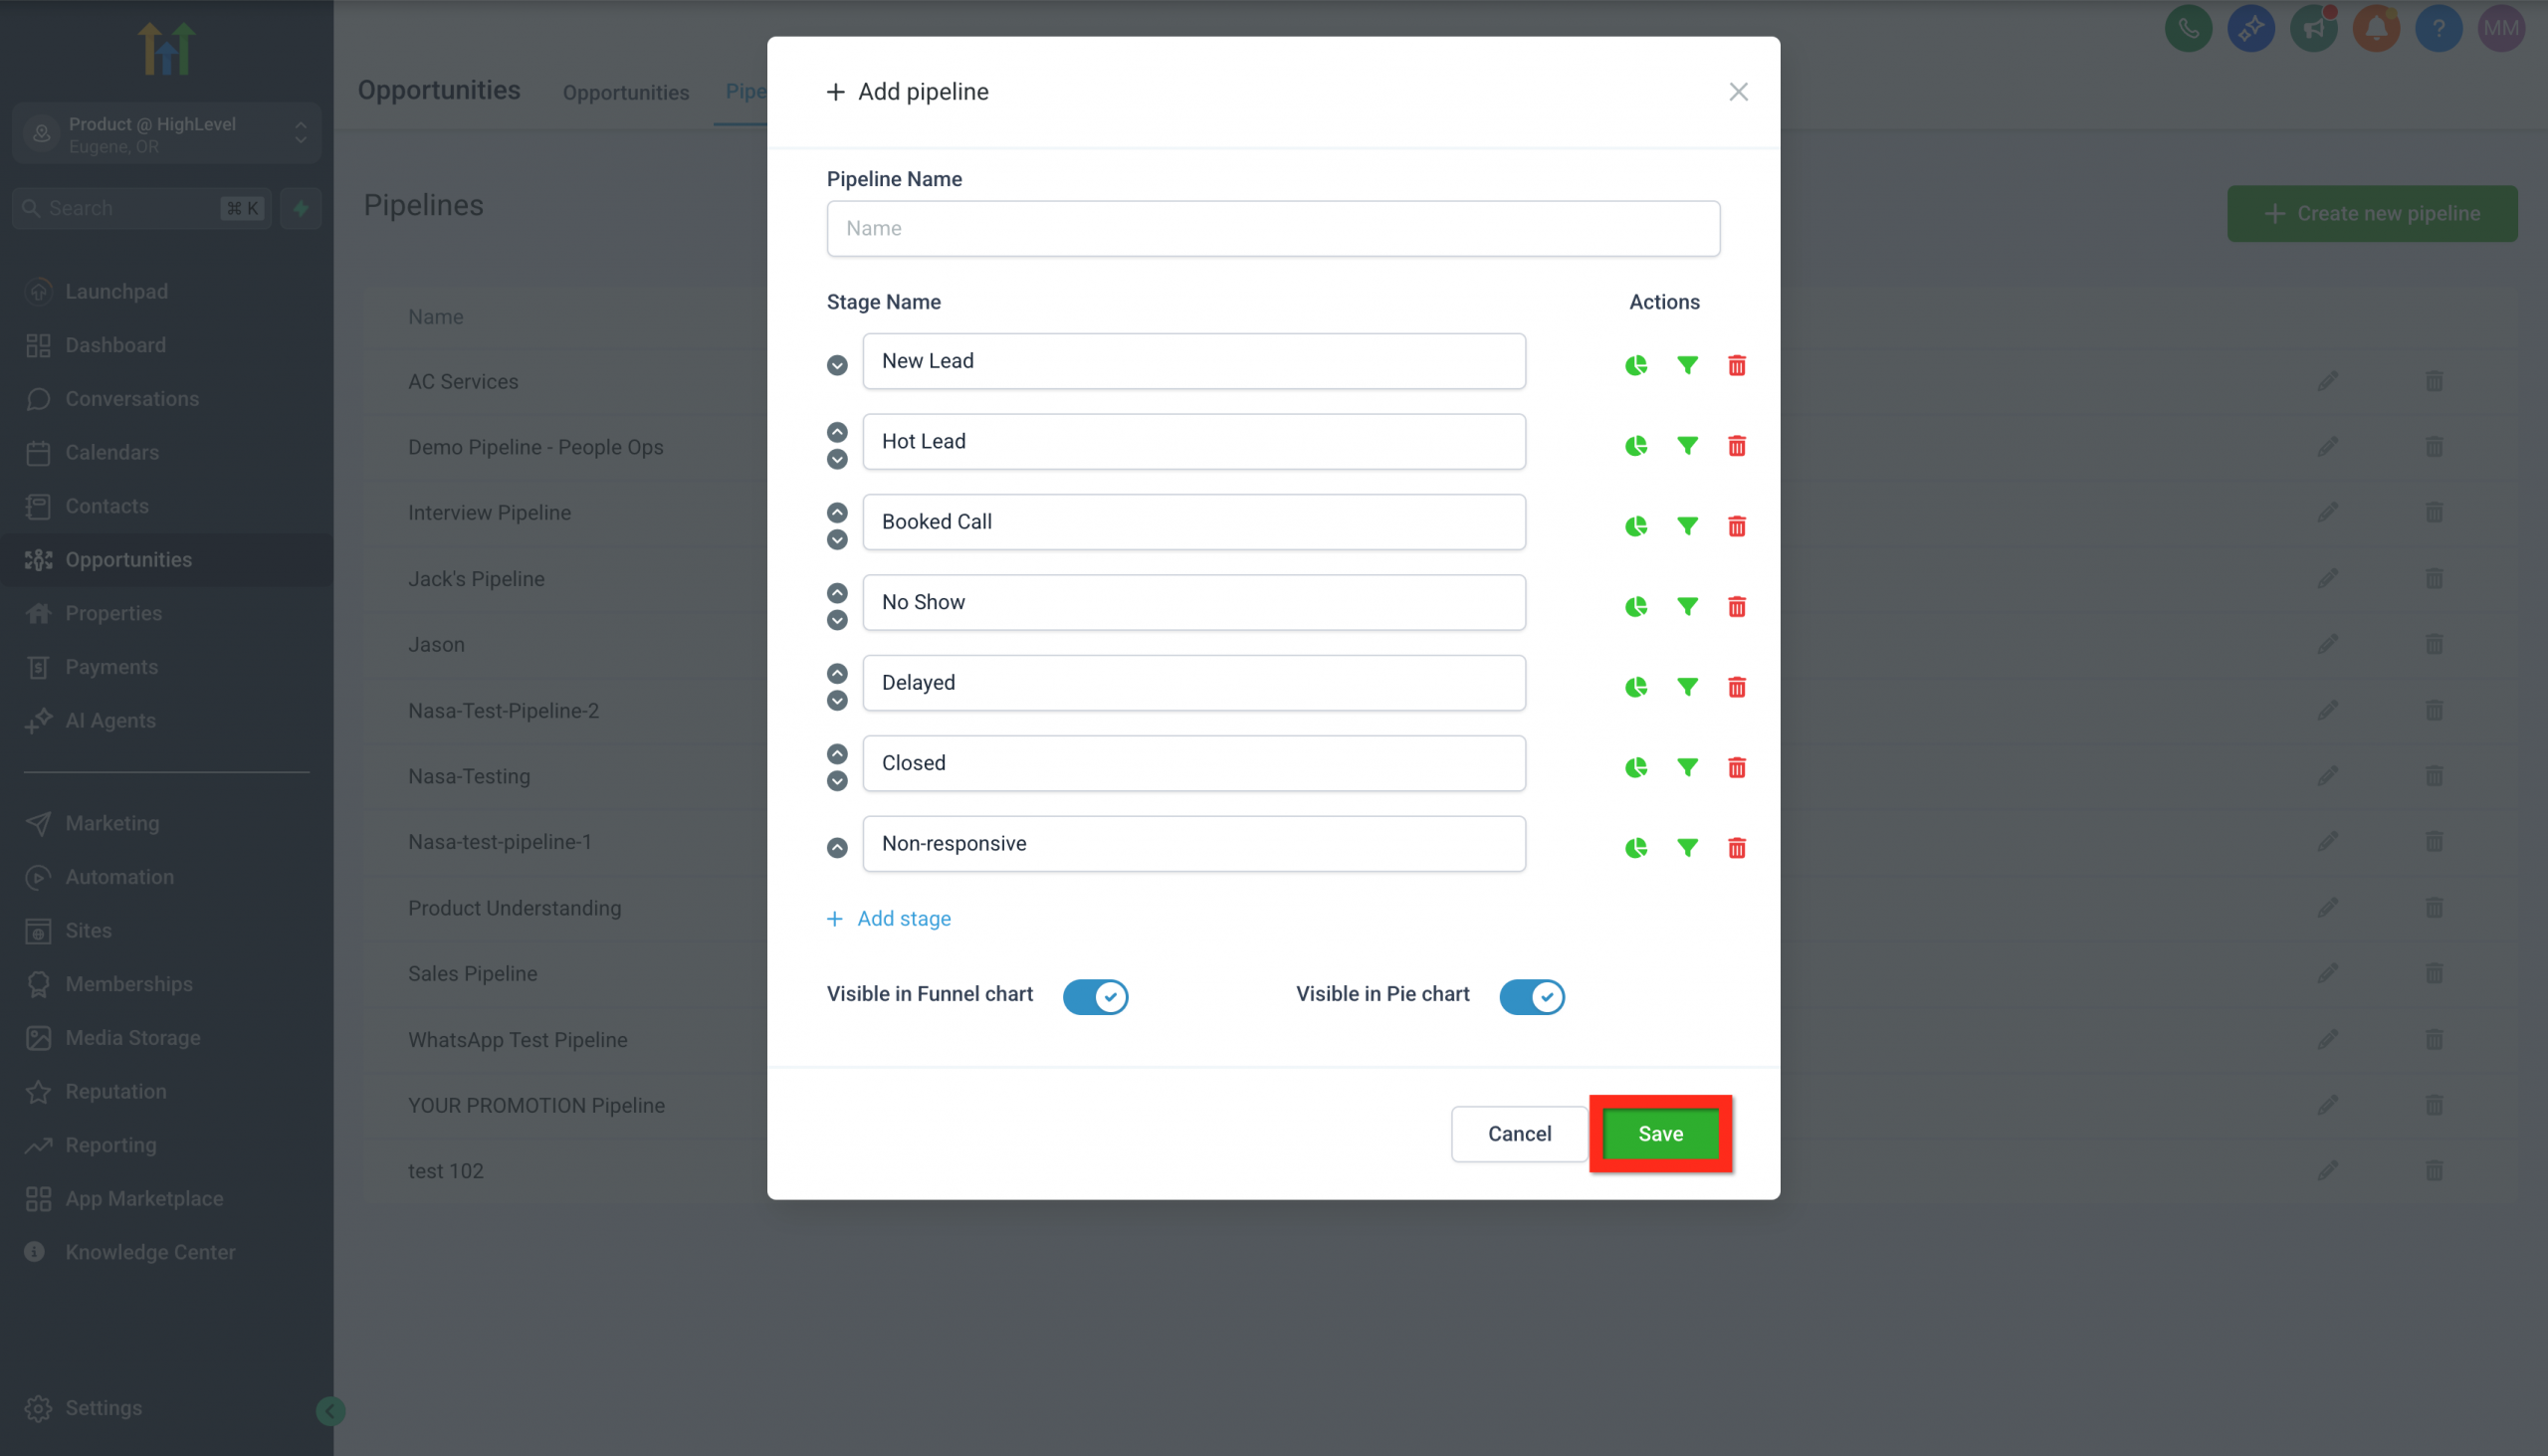
Consider customising your pipeline stages to suit your team’s workflow, for example:
- New lead
- Qualified lead
- Call booked
- No-show
- Overdue
- Closed
- No reply
Next, you can import your existing contacts to populate your pipeline.
Import contacts as opportunities
Do you have a contact list from an event or another platform? Good news: you can easily import them straight into your sales pipeline and turn those leads into opportunities in a few clicks:
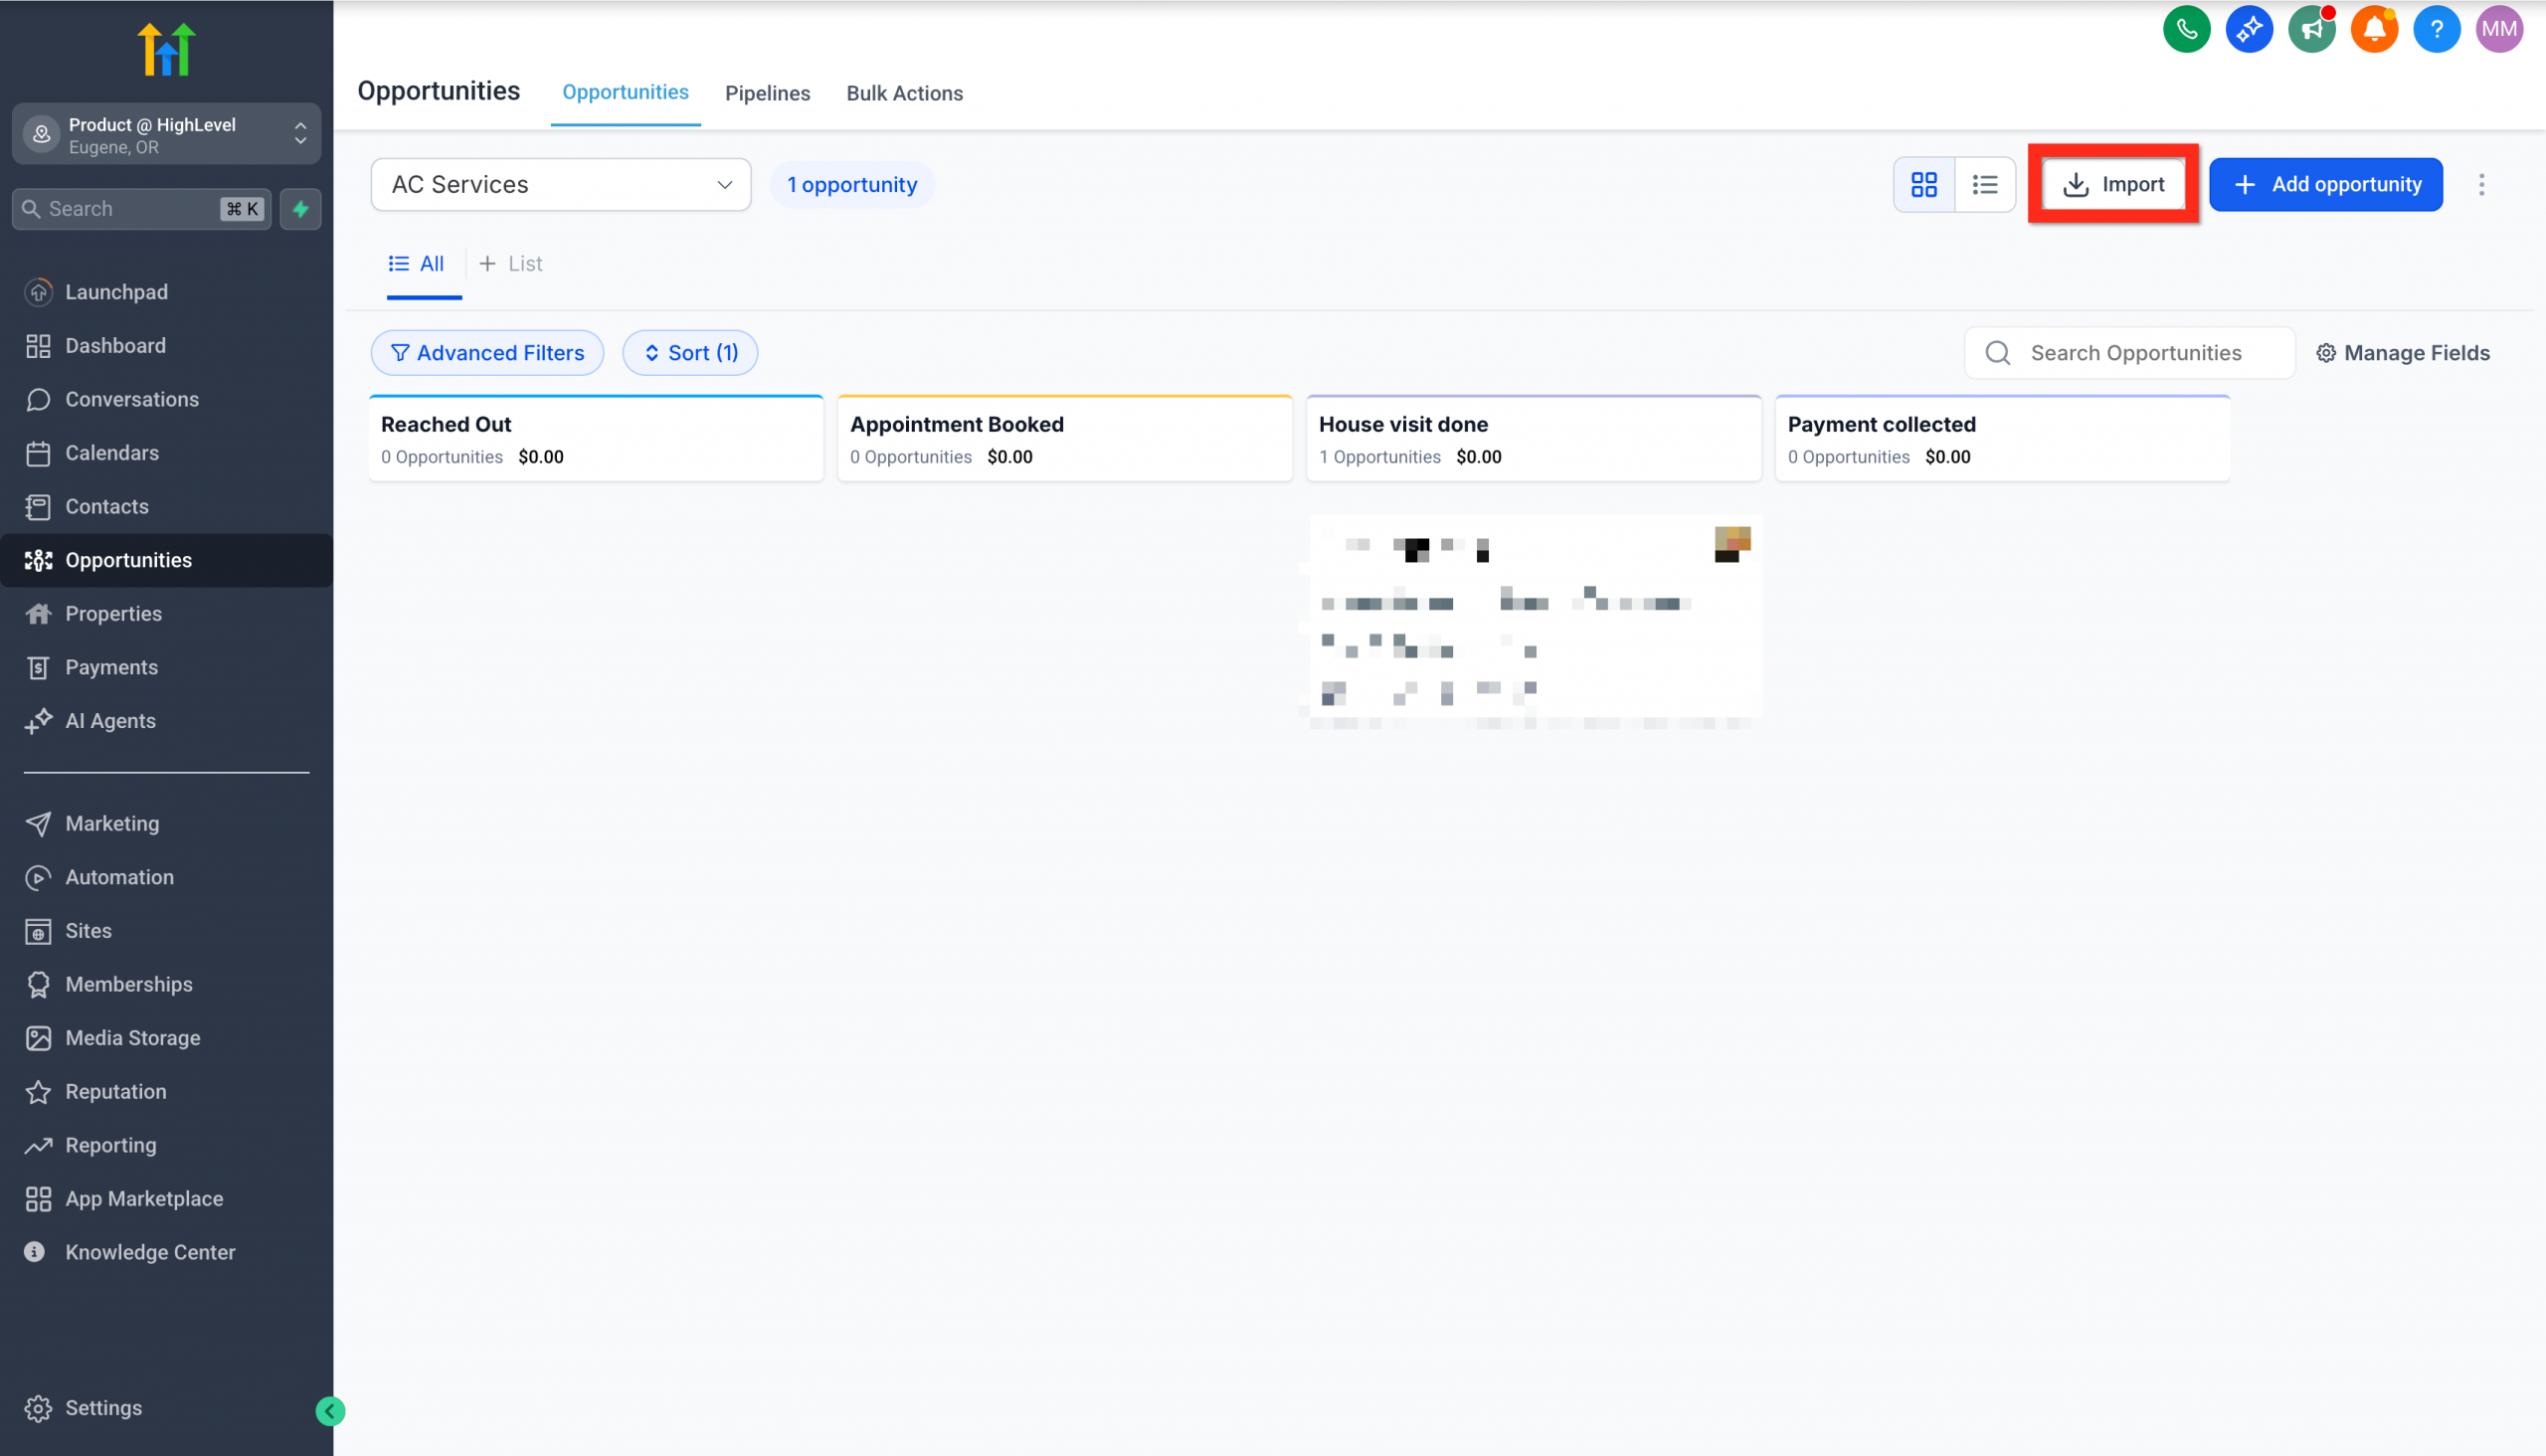
- Go to Opportunities.
- Click Import.
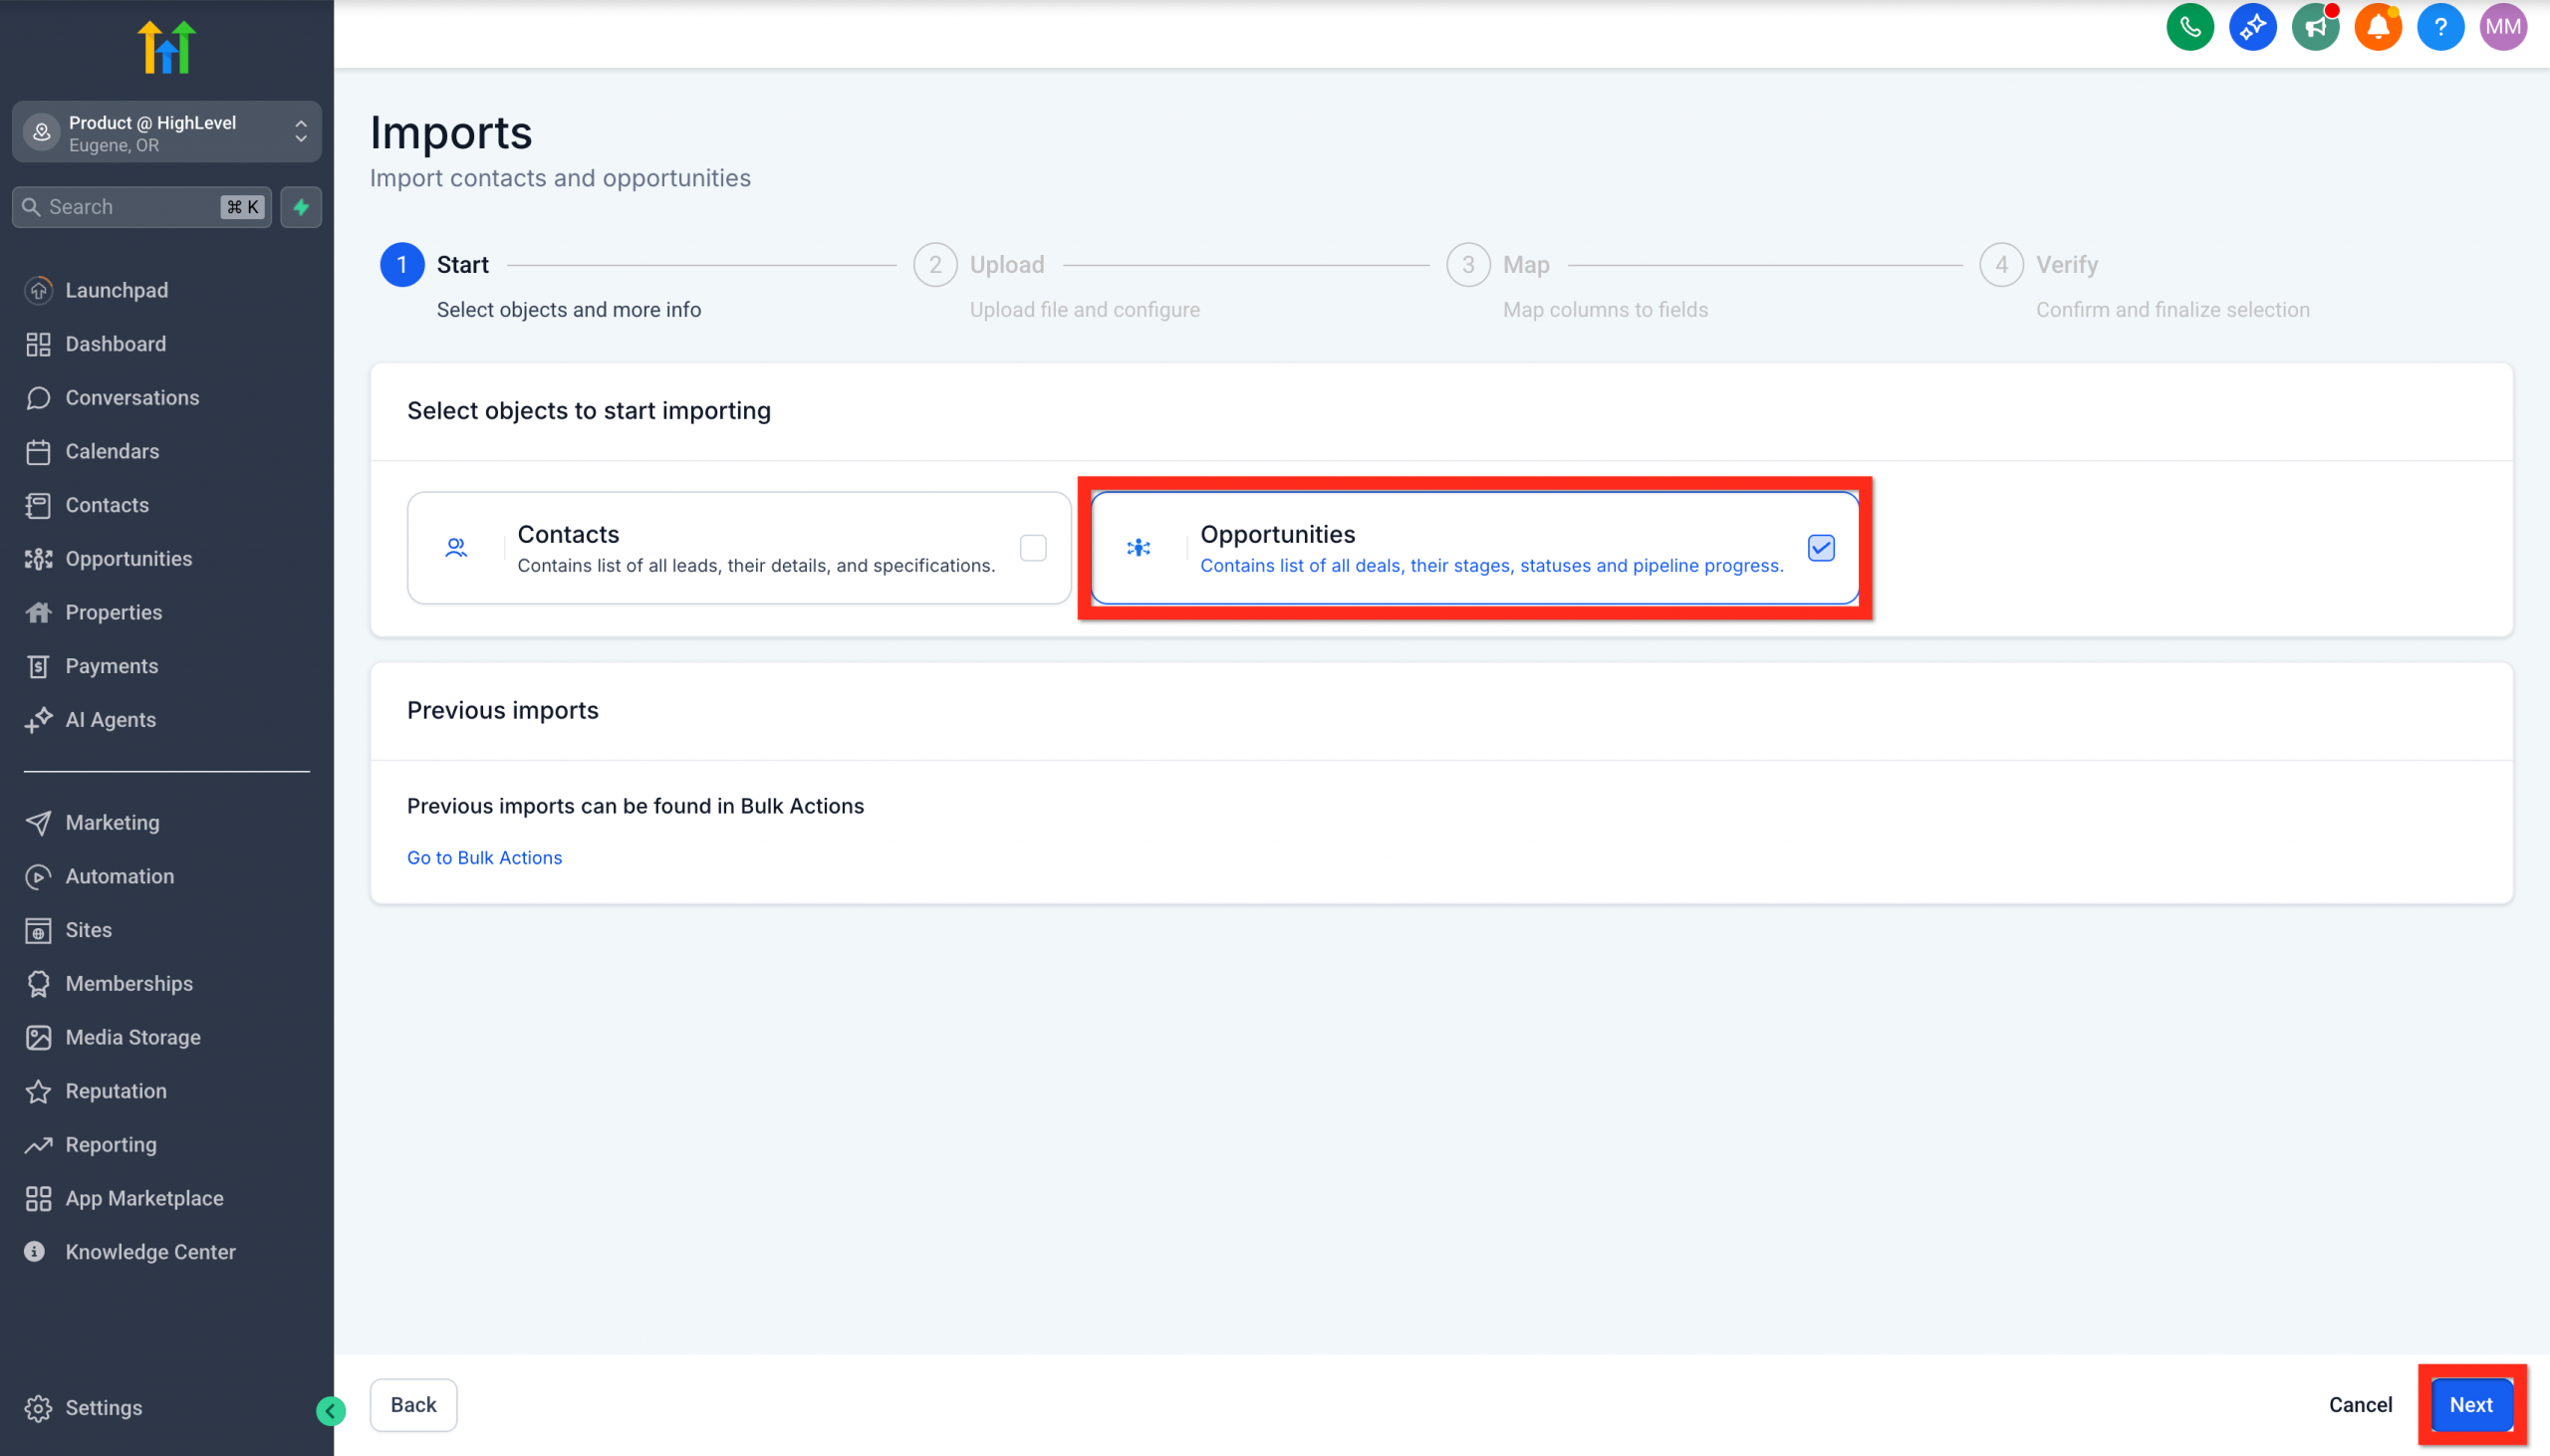
- Select Opportunities.
- Click Next.
- Upload your file.
- Click Next.
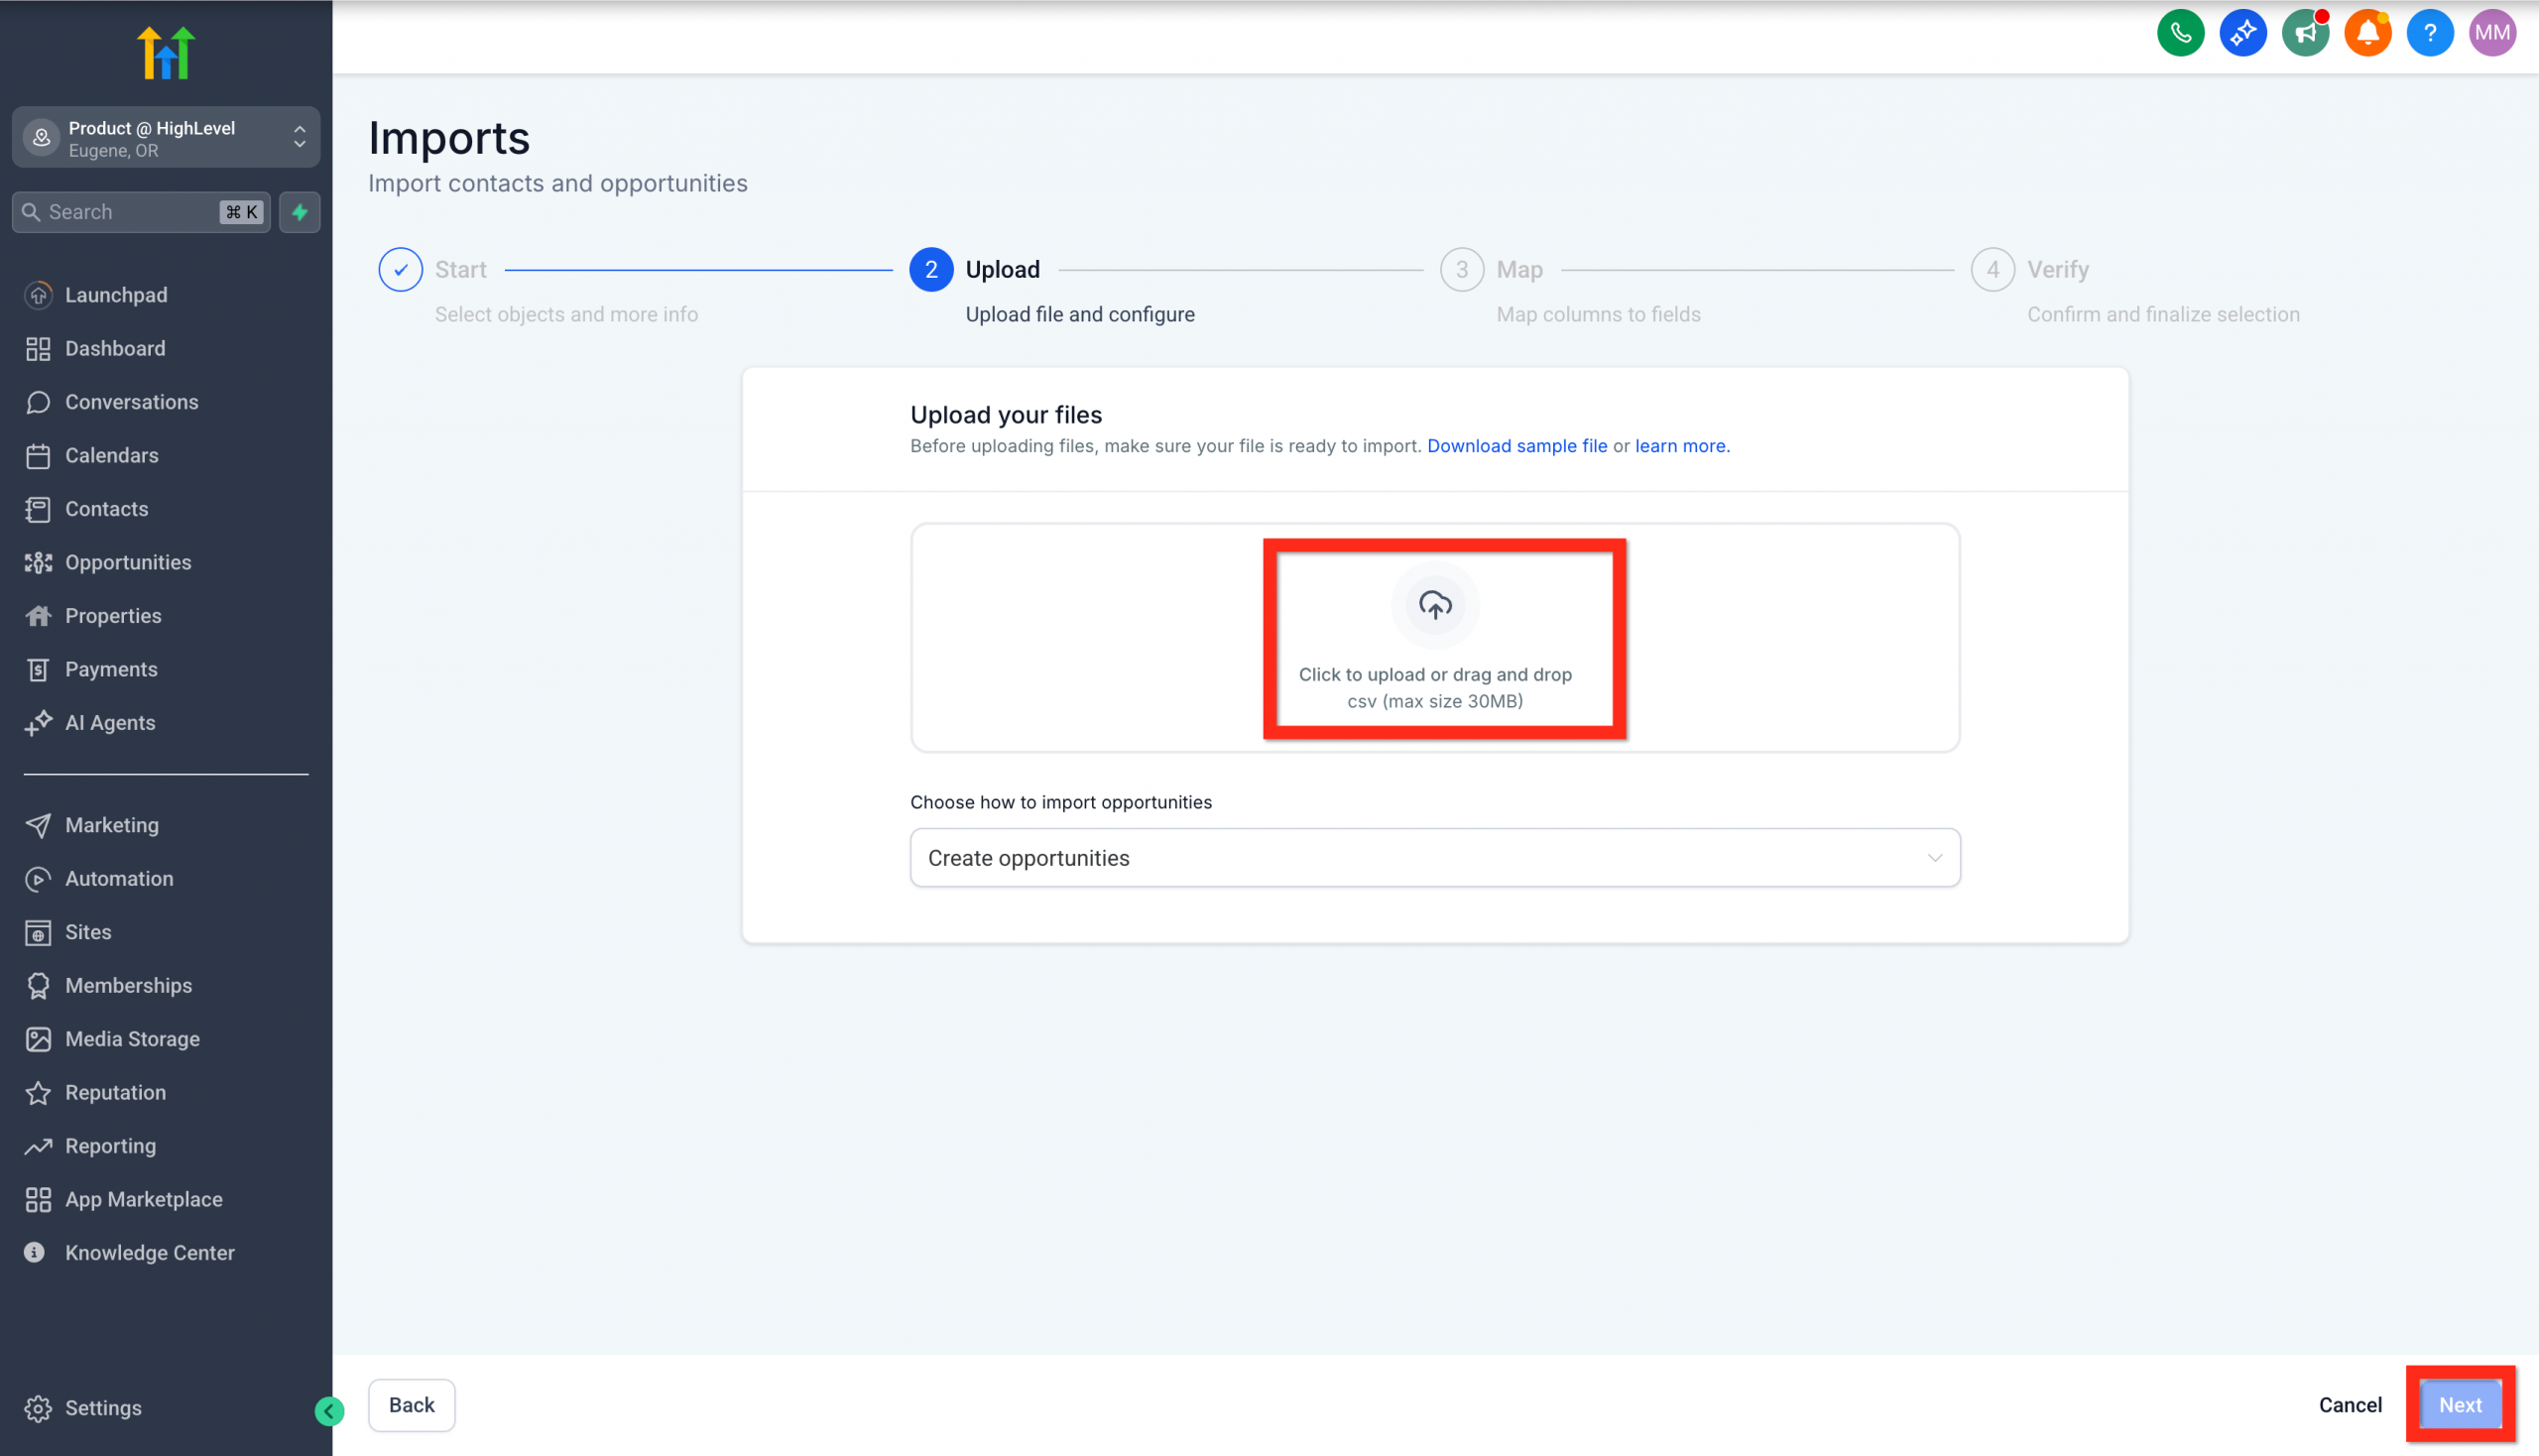
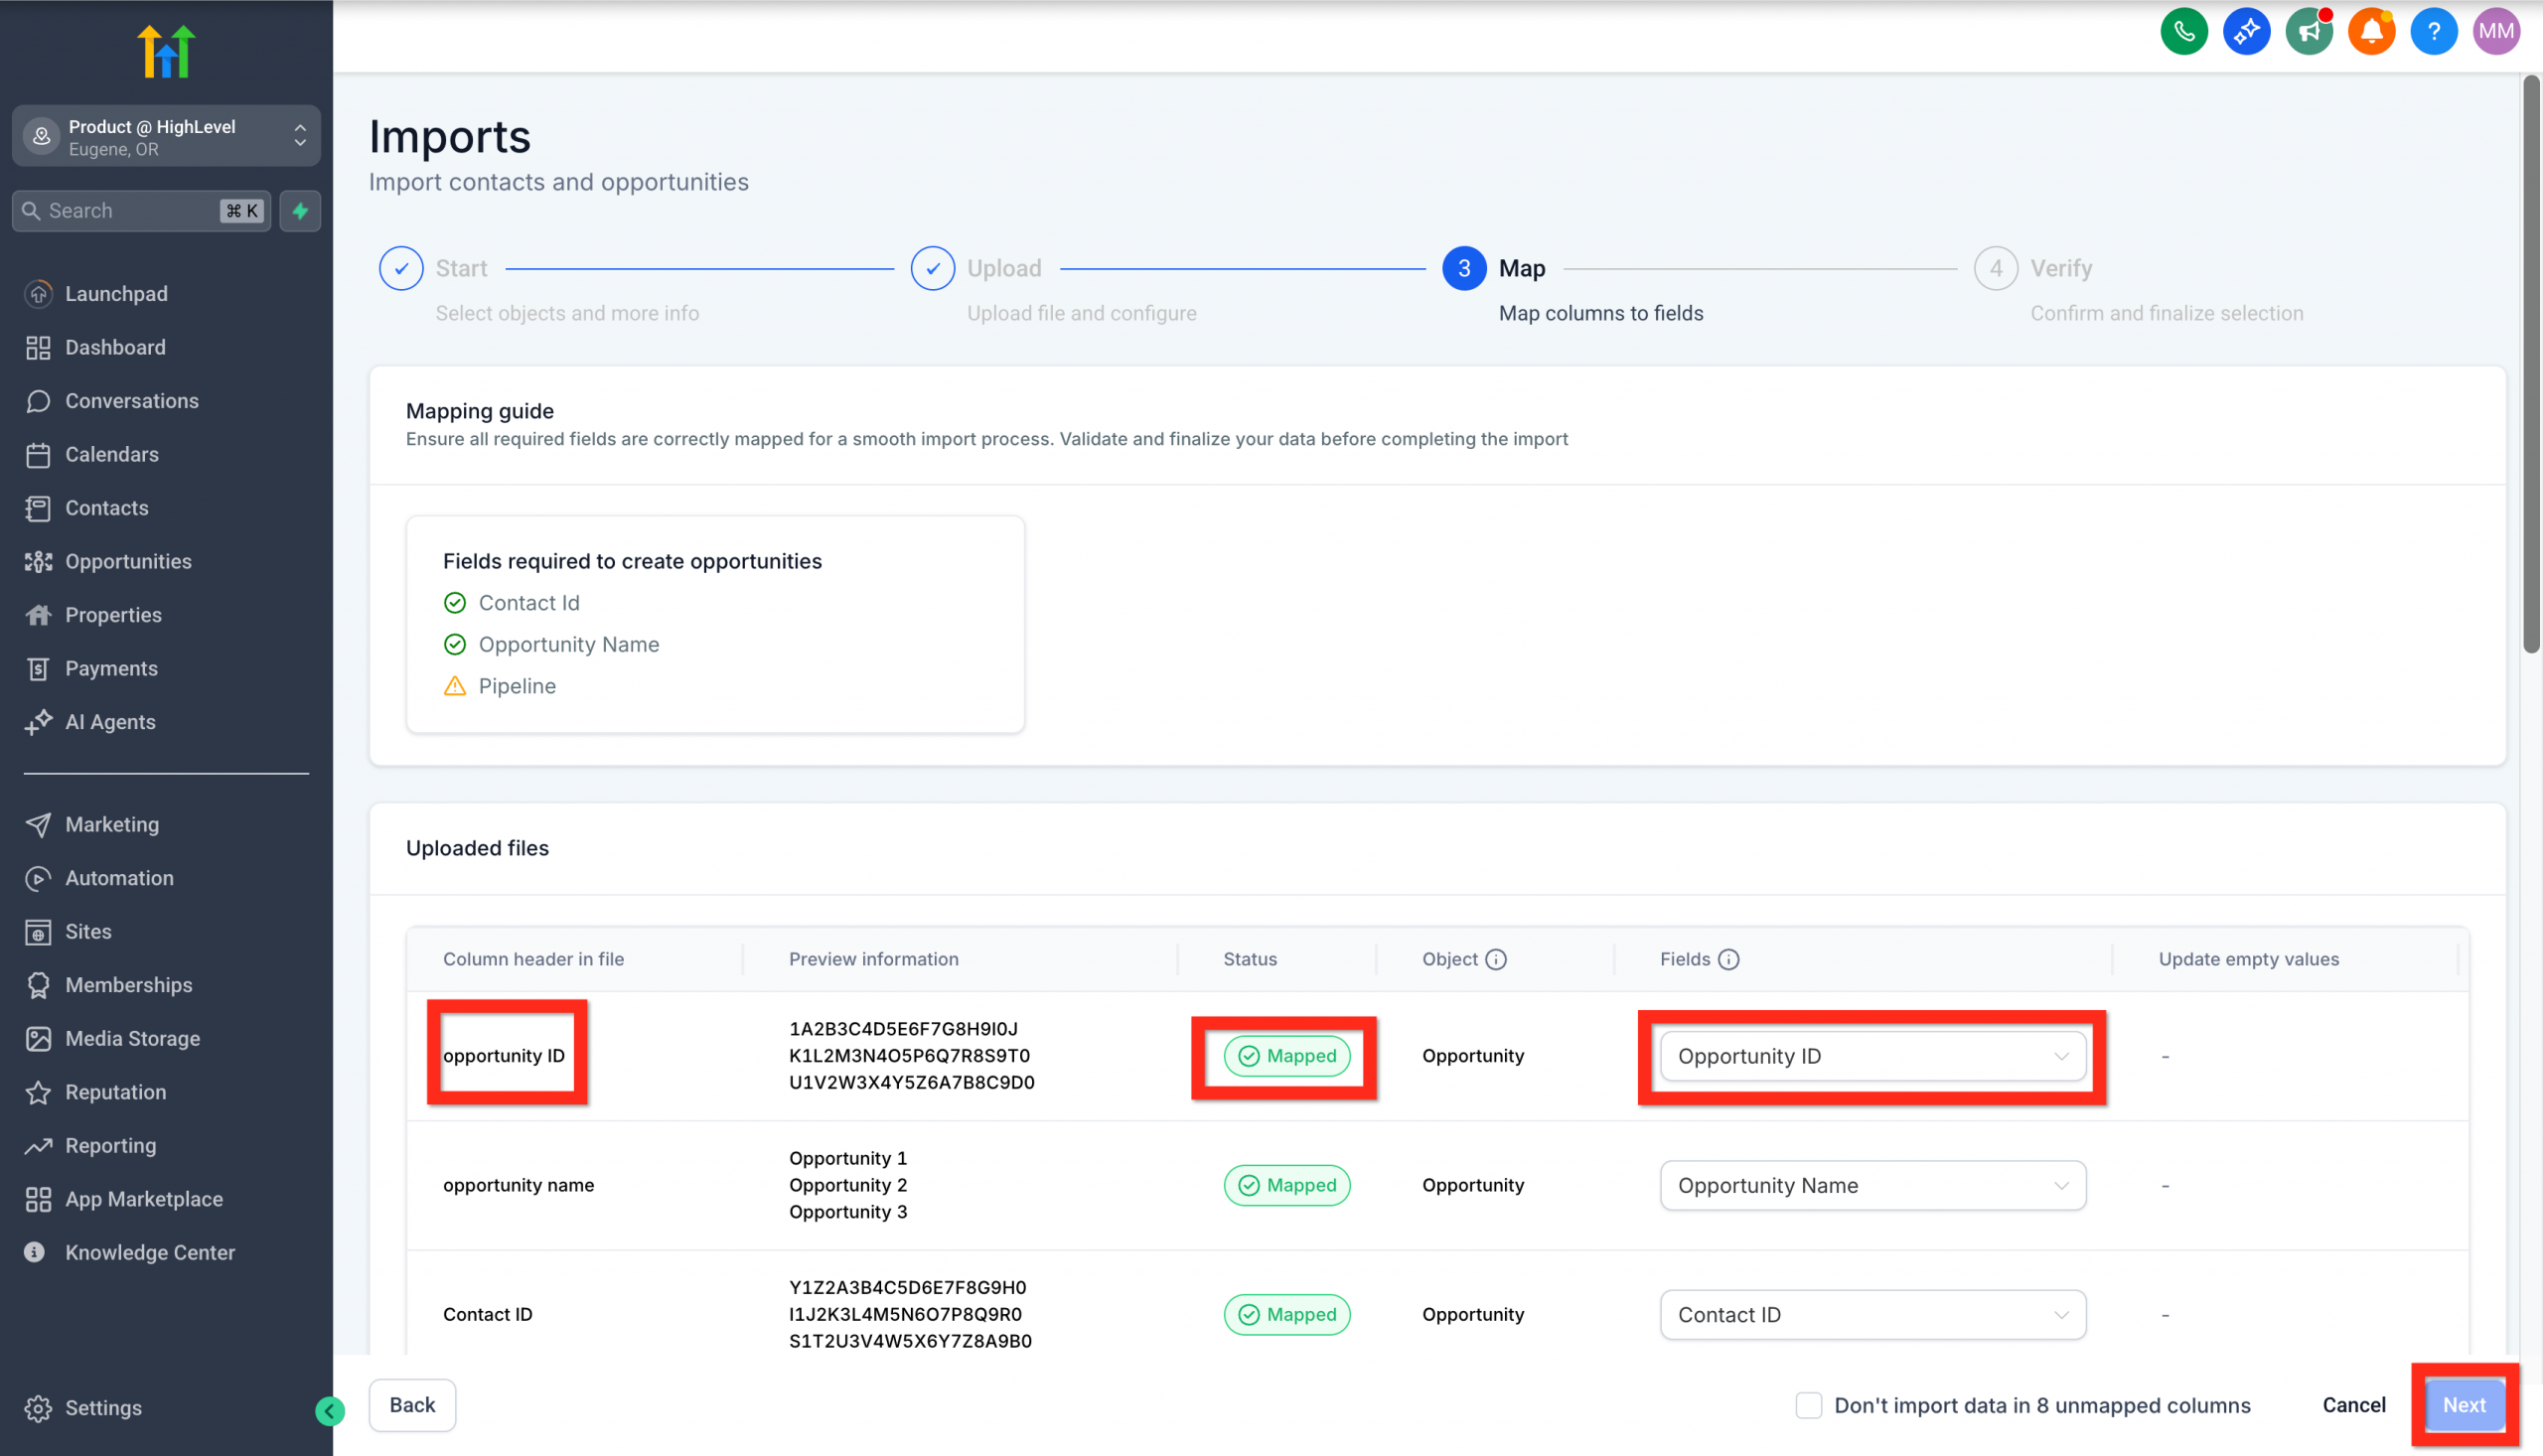
- Match the columns in your file to the Opportunity fields.
- Click Next.
- Check all the information and click Start bulk import.
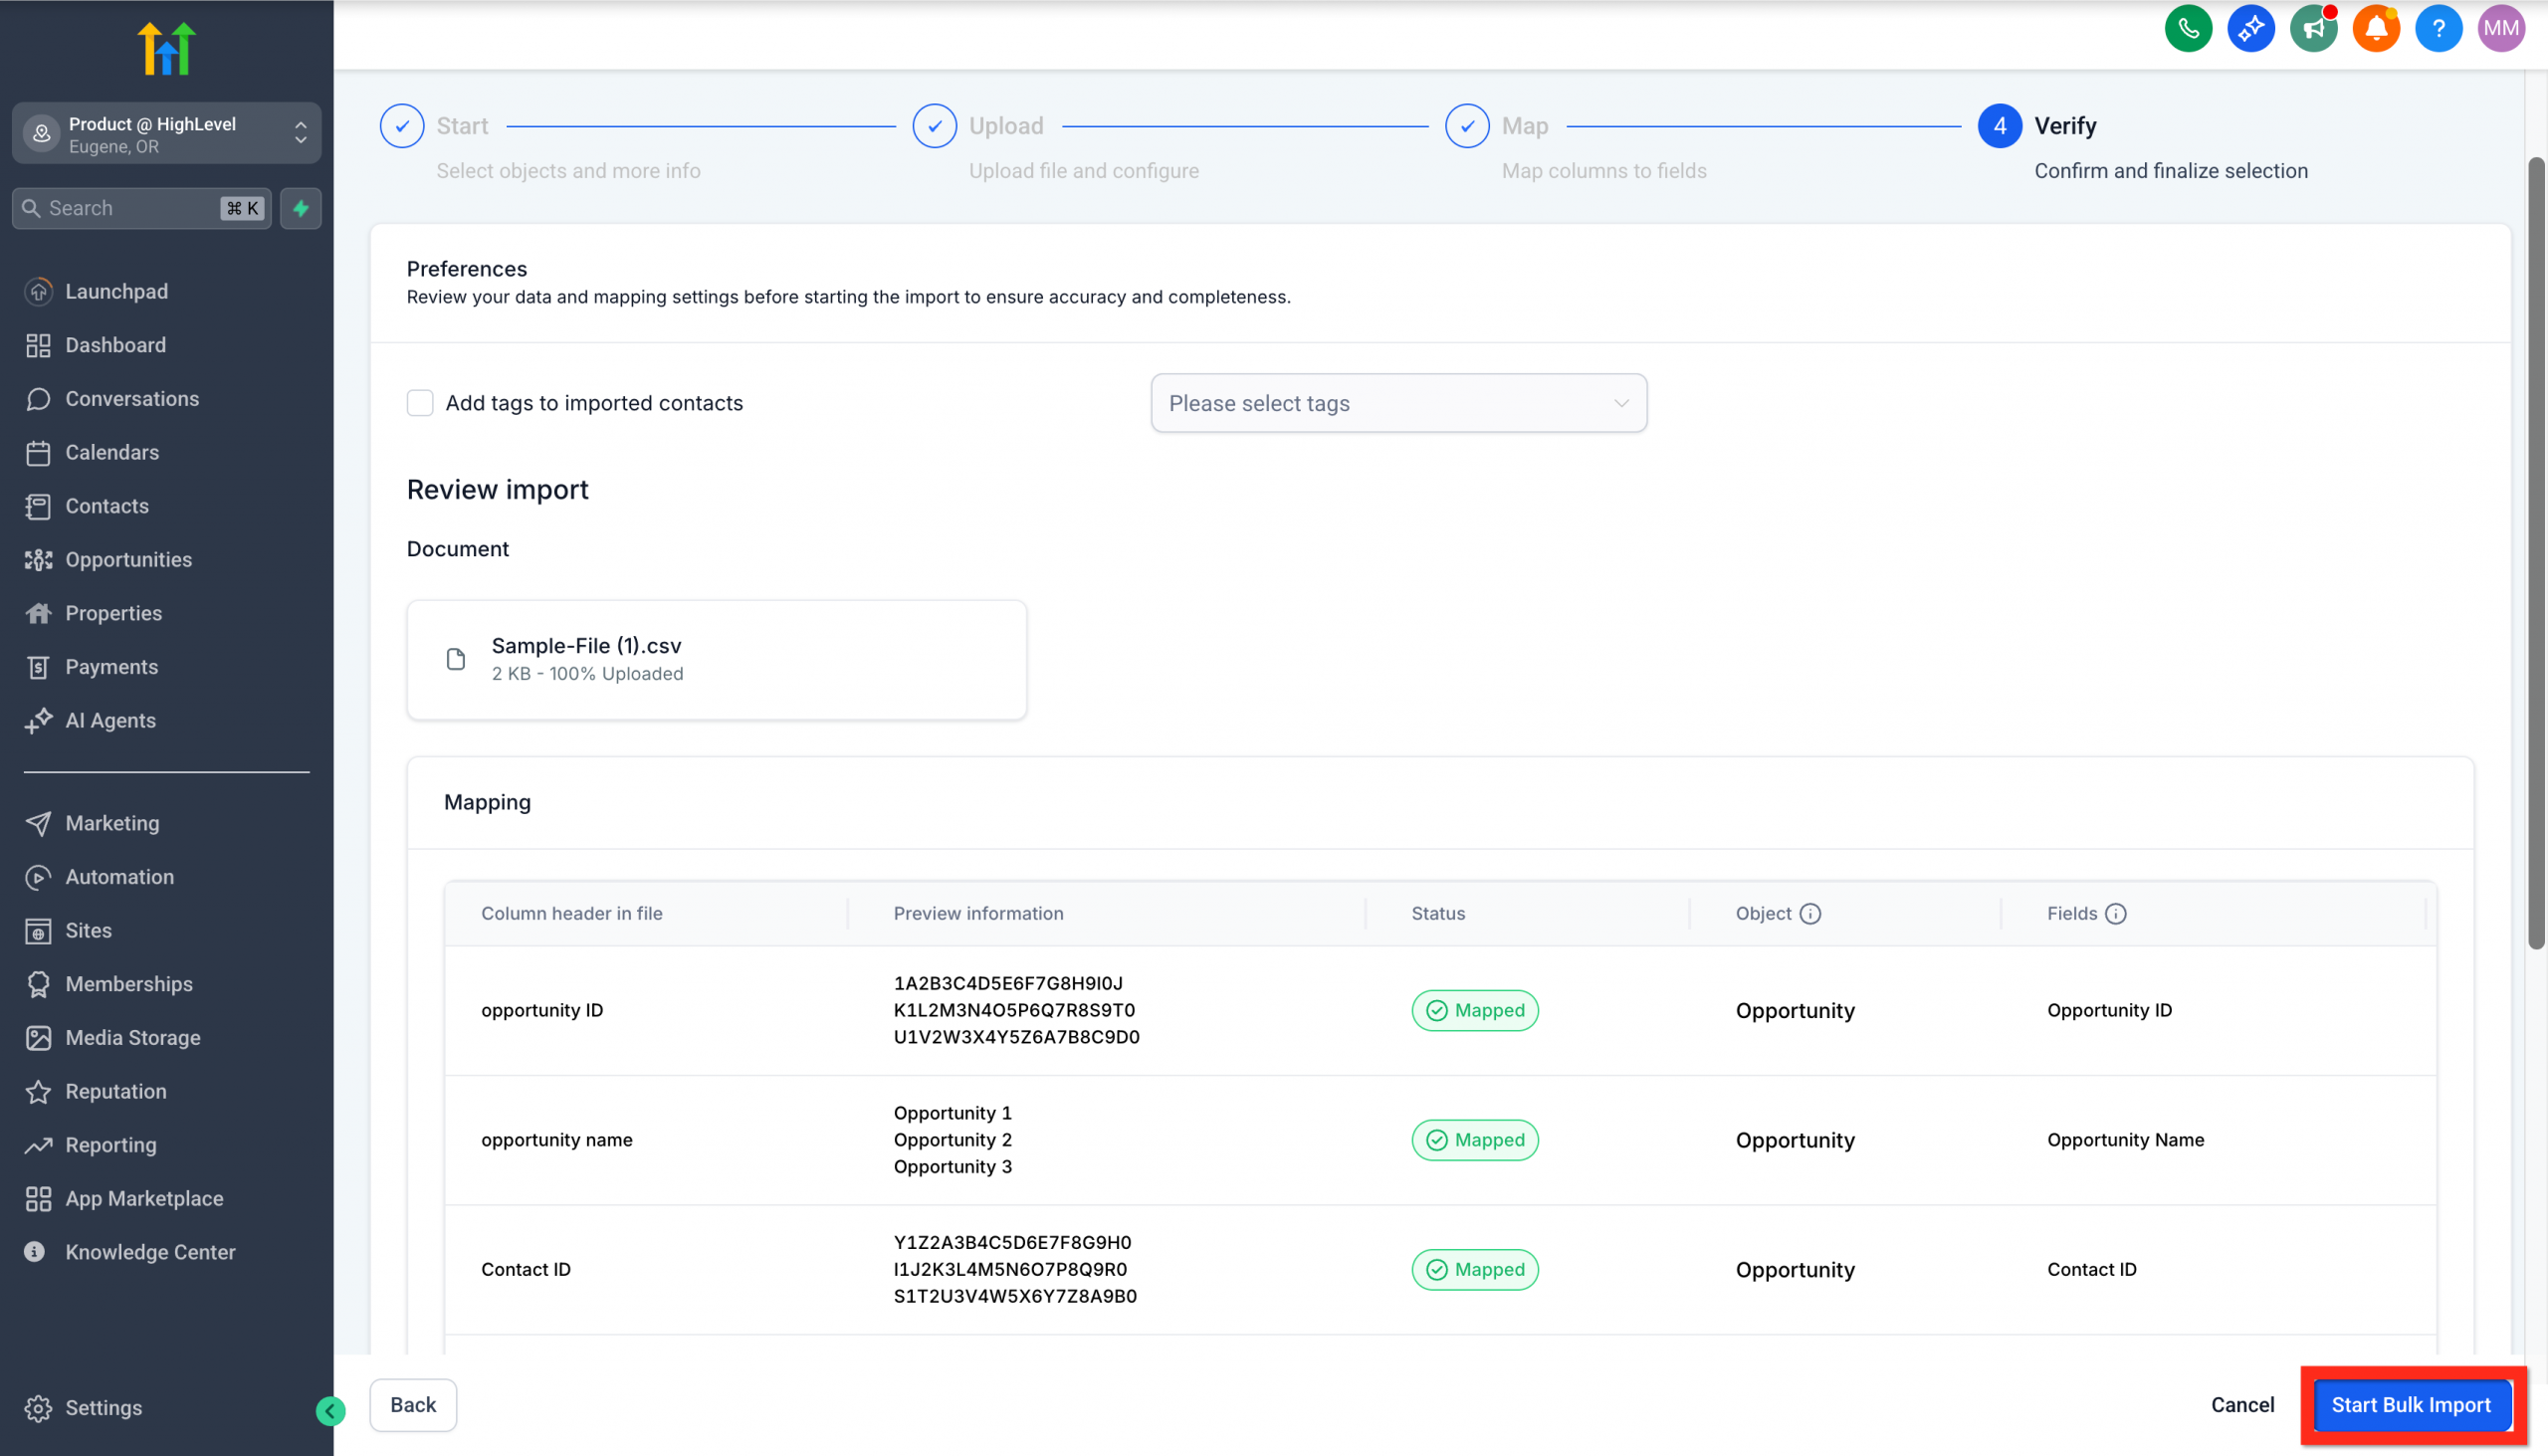
Now you might want to add opportunities manually to fine-tune your pipeline.
Create an opportunity manually
Sometimes opportunities arrive one at a time, and adding them manually gives you precise control. It is also quick and intuitive! Here is how:
- Go to Opportunities.
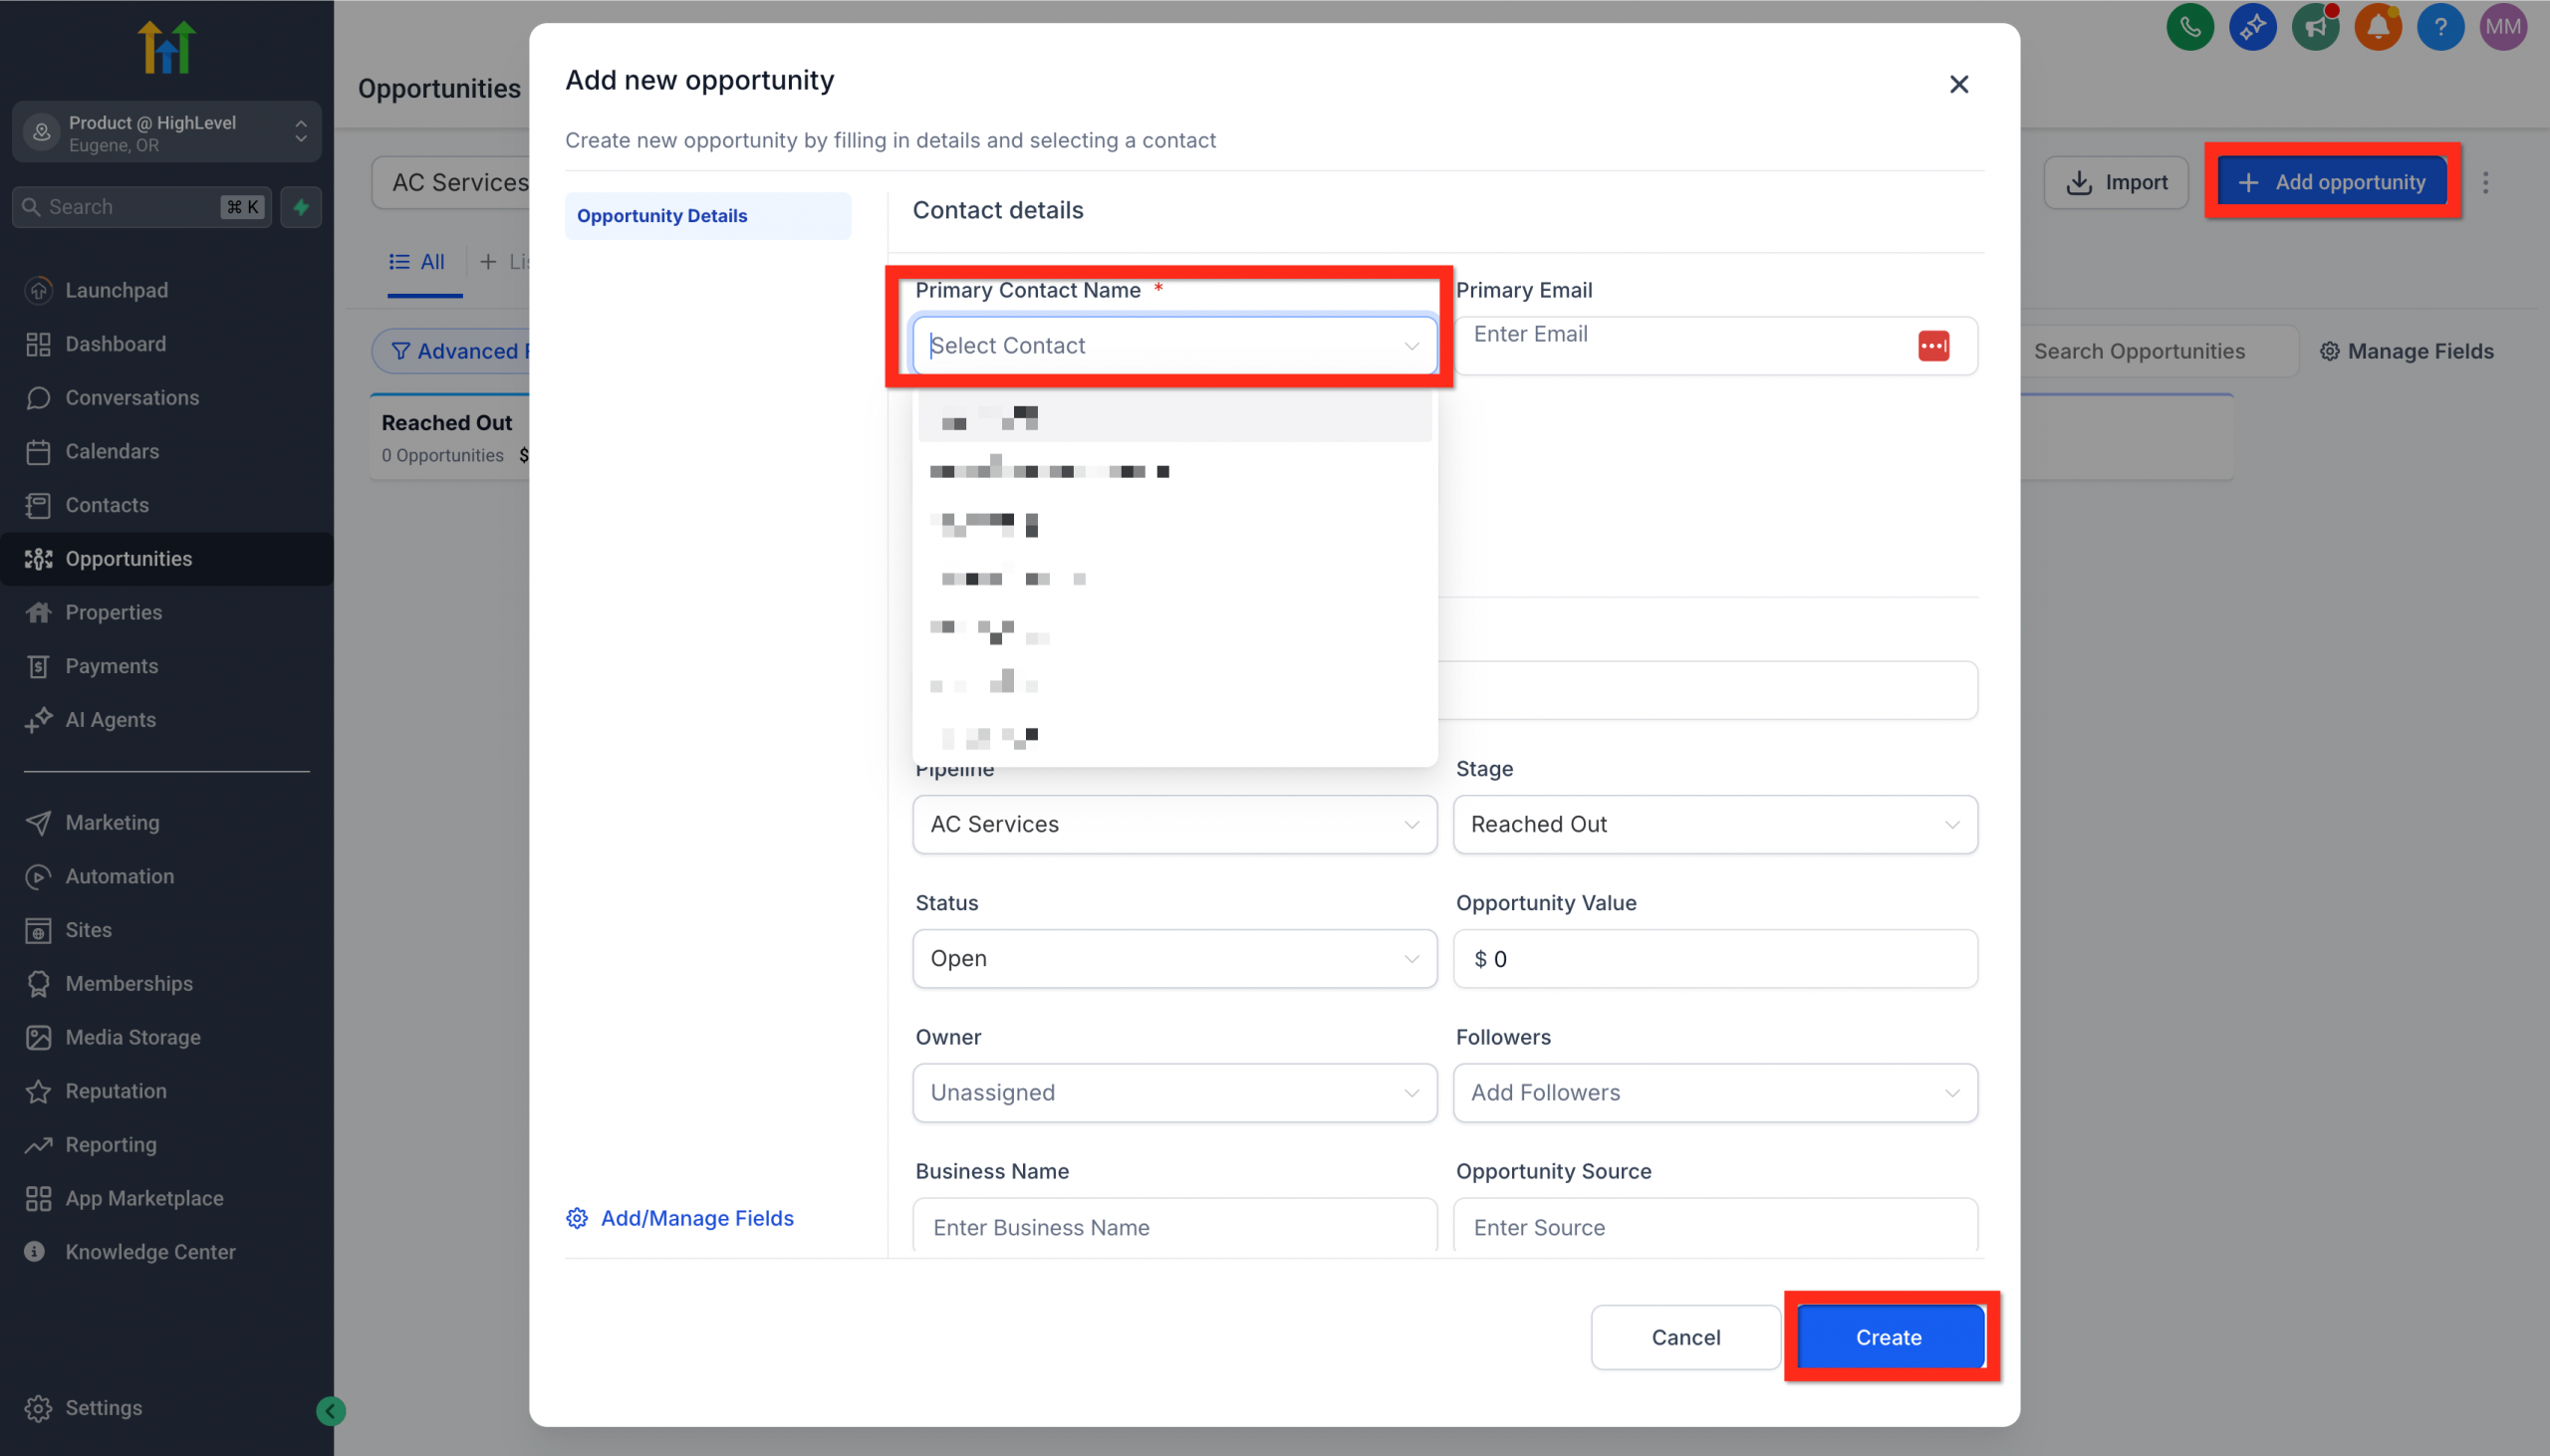
- Click Add opportunity.
- Select an existing contact or enter the details for a new one.
- Fill in the opportunity details (pipeline name, stage, value and so on).
- Click Create.
Create an opportunity through automation
Automating opportunity creation keeps your pipeline tidy with no extra steps. Below you will find a quick example that fires whenever someone submits a form, followed by a note about other triggers you can use.
- Open the workflowsGo to Automation → Workflows in the left-hand menu.
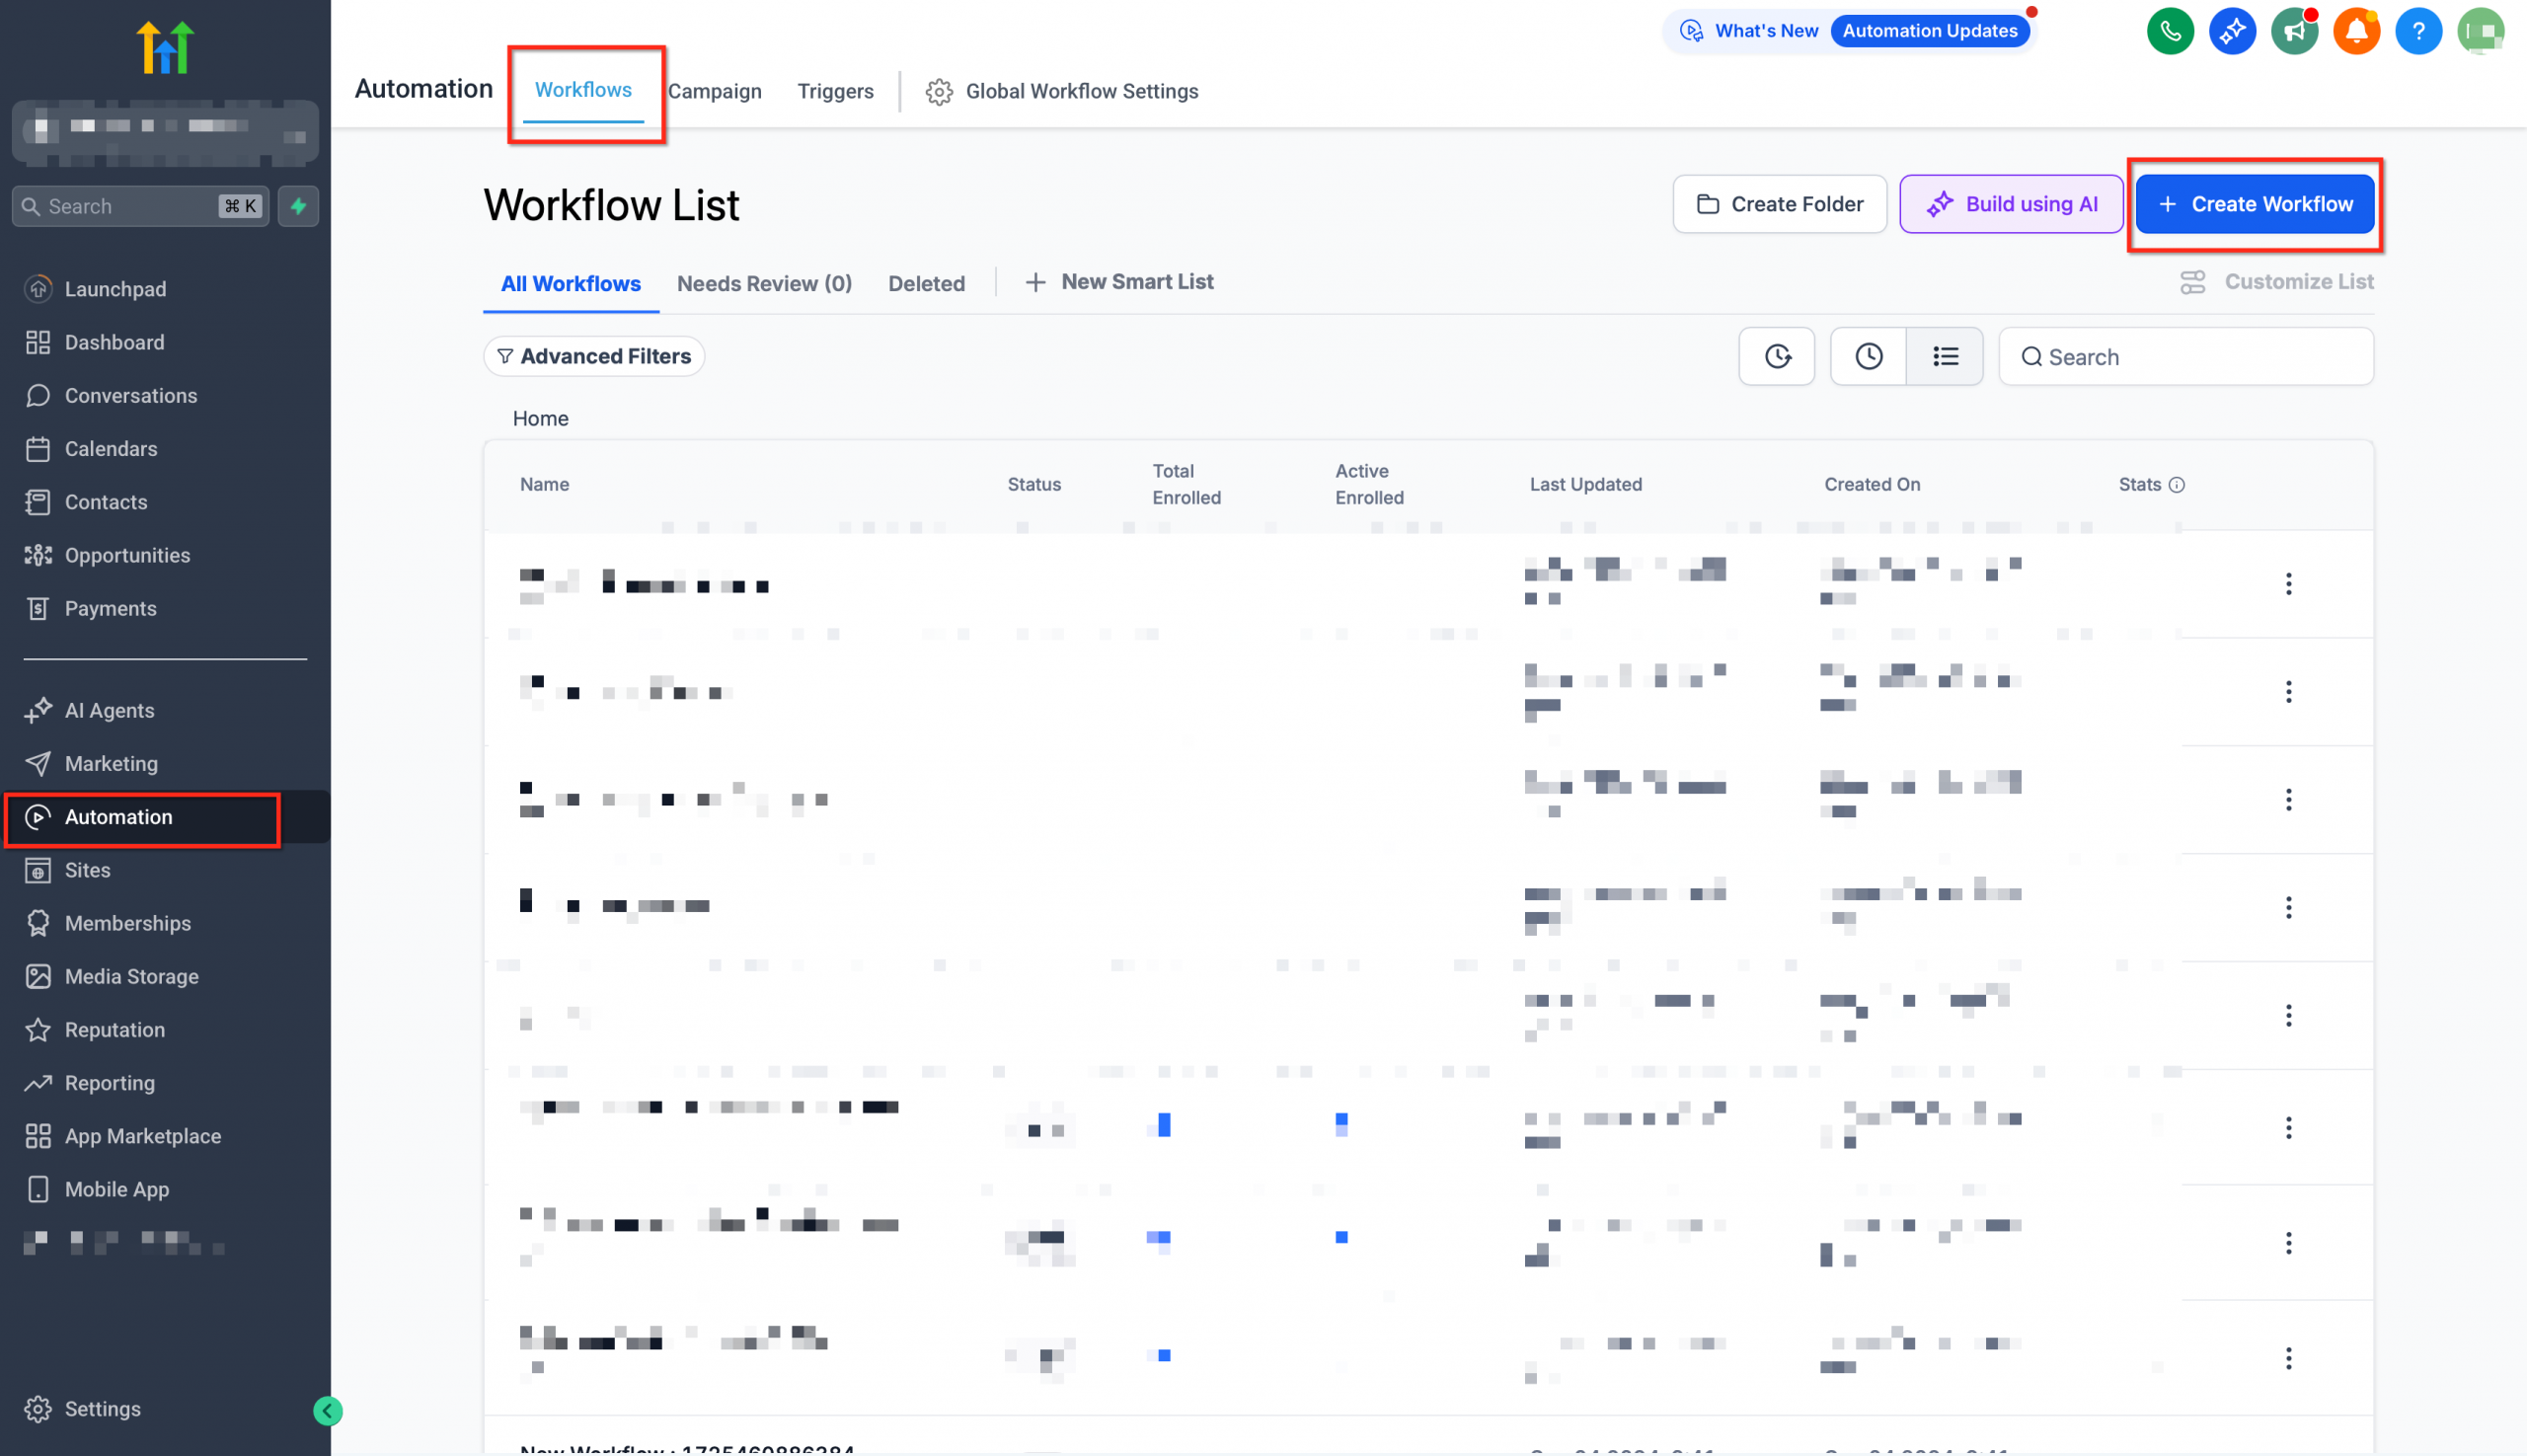
- Start a new workflowClick + Create workflow → Start from scratch (or choose a template you want to use).
- Add a trigger – Form submitted
- Click + Add new trigger and choose Form submitted.
- Select the specific form that collects your leads’ information.
- Press Save trigger.
- Add an action – Create/Update opportunity
- Click + (the add action button) below the trigger, then choose Opportunities → Create/Update opportunity.
- Choose the Pipeline and the Stage where you want new leads from the form to appear.
- Set the Status to Open (or another status), enter a Value if you know it and switch on Allow opportunity to move if you want the record to update when it is entered again later.
- Click Save action.
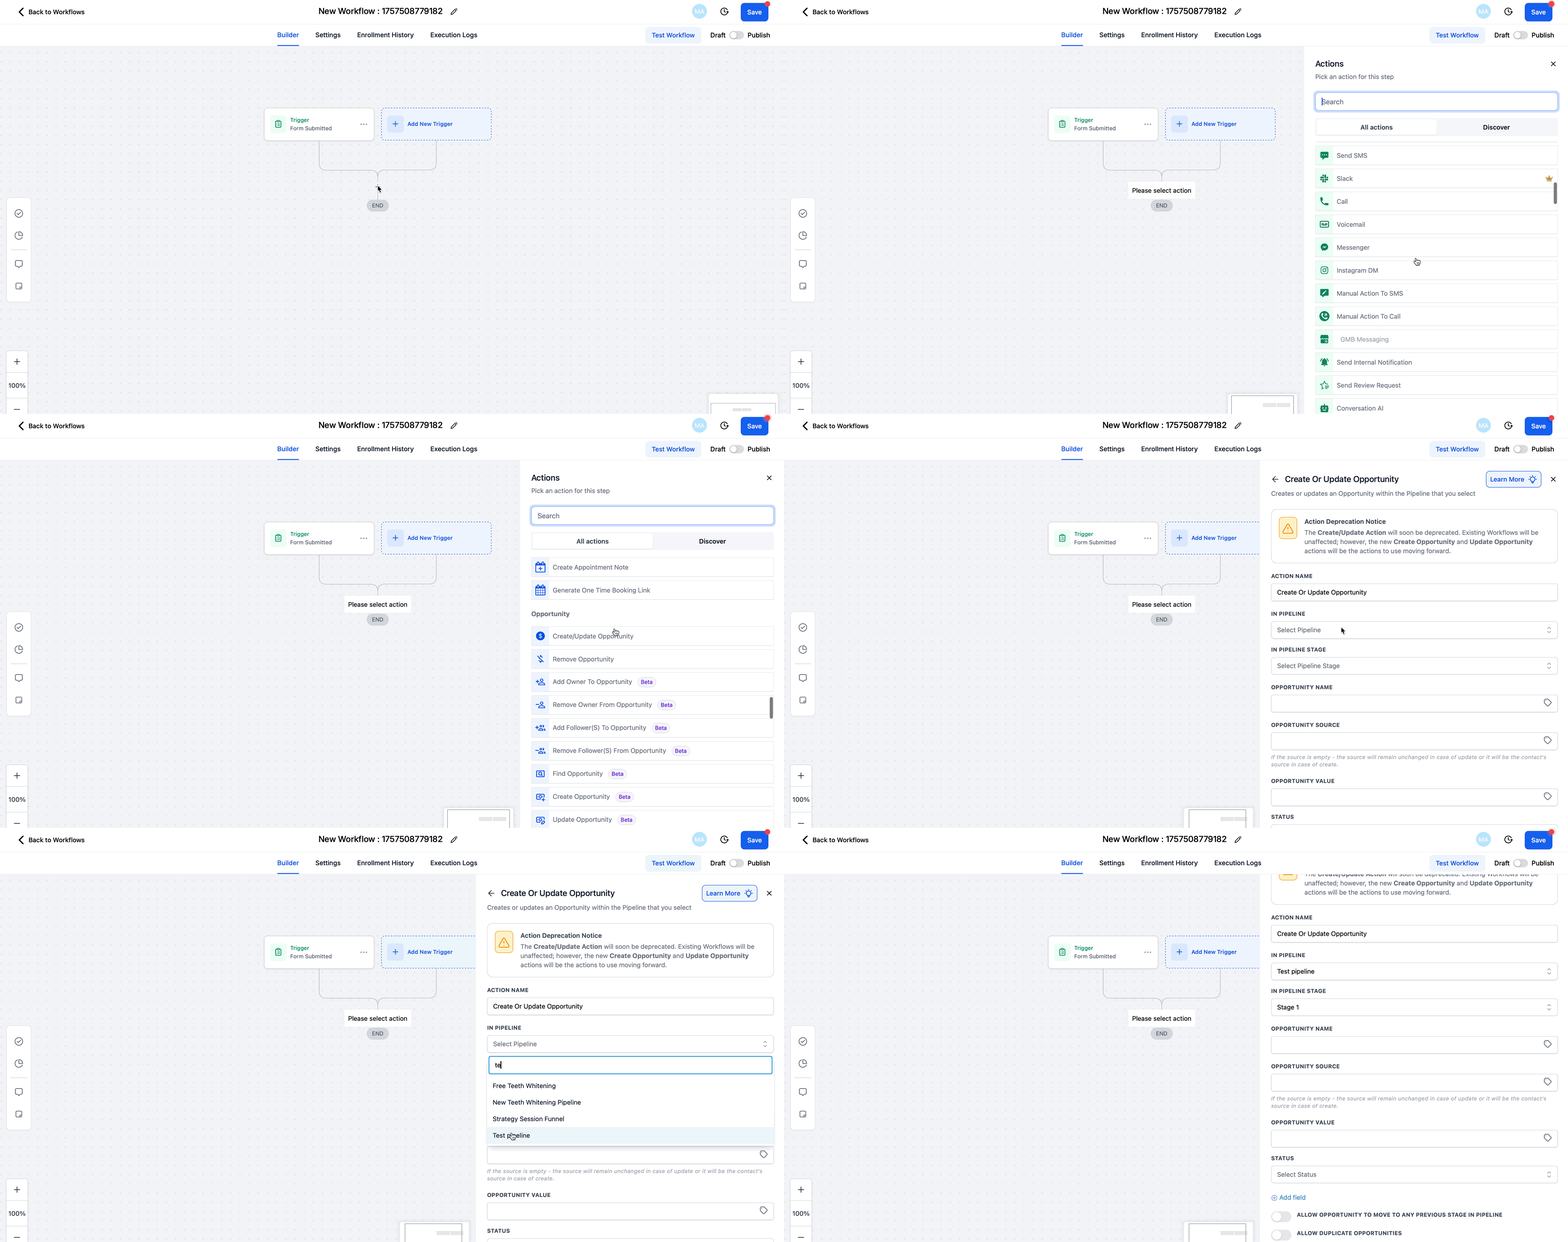
- Save and publishSwitch the button from Draft → Publish (top right). Every future form submission will land straight in the pipeline stage you chose, with no manual work.
Other common triggers and quick use cases
| Trigger | Quick use case |
|---|---|
| Customer booked an appointment | Automatically add prospective customers to “Consultation scheduled” when they book a call. |
| Contact tag | Move contacts tagged “Qualified lead” into a closing stage as soon as the tag is applied. |
| Facebook lead form submitted | Send leads from Facebook ads to a “New leads from Facebook” stage for a quick follow-up. |
| Payment received | Create an opportunity in a “Won – Awaiting onboarding” stage once a purchase is made. |
| Contact created | Start every new contact in “New lead” to make sure nothing is overlooked. |
| Call status | Put answered inbound calls into a follow-up stage so your sales team can handle them. |
| Survey submitted | Route completed surveys into a qualification stage for scoring. |
Note: the Create/Update opportunity action stays the same across every workflow; only the trigger changes. Choose the trigger that best matches how (and when) a lead should appear in your pipeline.