



Table of contents
- What is the advanced CSV upload in Social Planner?
- Key benefits of the advanced CSV upload
- How to use the advanced CSV upload
- Step 1: Go to Social Planner
- Step 2: Start a new bulk upload
- Step 3: Upload the CSV file
- Step 4: Select social accounts and approval settings
- Step 5: Review and fix errors
- Step 6: Schedule and import
- Media support by platform (images, reels and videos)
- Image support
- 1. Facebook and Instagram
- 2. Google Business Profile
- Reel and video support
- Uploading or updating images after the CSV import
- Watermark support
- Smart media optimisation
- Tag and category assignment
- Default settings for Pinterest boards
- Flexible date and time parsing
- Frequently asked questions
What is the advanced CSV upload in Social Planner?
The advanced CSV upload is a powerful enhancement to the Futuria CRM Social Planner that lets users upload and schedule content in bulk using a feature-rich CSV or XLSX template. This tool supports advanced platform-specific settings, media optimisation, watermarks, tags, categories and much more, making it the most complete CSV import system for social media management.
By taking advantage of the advanced CSV, users can efficiently plan, organise and automate posts across platforms such as Facebook, Instagram (including Stories and Reels), YouTube Shorts, Google Business Profile, TikTok, Pinterest and others, all from a single workflow.
Key benefits of the advanced CSV upload
Unlocking the advanced CSV feature brings a set of benefits designed to simplify and strengthen your social media scheduling:
- Bulk scheduling across multiple platforms: Schedule posts, stories, reels, shorts and more for several channels with a single upload.
- Watermark automation: Automatically apply a watermark to your media for a consistent visual identity.
- Smart media optimisation: Make sure images and videos are optimised automatically for each platform's requirements.
- Tag and category assignment: Organise posts with tags and categories to simplify reporting and trigger automations.
- Pinterest board selection: You can choose specific Pinterest boards by manually adding a new column called "Pinterest board" to the CSV template, even though it is not included by default. In each row, enter the board name or ID; both formats are supported.
- Flexible date and time parsing: Supports multiple date and time formats, reducing import errors and saving time.
- Dual format upload: Accepts both .csv and .xlsx files, removing problems during the import.
- Performance improvements: Enjoy faster workflows, smoother imports and better error handling.
- First comments and follow-ups: Add opening comments to posts to boost engagement.
- Full platform support: Configure Google Business Profile, YouTube, TikTok and more with platform-specific fields.
How to use the advanced CSV upload
Setting up the advanced CSV upload makes sure your campaigns are managed efficiently and without errors. Follow these steps for a smooth experience.
Step 1: Go to Social Planner
- Go to Marketing from your account.
- Click the Social Planner tab.
- Connect your preferred social accounts.

Step 2: Start a new bulk upload
- Click the + New post button.
- Select the Upload from CSV option from the drop-down menu.

Step 3: Upload the CSV file
- Select Advanced format to unlock all the advanced features.
- Upload your completed .csv or .xlsx file.
- Click Next.
Note: the latest templates include a thumbnailUrl column for video thumbnails.

Step 4: Select social accounts and approval settings
- Select the social channel/channels you want to publish to.
- If posts need approval, tick the Send for approval box to enable it and select an approver.
- Click Create.

Step 5: Review and fix errors
- The system will flag any issues.
- Review and fix the errors before moving on.

Step 6: Schedule and import
- Click Schedule.
- Click Import to add every approved post to your calendar queue.

Media support by platform (images, reels and videos)
When you use the advanced CSV upload, you can schedule posts across several social platforms such as Facebook, Instagram, Google Business Profile, LinkedIn and many more. Media support varies from platform to platform, so it is important to follow the guidelines below to make sure posts are scheduled correctly.
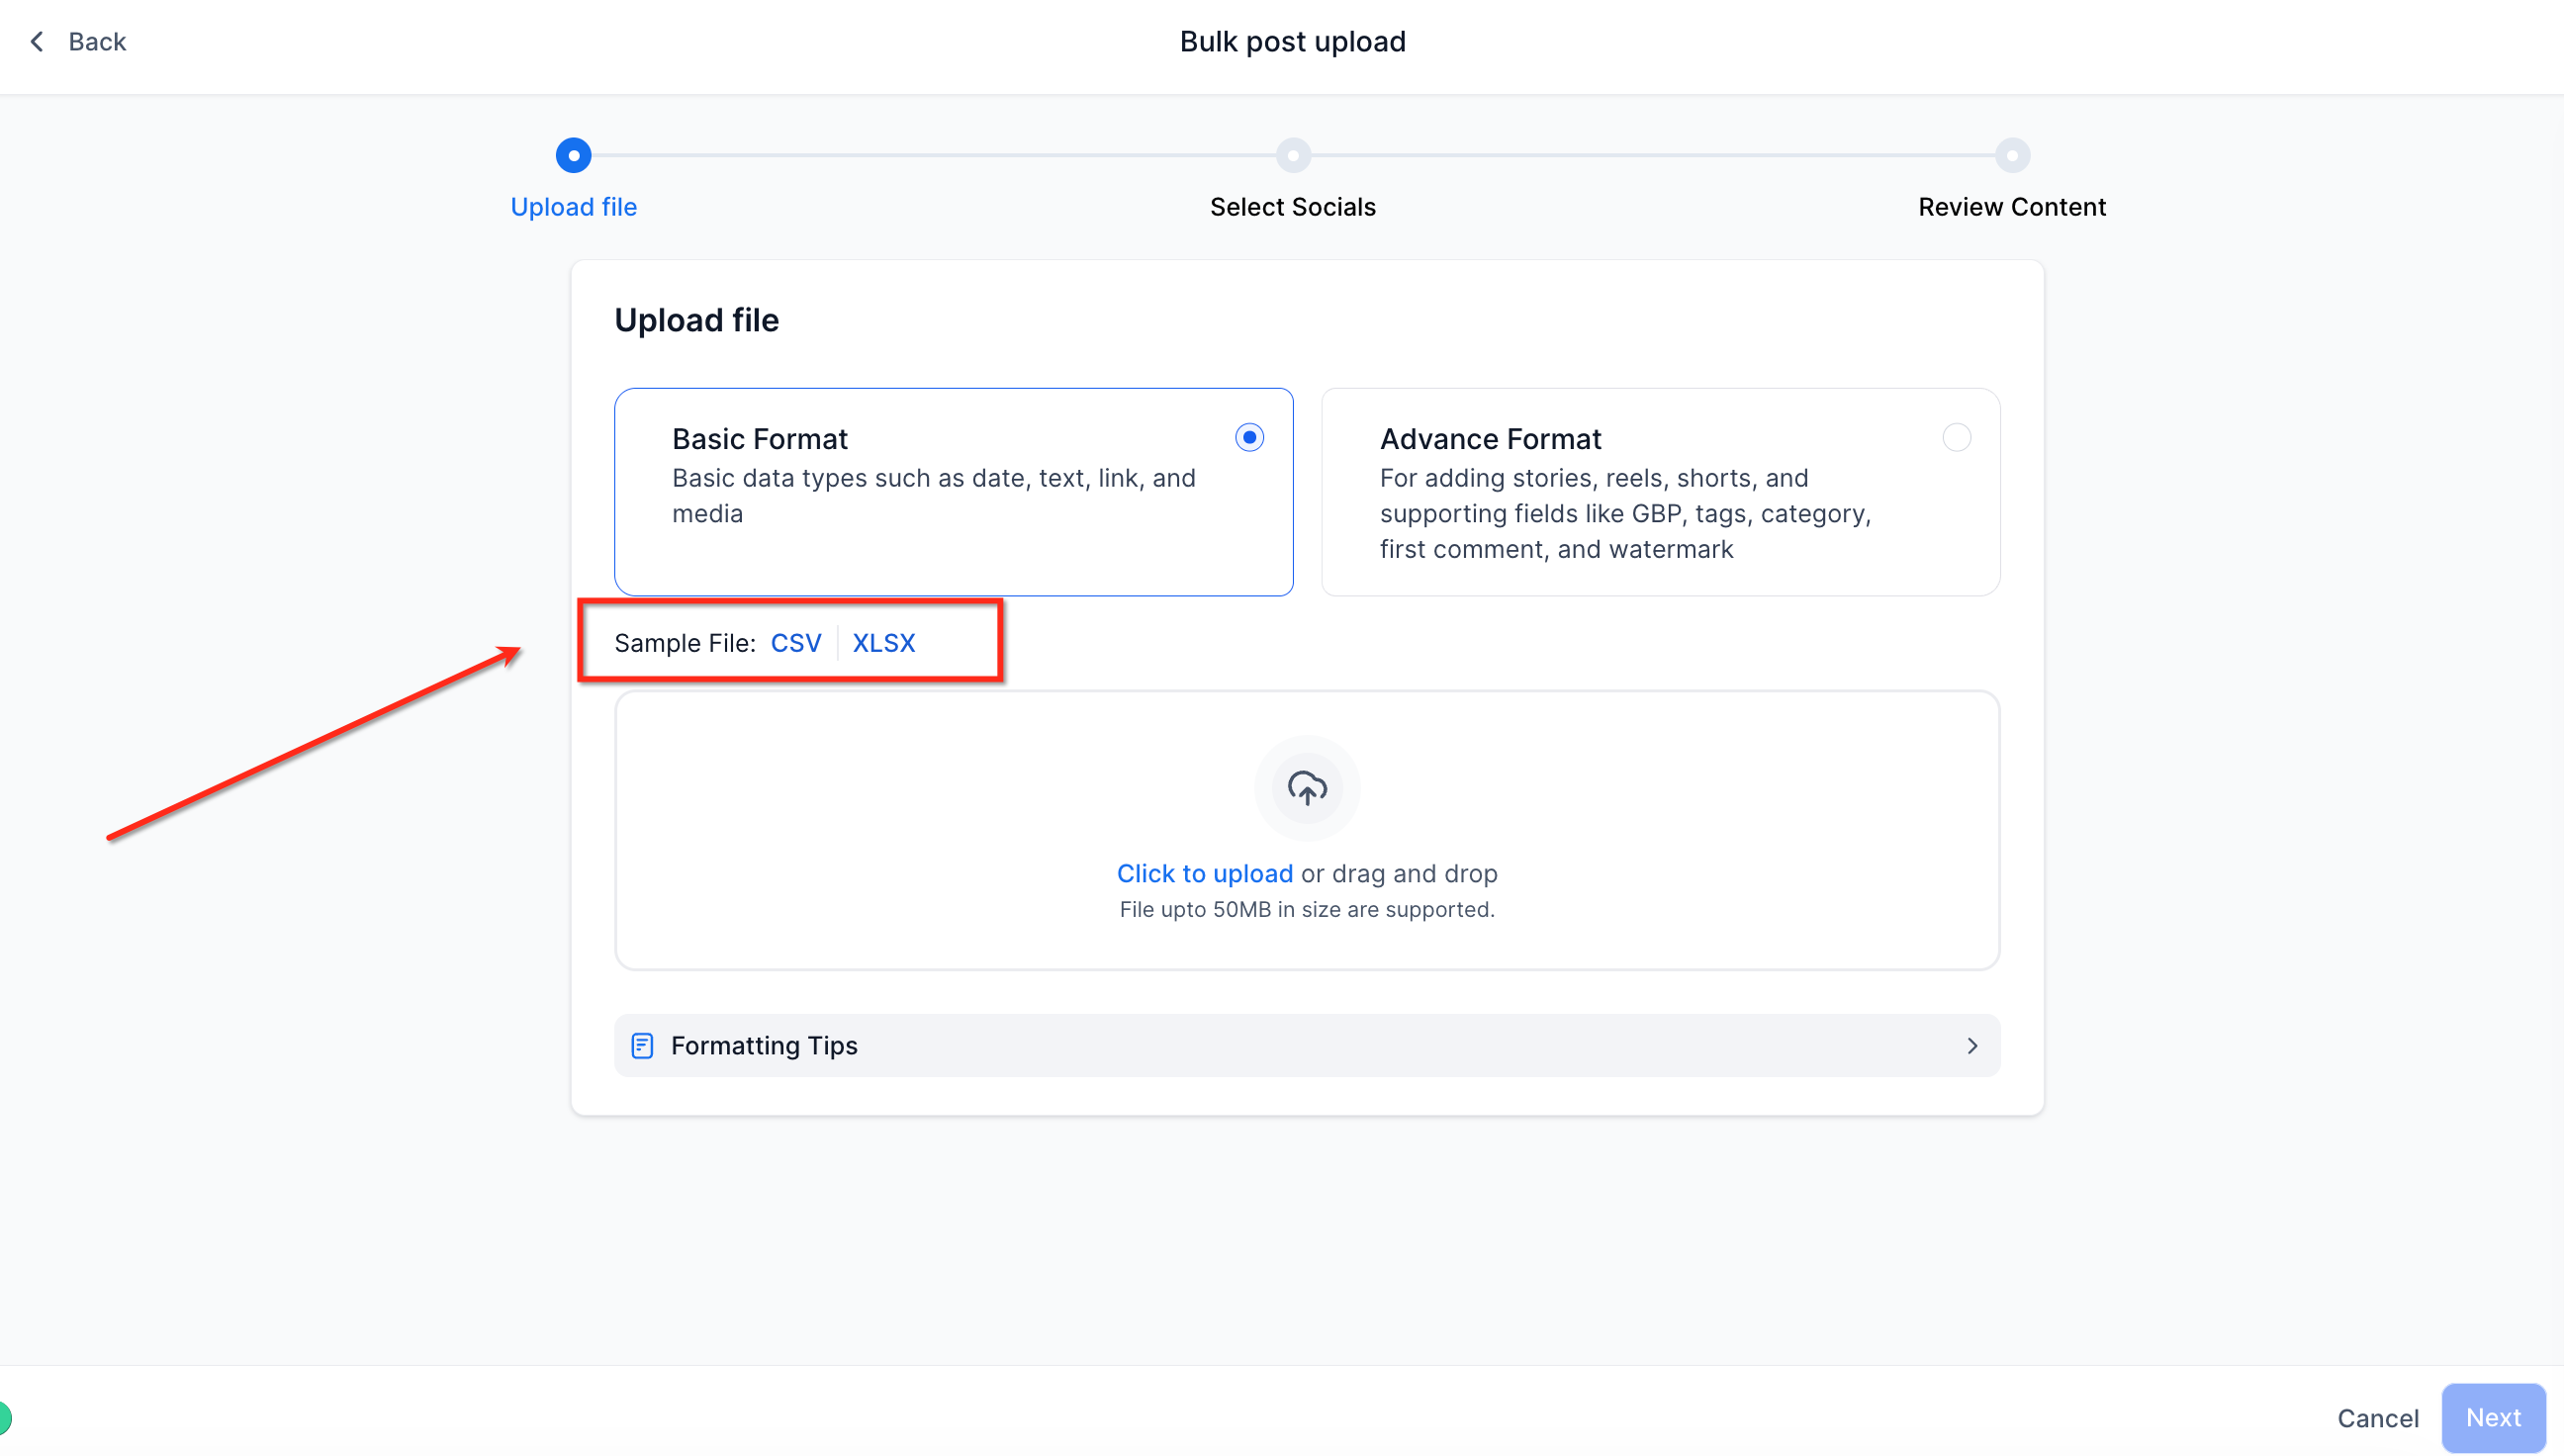
Image support
1. Facebook and Instagram
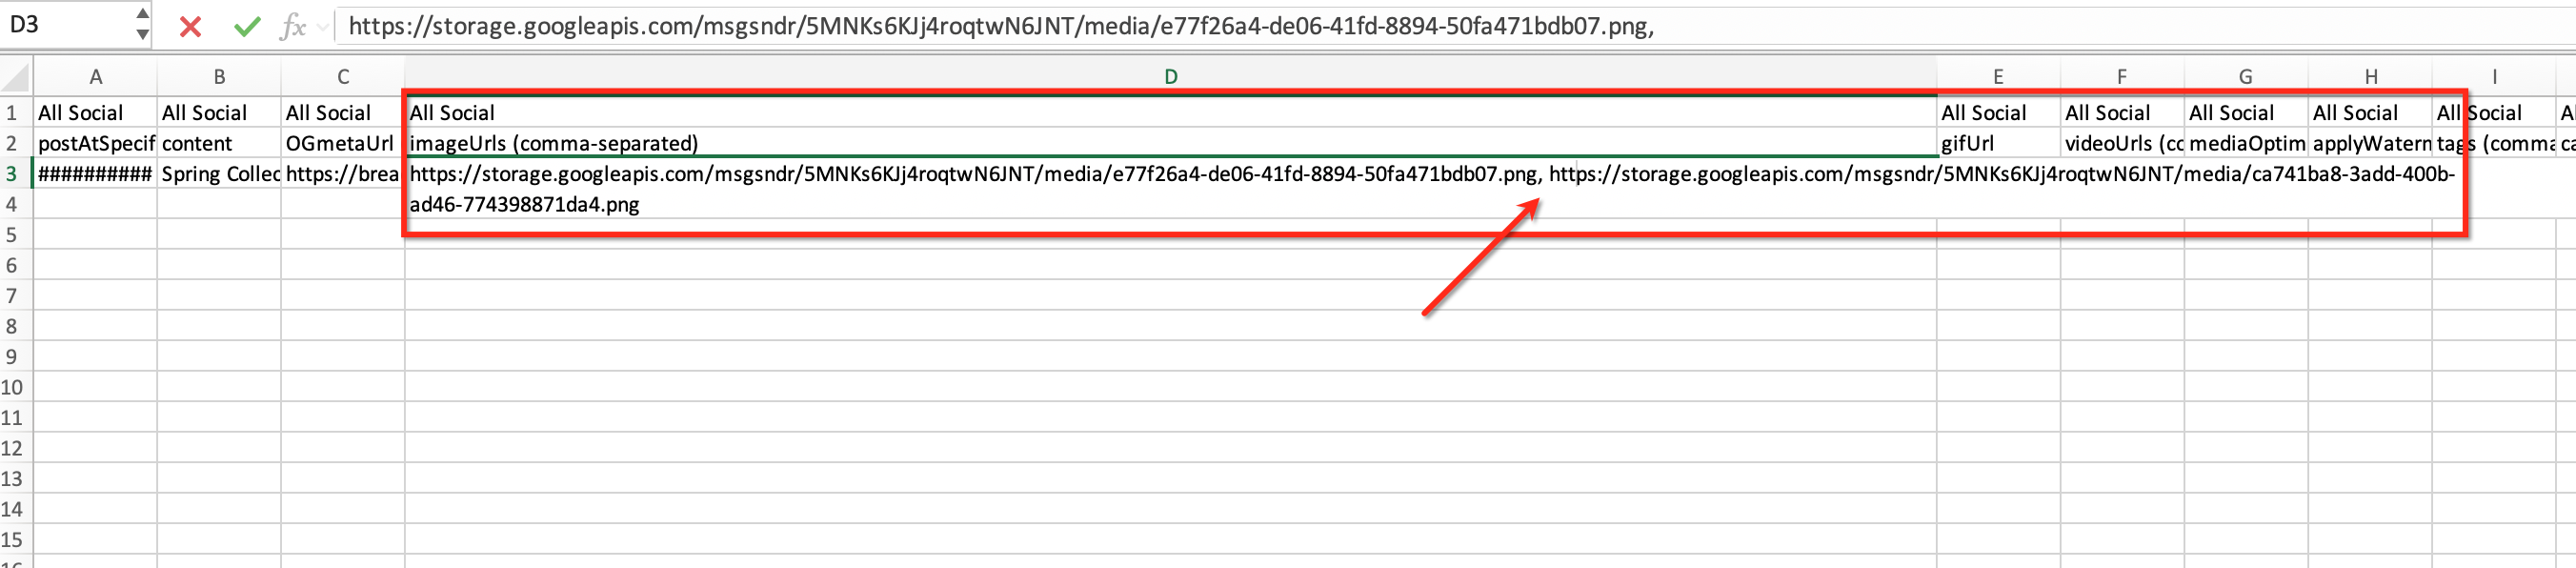
- They support image carousels.
- You can add multiple image URLs in the spreadsheet.
- Multiple image URLs must be separated by a comma.
- Example:
2. Google Business Profile
- Supports only one image per post.
- Image carousels are not supported.
Reel and video support
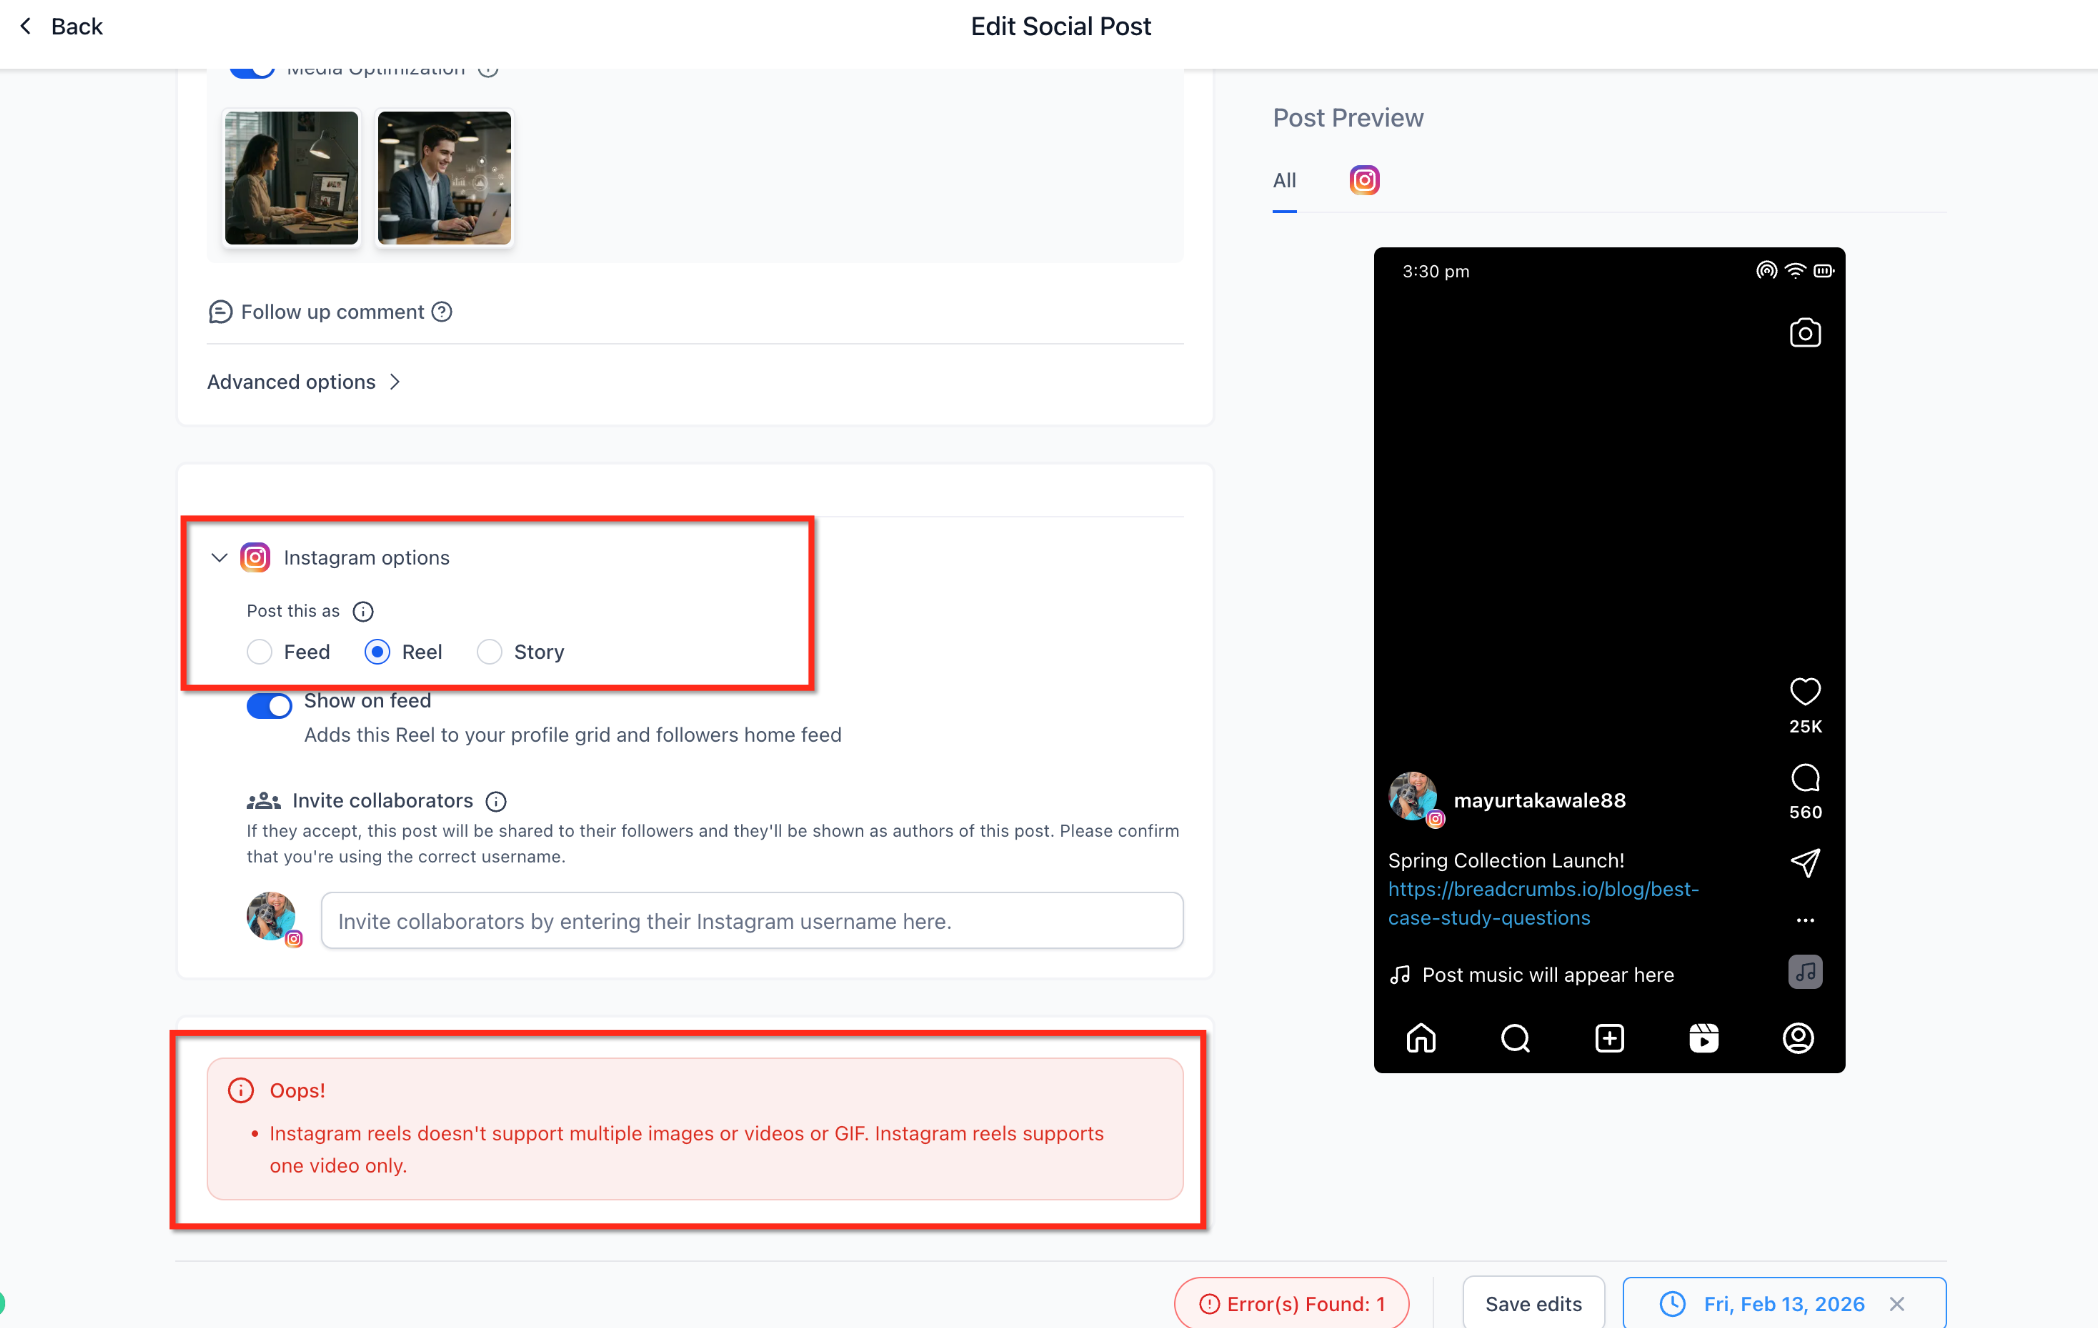
- Only one video or one reel per post is supported.
- Carousels are not supported for reels or videos.
- If multiple video URLs are added, scheduling the post may fail.
- You can set a custom thumbnail for video posts using the
thumbnailUrlfield in your CSV/XLSX file. - The thumbnail is applied automatically to the first video in the post.
- Multiple thumbnails for videos are not supported and the behaviour may vary from one social platform to another.
Uploading or updating images after the CSV import
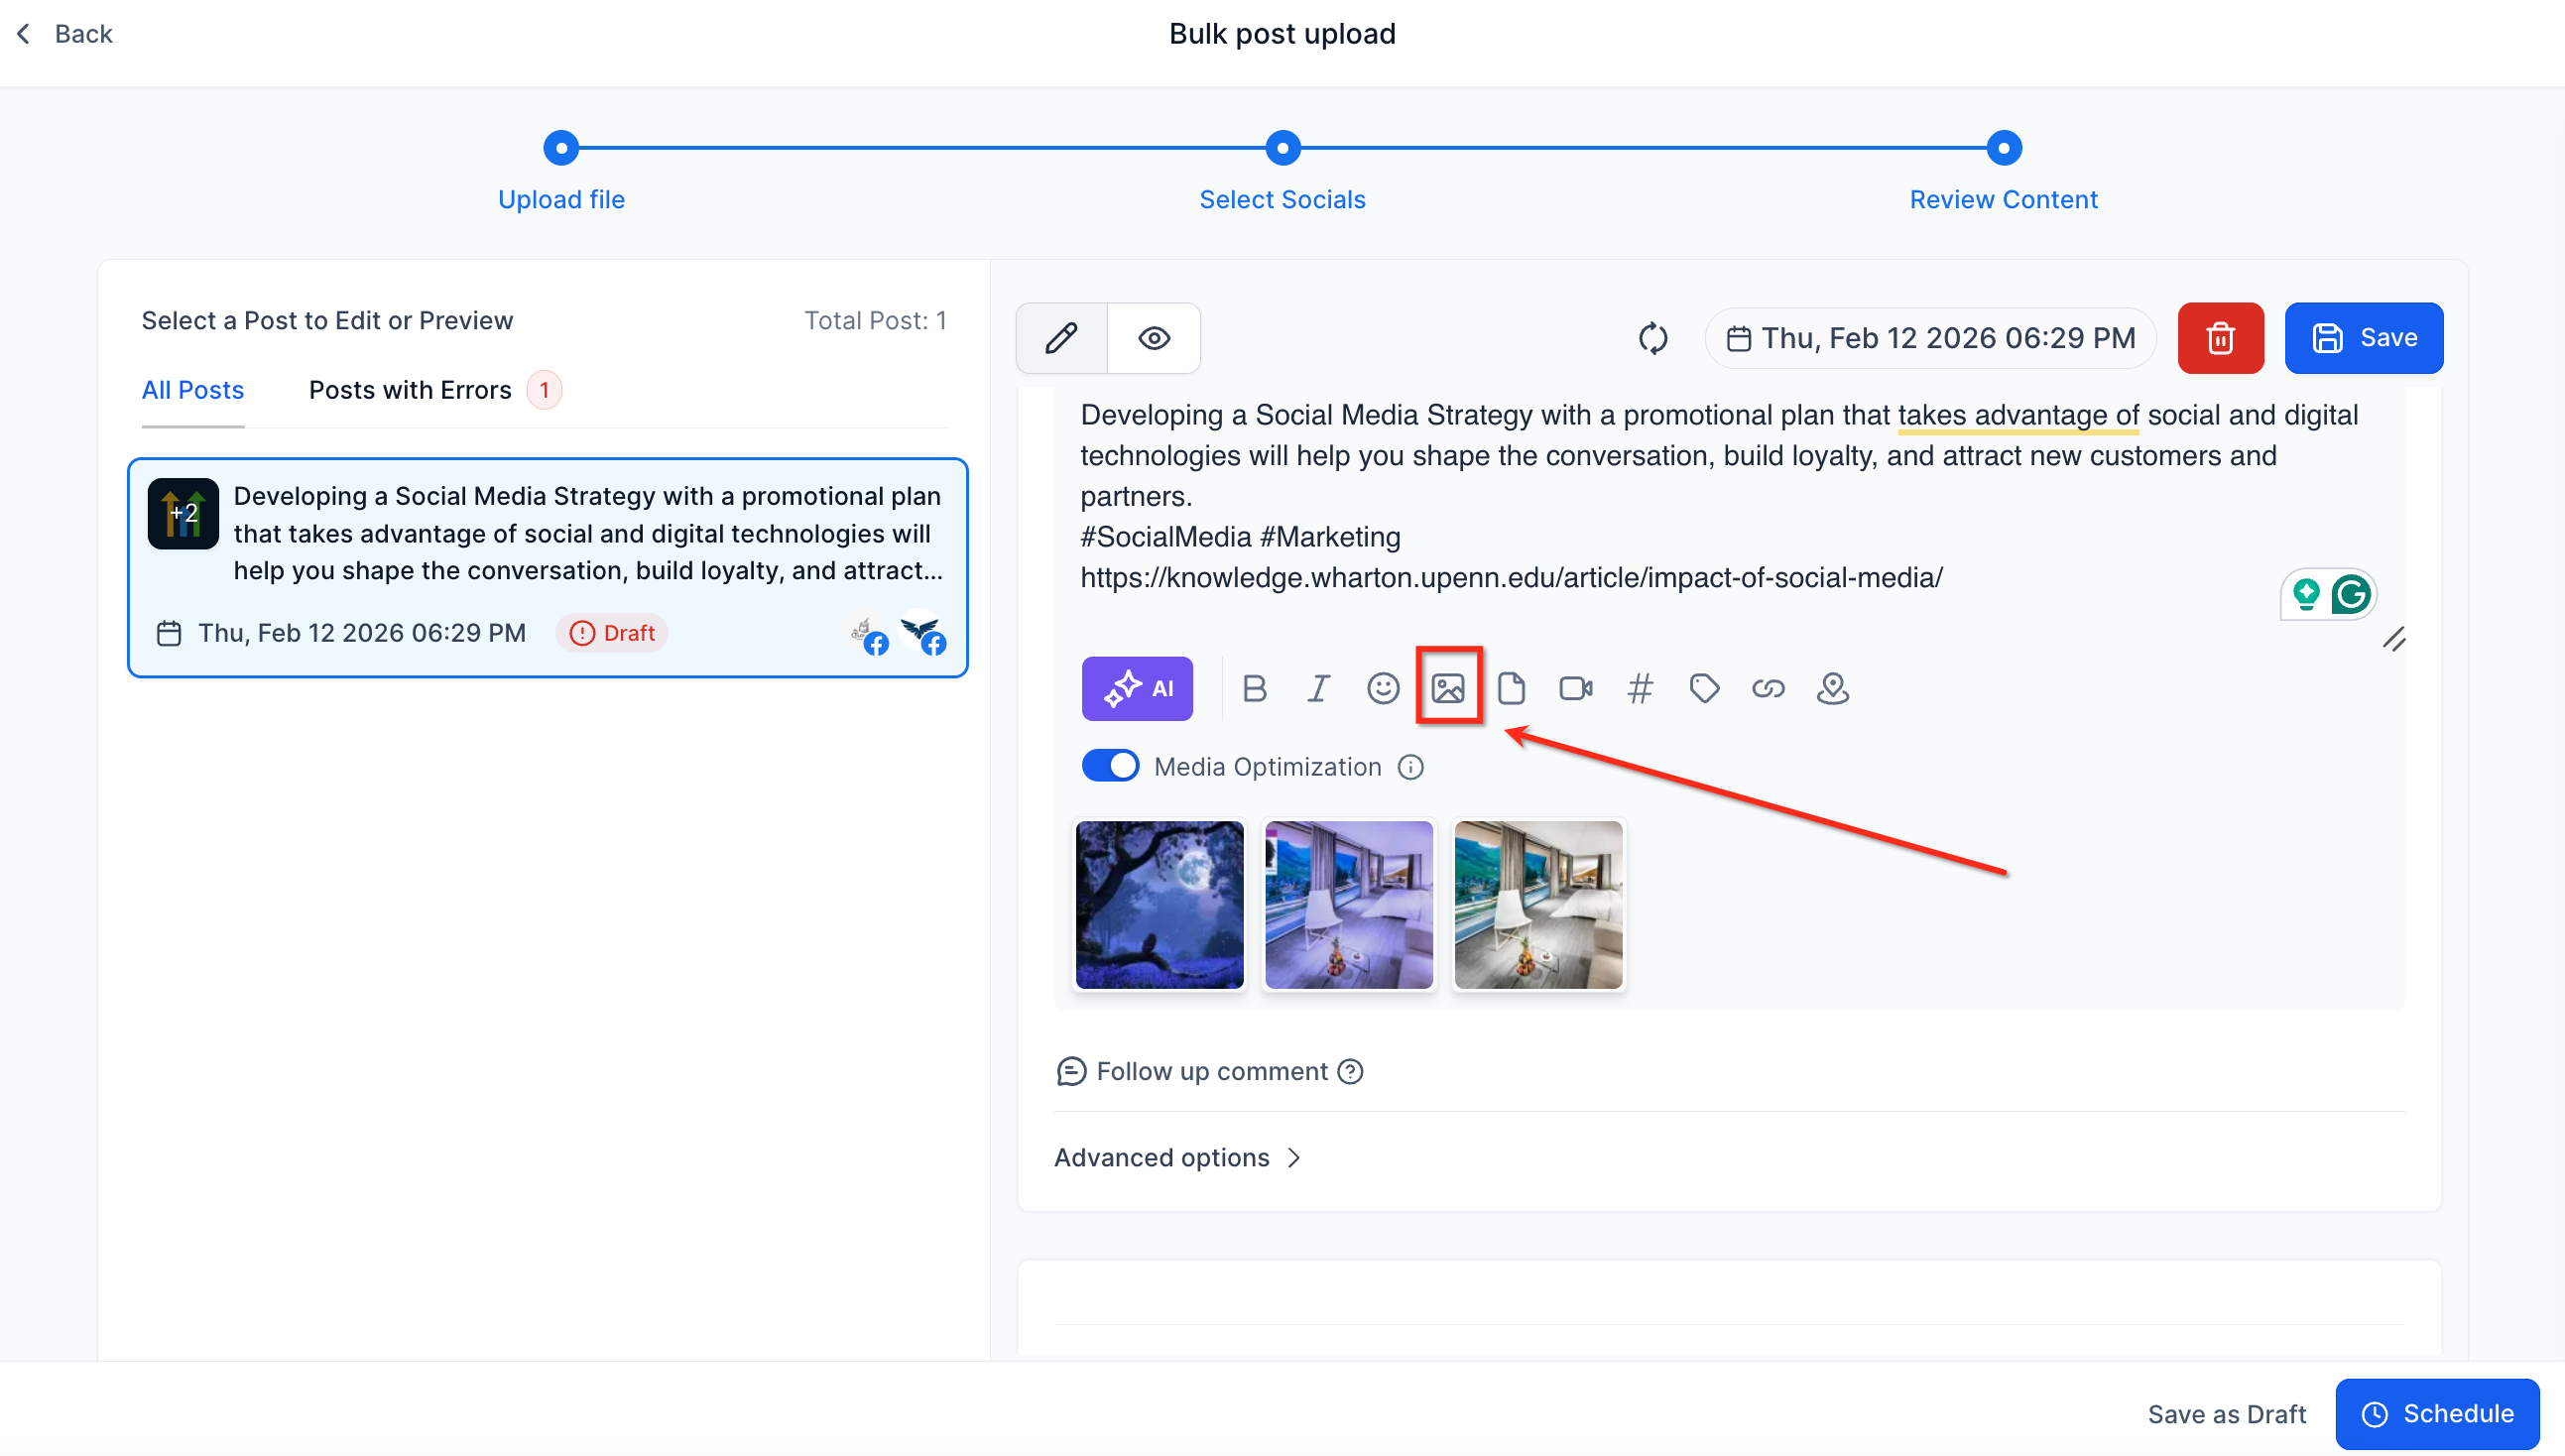
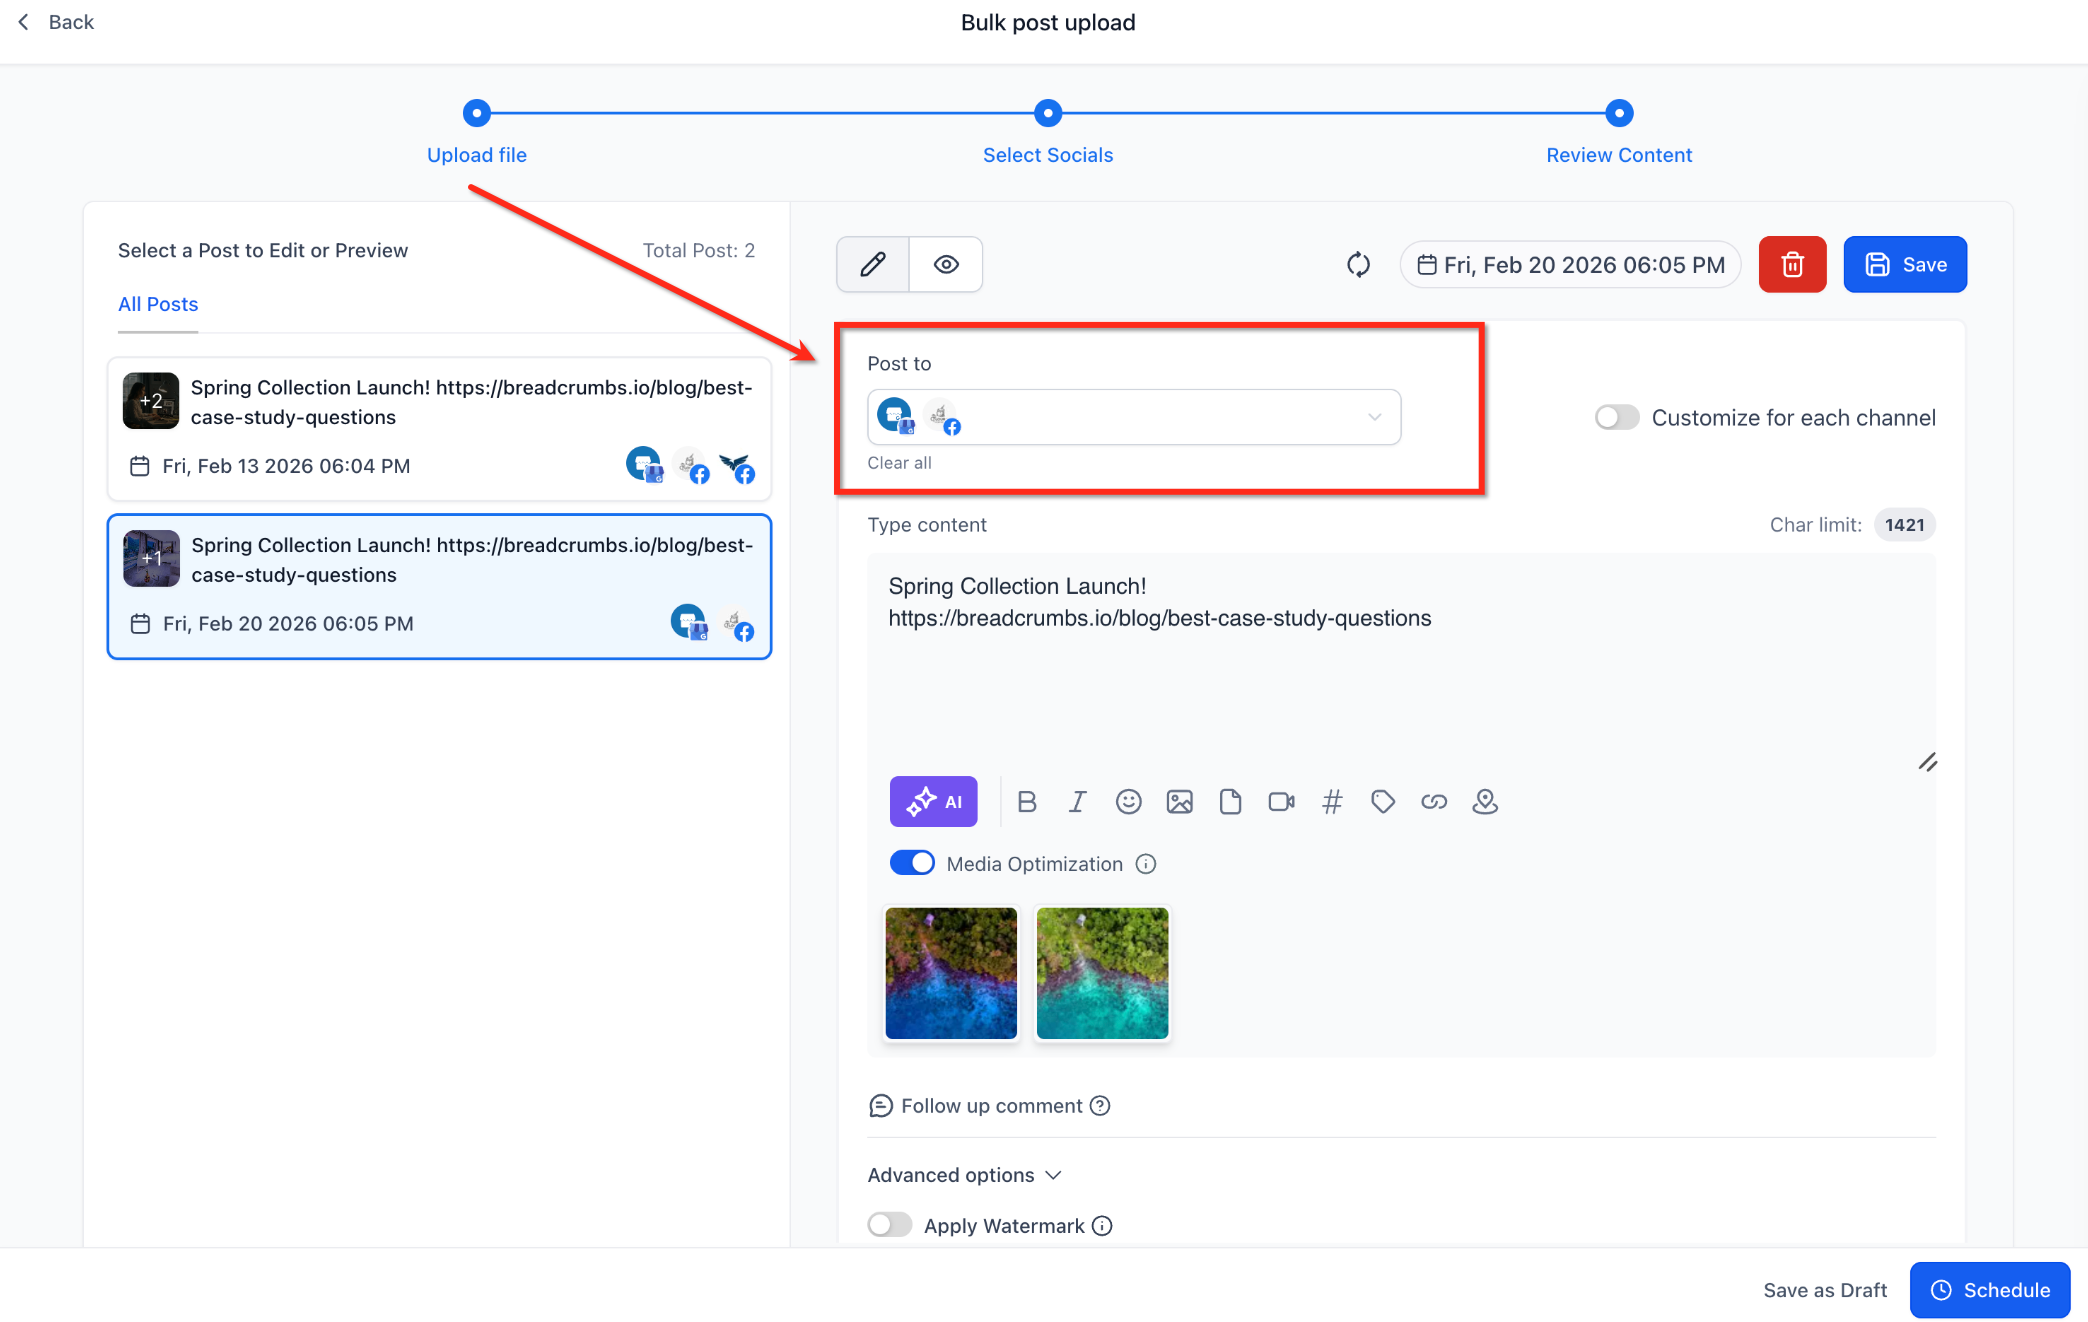
As well as adding media URLs in the spreadsheet, you can also upload or change images during the scheduling flow.
On the third review screen, you can:
- Add new images.
- Update existing images.
- Upload additional images (where the platform supports it).
This method can be used if you prefer not to include every media URL directly in the CSV file.
IMPORTANT: if you select Facebook (which supports multiple images in a carousel) and Google Business Profile (which supports only 1 image per post), the first image selected will be published on Google Business Profile and all the images on Facebook.
Watermark support
Automatically apply watermarks to your images and videos by filling in the relevant fields in your CSV. This guarantees consistent branding across all posts with no manual editing.
- Add the watermark file paths or settings in the designated CSV columns.
- Watermarks are applied during the import process for all supported platforms.
Smart media optimisation
Media files are optimised automatically for each platform's requirements, making sure your content looks its best and meets the technical specifications.
- Images and videos are resized, compressed or reformatted as needed.
- Platform-specific media settings can be configured in the CSV template.
Tag and category assignment
Assign tags and categories to each post directly in your CSV to simplify reporting, automation and organisation.
- Use the relevant columns in the template to add multiple tags or categories.
- Note: tags and categories will not carry over when you import from a pre-built configuration or a template into a new account.
Default settings for Pinterest boards
Select the default Pinterest board for each post inside the CSV, removing the need for manual assignment after the upload.
- Specify the board name or ID in the appropriate column.
- Posts are assigned automatically to the selected board at import time.
Flexible date and time parsing
Reduce import errors by using any of the supported date and time formats in your CSV. The system will recognise and process a wide range of common formats, including:
- YYYY-MM-DD HH:mm
- YYYY-MM-DD HH:mm:ss
- YYYY/MM/DD HH:mm:ss
- YYYY/MM/DD HH:mm
- MM/DD/YYYY H:mm:ss
- MM-DD-YYYY H:mm:ss
- MM/DD/YYYY H:mm
- MM-DD-YYYY H:mm
Frequently asked questions
Can I use both .csv and .xlsx files for bulk scheduling?
Yes, both file formats are supported for advanced CSV uploads.
Why can I no longer use Google Drive links in my CSV imports?
Because of recent changes made by Google, we can no longer process Google Drive links during CSV imports. To guarantee smooth uploads, upload your media files directly to the Media Library and use the Media Library links in your CSV file.
How many posts are allowed via CSV at one time?
The number of posts allowed in one CSV is 90 per file. You will need to spread them across all the social channels you are publishing to.
Can I import tags and categories into a new account from a pre-built configuration?
When you import a CSV from a pre-built configuration or a template, tags and categories will not carry over into a new account.
What happens if my CSV contains errors or invalid data?
The system will flag the errors during the review stage. You need to fix them before going ahead with the import.
Are watermarks applied to all media types?
Watermarks are applied to the supported image and video formats, as specified in the CSV.
Will tags and categories carry over if I import a CSV from a pre-built configuration or a template?
No, tags and categories do not carry over when you import from a pre-built configuration or a template into a new account.
Can I schedule posts for all the supported platforms in a single CSV upload?
Yes, you can schedule posts for several platforms, including Stories, Reels, Shorts, Google Business Profile, TikTok, Pinterest and more.
How do I specify a Pinterest board in the CSV?
Use the designated column in the template to enter the board name or ID for each post.
What should I do if I need to add a first comment to a post?
Include your comment in the relevant field in the advanced CSV template.
Is there a limit to the number of posts I can schedule in a single upload?
There is no hard limit, but extremely large files may take longer to process.