

Private integrations let you build secure, bespoke connections between your Futuria CRM account and any third-party application. This feature is ideal for internal tools, automated workflows and custom systems that need API access without having to build a full public app.
Table of contents
- What are private integrations?
- What is the difference between private integrations and API keys?
- Why private integration tokens are recommended for new credentials
- What is the difference between private integrations and OAuth2 access tokens?
- How do you use private integrations?
- Testing a private integration with API calls
- Where do I find private integrations?
- How do I create a new private integration?
- What are the best practices for keeping my private integration token secure?
- Has the token been compromised?
- Can I change the permissions of a private integration without updating the token?
- How do I delete a private integration when I no longer need it?
What are private integrations?
Private integrations let you build powerful custom integrations between your Futuria CRM account and any other third-party app.
If you want to integrate your Futuria CRM account with an external app, you have two options:
Find and install the relevant app from the App Marketplace.
Build your own private integration, on your own or with a developer’s help, using the APIs.
Private integrations help you take the second option securely.
The main benefits of using private integrations are:
Simplicity: generate the tokens for private integrations from your account settings and manage them with ease.
Security: you can restrict the scopes and permissions a developer can access in your account.
What is the difference between private integrations and API keys?
Put simply, private integrations are a more powerful and more secure alternative to traditional API keys.
Private integrationsAPI keysMore secure: you can restrict the scopes and permissions a developer can access in your account.Less secure: a developer gets unlimited access to all the data in your account.Modern: private integrations give you access to API v2.0, which is state of the art.Outdated: API keys work with API v1.0, which has reached the end of its life cycle and is no longer maintained.More features: API v2.0 offers more powerful APIs.Fewer features: API v1.0 has a limited number of APIs.
Why private integration tokens are recommended for new credentials
Private Integration Tokens (PITs) are the recommended replacement for the old API keys because they provide more secure and more flexible access management.
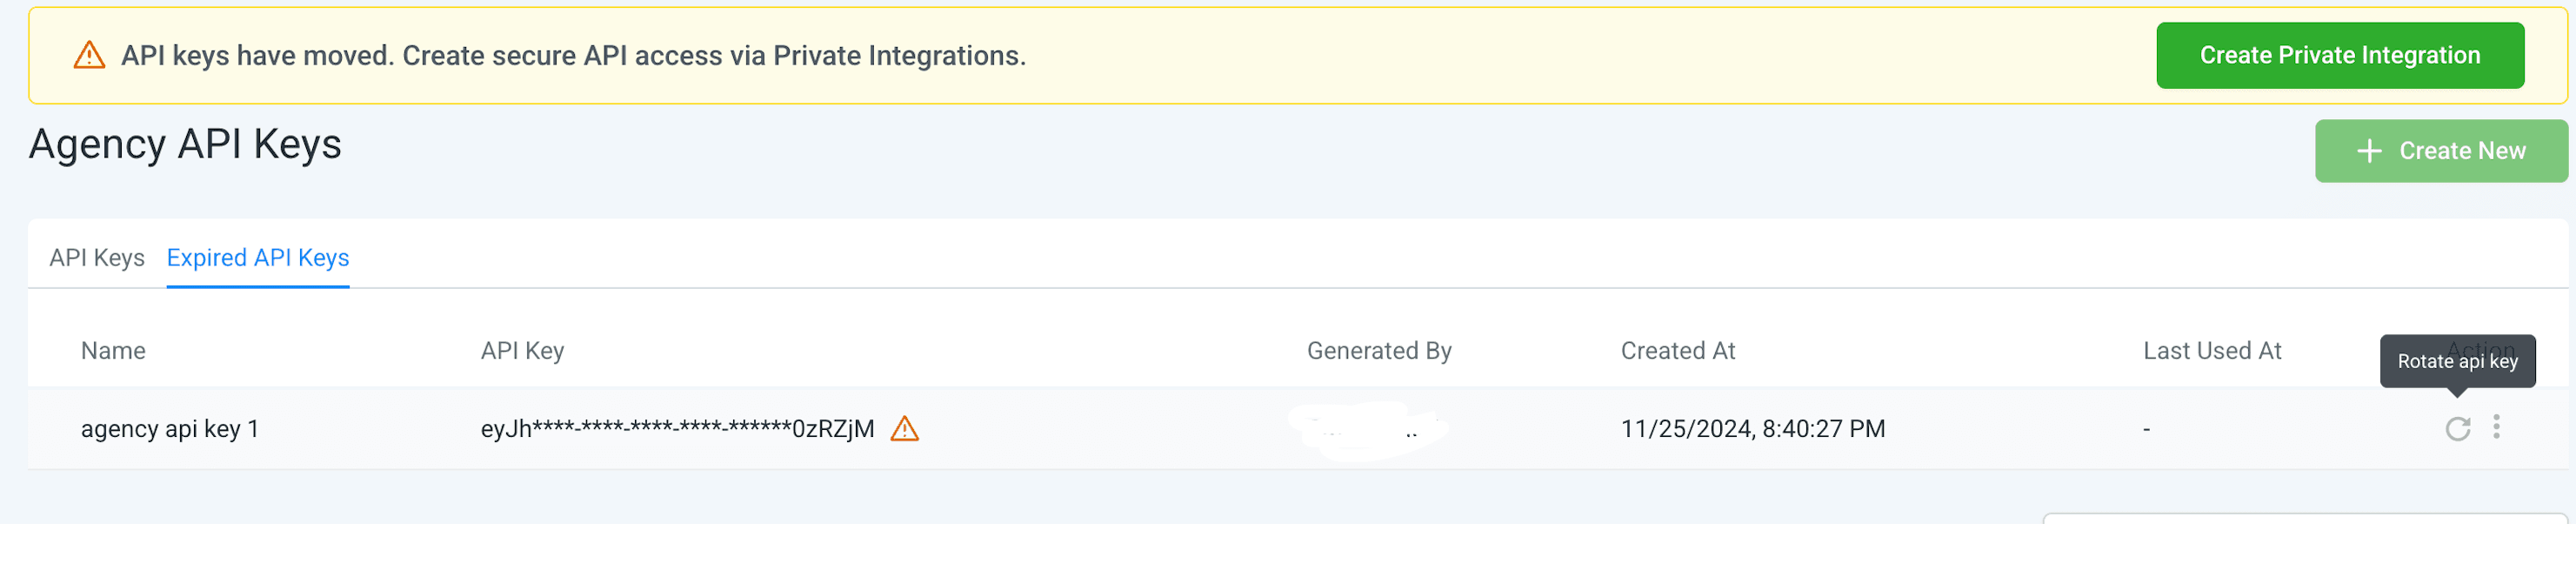
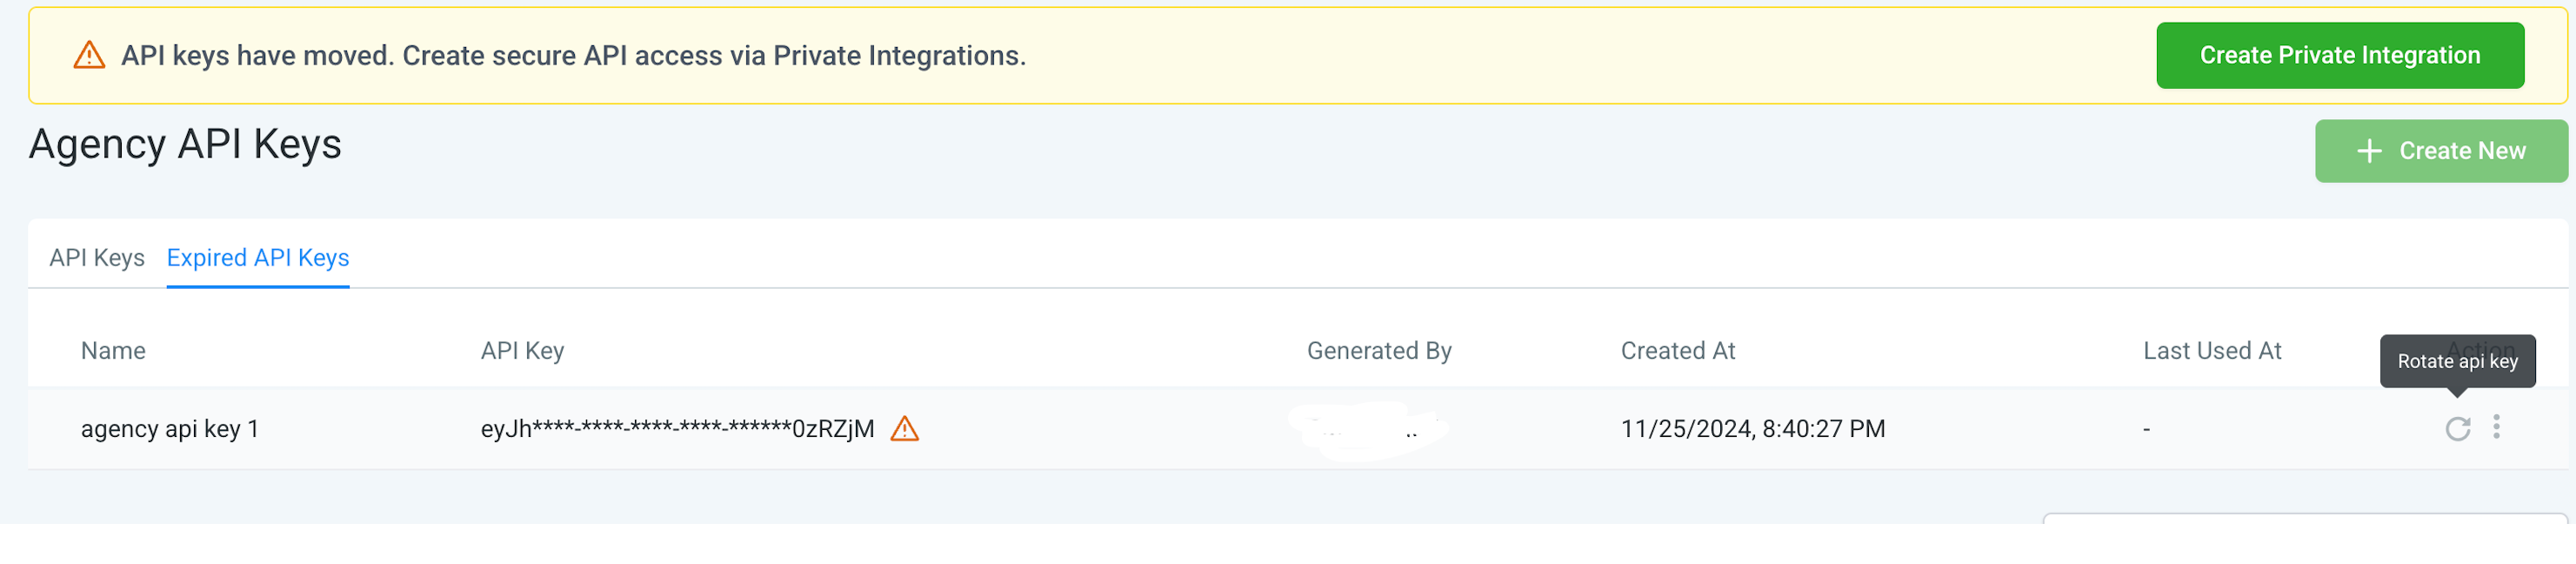
Old API keys that stay unused for more than 90 days may be marked as "Expired" in the settings. Since creating new legacy v1 keys is no longer supported, you need to use PITs for any new credential or to migrate old integrations to a more secure access model.
If you are still using an old API key, Futuria CRM recommends migrating that integration to a Private Integration Token as soon as possible.
What is the difference between private integrations and OAuth2 access tokens?
Put simply, private integrations are static, fixed OAuth2 access tokens.
Private integrationsAccess tokensGenerated from the user interface: the private integration token can easily be generated from the interface.Programmatic generation: API tokens are generated by exchanging an OAuth access code through the Get Access Token API.Static/fixed: private integration tokens are static and do not refresh automatically, unless you rotate them manually from the interface.Refreshed daily: access tokens expire every day and have to be refreshed.
How do you use private integrations?
Private integration tokens are used in the authorisation header, just like other access tokens.
For example, to get the details of an account, you can use the corresponding API with the Private Integration Token in the authorisation header.
curl --request GET \
  --url https://services.futuriacrm.com/locations/ve9EPM428h8vShlRW1KT \
  --header 'Accept: application/json' \
  --header 'Authorization: <YOUR_PRIVATE_INTEGRATION_TOKEN>' \
  --header 'Version: 2021-07-28'
Testing a private integration with API calls
Once you have created your private integration, you may want to test it by sending data to an API endpoint. To do that, you will need the correct API endpoint URL.
Here is an example of how to test the integration by adding a new contact:
curl --request POST \
  --url https://services.futuriacrm.com/contacts/ \
  --header 'Authorization: <YOUR_PRIVATE_INTEGRATION_TOKEN>' \
  --header 'Content-Type: application/json' \
  --header 'Version: 2021-07-28' \
  --data '{
    "firstName": "John",
    "lastName": "Doe",
    "email": "john.doe@example.com",
    "phone": "+1234567890",
    "locationId": "LOCATION_ID"
  }'
Make sure you:
Replace
LOCATION_IDwith the actual account ID.Replace the
Authorizationvalue with your generated private integration token.
Where do I find private integrations?
You will find private integrations in your account settings. If you cannot see them, make sure you have enabled the feature in the Labs section.
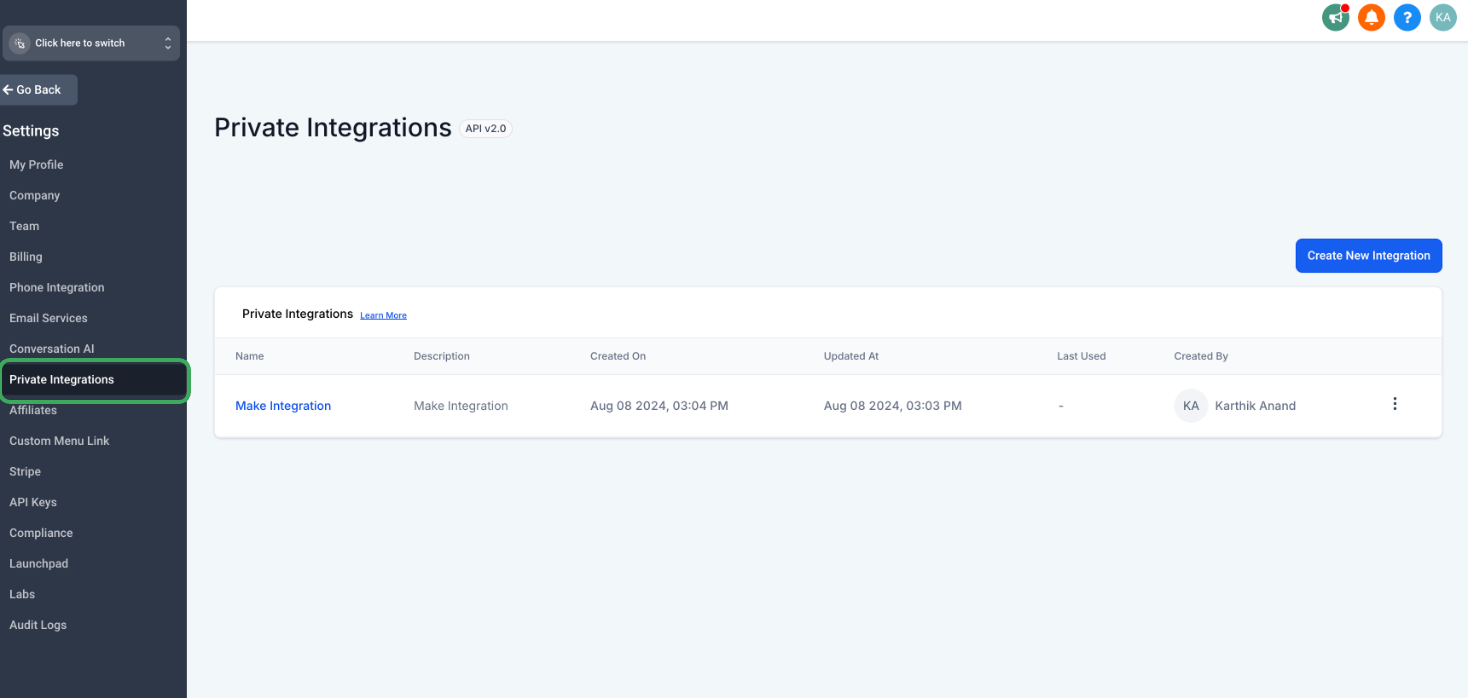
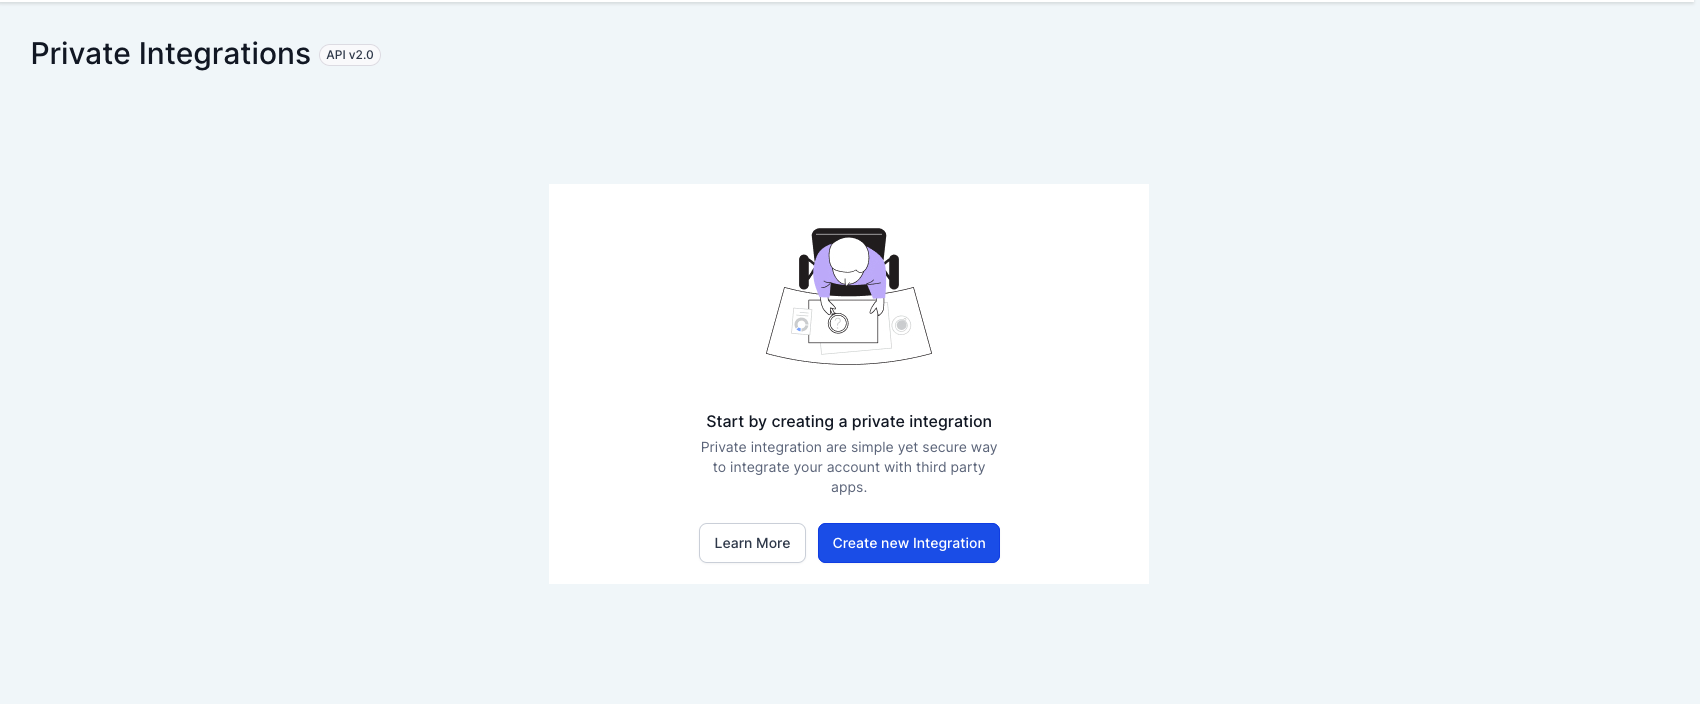
How do I create a new private integration?
Step 1: Click "Create new integration".
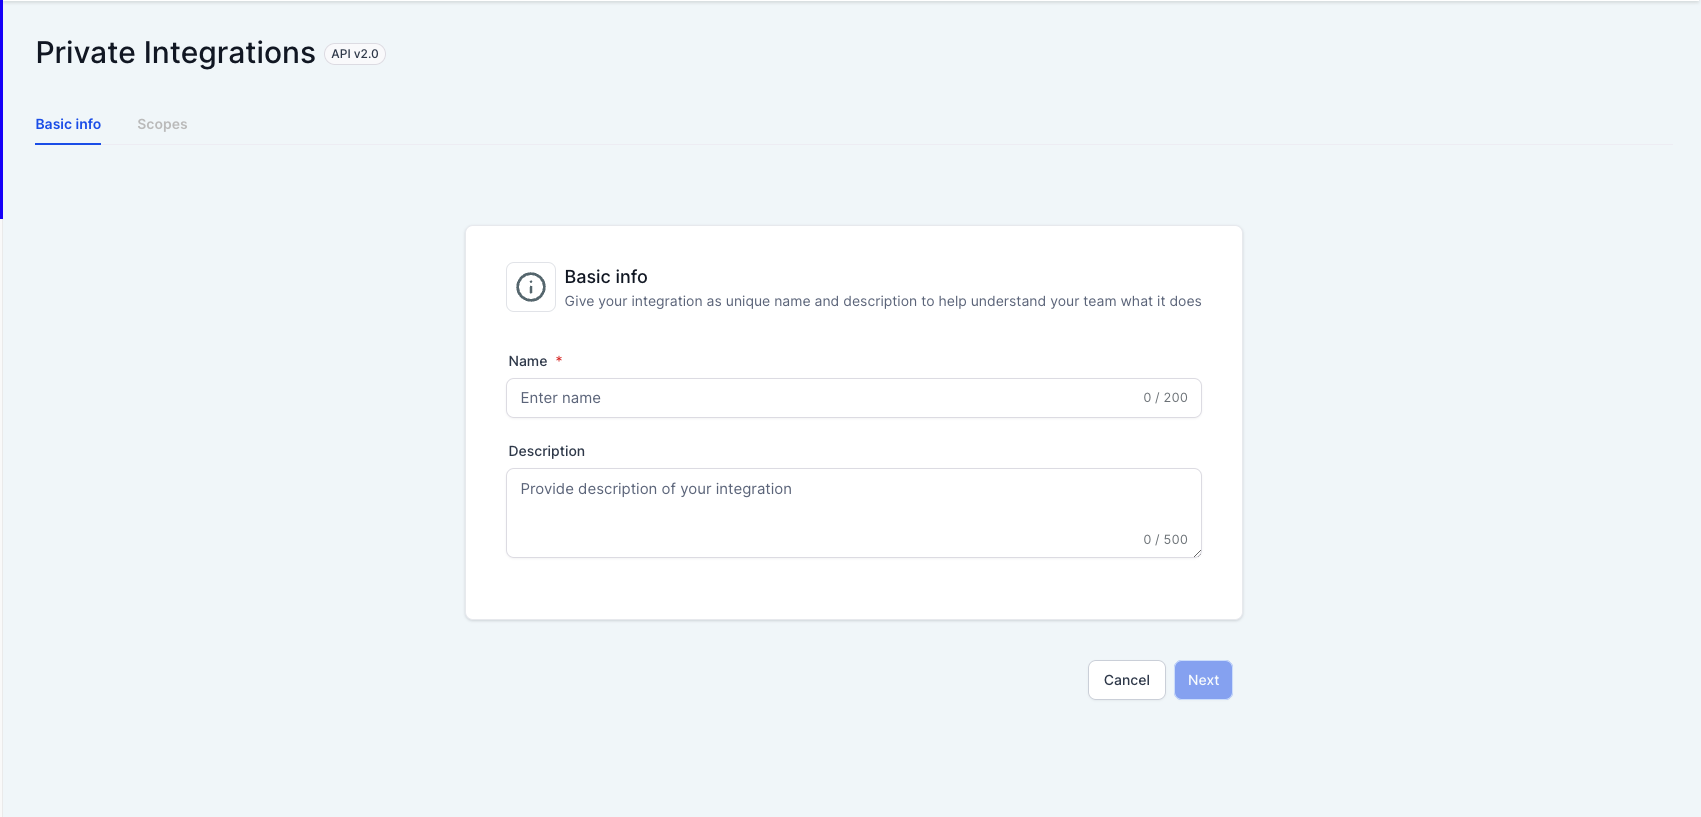
Step 2: Give your private integration a name and a description to help you and your team identify its purpose.
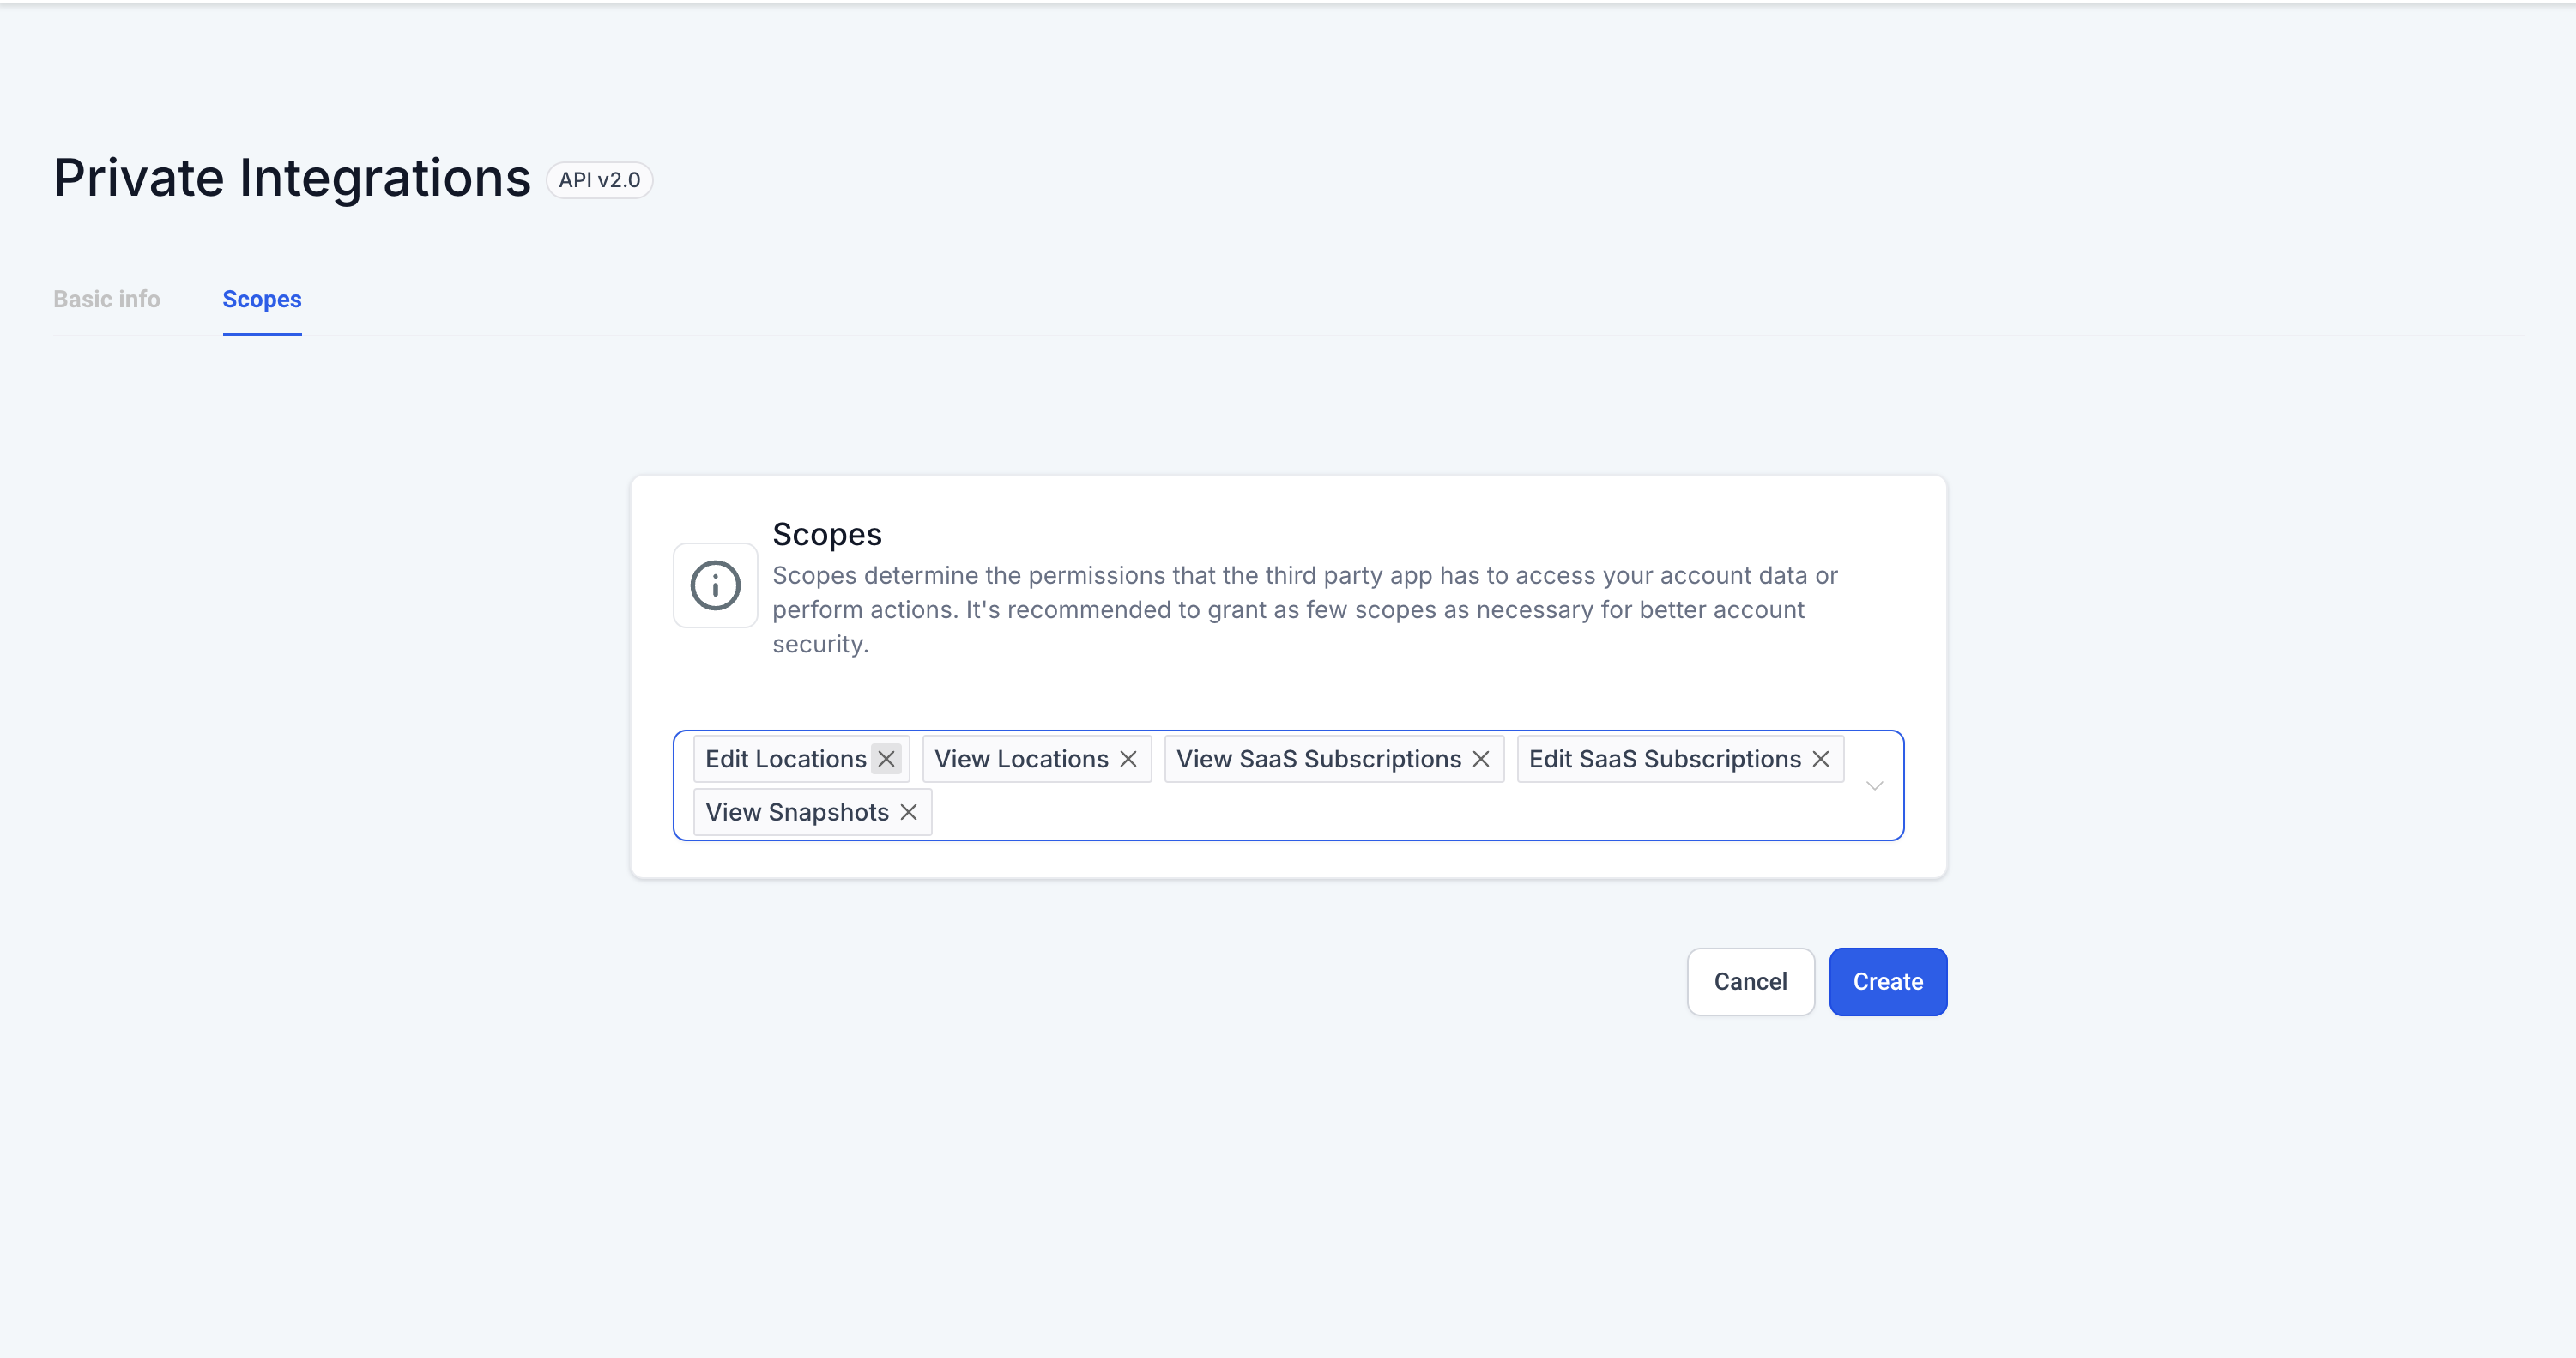
Step 3: Select the scopes and permissions you want the private integration to have access to in your account. Make sure you select only the scopes you need, for greater data security.
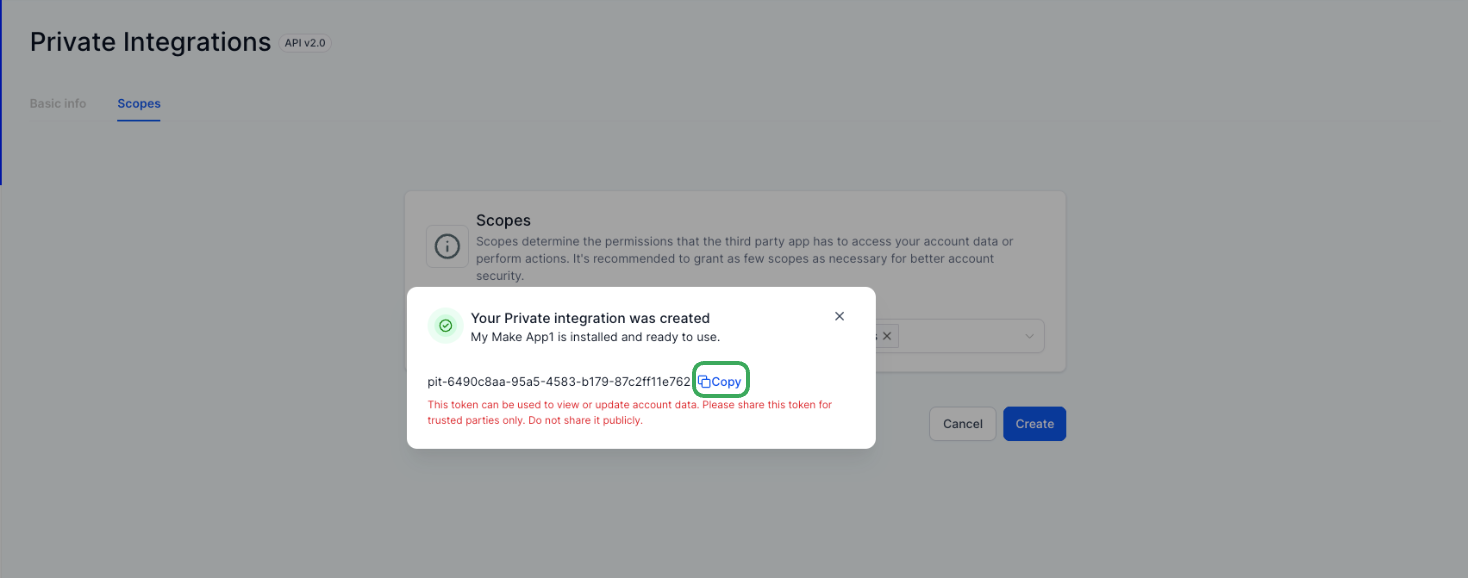
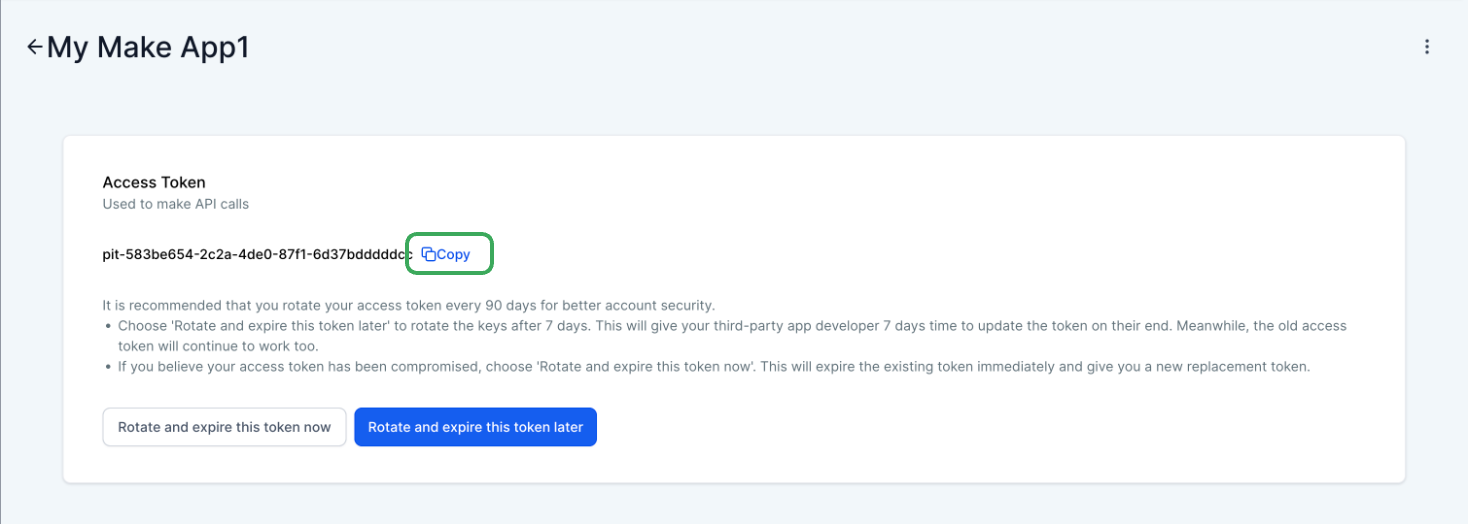
Step 4: Copy the generated token and share it with the developer of your third-party app.
Make sure you only share the token with people you trust. Do not share it publicly.
Note: do not forget to copy the generated token, as you will not be able to view it again later.
What are the best practices for keeping my private integration token secure?
We recommend rotating your private integration tokens every 90 days. Here is how to do it.
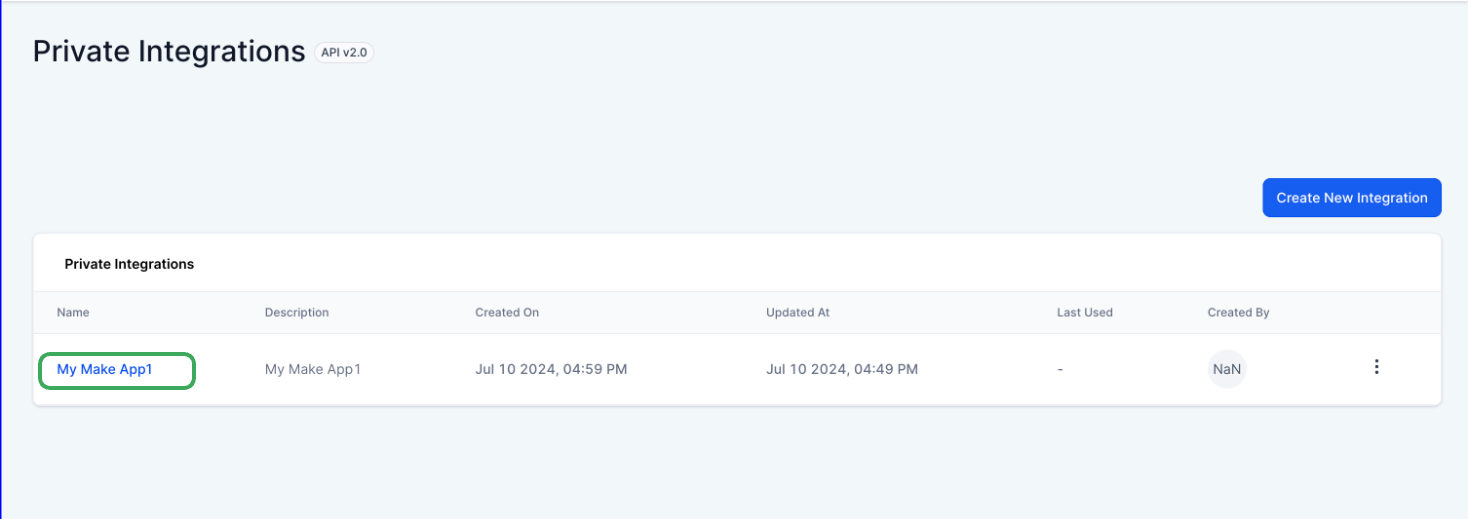
Step 1: Go to Private Integrations in the settings and click the integration you created.
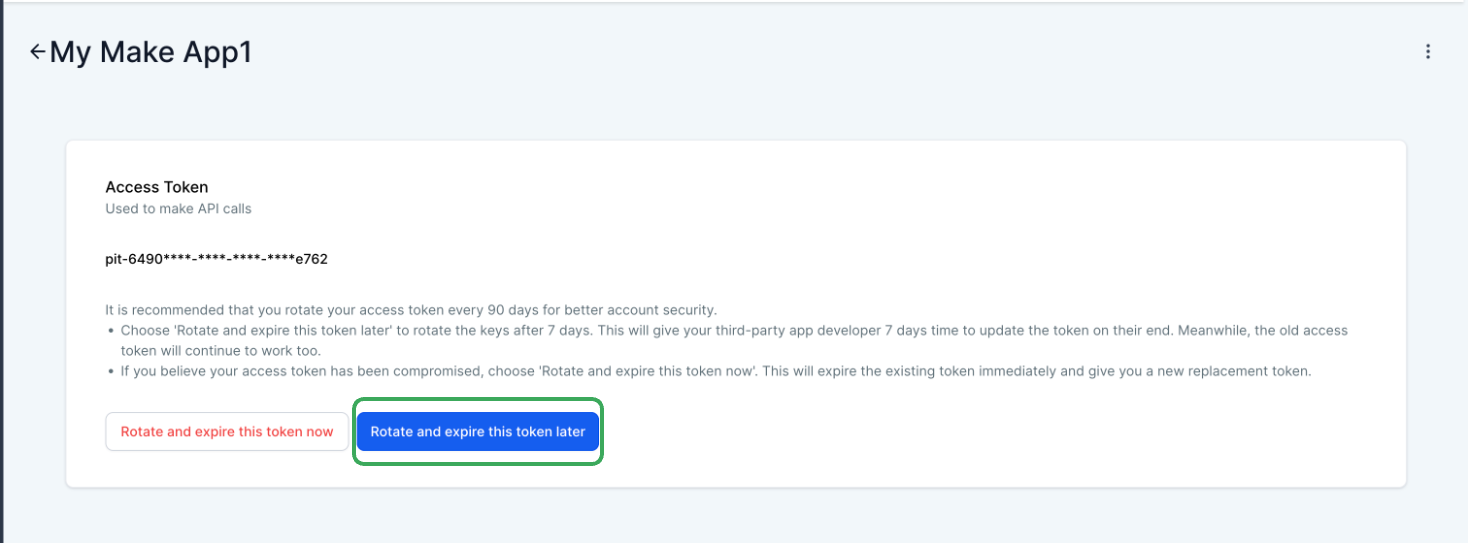
Step 2: Click "Rotate and expire this token later".
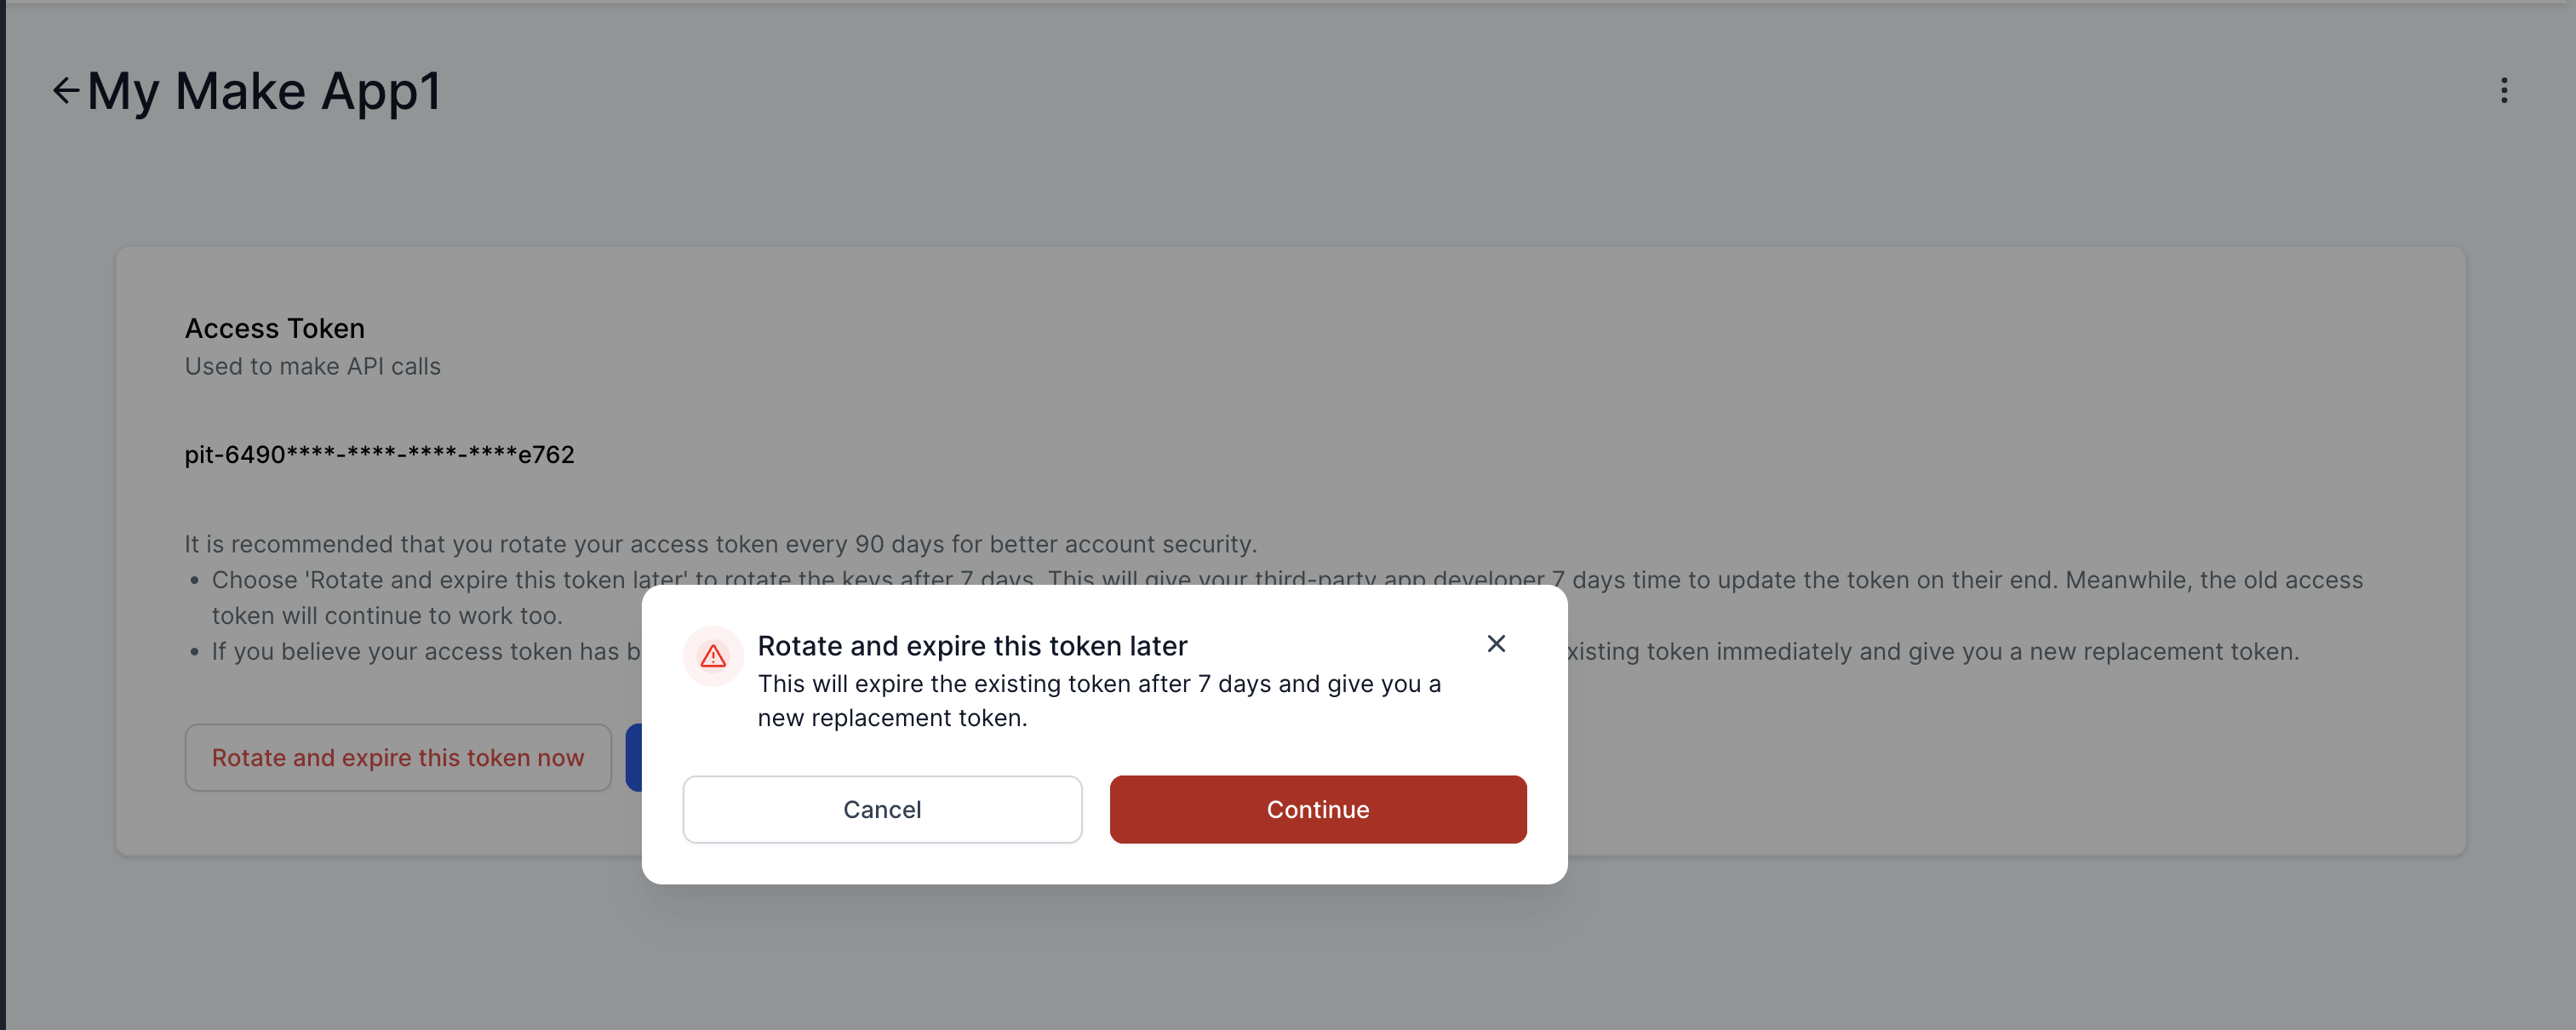
Step 3: Click "Continue" in the warning message if you are sure you want to go ahead with the rotation.
Step 4: Copy the new token and update it in your third-party app.
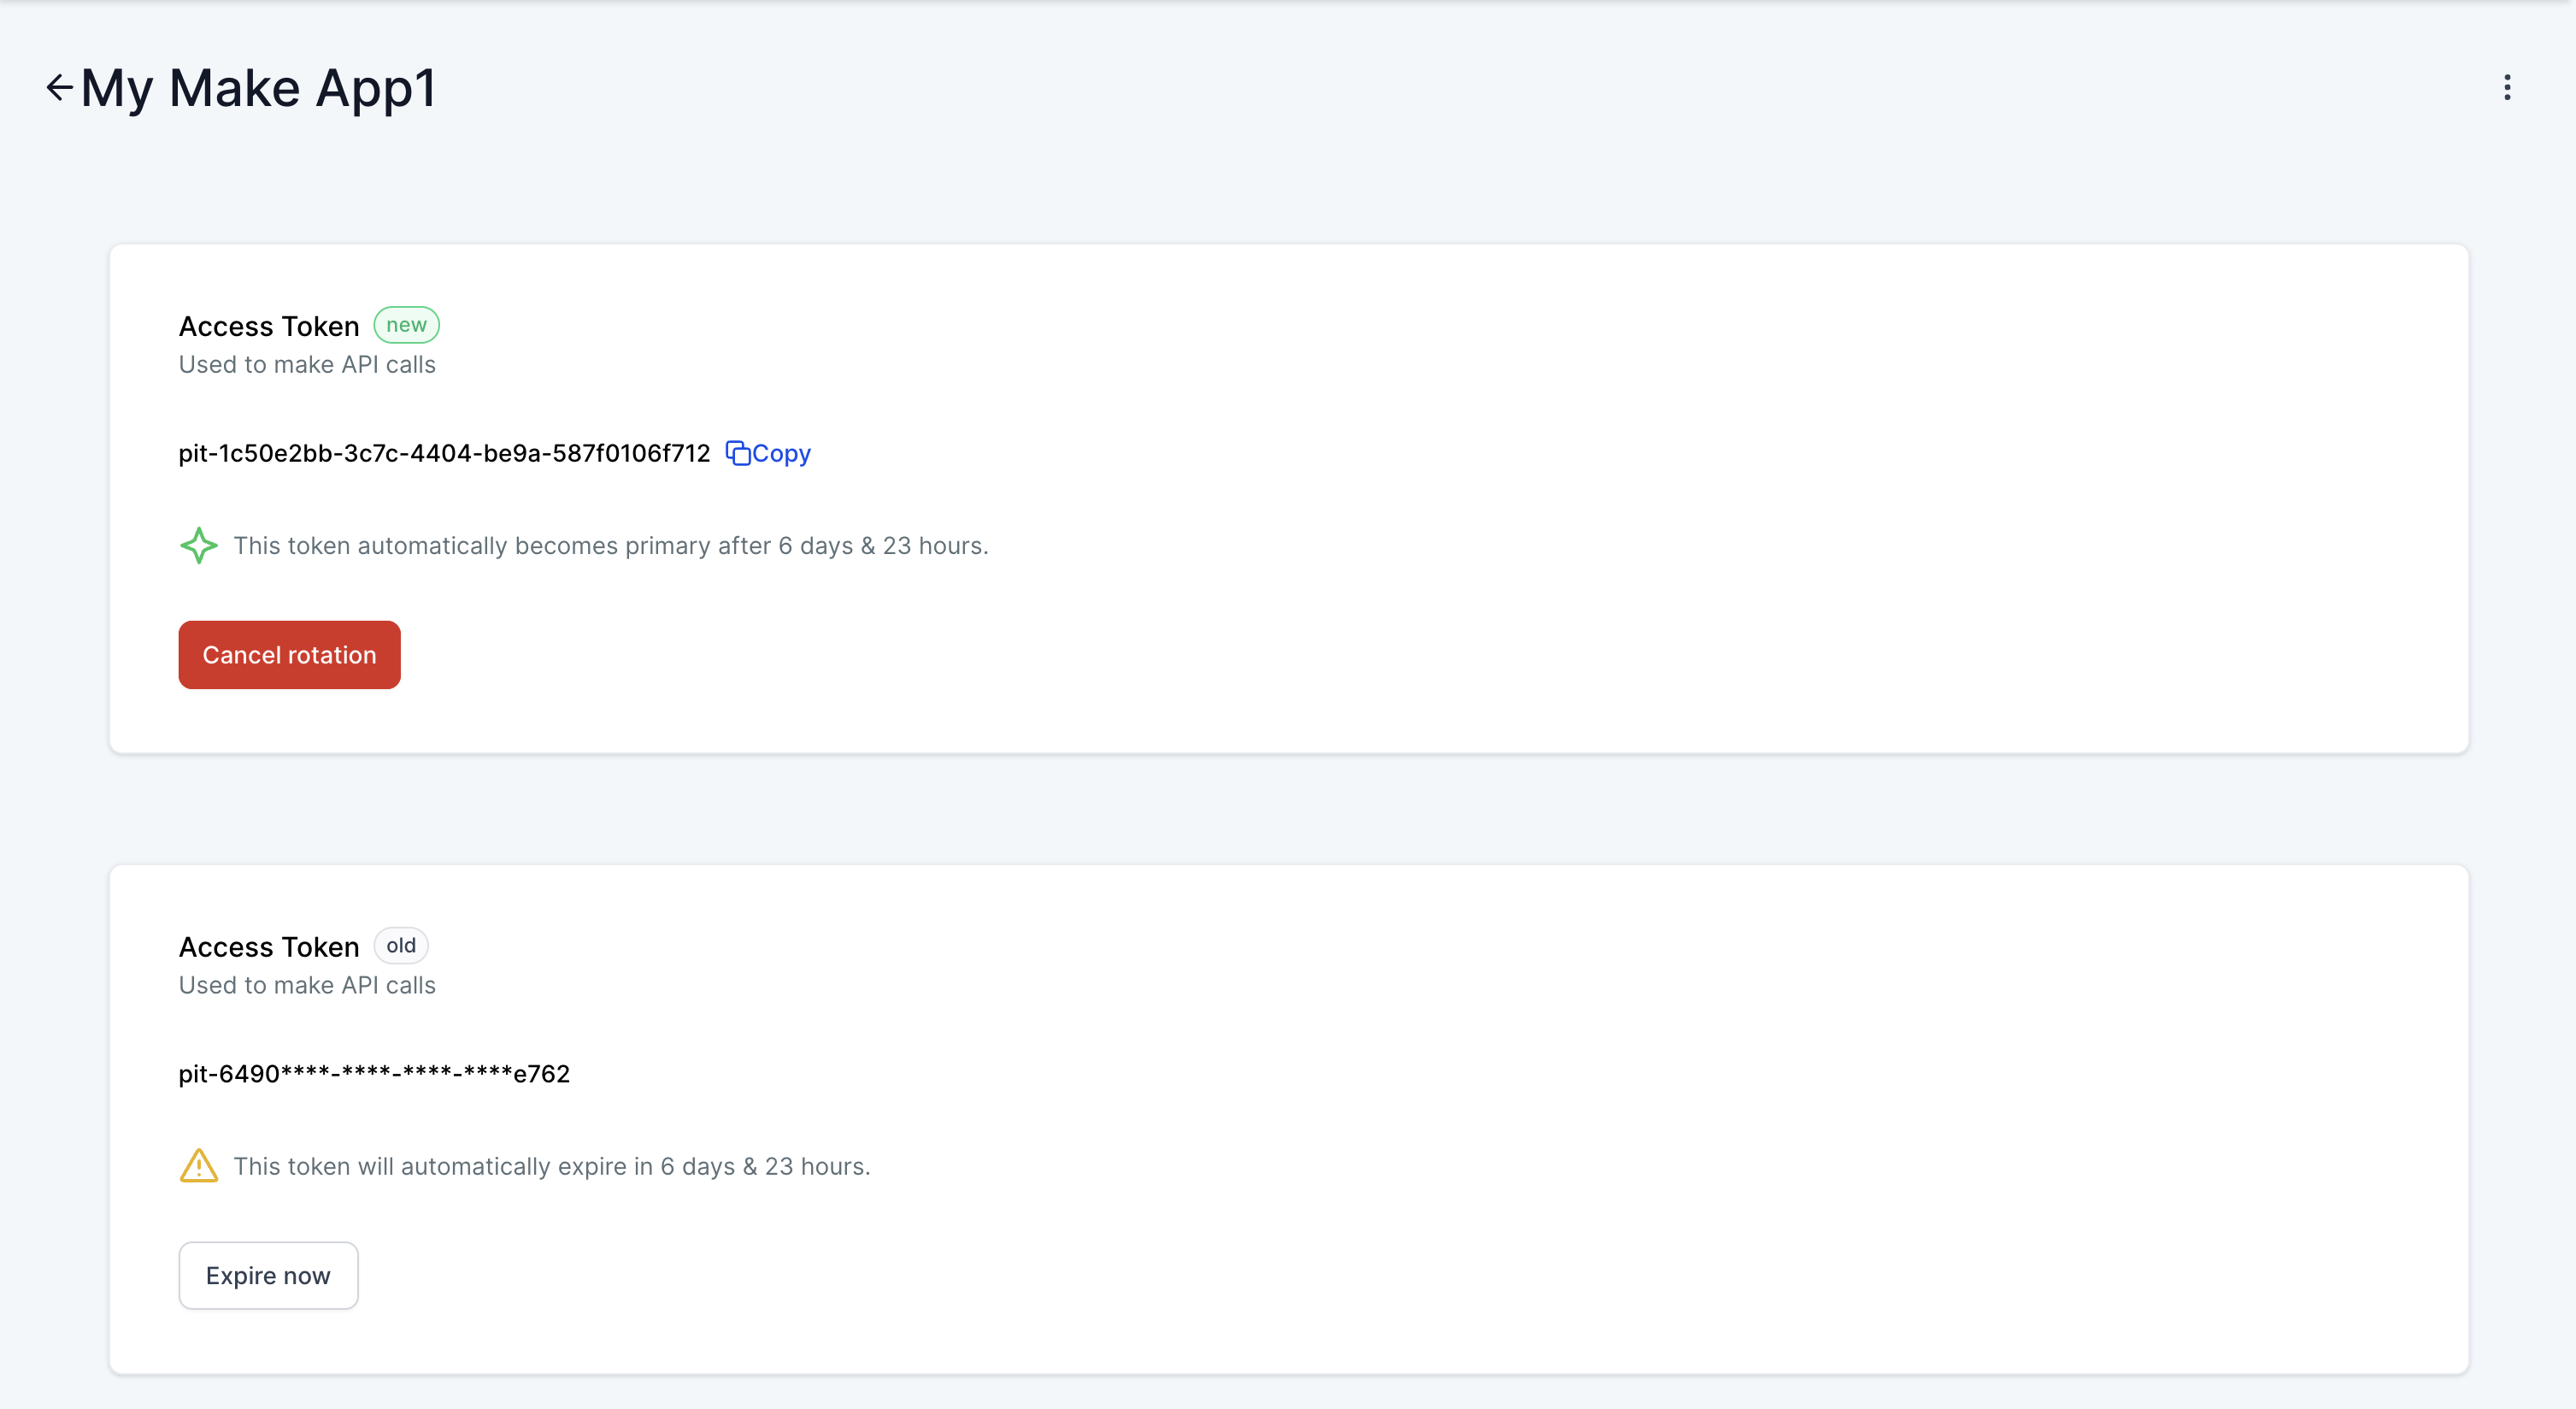
You will have a 7-day window during which both the old and the new token keep working. After 7 days, the old token expires. Within that window, you will have the option to:
"Cancel rotation" if, for example, your developer needs more time to update the token in the third-party app.
"Expire now" if, for example, the third-party app has already been updated with the new token.
Note: do not forget to copy the generated token, as you will not be able to view it again later.
Has the token been compromised?
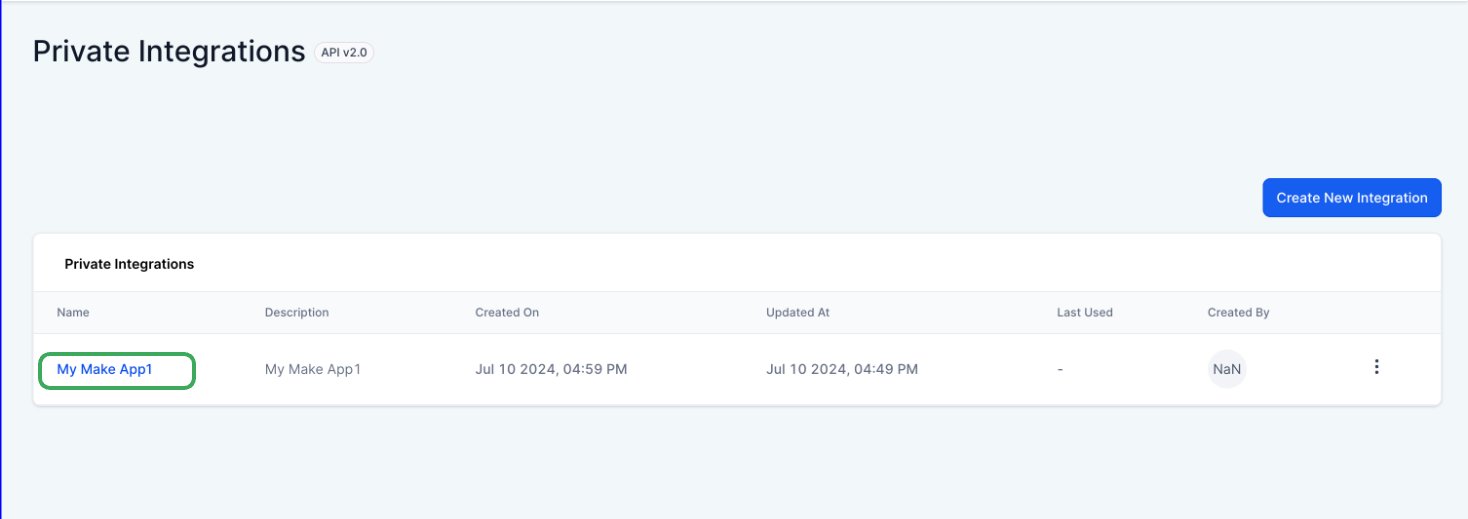
Step 1: Go to Private Integrations in the settings and click the integration you created.
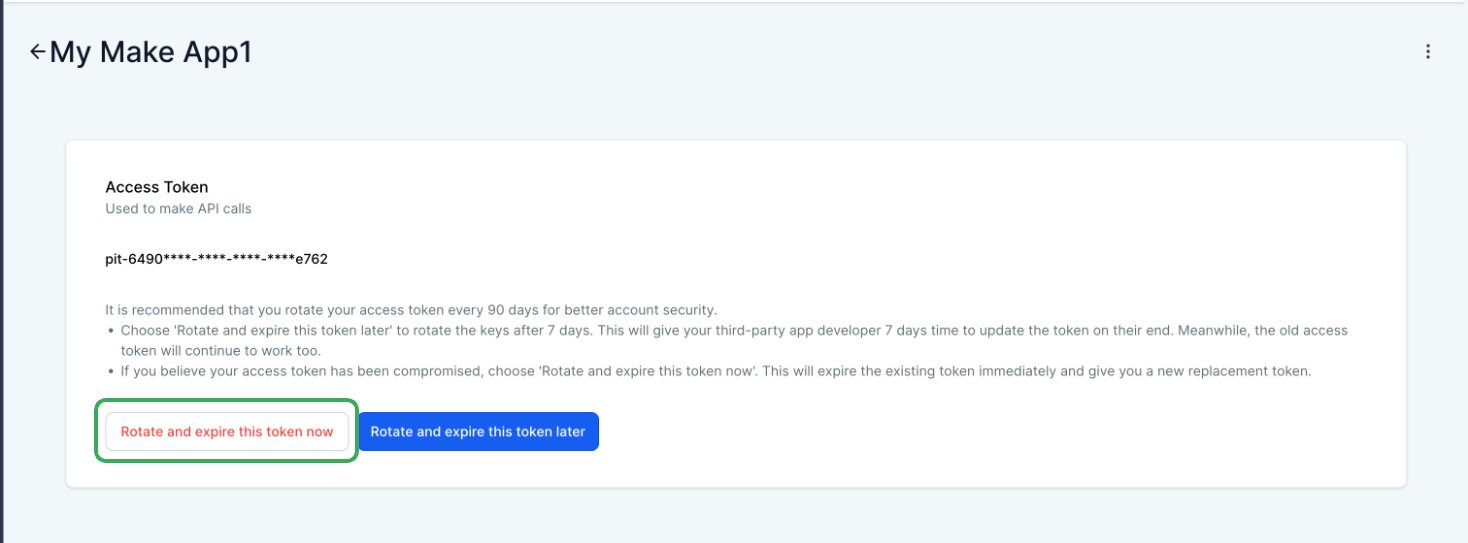
Step 2: Click "Rotate and expire this token now".
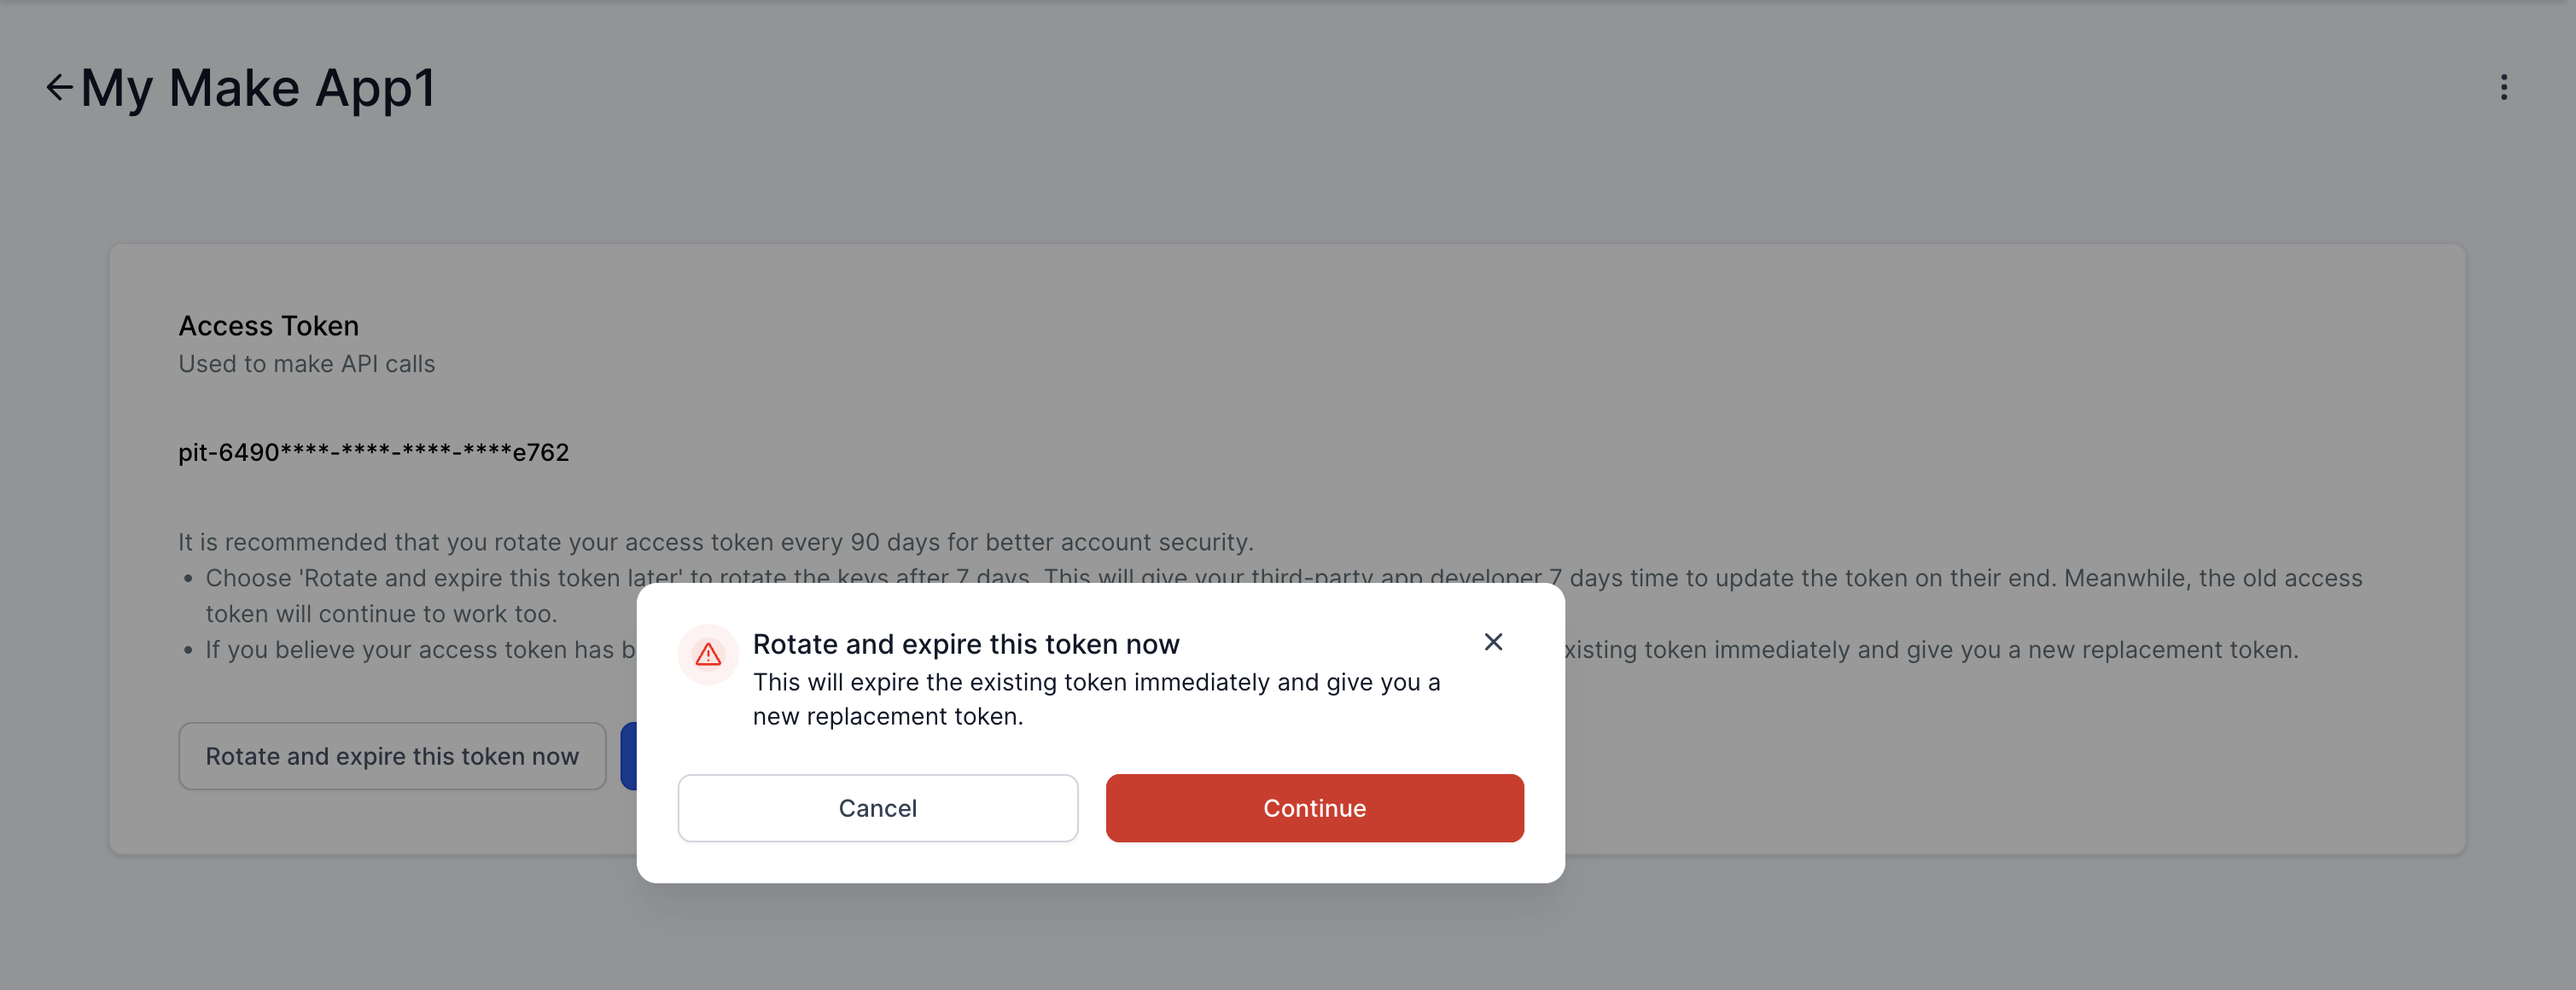
Step 3: Click "Continue" in the warning message if you are sure you want to go ahead with the rotation.
Step 4: Copy the new token and update it in your third-party app.
Note: do not forget to copy the generated token, as you will not be able to view it again later.
Can I change the permissions of a private integration without updating the token?
Yes, you can change the name, the description and the scopes/permissions of a private integration at any time after creating it. Here is how.
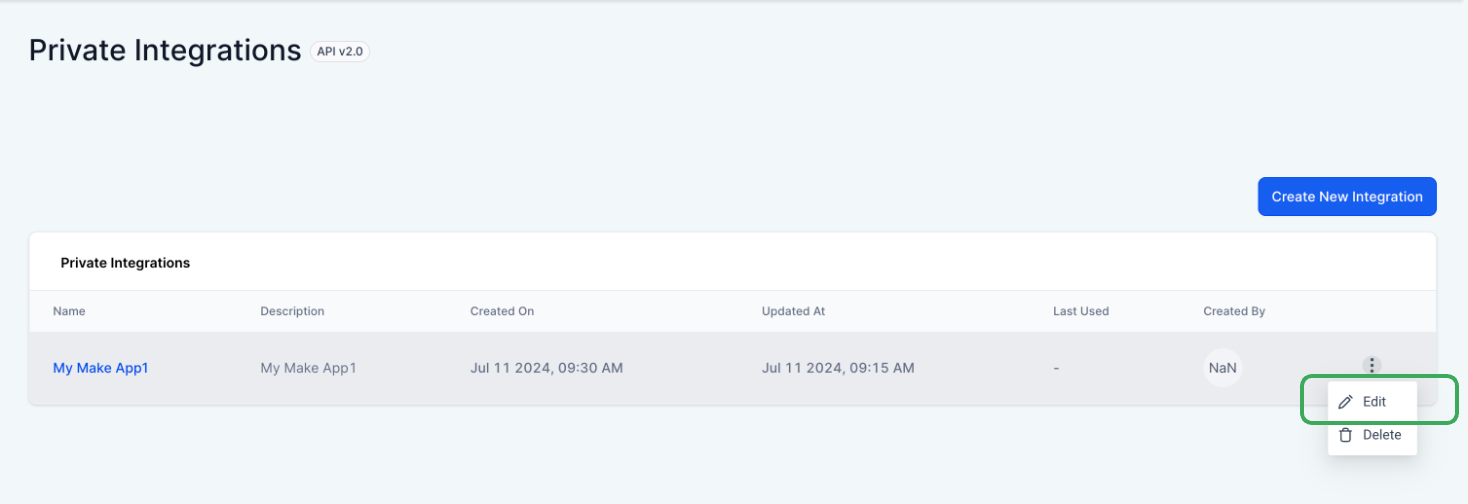
Step 1: Go to Private Integrations in the settings and select "Edit" from the three-dot menu.
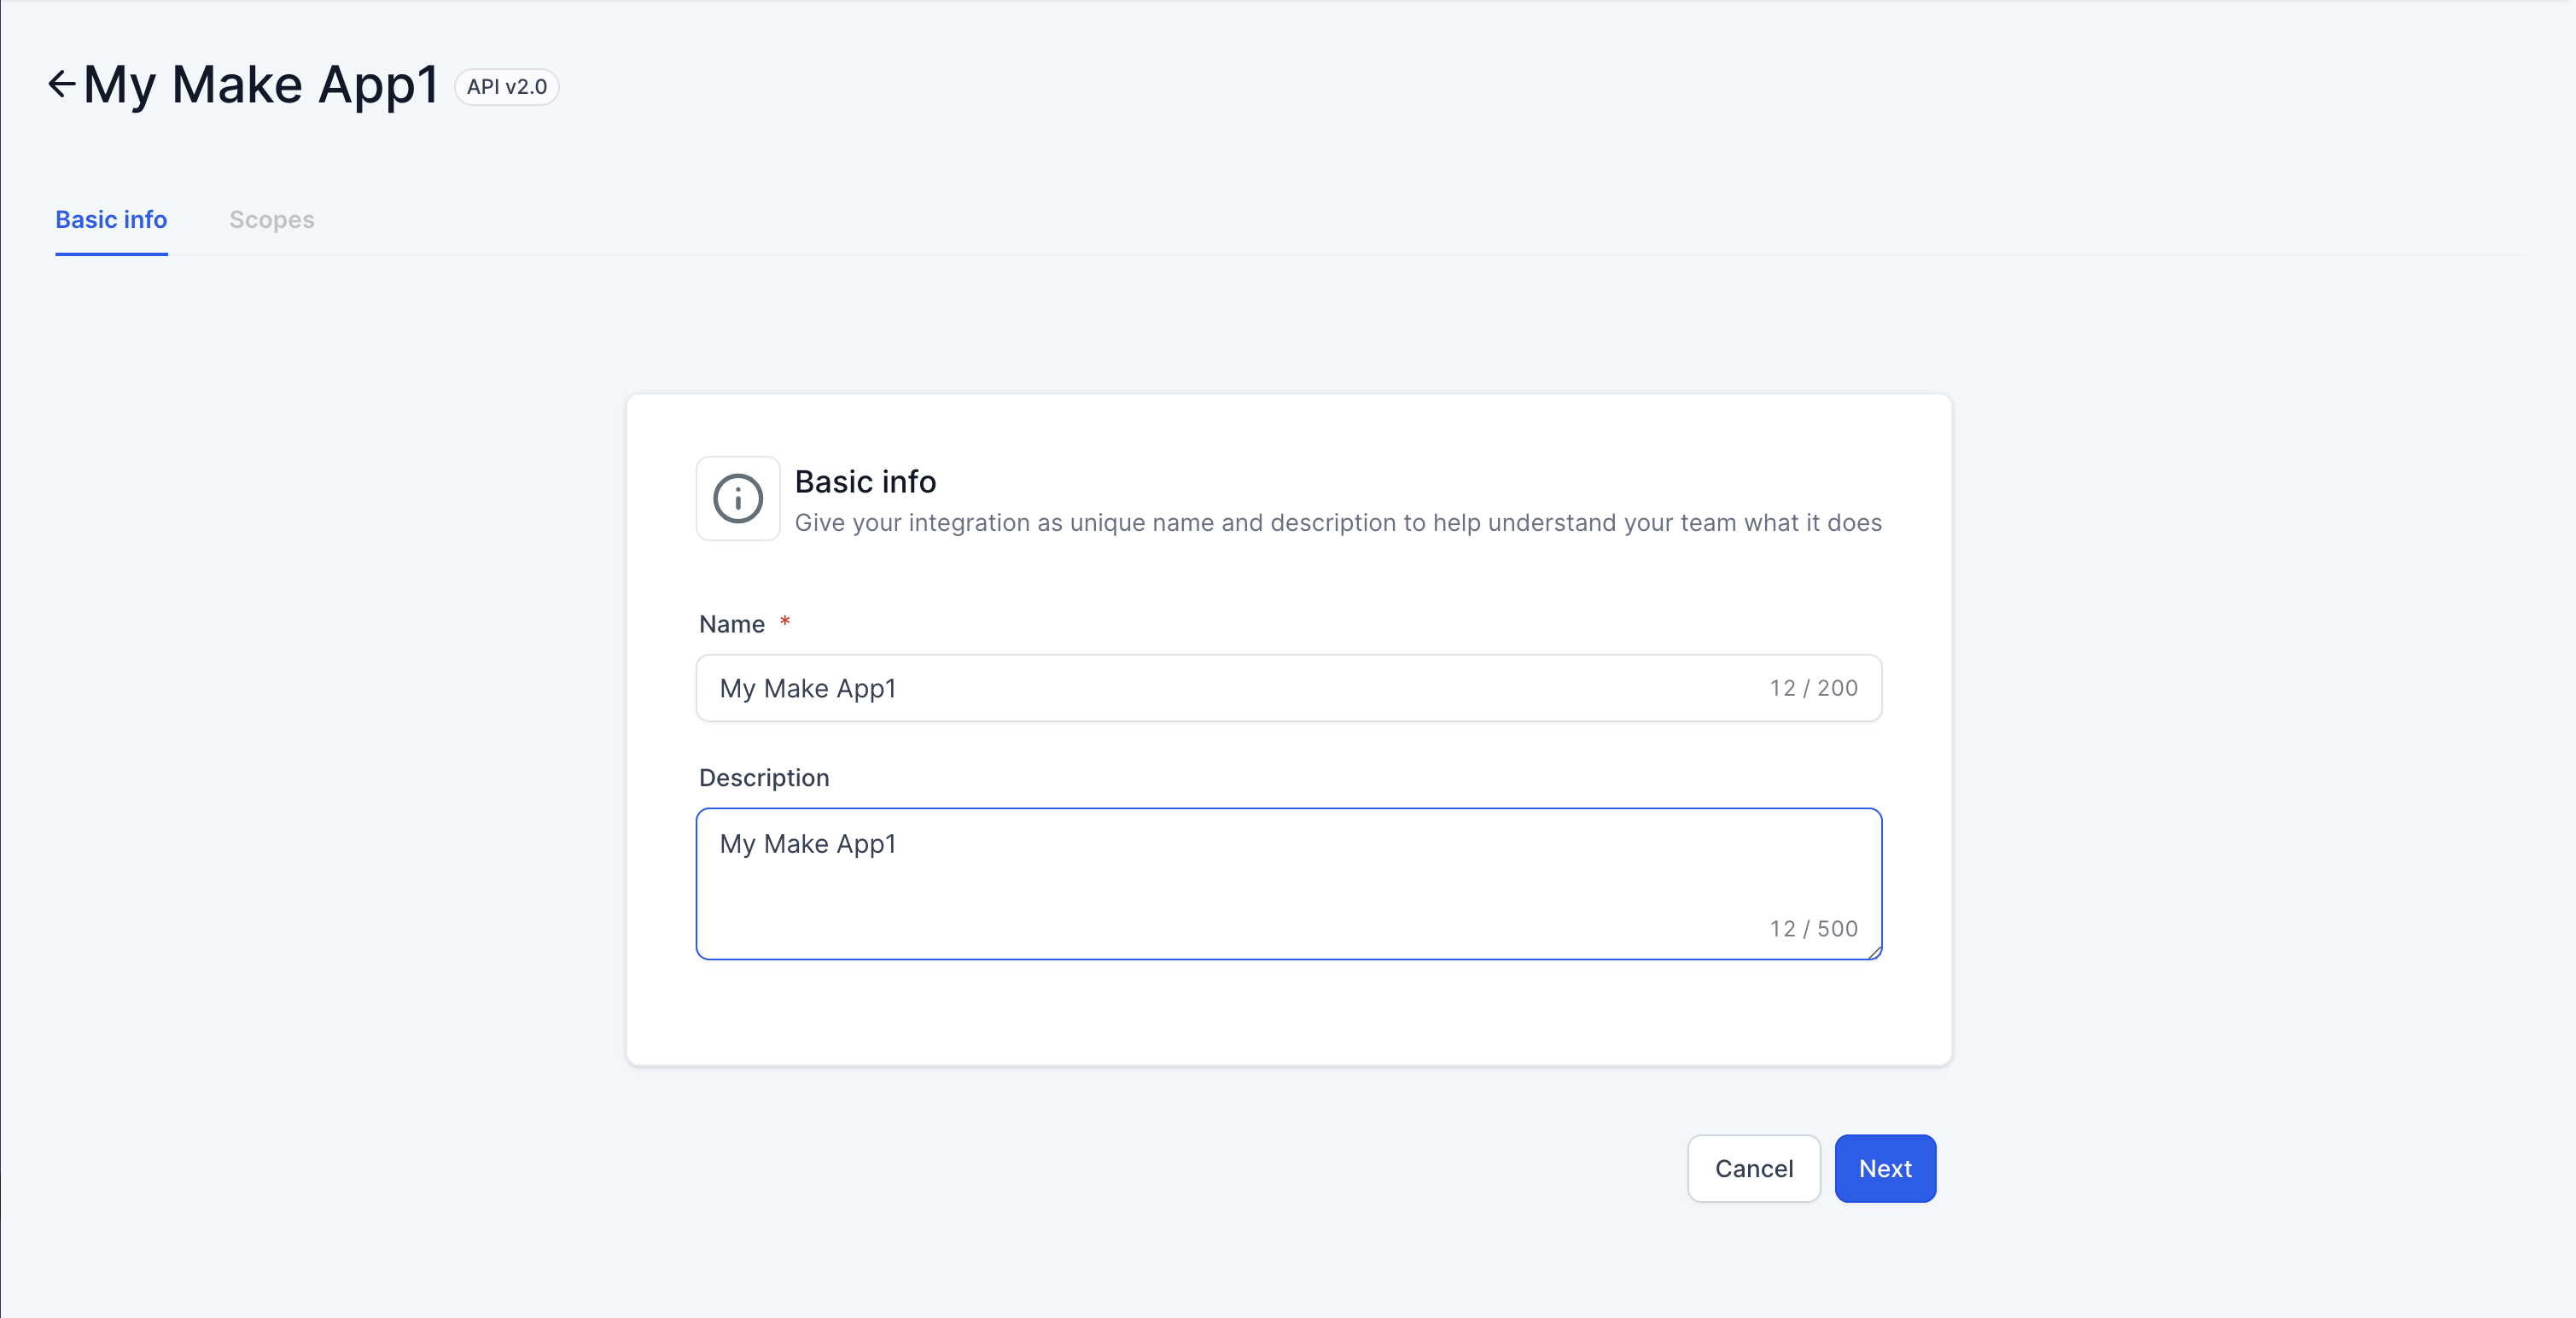
Step 2: If you need to, update the name and description of the private integration. Click "Next".
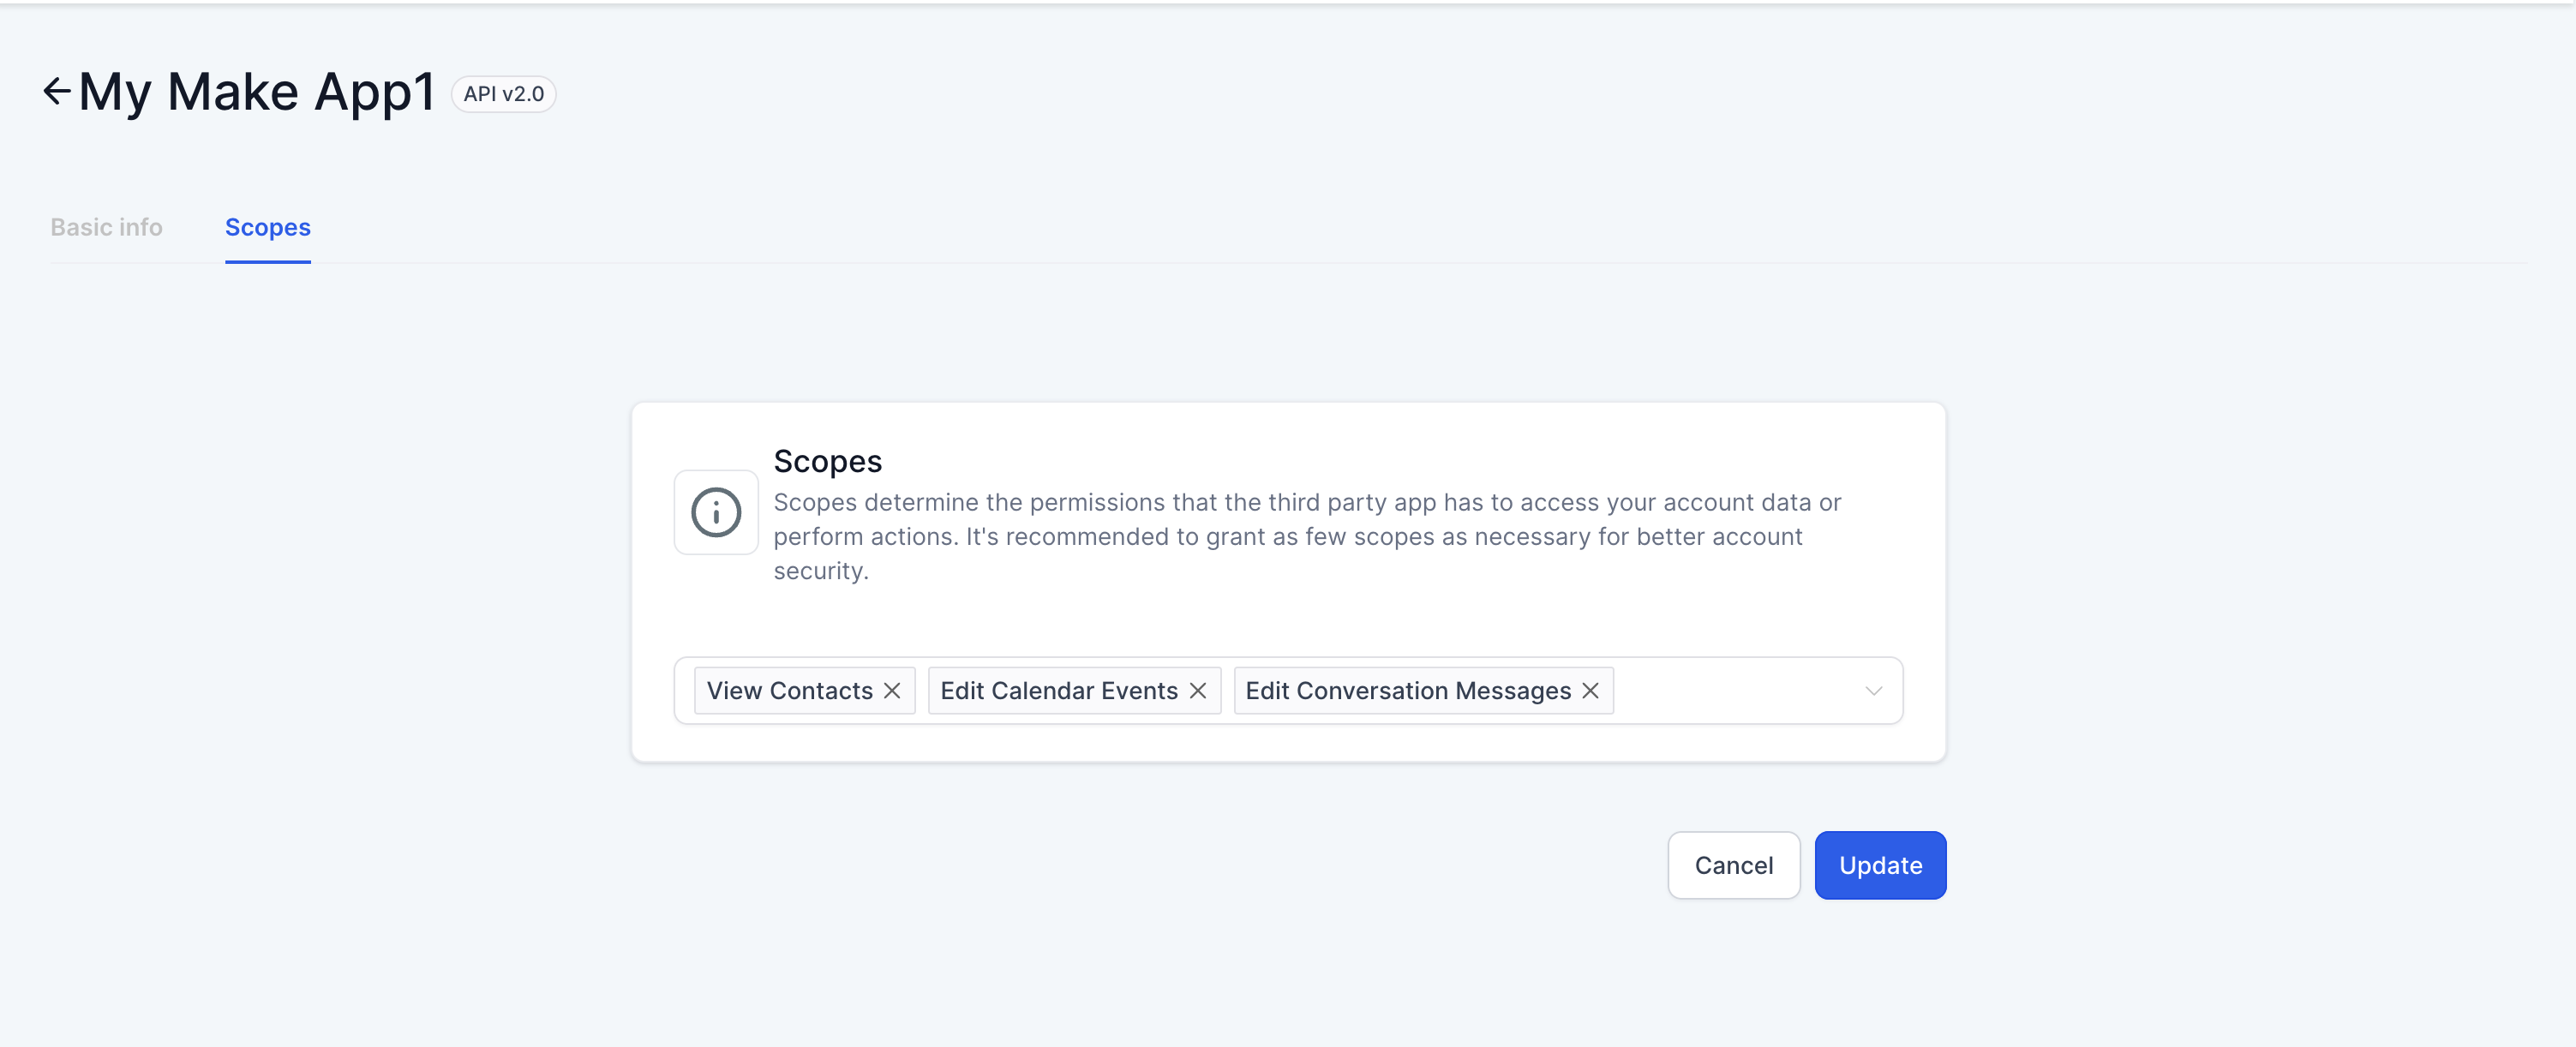
Step 3: If you need to, update the scopes/permissions you want the private integration to have access to in your account.
Make sure you select only the scopes you need, for greater data security. Click "Update" to save your changes.
Users can create up to 5 Private Integration Tokens (PITs) for their account.
Note: updating the details of a private integration does not generate a new token. The existing token will keep working.
How do I delete a private integration when I no longer need it?
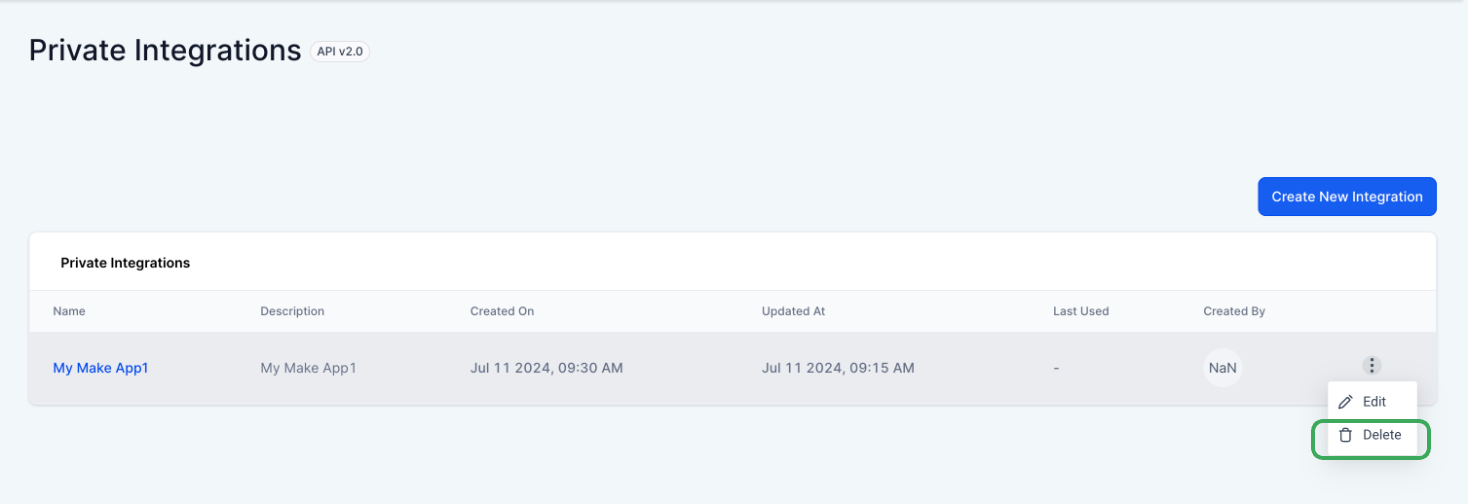
You can delete a private integration when you no longer use the third-party app. To do so, go to Private Integrations in the settings and select "Delete" from the three-dot menu.